
1. Introducció
This manual provides detailed instructions for the setup, operation, maintenance, and troubleshooting of your UNISHEEN UR500A-MINI 4K Capture Box. Please read this manual thoroughly before using the device to ensure proper functionality and to prevent damage.
2. Informació de seguretat
- No exposeu el dispositiu a l'aigua ni a una humitat excessiva.
- Eviteu col·locar el dispositiu a prop de fonts de calor o sota la llum solar directa.
- Utilitzeu només l'adaptador d'alimentació subministrat.
- No intenteu obrir ni reparar el dispositiu vosaltres mateixos. Encarregueu totes les tasques de manteniment a personal qualificat.
- Mantingueu el dispositiu fora de l'abast dels nens.
3. Contingut del paquet
Verifiqueu que tots els elements que s'enumeren a continuació s'inclouen al vostre paquet:
- UNISHEEN UR500A-MINI Video Recorder Box
- MMI Cable (Multi-Media Interface Cable for CVBS/VGA/YPbPr inputs)
- Cable USB
- Cable HDMI
- Control remot
- Adaptador d'alimentació
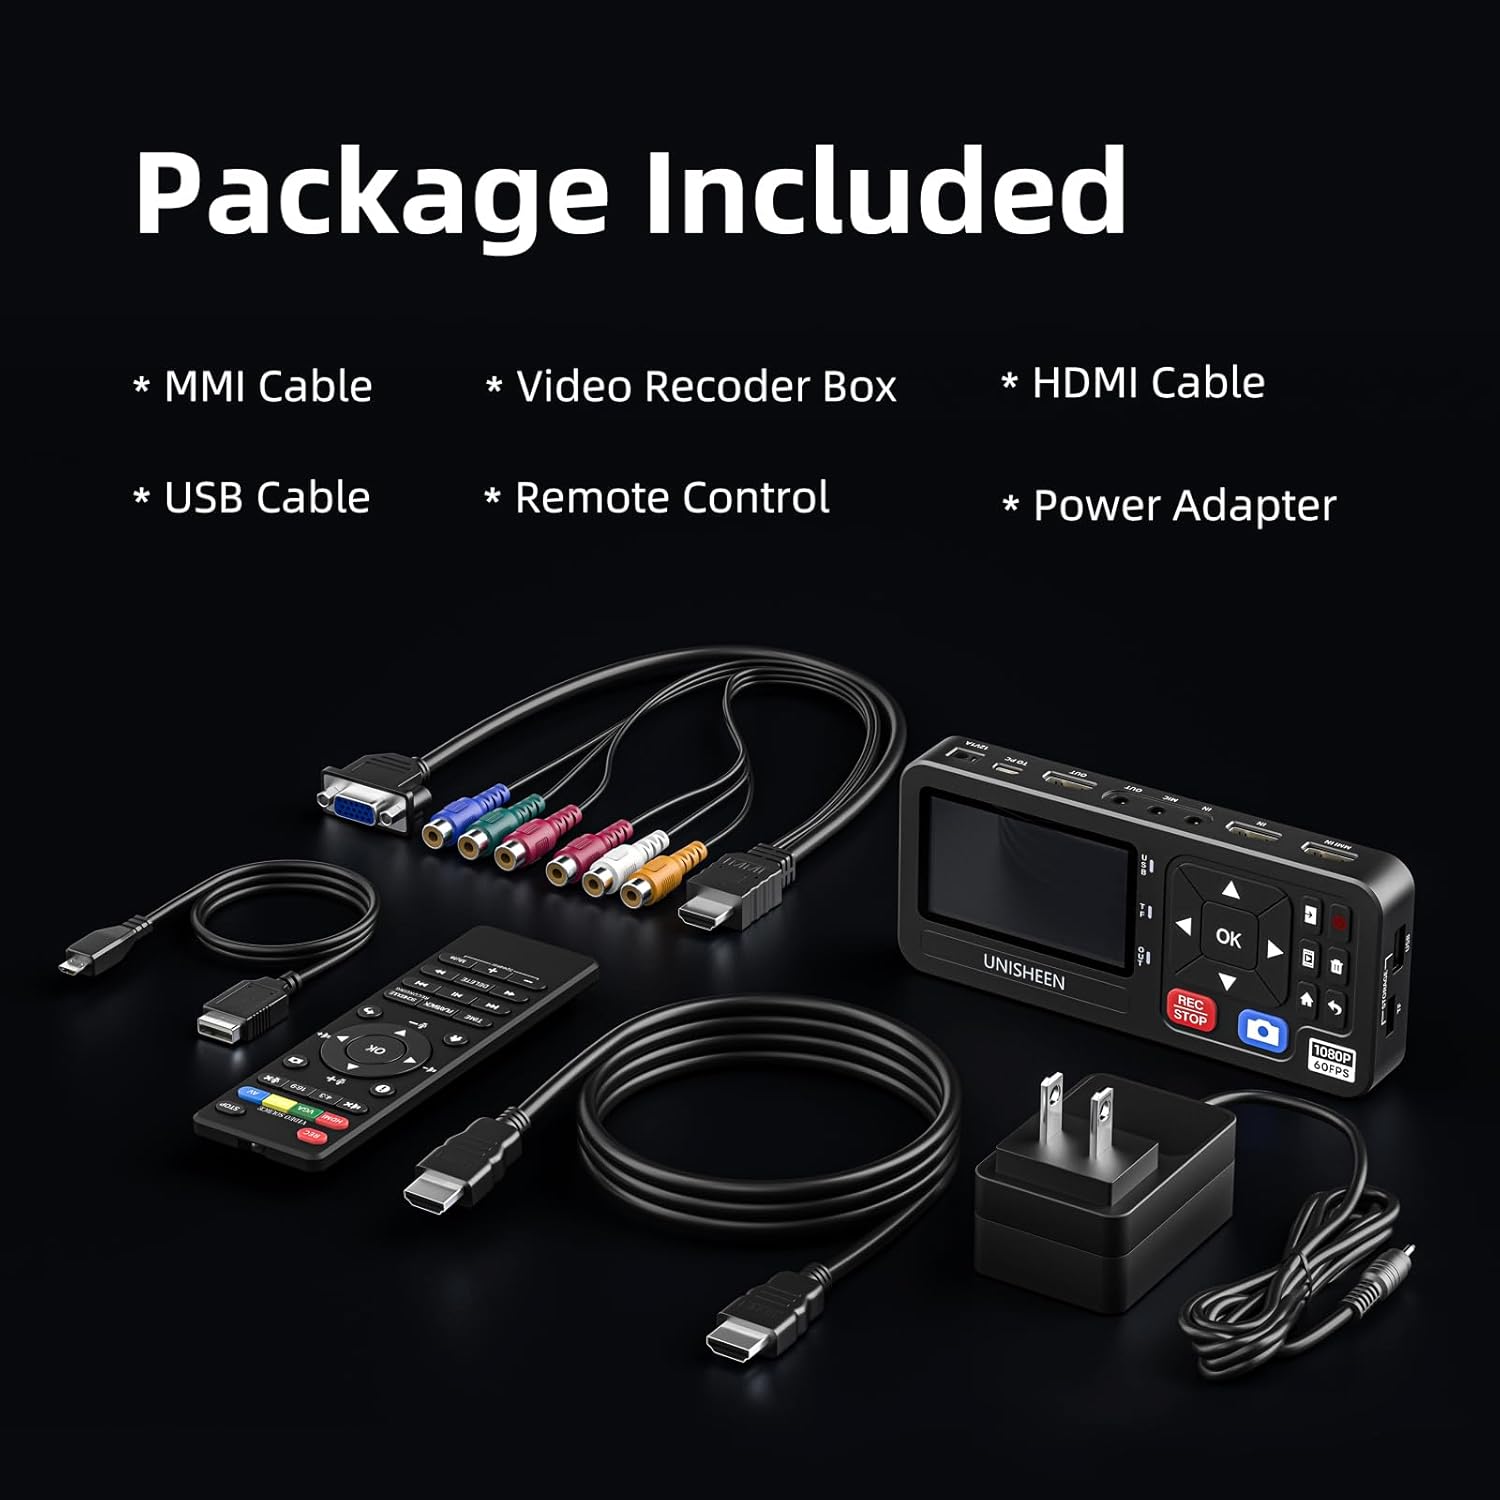
Image: All components included in the UNISHEEN UR500A-MINI package, including the main unit, various cables, remote control, and power adapter.
4. Producte acabatview
The UNISHEEN UR500A-MINI is a versatile video capture box designed to convert and record video from various sources to digital formats. It supports 4K input and 1080p 60FPS recording, offering multiple input options including HDMI, VGA, YPbPr, and CVBS.
4.1 Device Layout and Ports

Image: A detailed diagram illustrating the various input and output ports on the UNISHEEN UR500A-MINI, including HDMI In, HDMI Loop Out, CVBS/YPbPr/VGA Input, Mic In, Line In, Audio Out, USB, TF Card slot, and Power Input.
- Entrada HDMI: Connects to HDMI source devices (e.g., gaming consoles, Blu-ray players).
- Sortida de bucle HDMI: Connects to a monitor or TV for real-time preview del senyal d'entrada.
- CVBS/YPbPr/VGA Input: Connects to analog video sources via the MMI cable (e.g., VCRs, camcorders).
- Entrada de micròfon: Per a la connexió de micròfon extern.
- Línia d'entrada: Per a entrada d'àudio externa.
- Sortida d'àudio: Per connectar auriculars o altaveus externs.
- Port USB: For connecting USB storage devices (flash drives, external HDDs).
- Ranura per a targetes TF: For inserting a TF (MicroSD) card for storage.
- Entrada d'alimentació (12V/1A): Es connecta a l'adaptador de corrent.
- Botons de control: Navigation (Up, Down, Left, Right, OK), Record/Stop, Snapshot, Menu, Home, Return.
5. Configuració
5.1 Connexió de potència
Connect the provided power adapter to the 12V/1A power input port on the device and plug it into a wall outlet. The device will power on automatically.

Image: The underside of the UNISHEEN UR500A-MINI showing the slot for an optional battery pack (NP-F550, NP-F750, NP-F970) and the power adapter connection, illustrating dual power options.
5.2 Connexió de fonts d'entrada
Choose the appropriate cable for your source device and connect it to the corresponding input port on the UR500A-MINI.
- Font HDMI: Use an HDMI cable to connect your source device (e.g., game console, DVD player) to the HDMI Input port.
- VGA/YPbPr/CVBS Source: Use the MMI cable to connect your analog source device (e.g., VCR, camcorder) to the MMI Input port.

Image: The UNISHEEN UR500A-MINI connected to various input sources like a VCR and a camcorder, demonstrating HDMI, VGA, CVBS, and YPbPr input capabilities.
5.3 Connecting Storage
Insert a compatible storage device into the UR500A-MINI.
- USB Drive/HDD: Plug your USB flash drive or external hard disk (up to 8TB) into the USB port.
- Targeta TF: Insert a TF (MicroSD) card (up to 512GB) into the TF card slot.

Image: A close-up of the UNISHEEN UR500A-MINI's side, highlighting the USB and TF card slots, with a USB flash drive and a TF card inserted, demonstrating support for various storage types.
5.4 Connecting Output (Optional)
Per preview your input source on a larger screen while recording, connect an HDMI cable from the HDMI Loop Out port to your TV or monitor.

Image: The UNISHEEN UR500A-MINI connected to a source device and a television, showing the HDMI loop-out feature for real-time preview of the recording on a larger screen.
6. Instruccions de funcionament
6.1 Enregistrament bàsic
- Ensure your input source is connected and powered on.
- Select the correct input source using the remote control or the device's navigation buttons.
- Premeu el botó REC/STOP button to begin recording. A red indicator will typically appear on the screen.
- Premeu el botó REC/STOP botó de nou per aturar la gravació.
6.2 Enregistrament en bucle
When enabled, loop recording automatically overwrites the oldest recorded files when the storage device is full, ensuring continuous recording without interruption.
- Navigate to the System Settings menu.
- Locate the "Loop Recording" option and set it to "On".

Image: The UNISHEEN UR500A-MINI display showing a video playing, with text overlay indicating "Loop Recording" and its function of ensuring continuous recording by overwriting old files.
6.3 Auto Stop Recording
This feature allows you to define a specific duration for your recording session, after which the device will automatically stop recording.
- Accediu al menú Configuració del sistema.
- Find the "Autostop" setting and configure the desired recording duration.
6.4 Enregistrament programat
The device supports scheduling specific recording times and recurring schedules.
- Go to the System Settings menu.
- Select "Schedule Mode" to set up your recording schedule.

Image: The UNISHEEN UR500A-MINI display showing a video, with a clock graphic in the background, illustrating the precision capture and scheduling features for uninterrupted recordings.
6.5 Reproducció
Per tornarview your recorded videos:
- Premeu el botó Casa botó per tornar al menú principal.
- Select the playback option (usually represented by a play icon).
- Browse and select the desired video file per a la reproducció.
6.6 Configuració del sistema
Access the System Settings menu to configure various parameters:

Image: A television screen displaying the UNISHEEN UR500A-MINI's System Setting menu, showing options like Show time, Record Resolution, Bitrate, File size, Loop Recording, Time Watermark, Autostop, and System time, controlled by a remote.
- Hora d'espectacle: Display or hide the current time on the screen.
- Resolució de registre: Adjust the recording resolution (e.g., 1920x1080).
- Taxa de bits: Configure the video bitrate for recording quality.
- File mida: Estableix el màxim file size for recorded segments (e.g., 4GB).
- Enregistrament en bucle: Enable or disable automatic overwriting of old files.
- Marca d'aigua de temps: Afegiu un tempsamp watermark to recordings.
- Autostop: Set a duration for automatic recording cessation.
- Hora del sistema: Adjust the device's internal clock.
6.7 Funcions de control remot
El comandament a distància inclòs proporciona un accés còmode a diverses funcions:
- Programa de gravació
- Snapshot (take a still image)
- Control de l'altaveu
- Switch the signal source
- Gravar/Aturar
- Estableix l'hora
- Auto Stop Recording
- Reprodueix
- Mode de programació
7. Manteniment
- Netegeu el dispositiu amb un drap suau i sec. No utilitzeu netejadors líquids ni aerosols.
- Mantingueu els ports nets de pols i deixalles.
- Guardeu el dispositiu en un lloc fresc i sec quan no l'utilitzeu.
8. Solució De Problemes
| Problema | Causa possible | Solució |
|---|---|---|
| Sense poder | L'adaptador de corrent no està connectat o està defectuós. | Ensure power adapter is securely connected and plugged into a working outlet. Try a different outlet. |
| No video signal on screen | Incorrect input source selected; input cable loose or faulty; source device not powered on. | Verify the correct input source is selected. Check all cable connections. Ensure the source device is powered on and outputting a signal. |
| Recording fails or stops unexpectedly | Storage full; incompatible storage device; storage device faulty; auto-stop feature enabled. | Check available storage space. Ensure storage device is formatted correctly (FAT32/NTFS). Try a different storage device. Disable auto-stop or adjust its duration. |
| El comandament a distància no funciona | Batteries low or incorrectly inserted; obstruction between remote and device. | Replace remote batteries. Ensure batteries are inserted with correct polarity. Remove any obstructions. |
| Poca qualitat de vídeo | Low recording resolution or bitrate settings; poor quality source signal. | Adjust recording resolution and bitrate in System Settings to higher values. Ensure the source signal is clear. |
9. Especificacions
| Característica | Detall |
|---|---|
| Número de model | UR500A-MINI |
| Dimensions del producte | 7 x 5 x 3 polzades |
| Pes de l'article | 1.49 lliures |
| Interfície del maquinari | HDMI, USB 2.0 |
| Resolució de captura de vídeo | 1080p |
| Compatibilitat de sistemes operatius | Linux, Mac OS (for file transfer, device operates standalone) |
| Ús recomanat | Gravació de vídeo |
| Suport d'entrada | 4K HDMI, CVBS, VGA, YPbPr |
| Suport d'emmagatzematge | USB drives up to 512GB, Hard disks up to 8TB, SD cards up to 512GB |
| Recording Codec | H.264 |
| Opcions d'energia | Power Adapter, Compatible with NP-F550, NP-F750, NP-F970 batteries (not included) |
10. Garantia i Suport
For any questions or assistance regarding your UNISHEEN UR500A-MINI, please contact the seller directly through your purchase platform. Most issues can be resolved by following the troubleshooting steps in this manual or by contacting customer support.
- Contactant amb el venedor: Locate your order and click the "Contact Seller" button.
- Producte danyat: If you receive a damaged product, you may apply for an exchange through the Amazon platform within 30 days of purchase.