
Dragonhawk X2 Wireless Tattoo Pen
Dragonhawk X2 Wireless Tattoo Pen Machine User Manual
Model: X2 Wireless Tattoo Pen
Introducció
This user manual provides comprehensive instructions for the safe and effective operation, setup, and maintenance of your Dragonhawk X2 Wireless Tattoo Pen Machine. Designed for both beginners and experienced artists, the X2 offers a user-friendly experience with advanced features for precise tattooing.
Informació de seguretat
- Always ensure the machine is fully charged before use to avoid interruptions during tattooing.
- Use only sterile, single-use cartridge needles. Dispose of used needles properly in a sharps container.
- Maintain strict hygiene protocols. Clean and disinfect the machine and all reusable components before and after each use.
- Do not use the included practice ink on human skin. It is intended for practice skin only.
- Keep the machine away from water and excessive moisture. The device is water-resistant, not waterproof.
- Store the machine and accessories in a clean, dry place, out of reach of children.
- If the machine exhibits unusual behavior, excessive heat, or damage, discontinue use immediately and contact customer support.
Contingut del paquet
Your Dragonhawk X2 Wireless Tattoo Pen Kit includes the following items:
- Dragonhawk X2 Wireless Tattoo Pen Machine
- Cable de càrrega USB tipus C
- Assorted Cartridge Needles (20 pcs)
- Practice Skin
- Coberta de presa
- Black Ink (5ml, for practice only)
- Ink Cups (10 pcs)
- Guants (1 parell)
- Dragonhawk Symbol Bracelet
- Adhesius
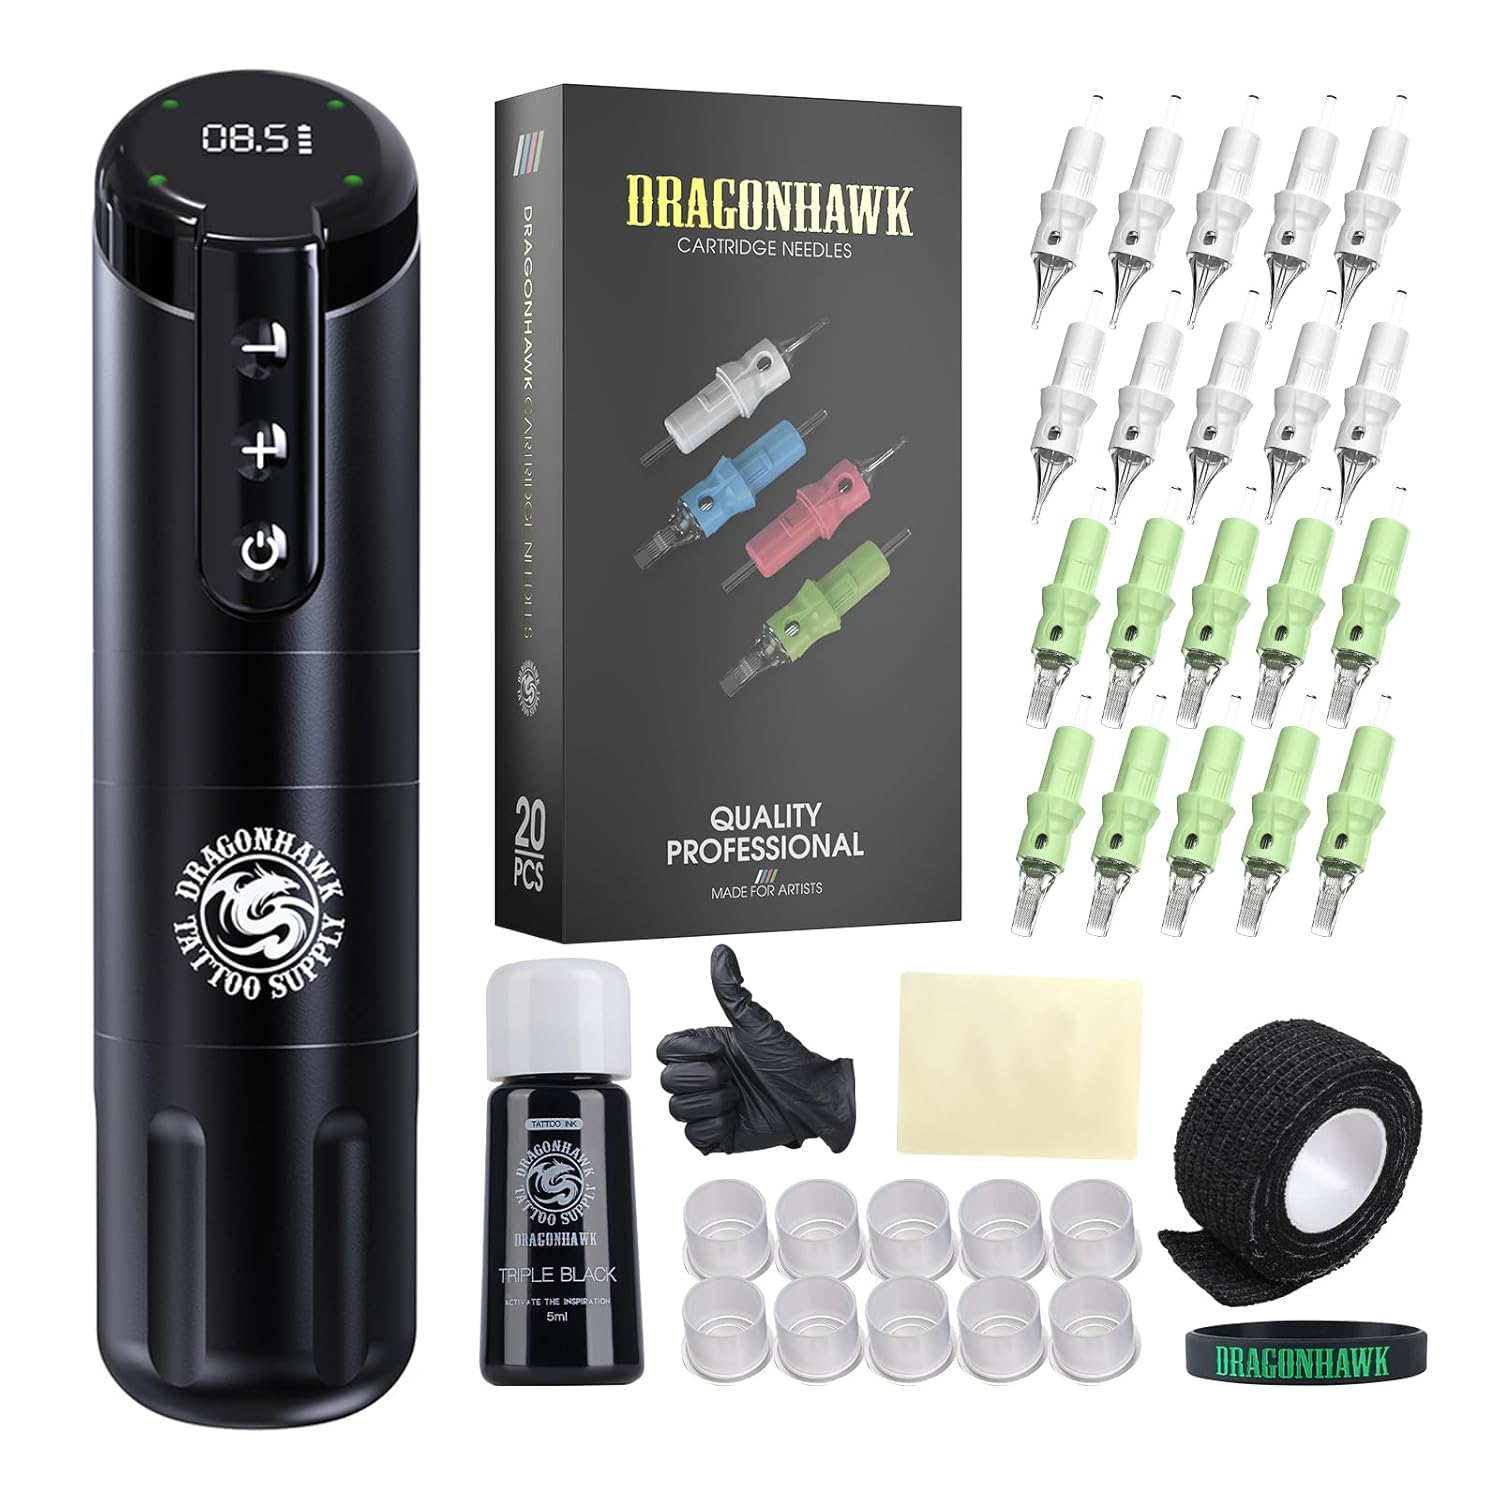
Image: Complete Dragonhawk X2 Wireless Tattoo Pen Kit, showing the machine, needles, ink, and accessories.

Image: Detailed layout of the Dragonhawk X2 kit components, including the pen, charging cable, cartridge needles, practice skin, grip cover, ink, ink cups, and gloves.
Producte acabatview
The Dragonhawk X2 Wireless Tattoo Pen is crafted from aluminum alloy using precision CNC technology, ensuring durability and ease of maintenance. It features an advanced direct drive system for smooth, precise, and quiet operation. The integrated digital display provides real-time voltage and battery information.

Image: The Dragonhawk X2 Tattoo Pen Machine, highlighting its sleek design and user-friendly interface.

Image: A hand holding the Dragonhawk X2 Tattoo Pen, demonstrating its ergonomic design and low center of gravity for stability during use.
Configuració
1. Càrrega del dispositiu
Before initial use, fully charge your Dragonhawk X2 Wireless Tattoo Pen. The device features a 1700mAh battery, providing 7-8 hours of working time on a 2-hour charge.
- Connect the provided USB Type-C charging cable to the charging port on the top of the tattoo pen.
- Connecteu l'altre extrem del cable a un adaptador de corrent USB compatible (no inclòs).
- The display will indicate charging status. Once fully charged, the battery indicator will show full.
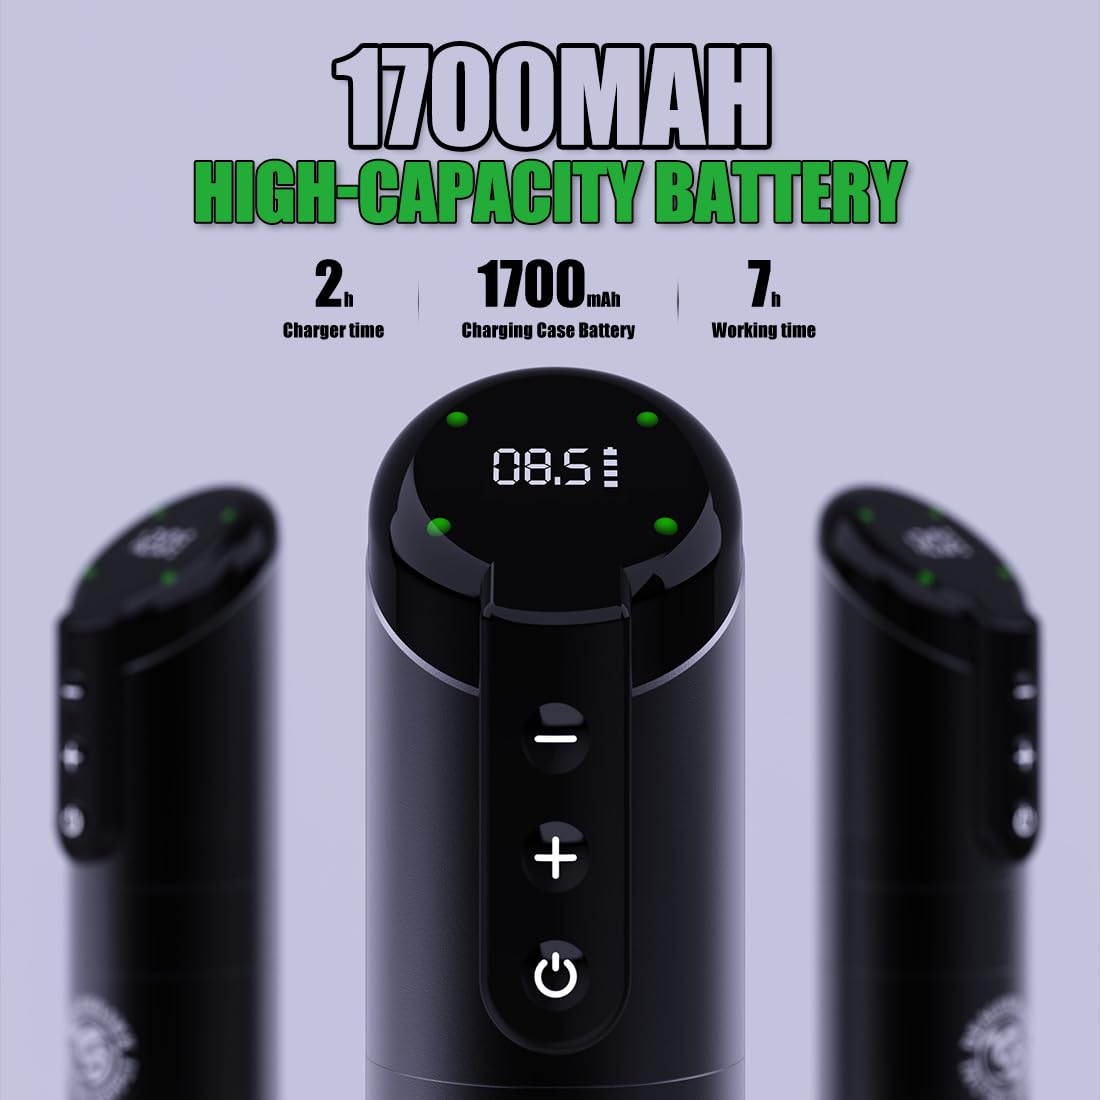
Image: Visual representation of the Dragonhawk X2's 1700mAh high-capacity battery, showing charging time and working time.
2. Installing Cartridge Needles
The X2 machine is compatible with standard cartridge needles.
- Assegureu-vos que la màquina estigui apagada.
- Carefully insert the desired cartridge needle into the front opening of the machine.
- Twist the cartridge clockwise until it clicks securely into place.
- To adjust needle depth, rotate the grip of the machine.

Image: Various types of Dragonhawk cartridge needles (M, RL, RM, RS) compatible with the X2 machine.
3. Filling Ink Cups
Use the provided ink cups for your tattoo ink. Remember, the included black ink is for practice skin only.
- Place ink cups on a clean, stable surface.
- Carefully pour your desired tattoo ink into the ink cups.
Instruccions de funcionament
1. Encès / apagat
- To power on the machine, press and hold the power button (⑂) for a few seconds until the display illuminates.
- Per apagar l'aparell, premeu i manteniu premut el botó d'engegada de nou fins que la pantalla s'apagui.

Image: Close-up of the Dragonhawk X2's control panel, showing the power button and voltagbotons d'ajustament.
2. Ajust Voltage
The X2 allows for precise 0.1V voltage adjustments, ranging from 5V to 12V.
- Use the "+" button to increase the voltage.
- Use the "-" button to decrease the voltage.
- El vol actualtage is displayed on the LCD screen.
3. Instant Start-up Mode
This mode provides a quick start for the machine, useful for certain needle configurations or preferences.
- To enable Instant Start-up Mode, press and hold the "⑂" (power) and "-" (voltage down) buttons simultaneously for 2 seconds. The display will show "E1".
- To disable Instant Start-up Mode, repeat the same action. The display will show "E0".

Image: Instructions for activating and deactivating the Instant Start-up Mode on the Dragonhawk X2, showing "E1" for enabled and "E0" for disabled.
4. Color Background Light Indicators
The X2 features a color-changing background light that indicates the current voltage rang:
- Vermell: 10V-12V
- Lila: 9V-9.9V
- Blau: 8V-8.9V
- Taronja: 6V-7.9V
- Verd: 5V-5.9V
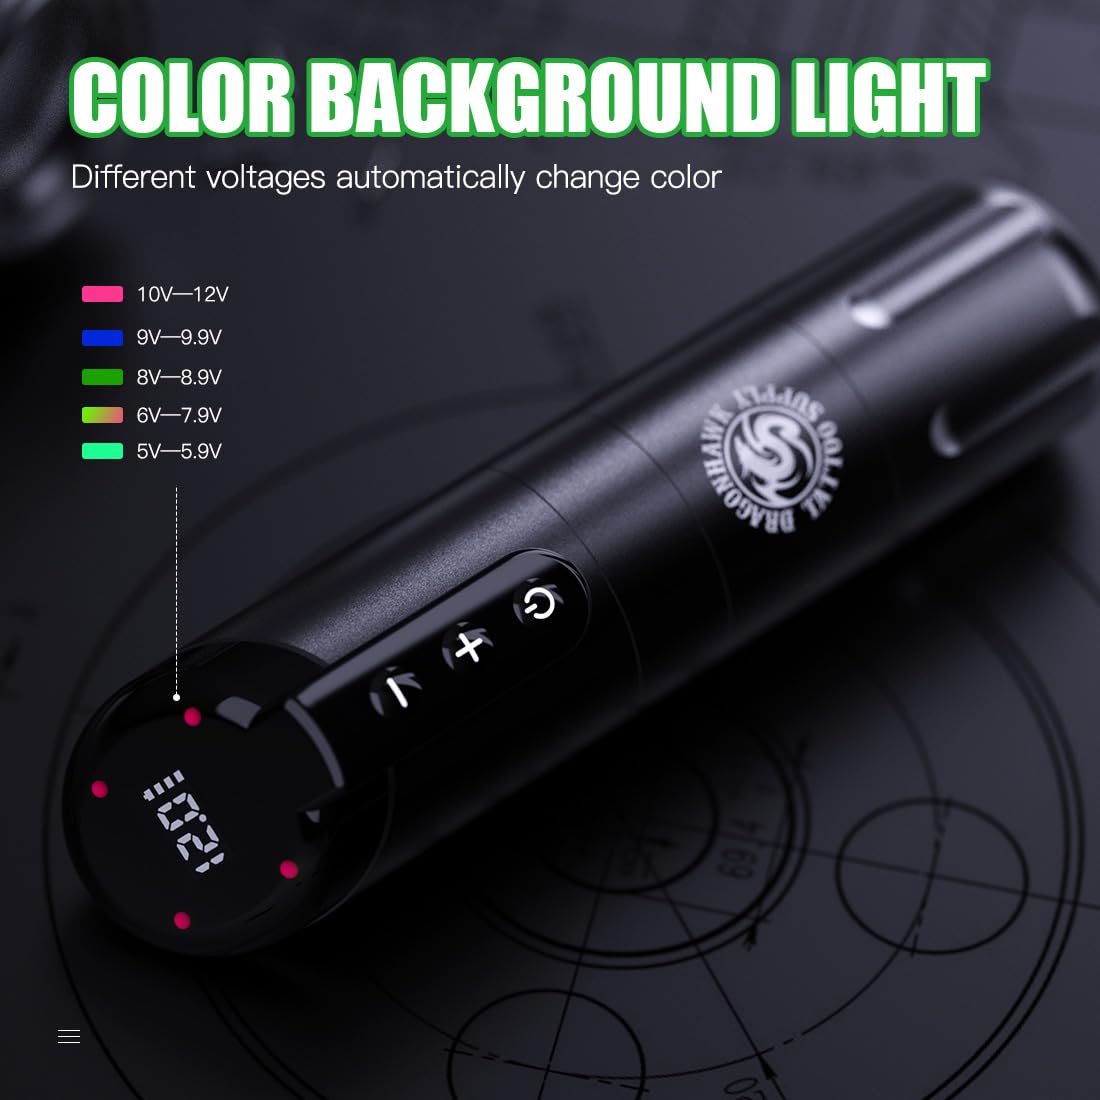
Image: The Dragonhawk X2 displaying different background light colors corresponding to various voltagrangs e.
5. Funcionament general
Once set up, the X2 is ready for use. The custom Mcore-A Motor provides stable voltage and low noise, suitable for both lining and shading.
Video: Official product video demonstrating the features and operation of the Dragonhawk X2 Wireless Tattoo Pen Machine, including power on, voltage adjustment, and needle installation.
Manteniment
1. Neteja de la màquina
Regular cleaning is crucial for the longevity and hygienic operation of your tattoo pen.
- Always power off and disconnect the machine before cleaning.
- Wipe down the exterior of the machine with a clean cloth dampened with an approved tattoo equipment disinfectant.
- Do not submerge the machine in liquid or allow liquids to enter the internal components.
- The X2 is designed for easy disassembly for thorough cleaning and maintenance of parts. Refer to detailed disassembly guides if necessary.
2. Emmagatzematge
- Store the machine in its original packaging or a protective case when not in use.
- Guardeu-ho en un lloc fresc i sec, allunyat de la llum solar directa i de temperatures extremes.
Resolució de problemes
| Problema | Causa possible | Solució |
|---|---|---|
| Machine won't turn on or charge. | Bateria baixa; cable/adaptador de càrrega defectuós; problema intern. | Ensure the machine is fully charged using the provided Type-C cable. Try a different USB power adapter. If the issue persists, contact customer support. |
| Needle spitting or inconsistent ink flow. | Improper needle installation; incorrect voltage setting; clogged cartridge. | Ensure the cartridge needle is securely installed and clicks into place. Adjust voltage settings. Replace the cartridge needle if it appears clogged or damaged. |
| La màquina vibra excessivament o fa un soroll inusual. | Loose components; damaged motor. | Check if all parts are securely assembled. If the noise or vibration is unusual and persistent, discontinue use and contact customer support. |
Especificacions
| Característica | Detall |
|---|---|
| Model | Dragonhawk X2 Wireless Tattoo Pen |
| Tipus de motor | Custom Mcore-A Motor with Chip (12V 12000Rpm) |
| Material | Aluminum Alloy (Precision CNC Technology) |
| Pes | 210 g / 7.4 oz |
| Mida de l'empunyadura | 34 mm |
| Longitud | 140 mm |
| Vol. Operatiutage | 5-12V (0.1V adjustments) |
| Longitud del traç | 3.5 mm |
| Capacitat de la bateria | 1700 mAh |
| Temps de treball | 7-8 hours (after 2 hours charge) |
| Mètode de càrrega | USB tipus C |
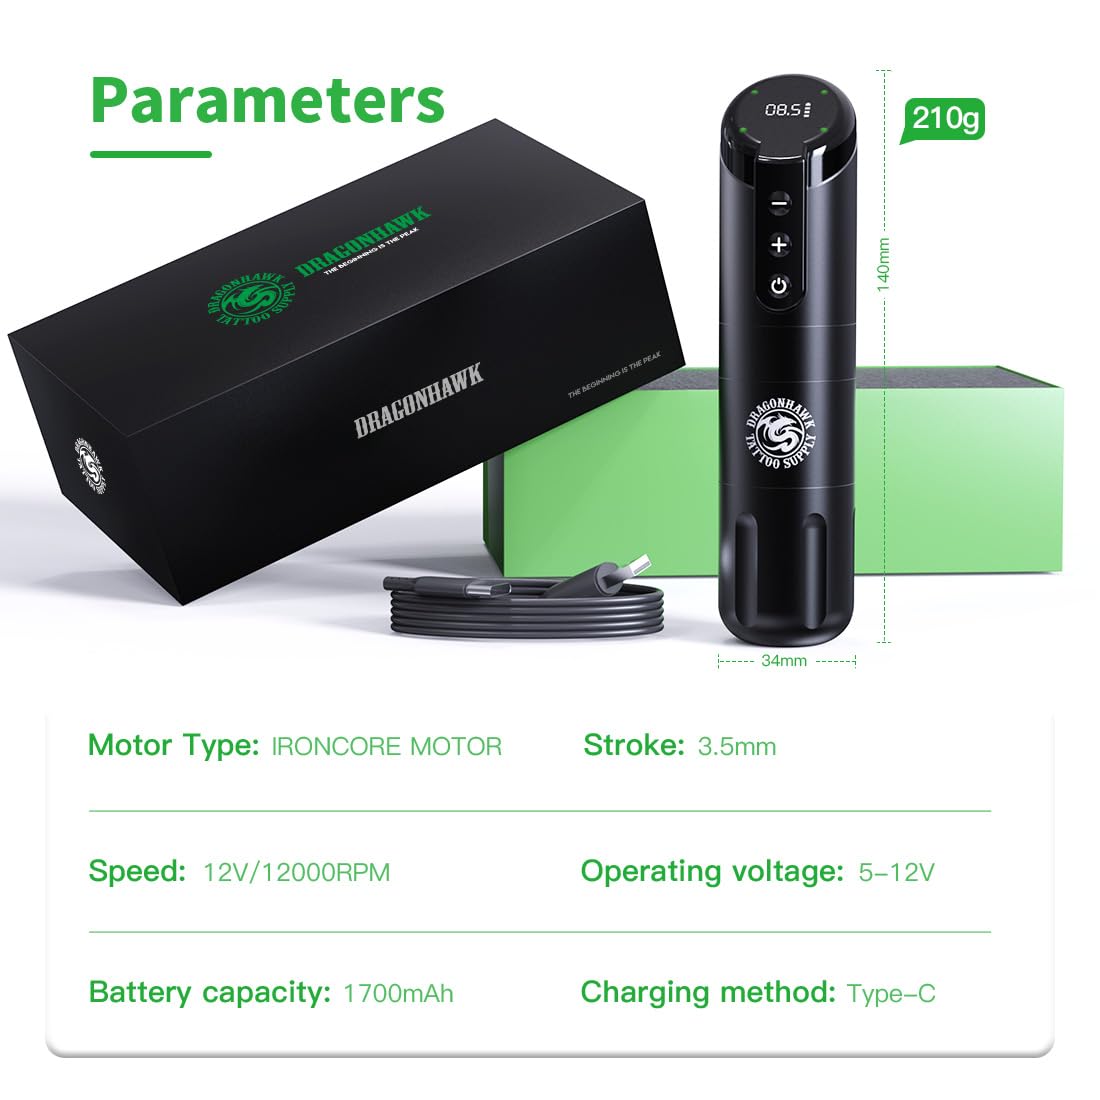
Image: Visual display of the Dragonhawk X2's key parameters, including weight, length, grip size, motor type, stroke, speed, operating voltage, battery capacity, and charging method.
Garantia i Suport
For warranty information, technical support, or any inquiries regarding your Dragonhawk X2 Wireless Tattoo Pen Machine, please refer to the official Dragonhawk Tattoo weblloc web o contacteu directament amb el servei d'atenció al client. Conserveu el rebut de compra com a comprovant de compra per a reclamacions de garantia.
Ask a question about this manual
Ask about setup, troubleshooting, compatibility, parts, safety, or missing instructions. Manuals+ will review the question and use this page’s manual context to help answer it.