
Boyel Living A3809-10BN
Boyel Living Shower System User Manual
Model: A3809-10BN
Introducció
Thank you for choosing the Boyel Living Shower System. This manual provides detailed instructions for the installation, operation, and maintenance of your new shower system. Please read this manual thoroughly before installation and keep it for future reference.
This shower system features a 10-inch ceiling-mounted rain shower head, a handheld shower head, and a tub spout, all in a brushed nickel finish. It is designed for high-pressure performance and includes a brass pressure balancing valve for safety and comfort.
Informació de seguretat
Always follow basic safety precautions when installing or maintaining this product to reduce the risk of injury or property damage.
- Assegureu-vos que el subministrament d'aigua estigui tallat abans de començar qualsevol instal·lació o manteniment.
- Es recomana instal·lació professional.
- Utilitzeu equips de protecció individual (EPI) adequats, com ara ulleres i guants de seguretat.
- Verify all connections are secure and leak-free before turning on the water supply.
- The water pressure of the faucet should be between 0.05MPa-1.0MPa (including cold water and hot water pressure).
- Applicable water temperature range: 39°F-194°F.
Contingut del paquet
Si us plau, comproveu que tots els components siguin presents i no estiguin danyats abans de començar la instal·lació.

Figure 1: Complete Shower System Components (Packing List)
This image displays all the parts included in the Boyel Living Shower System package, such as the main valve body, the large square rain shower head, the handheld shower head with its hose and wall mount, the tub spout, and various small installation accessories like screws and seals.
- Main Valve Body with Pressure Balancing Cartridge
- 10-inch Square Rain Shower Head
- Braç de dutxa de muntatge al sostre
- Capçal de dutxa de mà
- Shower Hose (59 inches)
- Porta dutxa
- Bec de banyera
- Decorative Covers/Plates
- Installation Hardware (screws, anchors, Allen key)
- Cinta de tefló
Especificacions
| Característica | Detall |
|---|---|
| Marca | Boyel Living |
| Número de model | A3809-10BN |
| Color | Níquel raspallat |
| Material | Copper (Valve Body), 304 Stainless Steel (Shower Head, Handheld, Hose) |
| Tipus d'acabat | Mat |
| Tipus de muntatge | Muntatge al sostre |
| Mida del cap | 10 inches (Rain Shower Head) |
| Caudal | GPN 2.5 |
| Connection Standard | NPT 1/2'' Tapered Threads |
| Vàlvula d'equilibri de pressió | Included (Brass) |

Figure 2: Product Dimensions and Model Number
This image provides a technical drawing with key dimensions for the shower system components, including the 10-inch square rain shower head, the handheld shower head (8 inches long), the main valve body (5.1" x 7.1"), and the tub spout (6.8" long). It also indicates the model number MS-A3809-10BN.
Configuració i instal·lació
This section guides you through the installation process. It is crucial to follow these steps carefully to ensure proper function and prevent leaks.
Tools and Materials Required (Not Included)
- Masilla de lampista
- Thread Seal Tape (Teflon Tape)
- Clau anglesa ajustable
- Tornavís ranurat
- Trepant elèctric
Video 1: 3-Function Ceiling Mount Shower System Installation Instruction Video
This video provides a general installation guide for the Boyel Living 3-function ceiling mount shower system. It covers preparation, pipe connection, valve fixation, water testing, wall sealing, and installation of the shower arm, handheld shower, and tub spout. Note that the model shown in the video may differ slightly, but connection types and installation steps are similar.
Passos d'instal·lació
- Preparació:
Before installation, ensure all necessary tools and components are available. Turn off the main water supply to the bathroom.
- Flush the Pipeline and Fix the Valve:
Drill holes in the wall for the main valve body, hot and cold water inlets, and shower arm connection according to the product dimension drawing. Flush the pipelines to remove impurities and sludge before connecting the water supply pipe to avoid clogging. Connect the pipes to the valve, ensuring proper hot and cold connections. Use enough Teflon tape on all pipe connections to prevent leaks. If using copper plumbing, remove the cartridge first to prevent damage from high temperatures during soldering.

Figure 3: Valve Connection Diagram
This image provides a technical drawing with key dimensions for the shower system components, including the 10-inch square rain shower head, the handheld shower head (8 inches long), the main valve body (5.1" x 7.1"), and the tub spout (6.8" long). It also indicates the model number MS-A3809-10BN.
- Water Testing and Sealing Testing:
After pipe connection, open the protective panel and cover. Open the cartridge and flush the pipelines. Then close the cartridge to check pressure resistance and sealing performance. Block each outlet pipe with a stopper, then open the cartridge to check if the pipe joint is well-sealed and the pipe condition is under pressure to ensure no leakage. This step is crucial to flush impurities and sludge to avoid clogging.
- Segellant la paret:
Use a parallel ruler to measure the flatness of the valve and the vertical wall surface. If the wall surface is not flat, it should be patched to ensure the valve and vertical wall angle meet at a nearly ideal angle of 90 degrees. Then, proceed with tile decoration. Remove the black protective cover from the diverter and cartridge. Install the panel, diverter, and handle in turn. Use the Allen key and accessory screws to fix the diverter and handle securely.
- Shower Sets Installation:
Handheld Shower Installation: Put the decorative cover into the shower holder. Use enough Teflon tape to wrap around the shower arm's connector. Use the shower hose to properly connect the hand shower head to the shower holder.
Ceiling Shower Head Installation: Put the decorative cover into the shower arm. Use enough Teflon tape to wrap around the shower arm's connector. Twist the shower arm into the pre-installed connector inside the wall. Twist the shower head into the connector on the other end of the shower arm.
Tub Spout Installation: Put the decorative cover into the tub spout. Use the Allen key and accessory screws to fix the tub spout.
Attention: Please take care to wrap the product with clothes or towels during installation to avoid damage to the surface coating of the product.
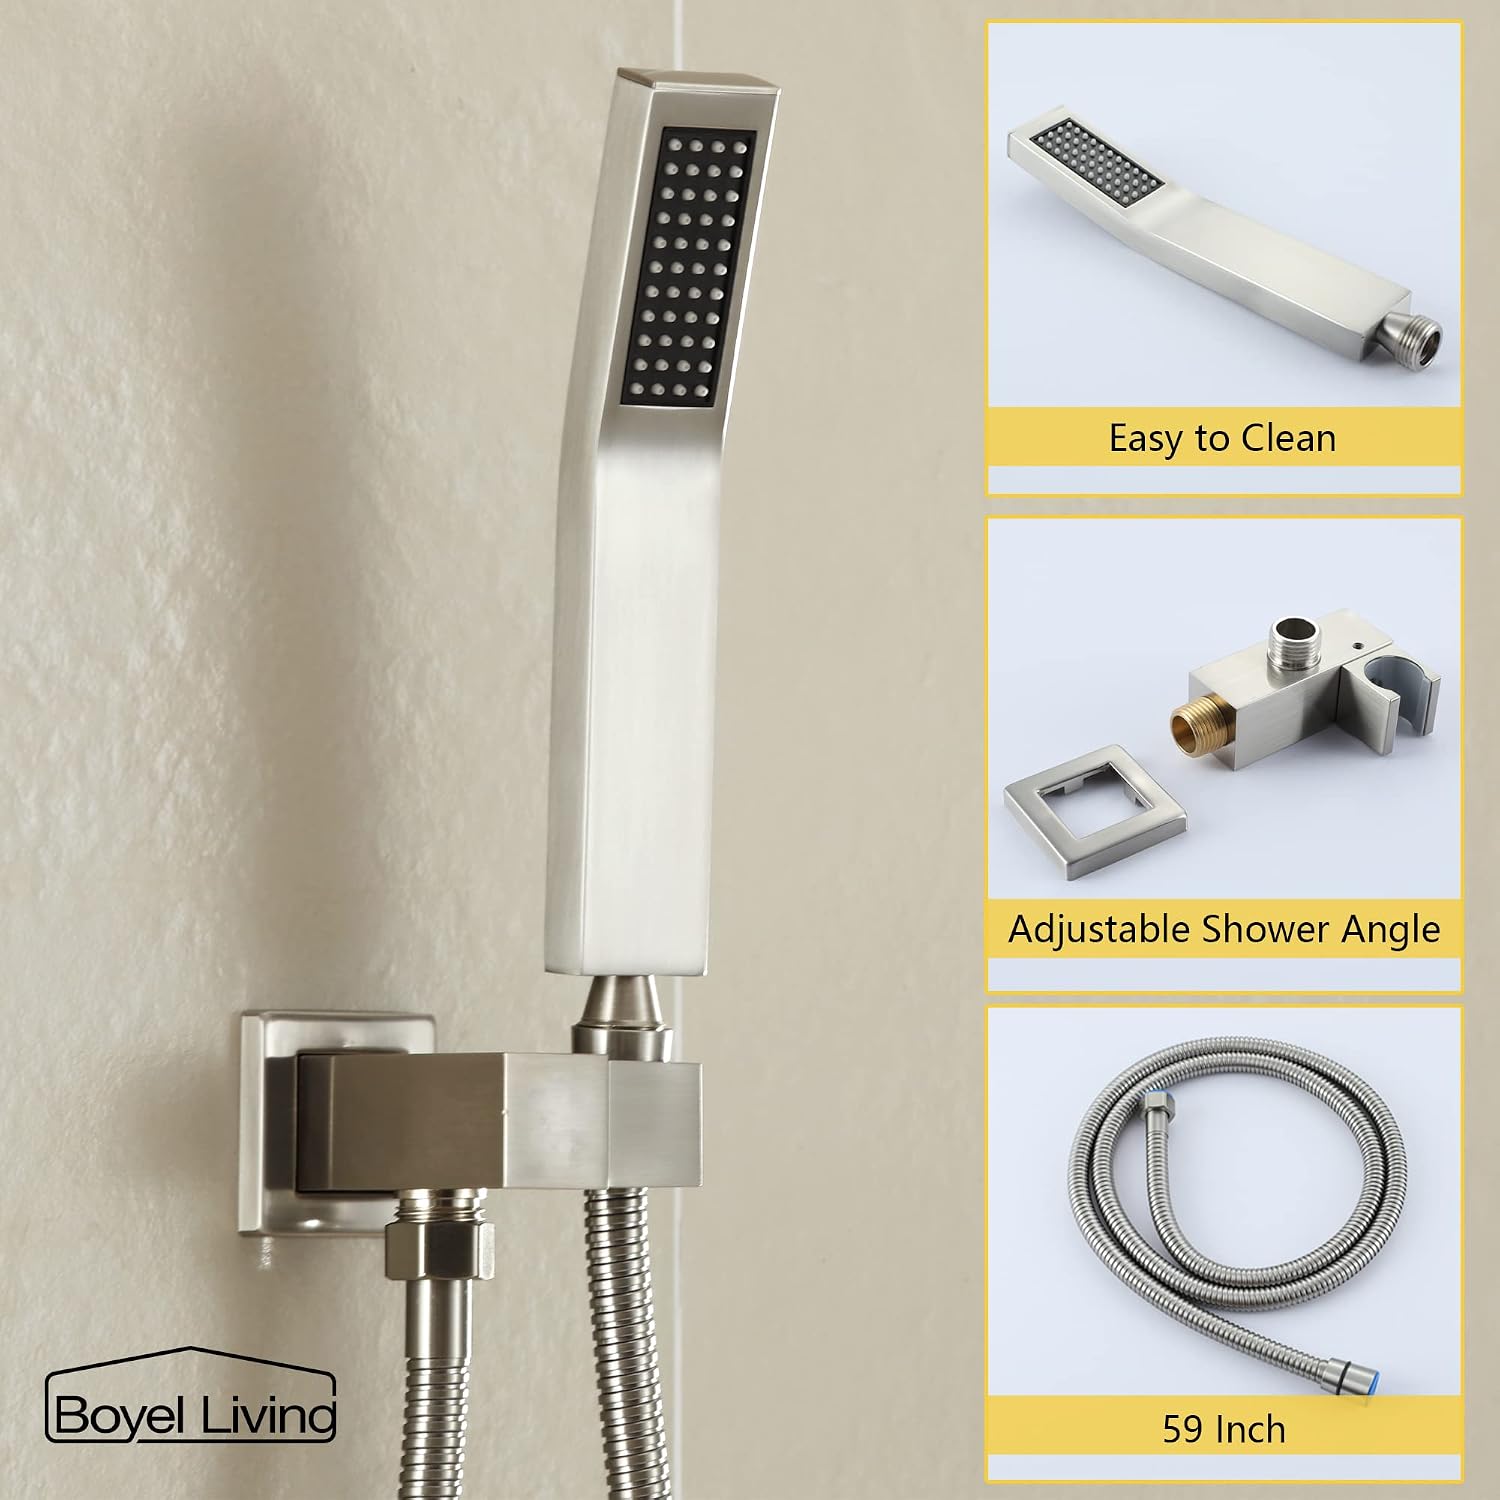
Figure 4: Handheld Shower Features
This image highlights the features of the handheld shower, including its easy-to-clean nozzles, the adjustable shower angle of its holder, and the length of the shower hose (59 inches).

Figure 5: Rain Shower Head Features
This image illustrates the 360-degree swivel connection of the ceiling-mounted rain shower head, allowing for a recommended maximum adjustment of 15 degrees. It also shows a close-up of the easy-to-clean silicone nozzles on the shower head.

Figure 6: Waterfall Tub Spout
This image shows the waterfall tub spout in action, demonstrating how it quickly fills the bathtub with a soft water flow that minimizes splashes.
Instruccions de funcionament
Your Boyel Living Shower System is designed for ease of use with intuitive controls.
- Control de temperatura: The main handle controls both water flow and temperature. Rotate the handle to adjust the water temperature from cold to hot. The brass pressure balancing valve automatically adjusts water pressure and temperature to prevent sudden scalding.
- Function Diverter: The upper knob on the main panel is the diverter. Rotate this knob to switch between the three functions:
- Capçal de dutxa pluja
- Capçal de dutxa de mà
- Bec de banyera
Note: The handheld shower and fixed shower head cannot be used at the same time.

Figure 7: Shower System Overview
Aquesta imatge ofereix una visió general view of the main components of the Boyel Living Shower System, showcasing the square rain shower head, the central control valve with its handle and diverter knob, the handheld shower with its hose, and the tub spout, all presented in a brushed nickel finish.
Manteniment i cura
Proper care will ensure the longevity and optimal performance of your shower system.
- Neteja: Clean the shower system regularly with a soft cloth and mild soap or a non-abrasive cleaner specifically designed for bathroom fixtures. Avoid harsh chemicals, abrasive cleaners, or scouring pads, as these can damage the brushed nickel finish.
- Manteniment de broquets: The silicone nozzles on the rain shower head and handheld shower head are designed to be easy to clean. Periodically rub the nozzles with your finger or a soft brush to dislodge any mineral buildup and maintain consistent water flow.
- Prevenció de fuites: If you notice any leaks, check all connections and ensure they are tightened properly. If leaks persist, consult a professional plumber.
Resolució de problemes
Aquesta secció tracta els problemes habituals que podeu trobar amb el vostre sistema de dutxa.
| Problema | Causa possible | Solució |
|---|---|---|
| Baixa pressió d'aigua | Clogged nozzles or pipes; insufficient main water pressure. | Clean shower head and handheld nozzles. Check main water supply pressure. Ensure no kinks in hoses. |
| Fuites d'aigua de les connexions | Loose connections; insufficient Teflon tape; damaged seals. | Tighten all connections. Reapply Teflon tape if necessary. Inspect and replace damaged seals. |
| Temperatura de l'aigua inconsistent | Pressure balancing valve issue; hot/cold water supply imbalance. | Ensure hot and cold water supply lines are correctly connected. If problem persists, the pressure balancing cartridge may need inspection or replacement by a professional. |
| El desviador no commuta les funcions | Debris in diverter; worn diverter cartridge. | Flush the system. If problem persists, the diverter cartridge may need cleaning or replacement. |
Informació de la garantia
Boyel Living products are manufactured to the highest quality standards. This product comes with a standard manufacturer's warranty covering defects in materials and workmanship. Please refer to the warranty card included in your package or contact customer support for specific warranty terms and conditions.
Conserveu el rebut de compra com a comprovant de compra per a reclamacions de garantia.
Atenció al client
If you have any questions, require technical assistance, or need to order replacement parts, please contact Boyel Living customer support:
- Weblloc: Boyel Living Store on Amazon
- Correu electrònic: [Inseriu aquí el correu electrònic d'atenció al client]
- Telèfon: [Inseriu aquí el número de telèfon d'atenció al client]
When contacting support, please have your product model number (A3809-10BN) and purchase date ready.
Documents relacionatsA3809-10BN


Ask a question about this manual
Ask about setup, troubleshooting, compatibility, parts, safety, or missing instructions. Manuals+ will review the question and use this page’s manual context to help answer it.