
1. Introducció
This manual provides essential information for the proper installation, operation, and maintenance of your FERMAX Duox Plus Veo-XL DDA 7-inch Monitor. Please read these instructions carefully before using the device to ensure safe and efficient operation. Keep this manual for future reference.
2. Informació de seguretat
Observe the following safety precautions to prevent damage to the device or injury to users:
- Seguretat elèctrica: Installation and wiring must be performed by qualified personnel in accordance with local electrical codes. Disconnect power before performing any installation or maintenance.
- Medi ambient: Do not expose the monitor to extreme temperatures, humidity, direct sunlight, or corrosive environments. Ensure adequate ventilation.
- Manipulació: Manipuleu el dispositiu amb cura. Eviteu deixar-lo caure ni sotmetre'l a impactes forts.
- Neteja: Utilitzeu un drap suau i sec per netejar. No utilitzeu netejadors abrasius ni dissolvents.
3. Contingut del paquet
Verifiqueu que tots els components siguin presents al paquet:
- FERMAX Duox Plus Veo-XL DDA 7-inch Monitor
- Suport de muntatge
- Cargols de muntatge i taps de paret
- Connection terminals/connectors
- Manual d'usuari (aquest document)
4. Configuració i instal·lació
The FERMAX Duox Plus Veo-XL DDA monitor is designed for wall-mounted installation. Ensure the installation location is suitable and provides easy access for wiring.
4.1 Muntatge del monitor
- Prepara el mur: Choose a suitable location on the wall, ensuring it is free from obstructions and has access to the necessary wiring.
- Col·loqueu el suport de muntatge: Use the provided screws and wall plugs to securely attach the mounting bracket to the wall. Ensure the bracket is level.
- Connecteu el cablejat: Before mounting the monitor, connect the Duox Plus system wiring to the terminals on the back of the monitor. Refer to the wiring diagram for correct connections.
- Monitor de muntatge: Carefully align the monitor with the mounting bracket and secure it in place. Ensure it clicks or slides firmly into position.
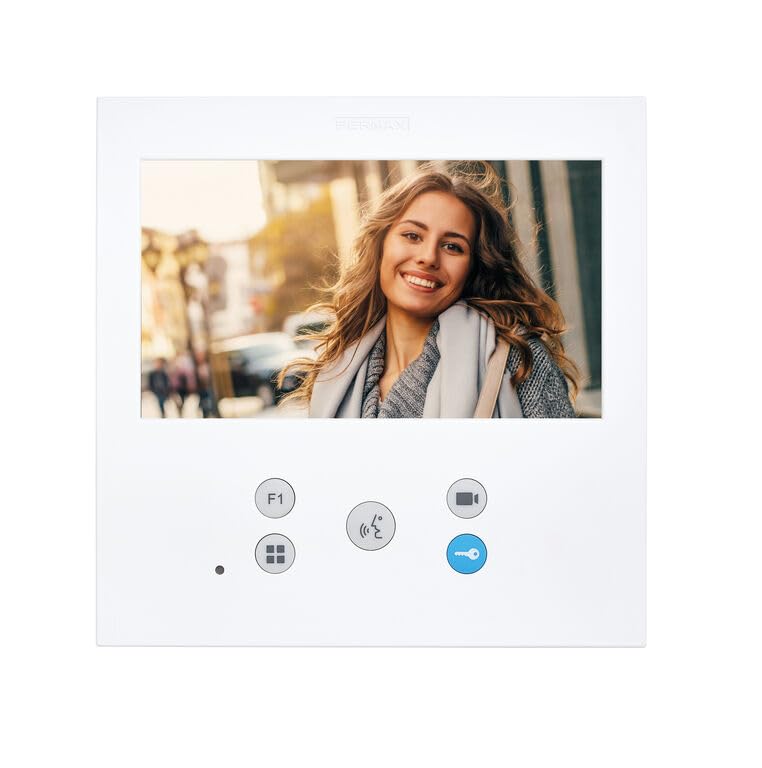
Figure 1: FERMAX Duox Plus Veo-XL DDA 7-inch Monitor. This image shows the front view of the monitor, highlighting its 7-inch screen and sleek design, ready for wall mounting.
4.2 Engegada inicial
Once the monitor is securely mounted and wired, restore power to the Duox Plus system. The monitor should power on and display the initial setup screen or standby interface. Follow any on-screen prompts for initial configuration, if applicable.
5. Instruccions de funcionament
The FERMAX Duox Plus Veo-XL DDA monitor provides intuitive controls for managing your video intercom system.
5.1 Respondre a una trucada
When an outdoor panel initiates a call, the monitor will ring and display the caller's video. Press the Respon button (typically indicated by a telephone icon) to establish communication.
5.2 Obrir la porta
During an active call or while monitoring the outdoor panel, press the Porta Oberta button (typically indicated by a key icon) to unlock the entrance door.
5.3 Monitoring the Outdoor Panel
A view the outdoor panel camera without an incoming call, press the Monitor button (often a camera icon). This allows you to see who is at the entrance at any time.
5.4 Ajustar la configuració
Access the monitor's menu to adjust settings such as ringtone volume, display brightness, and other system preferences. Navigate the menu using the directional buttons and confirm selections with the OK or Menú botó.
6. Manteniment
Regular maintenance ensures the longevity and optimal performance of your FERMAX monitor.
6.1 Cleaning the Screen and Casing
Utilitzeu un drap suau i sense pelusa lleugerament dampened with water to clean the screen and the monitor casing. Do not use harsh chemicals, abrasive cleaners, or aerosol sprays, as these can damage the surface or internal components.
6.2 Atenció general
- Keep the monitor free from dust and debris.
- Ensure no liquids spill onto the device.
- Eviteu col·locar objectes pesats al monitor.
7. Solució De Problemes
Si teniu problemes amb el monitor, consulteu els problemes i solucions més comuns següents:
| Problema | Causa possible | Solució |
|---|---|---|
| El monitor no s'encén. | Sense subministrament elèctric; cablejat fluix. | Check power connection to the system. Verify wiring connections are secure. |
| No video from outdoor panel. | Camera issue; wiring fault; system configuration. | Check outdoor panel camera. Inspect video wiring. Consult system installer for configuration check. |
| No audio during call. | Microphone/speaker issue; volume too low; wiring fault. | Adjust monitor volume. Check audio wiring. |
| Door open function not working. | Wiring to door lock faulty; lock mechanism issue. | Verify wiring to the door strike/lock. Check the door lock mechanism. |
If the problem persists after attempting these solutions, contact qualified technical support.
8. Especificacions
Technical specifications for the FERMAX Duox Plus Veo-XL DDA 7-inch Monitor:
- Marca: FERMAX
- Model: Duox Plus Veo-XL DDA
- Mida de la pantalla: 7 polzades
- Mida de la pantalla de peu: 7 polzades
- Tecnologia de visualització: LCD
- Descripció de la superfície de la pantalla: brillant
- Característica especial: Ampla pantalla
- Dimensions del paquet: 7.48 x 7.48 x 1.69 polzades
- Fabricant: FERMAX
- ASIN: B0C9F4CMGM
- Data de primera disponibilitat: 26 de juny de 2023
9. Garantia i Suport
FERMAX products are manufactured to high-quality standards. For warranty information and technical support, please refer to the documentation provided with your purchase or visit the official FERMAX weblloc web. Conserveu el comprovant de compra per a reclamacions de garantia.