
1. Introducció
Thank you for choosing the Crivit Auriol Radio-Controlled Projection Alarm Clock. This device combines a precise radio-controlled clock with a clear LCD display, dual alarms, and a convenient projection feature. This manual will guide you through the setup, operation, and maintenance of your new alarm clock.

Davant view of the alarm clock displaying time, date, and temperature.
2. Instruccions de seguretat
- Llegiu atentament totes les instruccions abans d’utilitzar-les i conserveu-les per a futures consultes.
- No exposeu el dispositiu a temperatures extremes, llum solar directa ni humitat elevada.
- Eviteu deixar caure o sotmetre el dispositiu a forts impactes.
- No intenteu desmuntar ni reparar el dispositiu vosaltres mateixos. Poseu-vos en contacte amb personal de servei qualificat.
- Mantingueu les piles fora de l'abast dels nens. Elimineu les piles usades d'acord amb la normativa local.
- Use only the provided AC adapter or one with identical specifications.
3. Contingut del paquet
Si us plau, comproveu el paquet per veure si hi ha els elements següents:
- Crivit Auriol Radio-Controlled Projection Alarm Clock (Model 373928)
- Adaptador de corrent alterna
- Bateries (preinstal·lades o separades)
- Manual d'usuari (aquest document)

Included AC power adapter.
4. Característiques del producte
- Temps controlat per ràdio: Automatic time synchronization for precise timekeeping.
- Funció de projecció: Projects time, alarm times, or ambient temperature onto a wall or ceiling.
- Pivoting Projection Arm: Adjustable projection angle with easy focus adjustment.
- Pantalla LCD: Clear screen showing time, day, month, week number/day of the week, and indoor temperature.
- Alarmes dobles: Two independent alarm settings with snooze function.
- Sensor tàctil: Activates short-term projection and screen backlight.
- Opcions d'energia: Operates via AC adapter or batteries.
- Port de càrrega USB-A: Convenient 5V, 800mA output for charging external devices.
- Brillantor ajustable: Customizable display brightness.
5. Identificació de components
Davant View:
Davant view with LCD display.
- Pantalla LCD: Shows time, date, temperature, alarm status, and radio control signal.
- Touch Sensor Area: Located above the display, for temporary backlight and projection.
- Projection Indicator: Icon indicating projection is active.
- Indicadors d'alarma: Icons for Alarm 1 and Alarm 2.
- Botó de rotació: Adjusts projection orientation.
lateral View (Projection Arm):
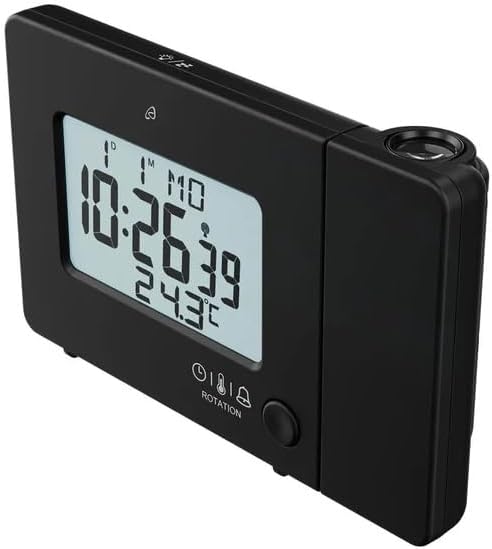
lateral view with projection arm extended.
- Braç de projecció: Pivots to direct the projection.
- Roda de focus: Ajusta la claredat de la imatge projectada.
- Lent de projecció: Emits the time/temperature display.
posterior View:

posterior view with control buttons and ports.
- -/WEEK Button: Decreases values, sets week display.
- +/ZONE Button: Increases values, sets time zone.
- Botó °C/°F: Toggles temperature unit.
- LANG Button: Selects display language for day of the week.
- Botó 12/24: Toggles 12/24 hour format.
- Botó MODE: Cycles through settings modes (Time, Alarm 1, Alarm 2).
- Botó SET: Enters setting mode for current display.
- Botó de reset: Resets the device to factory defaults (use a pointed object).
- Compartiment de la bateria: Per a bateries de reserva.
- Port DC IN: Per connectar l'adaptador de corrent altern.
- Port de sortida USB-A: Per carregar dispositius externs.
6. Configuració
6.1. Encès
The alarm clock can be powered by either the included AC adapter or batteries for backup.
- Instal·lació de la bateria: Open the battery compartment on the rear of the unit. Insert the included batteries, observing the correct polarity (+/-). Batteries primarily serve as backup in case of power outage.
- Connexió de l'adaptador de CA: Connect the small plug of the AC adapter into the DC IN port on the back of the alarm clock. Plug the AC adapter into a standard wall outlet. The display will light up.
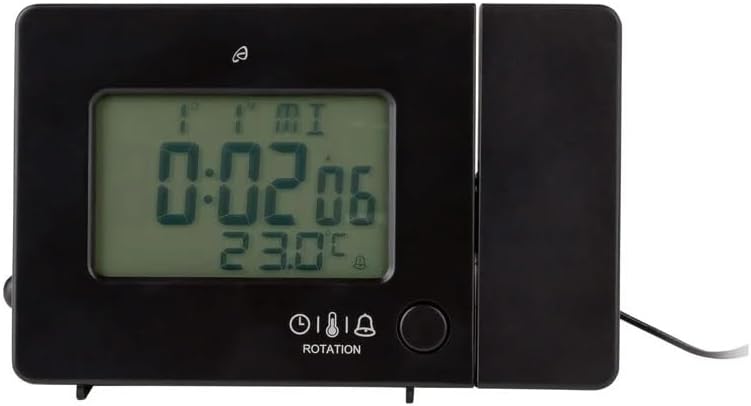
Alarm clock connected to power.
6.2. Configuració inicial i sincronització del radiocontrol
Upon first power-up or after a reset, the clock will automatically attempt to synchronize with the radio-controlled time signal (DCF77). This process can take several minutes to an hour, depending on your location and signal strength. During synchronization, a radio tower icon will flash on the display.
- Col·loca el rellotge a prop d'una finestra per a una millor recepció del senyal.
- Avoid placing it near electronic devices that may cause interference.
- Once synchronized, the radio tower icon will appear solid on the display.
If the radio signal is not received, you may need to set the time manually (see Section 7.1).
6.3. Basic Settings (if not automatically set or for adjustment)
Premeu el botó SET button to enter setting mode. Use the -/WEEK i +/ZONE buttons to adjust values, and SET per confirmar i passar a la configuració següent.
- Zona horària: Adjust if you are not in the standard time zone for the radio signal.
- Format 12/24 hores: Premeu el botó 12/24 button to toggle between 12-hour (with AM/PM) and 24-hour formats.
- Unitat de temperatura: Premeu el botó ° C / ° F botó per canviar entre Celsius i Fahrenheit.
- Idioma de visualització: Premeu el botó LANG button to select the language for the day of the week display (5 languages available).
7. Instruccions de funcionament
7.1. Configuració manual de l'hora
If the radio-controlled time signal is weak or unavailable, you can set the time manually:
- Manteniu premut el botó SET fins que els dígits de les hores parpellegin.
- Utilitza el -/WEEK i +/ZONE botons per ajustar l'hora.
- Premeu SET to confirm and move to minutes, then year, month, and day.
- Premeu SET again to exit manual time setting.
7.2. Configuració d'alarmes (alarma 1 i alarma 2)
The clock features two independent alarms.
- Premeu el botó MODE button once to display Alarm 1 time, or twice for Alarm 2 time. The corresponding alarm icon (e.g., A1) will flash.
- Mentre es mostra l'hora de l'alarma, manteniu premut el botó SET fins que els dígits de les hores parpellegin.
- Utilitza el -/WEEK i +/ZONE botons per ajustar l'hora.
- Premeu SET to confirm and move to minutes. Adjust minutes using -/WEEK i +/ZONE.
- Premeu SET again to confirm and exit alarm setting.
- Per activar/desactivar una alarma, premeu la tecla MODE button to display the desired alarm, then press the +/ZONE button. The alarm icon (bell) will appear/disappear on the display.
7.3. Funció de posposició
Quan soni una alarma, toqueu la Àrea del sensor tàctil o premeu el botó SNOOZE / LIGHT button (if available, otherwise use the touch sensor) to activate the snooze function. The alarm will pause for approximately 5 minutes and then sound again. To stop the alarm completely, press any other button.
7.4. Funció de projecció
The alarm clock can project the time, alarm times, or ambient temperature onto a wall or ceiling.
- Activate Projection: The projection is continuously active when powered by the AC adapter. If running on batteries, touch the Àrea del sensor tàctil for short-term projection.
- Ajust de l'angle de projecció: Pivot the projection arm to direct the image to your desired location.
- Ajustar el focus: Utilitza el Roda d'enfocament on the projection arm to sharpen the projected image.
- Change Projected Content: Premeu el botó MODE button repeatedly to cycle through projecting Time, Alarm 1, Alarm 2, or Temperature.
- Girar projecció: Premeu el botó ROTACIÓ button to rotate the projected image by 90-degree increments (4 orientations available).

Time projected onto a surface.
7.5. Retroil·luminació de la pantalla
When powered by the AC adapter, the display backlight is continuously on. When running on batteries, touch the Àrea del sensor tàctil to activate the backlight for a few seconds.
7.6. USB Charging Output
The USB-A port on the back of the unit provides a 5V, 800mA output for charging small electronic devices like smartphones or tablets. Connect your device's USB charging cable to this port.
8. Manteniment
- Neteja: Netegeu el dispositiu amb un drap suau i sec. No utilitzeu productes de neteja abrasius ni dissolvents.
- Substitució de la bateria: If using batteries for backup, replace them annually or when the display becomes dim during power outages. Ensure correct polarity.
- Emmagatzematge: Si guardeu el dispositiu durant un període prolongat, traieu-ne les piles per evitar fuites.
9. Solució De Problemes
| Problema | Causa possible | Solució |
|---|---|---|
| La pantalla està en blanc o tènue. | No power, dead batteries, or AC adapter not connected. | Ensure AC adapter is securely connected. Replace batteries if using for backup. |
| Radio-controlled time not synchronizing. | Weak signal, interference, or incorrect time zone. | Move the clock to a window or open area. Avoid electronic devices. Manually set time if necessary. Check time zone setting. |
| La projecció és borrosa. | Enfocament no ajustat. | Ajusteu el Roda d'enfocament on the projection arm. |
| L'alarma no sona. | L'alarma no està activada o està configurada incorrectament. | Ensure the alarm icon is visible on the display. Recheck alarm time settings. |
| La càrrega USB no funciona. | Device not properly connected, or device requires more power than 800mA. | Ensure the USB cable is securely connected. Check if your device's charging requirements exceed 5V/800mA. |
10. Especificacions

Dimensions del producte.
- Número de model: 373928
- Dimensions (L x A x A): 15 x 3.81 x 9.5 cm (approx. 15l x 9.5H centimeters)
- Material: Plàstic
- Tipus de visualització: LCD digital
- Font d'alimentació: AC Adapter (included) or Batteries (included)
- Sortida USB: 5 V, 800 mA
- Característiques especials: Adjustable brightness, Snooze, Projection, Radio-controlled time
- Tipus de moviment: Quars
- Tipus de muntatge: Taula
- Ús interior / exterior: Interior
11. Garantia i Suport
This Crivit Auriol Projection Alarm Clock comes with a standard manufacturer's warranty. Please refer to the warranty card included in your package or contact your retailer for specific warranty terms and conditions.
For technical support or inquiries, please contact the customer service department of your retailer or the Crivit support line as indicated on the product packaging or official weblloc.