
Boxlight P8 WX31NXT
Manual d'usuari del projector DLP Boxlight P8 WX31NXT
Model: P8 WX31NXT
1. Introducció
This manual provides comprehensive instructions for the setup, operation, maintenance, and troubleshooting of your Boxlight P8 WX31NXT DLP Projector. Please read this manual thoroughly before using the projector to ensure proper functionality and to prevent damage.
2. Informació de seguretat
- No bloquejar les obertures de ventilació.
- No mireu directament a la lent del projector quan estigui encès.amp està activat.
- Feu servir només el cable d'alimentació que s'inclou amb el projector.
- Demaneu tot el servei a personal de servei qualificat.
- Mantingueu el projector lluny de l'aigua i la humitat.
3. Contingut del paquet
Verifiqueu que tots els elements siguin presents al vostre paquet:
- Boxlight P8 WX31NXT DLP Projector
- Control remot
- Cable d'alimentació
- Cable HDMI
- Manual d'usuari (aquest document)
4. Producte acabatview
Familiarize yourself with the various parts and connections of your projector.
4.1 Amunt View i Panell de control
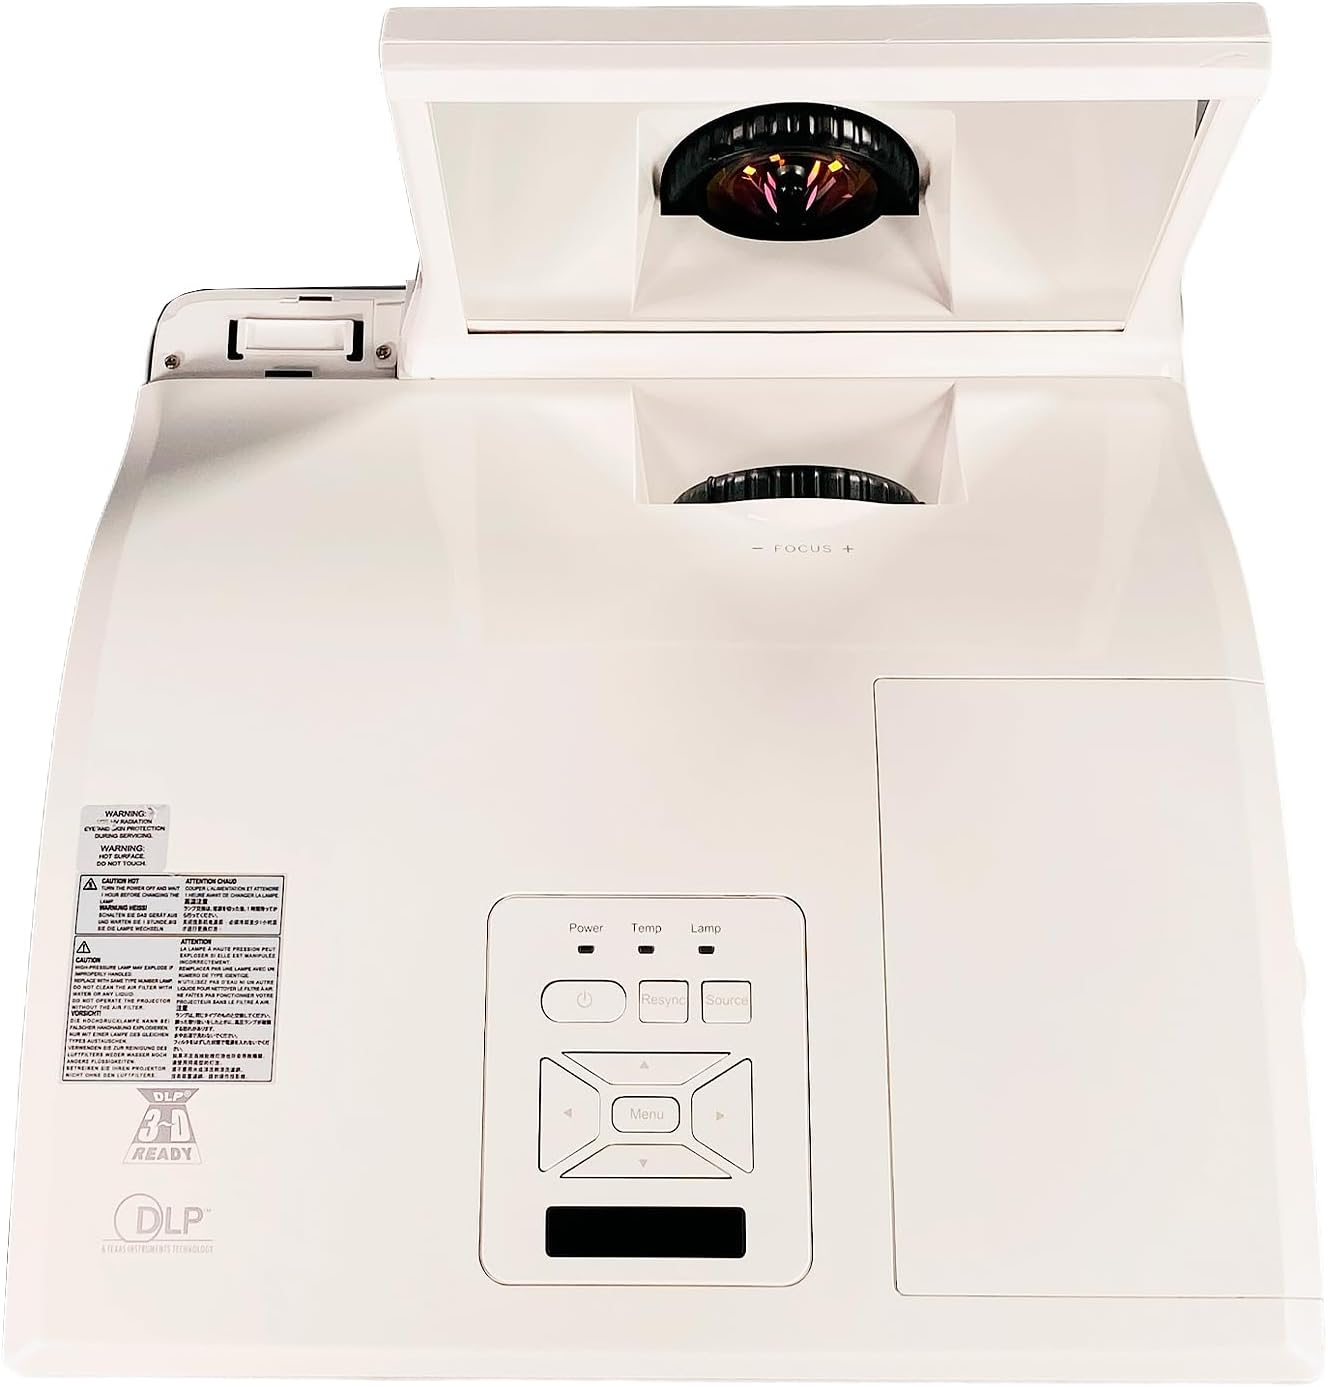
Figura 4.1: A dalt view of the projector, showing the control panel with Power, Temp, Lamp indicators, and navigation buttons. The ultra-short throw lens assembly is visible at the front.
The top of the projector features the main control panel, allowing direct access to power, source selection, and menu navigation. The ultra-short throw lens is located at the front, protected by a movable cover.
4.2 Connexions del panell posterior

Figura 4.2: Rear panel of the projector, displaying various connectivity options including HDMI, VGA, S-Video, Composite, Audio In/Out, Mini USB, RS232, and LAN ports.
The rear panel provides a comprehensive array of input and output ports for connecting various devices:
- HDMI: Digital video and audio input.
- VGA In 1 & 2: Analog video inputs for computers.
- VGA Out: Analog video output for a monitor.
- Vídeo S: Entrada de vídeo analògic.
- Video (Composite): Entrada de vídeo analògic.
- Audio In (L/R), Audio In 1 & 2, Microphone: Various audio inputs.
- Sortida d'àudio: Sortida d'àudio.
- Mini USB: For service or control.
- RS232: Port de control sèrie.
- LAN: Network connectivity.
- DC Out 12V: Potència de sortida.
4.3 lateral View i Ventilació

Figura 4.3: lateral view of the projector, highlighting the ventilation grilles essential for heat dissipation. The ultra-short throw lens assembly is also visible.
The sides of the projector feature ventilation grilles to ensure proper airflow and prevent overheating. Do not obstruct these grilles during operation.
4.4 Etiqueta del producte

Figura 4.4: Product label located on the bottom of the projector, displaying model number P8 WX31NXT, serial number (e.g., 330900834210132), input power requirements, and regulatory compliance marks.
The product label contains important information such as the model number, serial number, and electrical specifications. This information is crucial for support and warranty purposes. For technical support, you can contact Boxlight at +1-360-464-2119 (Internacional) o +1-866-972-1649 (USA and Canada), or visit www.boxlight.com.
5. Configuració
5.1 Col·locació del projector
As an ultra-short throw projector, the P8 WX31NXT is designed to be placed very close to the projection surface. Position the projector on a stable, flat surface directly in front of the screen or wall. Ensure there is adequate space around the ventilation grilles for airflow.
5.2 Connexió de potència
- Connect the supplied power cable to the AC inlet on the projector's rear panel.
- Connecteu l'altre extrem del cable d'alimentació a una presa de corrent amb connexió a terra.
5.3 Connexió de fonts d'entrada
Choose the appropriate cable for your source device and connect it to the corresponding port on the projector's rear panel (refer to Figure 4.2).
- HDMI: For digital video and audio from devices like laptops, Blu-ray players, or streaming boxes.
- VGA: For analog video from computers. Use VGA In 1 or VGA In 2.
- S-Video/Composite Video: For older video sources.
- Àudio: Connect external audio sources to the Audio In ports if not using HDMI for audio.
6. Funcionament del projector
6.1 Engegada/apagada
- Per encendre: Premeu el botó Poder button on the control panel or remote control. The power indicator will illuminate.
- Per apagar: Premeu el botó Poder button twice. The projector will initiate a shutdown sequence.
6.2 Selecció de la font d'entrada
Premeu el botó Font button on the control panel or remote control repeatedly to cycle through available input sources (HDMI, VGA 1, VGA 2, S-Video, Video, etc.) until your desired source is displayed.
6.3 Ajust del focus
The projector features a manual focus adjustment. Rotate the focus ring near the lens assembly until the projected image is clear and sharp.
6.4 Navegació de menús
Premeu el botó Menú button on the control panel or remote to access the On-Screen Display (OSD) menu. Use the arrow buttons to navigate through options and the Entra botó per seleccionar. Premeu Menú de nou per sortir.
Common menu settings include:
- Configuració de la imatge: Brightness, Contrast, Color, Aspect Ratio.
- Configuració de la pantalla: Keystone correction, Position.
- Configuració del sistema: Language, Timer, Lamp configuracions.
7. Manteniment
7.1 Neteja de la lent
Netegeu suaument la lent del projector amb un drap suau i sense borrissol dissenyat específicament per a superfícies òptiques. No utilitzeu productes de neteja abrasius ni força excessiva, ja que això pot ratllar la lent.
7.2 Neteja dels filtres d'aire
Regularly clean the air filters to maintain optimal performance and prevent overheating. Refer to the projector's specific filter location (usually on the side or bottom) and cleaning instructions. Typically, filters can be cleaned with a soft brush or vacuum cleaner.
7.3 Lamp Substitució
El projector lamp té una vida útil finita. Quan la lamp indicator illuminates or the image brightness significantly decreases, the lamp may need replacement. Consult a qualified technician or refer to the detailed lamp replacement guide for your specific model. Always use genuine Boxlight replacement lamps.
8. Solució De Problemes
| Problema | Causa possible | Solució |
|---|---|---|
| No es mostra cap imatge | Power cable disconnected; Incorrect input source selected; Source device not powered on. | Check power connections; Select correct input source; Ensure source device is on. |
| La imatge és borrosa | Enfocament no ajustat; Projector massa a prop/lluny de la pantalla. | Adjust the focus ring; Reposition the projector. |
| El projector s'sobreescalfa i s'apaga | Ventilation blocked; Dirty air filter. | Ensure clear airflow around projector; Clean air filters. |
| El comandament a distància no funciona | Batteries depleted; Obstruction between remote and projector. | Replace batteries; Remove obstructions; Point remote directly at IR receiver. |
9. Especificacions
| Característica | Detall |
|---|---|
| Model | Boxlight P8 WX31NXT |
| Tecnologia de visualització | DLP |
| Brillantor | 3100 lúmens ANSI |
| Resolució nativa | WXGA (1280 x 800) |
| Relació d'aspecte | 16:10 |
| Relació de contrast | 3000:1 |
| Throw Type | Llançament ultra curt |
| Connectivitat | HDMI, VGA (x2 In, x1 Out), S-Video, Composite Video, Audio In (x3), Audio Out, Microphone, Mini USB, RS232, LAN, DC Out 12V |
| Dimensions del producte | 14.45 x 14 x 5.32 polzades |
| Potència d'entrada | AC 100-240V~ 50/60 Hz 3.6A |
10. Garantia i Suport
For warranty information and technical support, please refer to the official Boxlight website or contact their customer service directly. Keep your purchase receipt and the projector's serial number (found on the product label, e.g., 330900834210132) readily available when contacting support.
Boxlight Contact Information:
- International Technical Support: +1-360-464-2119
- USA and Canada Technical Support: +1-866-972-1649
- Weblloc: www.boxlight.com
Documents relacionatsP8 WX31NXT


Ask a question about this manual
Ask about setup, troubleshooting, compatibility, parts, safety, or missing instructions. Manuals+ will review the question and use this page’s manual context to help answer it.