
1. Introducció
This manual provides detailed instructions for the installation, operation, and maintenance of your Kittyhok BC5B 2K Solar Security Camera. Please read this manual thoroughly before using the product to ensure proper functionality and safety.
The Kittyhok BC5B is a 2K (4MP) wireless outdoor security camera designed for home surveillance. It features solar power for continuous operation, smart detection capabilities, color night vision, and two-way audio. The camera is weatherproof and offers local storage options.
2. Què hi ha a la caixa
Verifiqueu que tots els components siguin presents al vostre paquet:
- Cos de la càmera
- Panell solar
- Cable de càrrega
- Manual d'instruccions (aquest document)
- Cargols de muntatge
Note: The exact components and quantities may vary slightly depending on your specific model number.
3. Configuració i instal·lació
3.1 Initial Camera Recharge
It is recommended to fully recharge the camera before initial installation. Connect the camera to a 5V 1A or 2A DC phone charger (not included) using the provided charging cable. The indicator light will blink green during charging. It will stop blinking when fully charged. This typically takes 4-6 hours.
Note: Use only 5V DC power chargers. Chargers that do not meet the standard may damage the batteries. Please charge the battery at room temperature to avoid damage.

Image: A Kittyhok solar security camera mounted on an exterior wall next to its solar panel, highlighting its wire-free operation.
3.2 Muntatge de la càmera i del panell solar
Install the camera 2-3 meters (7-10 feet) above the ground. This height maximizes the detection range of the motion sensor. For optimal motion detection, install the camera at an angle rather than directly facing the detection area.
For dome cameras (if applicable to your system), they must be installed upside down for better waterproof performance and motion sensor efficiency.
Ensure the solar panel is positioned to receive 2-3 hours of direct sunlight daily for continuous power.

Image: Illustrations demonstrating different mounting configurations for the camera, including wall, ceiling, and stand mounts, along with the adjustable solar panel.

Image: A person using a drill to install a Kittyhok security camera on a wall, emphasizing ease of installation.
3.3 Connecting Your System (NVR)
If your system includes an NVR (Network Video Recorder), follow these steps:
- Connect the NVR to power using the included power adapter. Connect a mouse to the NVR's USB port.
- Connect the NVR to a PC monitor or TV with an HDMI cable. Skip this step if your NVR has a built-in monitor. A monitor is required for initial setup. After completing the initial setup, your NVR does not need to be connected to a TV or monitor to view o capturar enregistraments.
- Connect the NVR to your router with an Ethernet cable if you plan to use it remotely. You can also connect the NVR to your router via Wi-Fi through the NVR's Network Setting > Wireless network setting.
- Follow the on-screen steps of the Startup Wizard on the monitor/TV to complete the initial setup.
- Turn on the power switch on the battery cameras. You should see each camera appear on your monitor/TV.
- Bring cameras to desired mounting locations, power them on, and go back to the NVR screen. Wait 5 minutes to see if they stream fluently. If a camera does not stream well, move it to a location with less obstacles in line-of-sight from the NVR.
Note: Select a least interfered Wi-Fi channel so your NVR performs its best Wi-Fi capability. In NVR's menu System setting > Network > NVR Wi-Fi hotspot, feu clic Canal adaptatiu.
3.4 Pairing a New Camera to the NVR
By default, each camera within your NVR kit comes pre-paired to the NVR. If you want to add more cameras, follow these steps:
- Hold the ON/OFF switch of the camera to turn it on. Make sure the camera is in Mode de sincronització. If not, reset the camera to bring it to Pairing Mode.
- With the NVR connected to a TV/Monitor, click the '+' icon at the bottom and follow the on-screen guide to pair your camera to the NVR.
- Un cop emparellada correctament, la nova càmera apareixerà en un camp de vídeo vacant.
Note: Pairing a replacement camera is similar to adding a new add-on camera. You need to delete the old camera from NVR first, and then start pairing the replacement camera to NVR.
3.5 Positioning Your NVR and Cameras
Camera distance from NVR can reach up to 1300 ft. wirelessly in line of sight. Proper placement of the wireless NVR in your home will help ensure you achieve maximum coverage.
Do not place near high voltage cables o altres fonts d'interferències elèctriques. La interferència elèctrica degradarà la qualitat del senyal.
4. Operating Your Camera System
4.1 Accessing Your System via Smartphone
Descarrega't el Kittyhok App from the App Store or Google Play and install it on your smart device.
Launch the App, register a user account, and log in.
In the App, tap the '+' button and then tap Scan to add. Scan the QR code on the NVR and follow the on-screen instructions to add the NVR.
Note: The QR code can also be found in NVR's System setting > Download the App.
4.2 Accessing Your System via PC and Mac
Download and install the CMS (Central Management Software) on your computer. Go to https://kittyhok.com/pages/download.
Login with your phone App user account; your system will be automatically synced to the CMS.
Note: You can also add your system to the CMS Client with Cloud ID manually.
4.3 Característiques clau
- Resolució 2K (4MP): Captura un vídeo clar i detallattage.
- Color Day & Night Vision: Provides vivid color images during the day and at night with powerful spotlights.
- Smart Detection (PIR+): Minimizes false notifications by detecting persons and cars.
- Àudio bidireccional: Listen and talk through the camera from anywhere using the app.
- Emmagatzematge local: Supports SD card (up to 256GB, not included) for video storage with no monthly fees.
- Resistent a la intempèrie: Designed to work in various weather conditions (IP66 rated).

Image: A Kittyhok camera facilitating a two-way audio conversation between a homeowner and a delivery driver.

Image: A side-by-side comparison demonstrating the clarity and color provided by the camera's night vision with the spotlight on, versus standard black and white night vision.
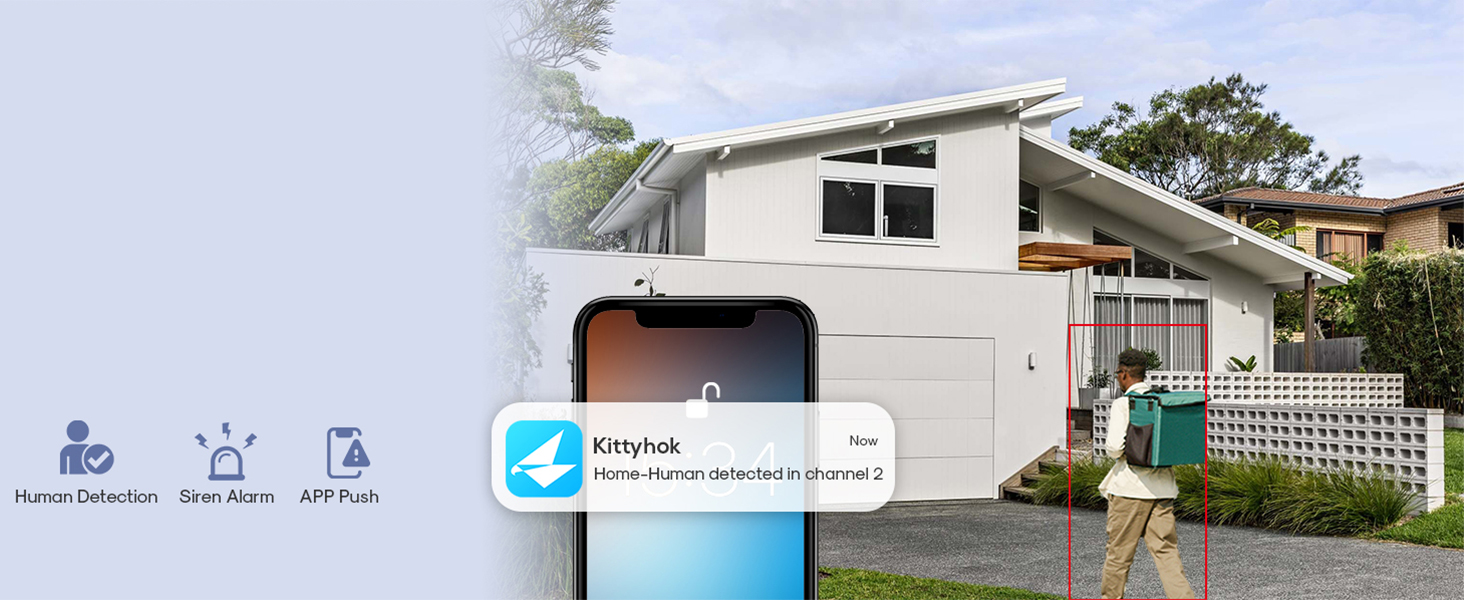
Image: A smartphone displaying a notification from the Kittyhok app, indicating human detection by the security camera.

Image: A Kittyhok camera and its solar panel shown during rainfall, illustrating its weatherproof construction.
5. Manteniment
5.1 Eficiència dels panells solars
The solar panel requires 2-3 hours of daily sunlight to maintain continuous power for the camera. Regularly clean the solar panel to ensure maximum efficiency. Dust, dirt, or debris can reduce its ability to charge the camera's battery.
5.2 Durada de la bateria
Without the solar panel, the camera's batteries can last 45-120 days depending on activation frequency. With solar panels, batteries are replenished daily, eliminating the need for manual recharging.
5.3 Protecció meteorològica
The camera is designed to be weatherproof (IP66 rated). However, ensure all connections are secure and covers are properly sealed to prevent water ingress.
6. Resolució de problemes (preguntes freqüents)
6.1 Why cannot I see continuous live video on the monitor?
Because the cameras automatically enter standby mode to save power. As a thermal detection security system powered with solar and batteries, the system works when activities are detected and stands by when there is no activity.
6.2 Does the system have to be connected to a monitor all the time?
No. Connecting the NVR to your TV or monitor enables you to enter the NVR's menu. It is necessary for the initial setup. After the setup is complete, you can view the NVR from its screen and view the system on your smartphone or tablet.
If you are using a TV, you can switch the signal source to TV programs and switch back to this HDMI connection while needed.
6.3 Does the battery/solar cameras record 24/7?
Yes but not by default. All solar/battery-powered security cameras record motion-triggered activities only. If you need 24/7 cameras, please go for Wi-Fi security camera system with plug-in power.
You can also plug this camera to power with a 5V DC phone charger, then switch to Mode d'enregistrament continu to make it work 24/7.
6.4 Why my cameras run out of batteries fast?
- Make sure to fully recharge your cameras before you mount them. It shall take 4-6 hours to fully charge them.
- When you are using solar panel as the power source, make sure the camera is in Event Record Mode. If you want the cameras to work in Continuous Record Mode, plug the cameras to wall outlets with 5V power chargers.
- Assegureu-vos que el vostre panell solar estigui instal·lat correctament per obtenir energia solar.
6.5 Do I have to use the cameras with solar panels?
No, you can use the cameras without solar panels. The cameras' batteries last 45-120 days depending on how often they are activated. You will need to take the cameras down to recharge when battery is low.
Amb panells solars, reposen energia a les bateries cada dia. Això estalvia la molèstia de desmuntar les càmeres per recarregar-les.
7. Especificacions
| Característica | Detall |
|---|---|
| Marca | Kittyhok |
| Nom del model | BC5B |
| Tecnologia de connectivitat | Sense fil (Wi-Fi, Ethernet) |
| Característiques especials | 2-Way Audio, Built-In Light, HD Resolution, Motion Sensor, Weather Proof |
| Ús interior/exterior | Interior, Exterior |
| Tipus de controlador | Amazon Alexa, Android, Kittyhok NVR, KittyhokPro APP |
| Tipus de muntatge | Muntatge de paret |
| Color | Negre |
| Nivell de resistència a l'aigua | Impermeable (IP66) |
| Tipus d'alerta | Només moviment |
| Resolució de fixes efectius | 5 MP |
| Resolució del sensor fotogràfic | 5 MP |
| Mètode de control | Aplicació, comandament a distància |
| Font d'alimentació | Energia solar |
| Resolució de captura de vídeo | 2K (1440p) |
| Velocitat de fotogrames | 15 fps |
| Viewangle ing | 110 graus |
| Zoom digital | 8x |
| Mida màxima admesa de la memòria flash | 256 GB (Micro SD) |
| Gamma de visió nocturna | 33 peus |
| Dimensions de l'article | 3.74 x 7.78 x 7.09 polzades |
| Pes de l'article | 1.54 lliures |
8. Garantia i Suport
8.1 Garantia del fabricant
Your Kittyhok BC5B 2K Solar Security Camera comes with a 1 anys de garantia. This warranty typically covers manufacturing defects and ensures replacement rather than repair for eligible issues.
8.2 Atenció al client
Kittyhok offers 24/7 online support. For assistance, please visit the official Kittyhok weblloc web o contacteu directament amb el seu servei d'atenció al client.
Additionally, Kittyhok provides a 30-Day Money Back Guarantee.
For more information and support resources, visit: www.kittyhok.com
9. Official User Manual Video Guide
For a comprehensive visual guide on setting up and operating your Kittyhok Solar Security Camera System, please watch the official user manual video below.
Video: Official User Manual for Kittyhok Solar Powered Security System. This video covers unboxing, NVR and camera introductions, system connection, camera recharging, app access, PC/Mac access, camera positioning, and pairing new cameras.