
1. Producte acabatview
The Agrieyes USB-C Wireless Beacon Light is a compact, rechargeable, and magnetic safety light designed for various vehicles and emergency situations. It features high-intensity LEDs, multiple flashing modes, and a durable, waterproof design.

Image: The Agrieyes USB-C Wireless Beacon Light showing its compact design and amber light output.
Característiques principals:
- Funcionament sense fil: Functions independently, ideal for temporary safety needs.
- Càrrega USB-C: Fast charging capability for extended use.
- Base magnètica: Secure attachment to metallic surfaces without damage.
- Alta visibilitat: 32 high-intensity LED chips with 7 flashing modes.
- Disseny impermeable: IP67 rated for reliable performance in various weather conditions.
2. Contingut del paquet
- 1 x Agrieyes Mini Beacon Light
- 1 x cable de càrrega USB-C
- 1 x manual d'instruccions
3. Configuració
3.1 Càrrega del dispositiu
Before first use, fully charge the beacon light. The device features a USB-C quick charging port.
- Locate the USB-C charging port on the side of the beacon light. It is protected by a rubber dust cover.
- Gently lift the rubber dust cover to expose the port.
- Connect the provided USB-C cable to the port and the other end to a compatible USB power source (e.g., car charger, wall adapter, computer USB port).
- The battery indicator lights on the top of the device will illuminate to show charging progress. A full charge typically takes approximately 2.5 hours.
- Once fully charged, disconnect the cable and ensure the rubber dust cover is securely re-sealed to maintain waterproofing.

Image: The beacon light highlighting its USB-C charging port and charging duration.

Imatge: Una imatge detallada view of the USB-C charging port with its protective cover.
3.2 Mounting the Beacon Light
The beacon light is equipped with a powerful built-in magnetic base for secure attachment.
- Ensure the surface where you intend to mount the light is clean and free of debris.
- Place the magnetic base of the beacon light firmly onto any suitable metallic surface (e.g., vehicle roof, side panel).
- Verify that the light is securely attached. The magnet is designed to hold firmly even during vehicle movement.

Image: The beacon light demonstrating its magnetic attachment to a vehicle's roof.

Imatge: Una imatge detallada view of the powerful magnets integrated into the base of the light.
4. Instruccions de funcionament
4.1 Engegada/Apagada i Selecció de Mode
The beacon light features a single switch button for all operations.
- Encès: Short press the switch button once to turn on the light. The battery indicator will briefly show the current charge level.
- Canvia el mode: Short press the switch button repeatedly to cycle through the 7 available flashing modes.
- Apagar: Long press the switch button for approximately 3 seconds to turn off the light.
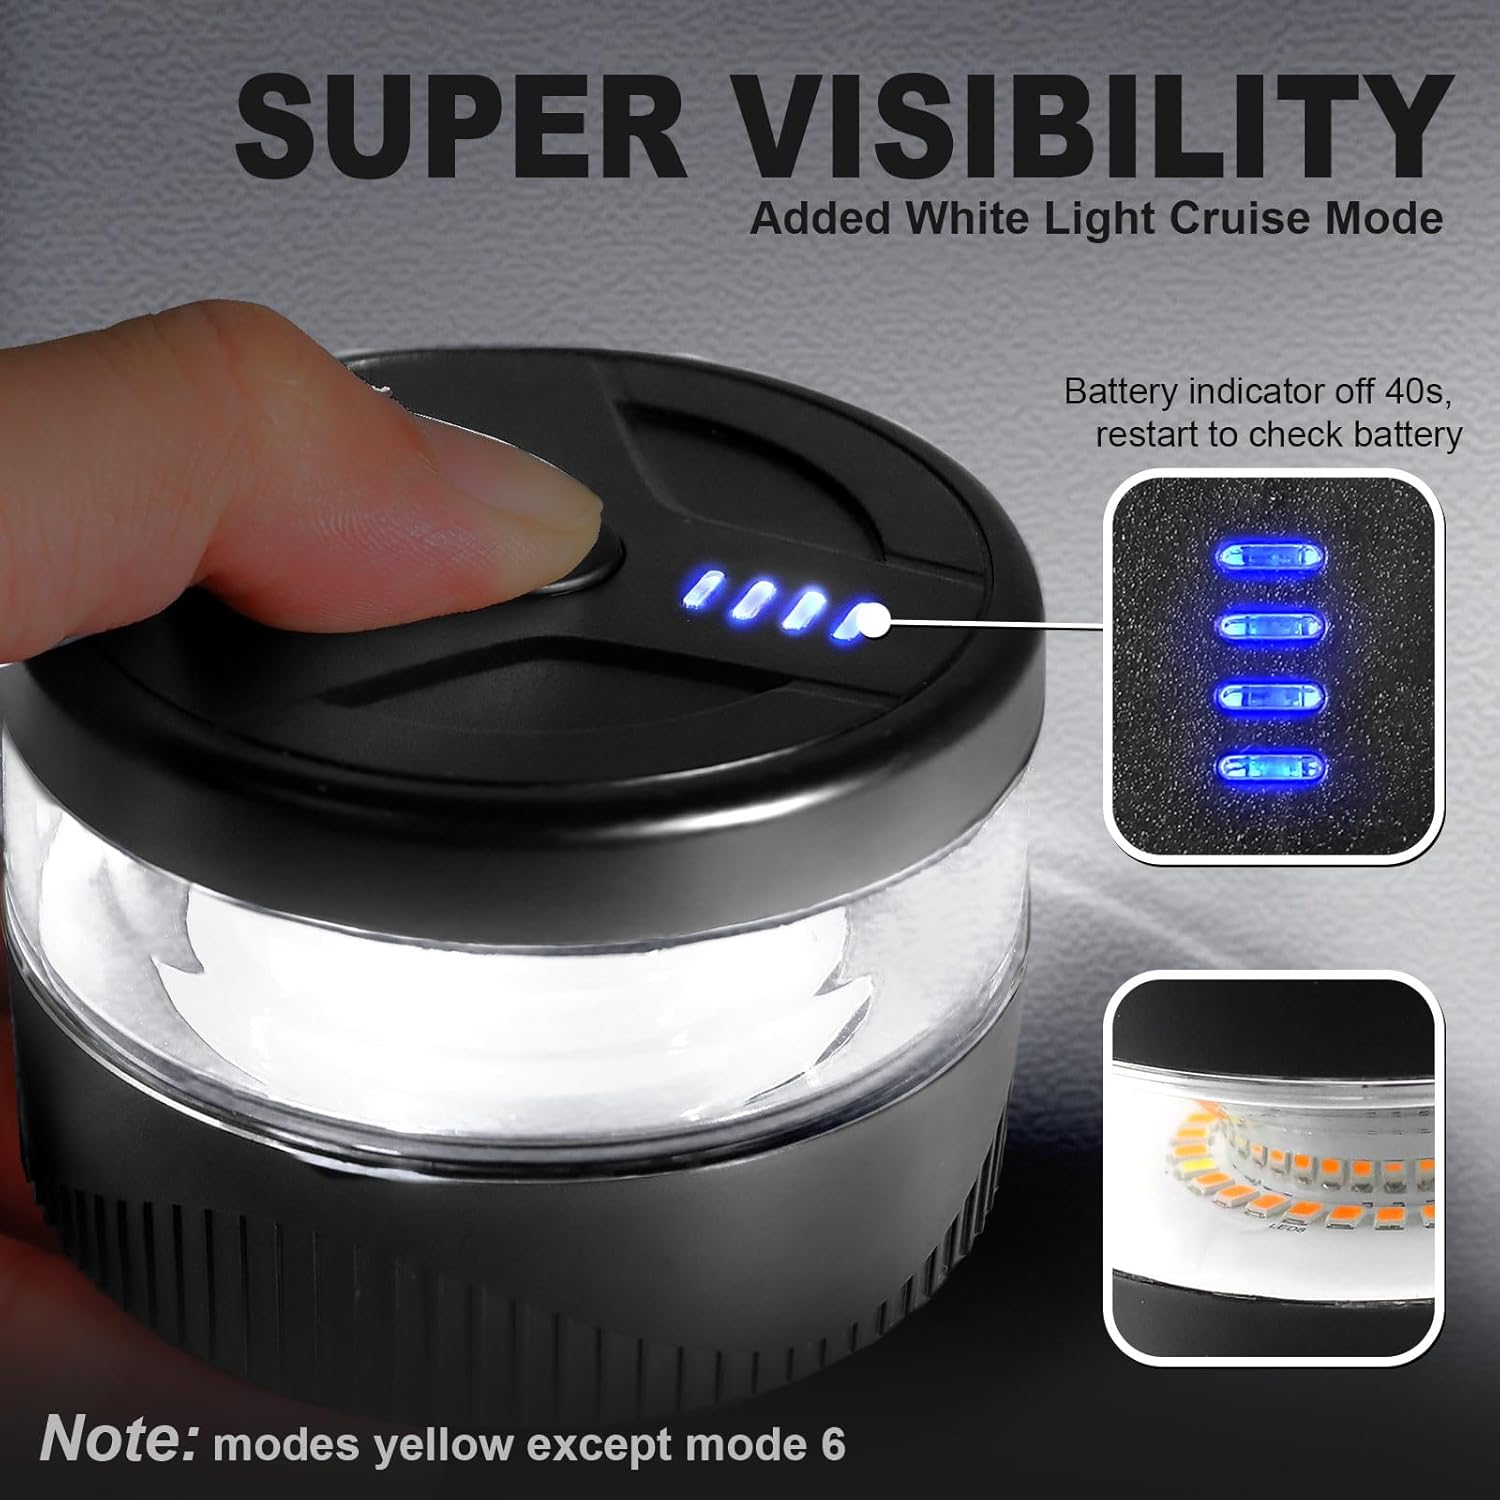
Image: The top of the beacon light, indicating the switch button and battery level display.
4.2 modes de parpelleig
The beacon light offers 7 distinct modes to suit various warning and safety requirements. All modes are amber light, except for Mode 6 which is a white cruising light.
- Mode 1: Single Flash (Amber)
- Mode 2: Double Flash (Amber)
- Mode 3: Triple Flash (Amber)
- Mode 4: Penta Flash (Amber)
- Mode 5: Double-Quadra Flash (Amber)
- Mode 6: Cruising Mode (White)
- Mode 7: SOS (Amber)
Video: An official Agrieyes video demonstrating the various flashing modes of the beacon light.
4.3 Indicador de bateria
The battery indicator lights on the top of the device show the remaining power level. These lights will turn off automatically after approximately 40 seconds to conserve power. To check the battery level again, simply short press the switch button.

Imatge: Un primer pla view of the battery indicator lights on the top surface of the beacon light.
5. Manteniment
5.1 Impermeabilització
The Agrieyes beacon light is designed with IP67 waterproofing, utilizing ultrasonics and gluing technology for dual protection against water and dust ingress.
- Always ensure the USB-C charging port's rubber dust cover is securely closed when not charging to maintain its waterproof integrity.
- Avoid submerging the device in water for extended periods, despite its waterproof rating.

Image: The beacon light shown with water splashing, illustrating its waterproof feature.
5.2 Atenció general
- Clean the light's exterior with a soft, damp tela. No utilitzeu netejadors abrasius ni dissolvents.
- Guardeu el dispositiu en un lloc fresc i sec quan no l'utilitzeu.
- Avoid dropping the device or subjecting it to strong impacts, which could compromise its internal components or seals.
6. Solució De Problemes
If you encounter issues with your Agrieyes USB-C Wireless Beacon Light, please refer to the following common solutions:
- La llum no s'encén: Ensure the device is fully charged. If the battery is depleted, connect it to a power source using the USB-C cable.
- Light not holding a charge: Verify that the USB-C cable and power adapter are functioning correctly. Try using a different cable or adapter. Ensure the charging port is clean and free of debris.
- Water inside the light: While the device is IP67 waterproof, extreme conditions or improper sealing of the charging port cover can lead to water ingress. If water is observed inside, immediately power off the device and allow it to dry completely in a warm, dry environment. Do not attempt to use it until all moisture has evaporated.
- Els modes de llum no canvien: Ensure you are performing a short press on the switch button to cycle through modes. A long press will power the device off.
- Magnetic base not holding securely: Clean both the magnetic base of the light and the mounting surface to ensure optimal adhesion. Ensure the surface is flat and metallic.
If these steps do not resolve the issue, please contact Agrieyes customer support for further assistance.
7. Especificacions
| Característica | Especificació |
|---|---|
| Marca | Agrieyes |
| Número de model | AG-W56 |
| Color | Ambre |
| Tipus de font de llum | Díode emissor de llum (LED) |
| Nombre de fonts de llum | 32 |
| Font d'alimentació | Funciona amb bateria (1 bateria d'ions de liti inclosa) |
| Port de càrrega | USB-C |
| Temps de càrrega | Aprox. 2.5 hores |
| Temps d'ús continu | Més de 10 hores |
| Tipus de muntatge | Muntatge magnètic |
| Classificació impermeable | IP67 |
| Pes de l'article | 7.8 unces (aproximadament 221 grams) |
| Dimensions del producte | 3.16" de llargada x 3.15" d'amplada x 2.16" d'alçada (aprox. 8.03 x 8.00 x 5.49 cm) |
| Voltage | 5 Volts |
| Wattage | 4.7 watts |
| Material | Polycarbonate (PC), Acrylonitrile Butadiene Styrene |
| Certificacions | CE, EMC |
8. Garantia i Suport
Agrieyes provides a one-year warranty for this product. If you encounter any issues or require assistance, please contact Agrieyes customer support. We are committed to resolving any problems within 24 hours.
For support, please visit the official Agrieyes store on Amazon or refer to the contact information provided with your product packaging.
Visit the Agrieyes Store