
1. Introducció
This manual provides detailed instructions for the installation, operation, and maintenance of your Amazon Basics Gas Spring Single Monitor Arm Mount. Please read this manual thoroughly before installation and retain it for future reference. This monitor arm is designed to enhance your workspace ergonomics by providing flexible positioning for a single computer monitor.
2. Informació de seguretat
- Assegureu-vos que tots els components siguin presents i no estiguin danyats abans del muntatge. No utilitzeu el producte si hi falta alguna peça o si és defectuosa.
- Verify that the mounting surface (desk) is stable and capable of supporting the combined weight of the monitor arm and your monitor.
- Do not exceed the maximum weight capacity of 15.4 lbs (7 kg) for the monitor arm.
- During gas spring tension adjustment, hold the monitor arm firmly to prevent sudden movement and potential injury. Do not abruptly release the gas spring arm.
- Mantingueu els nens i les mascotes allunyats durant la instal·lació.
- Estrenyeu tots els cargols fermament, però no els estrenyeu massa per evitar que es pelin les rosques o que es facin malbé els components.
- Reviseu regularment totes les connexions i elements de fixació per assegurar-vos que estiguin ben ajustats i segurs.
3. Contingut del paquet
Si us plau, verifiqueu que totes les peces estiguin incloses al paquet:
- Gas Spring Monitor Arm (A)
- Escriptori Clamp Base (C)
- Grommet Base Plate (D)
- C-Clamp Assemblea (E)
- VESA Mounting Plate (B)
- Kit de ferramenta (cargols, volanderes, claus Allen)

Image: All components of the Amazon Basics Gas Spring Single Monitor Arm Mount.
4. Instal·lació
4.1 Compatibilitat amb l'escriptori
Ensure your desk meets the following requirements:
- Gruix de l'escriptori: 0.39 - 4 inches (1 - 10.2 cm) for C-clamp o muntatge amb ojal.
- Grommet Hole Diameter: 1.5 - 2.36 inches (4 - 6 cm) if using grommet mount.

Image: Illustration of the two available installation options: Grommet Mount and Clamp Mount, showing desk thickness and hole diameter requirements.
4.2 Muntatge del braç a l'escriptori
Choose either the C-clamp or grommet mount method based on your desk setup.
C-Clamp Instal·lació:
- Enganxeu el C-Clamp Assembly (E) to the Desk Clamp Base (C) using the provided screws.
- Position the assembled base on the edge of your desk.
- Apretar el C-clamp screw until the base is securely fastened to the desk.
Instal·lació de muntatge amb ojales:
- If your desk has a grommet hole, attach the Grommet Base Plate (D) to the Desk Clamp Base (C).
- Insert the pole of the Desk Clamp Base through the grommet hole.
- Fixeu la base des de sota l'escriptori amb la volandera i la femella proporcionades.
4.3 Attaching the Monitor Arm
- Slide the Gas Spring Monitor Arm (A) onto the pole of the Desk Clamp Base (C).
- Ensure the arm is fully seated and secure.
4.4 Connectar el monitor
The monitor arm supports VESA patterns of 75x75mm and 100x100mm.
- Attach the VESA Mounting Plate (B) to the back of your monitor using the appropriate screws (F or G) and washers (J) from the hardware kit. Ensure the plate is oriented correctly with the 'UP' indicator facing upwards.
- Carefully slide the monitor with the attached VESA plate onto the end of the monitor arm until it clicks into place.
- Estrenyeu els cargols de seguretat de la placa VESA per evitar que es desprengui accidentalment.

Image: Demonstrates rotating the VESA panel 45 degrees horizontally and installing the monitor before final VESA panel adjustment for smoother rotation.

Image: A monitor securely mounted on the Amazon Basics Gas Spring Single Monitor Arm Mount, viewed des del darrere.
5. Funcionament i ajust
5.1 Ajust de la tensió de la molla de gas
The gas spring is pre-set for 15.4 pound monitors. Adjust the tension to match your monitor's weight for optimal movement and stability.
- Hold the monitor arm in a horizontal position before adjusting the tension.
- Locate the tension adjustment screw on the arm (typically covered by a plastic cap).
- Use the provided Allen key (L) to adjust the tension:
- If the monitor sags, turn the tension nut counter-clockwise (+) to increase tension.
- If the monitor arm rises up, turn the tension nut clockwise (-) to decrease tension.
- Adjust gradually and test the arm's movement until the monitor stays in position when released.
Reference values for adjustment (adjust based on actual experience):
- 7 turns clockwise (-) for 13.2 lbs (6 kg)
- 12 turns clockwise (-) for 11 lbs (5 kg)
- 16 turns clockwise (-) for 8.8 lbs (4 kg)
- 19 turns clockwise (-) for 5.5 lbs (2.5 kg)
Video: Official Amazon Product Imaging video demonstrating the assembly and adjustment of the monitor arm, including gas spring tension and monitor positioning.
5.2 Ajust de la posició del monitor
The monitor arm offers extensive flexibility for optimal viewcomoditat:
- Inclinació: -90° a +85°
- Girar: ±90°
- Rotació: 360° (for landscape or portrait orientation)
- Extensió: Up to 20.5 inches (52.1 cm) long
- Alçada: Up to 18.25 inches (46.4 cm) high
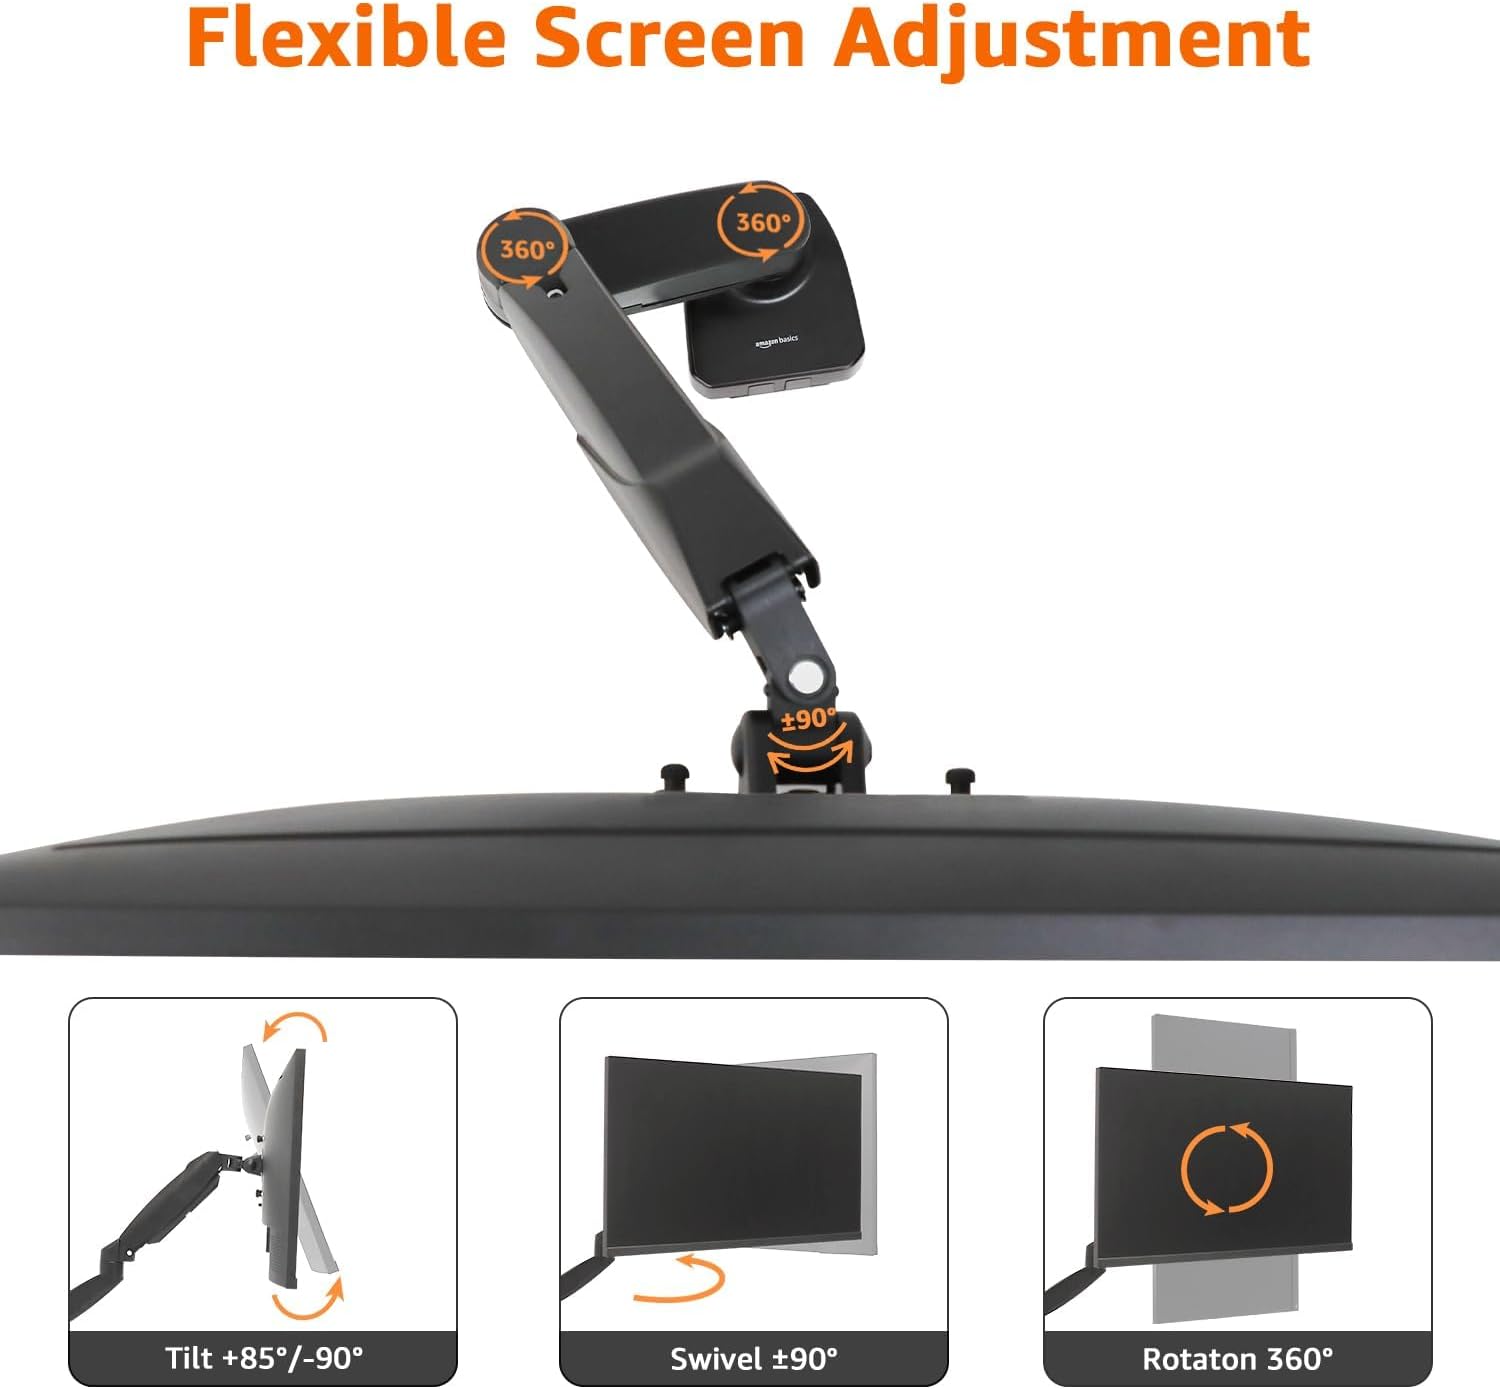
Image: Visual representation of the flexible screen adjustment options, including tilt, swivel, and 360-degree rotation.

Image: Diagram illustrating the adjustable height (5.7 to 18.25 inches) and length (3.1 to 20.5 inches) of the monitor arm.
6. Gestió de cables
The monitor arm features an integrated cable management system to keep your workspace tidy. Route your monitor and power cables along the arm and through the designated channels. This helps to reduce clutter and maintain a clean aesthetic.
7. Manteniment
- Clean the monitor arm regularly with a soft, dry cloth. Avoid abrasive cleaners or solvents.
- Reviseu periòdicament tots els cargols i connexions per assegurar-vos que estiguin ben ajustats. Torneu a apretar-los si cal.
- Do not lubricate the gas spring mechanism unless specifically instructed by the manufacturer.
8. Solució De Problemes
8.1 Monitor Sags or Rises Unexpectedly
- Solució: Adjust the gas spring tension as described in Section 5.1. Ensure the tension is correctly calibrated to your monitor's weight.
8.2 Monitor Arm is Loose on the Desk
- Solució: Torneu a apretar el C-clamp or grommet mount screws. Ensure the desk thickness is within the specified range for the chosen mounting method.
8.3 Monitor Does Not Rotate or Tilt Smoothly
- Solució: Check for any obstructions. Ensure all mounting screws are tightened appropriately, but not excessively, which could restrict movement.
9. Especificacions
| Característica | Especificació |
|---|---|
| Marca | Conceptes bàsics d'Amazon |
| Número de model | DS-MADSBE |
| Pes de l'article | 4.18 lliures (1.9 kg) |
| Dimensions del producte (LxWxH) | 18.7 x 4.25 x 18 polzades (47.5 x 10.8 x 45.7 cm) |
| Color | Negre |
| Material | Alumini |
| Tipus de muntatge | Tabletop Mount (C-Clamp o Ullera) |
| Tipus de moviment | Swivel, Tilt, Rotation, Height Adjustment |
| Dispositius compatibles | Monitors 15 to 27 inches |
| Capacitat de pes | 4.4 - 15.4 pounds (2 - 7 kg) |
| Compatibilitat VESA | 75x75mm, 100x100mm |
| Interval d'inclinació | -90° a +85° |
| Gamma giratòria | ±90° |
| Rotació | 360° |
| Extensió màxima | 20.5 polzades (52.1 cm) |
| Altura màx | 18.25 polzades (46.4 cm) |
| Gruix de l'escriptori (C-Cl)amp/Ullerol) | 0.39 - 4 polzades (1 - 10.2 cm) |
| Diàmetre del forat del grommet | 1.5 - 2.36 polzades (4 - 6 cm) |
| UPC | 840324414622 |

Imatge: Més deview of the monitor arm's wide compatibility, including weight capacity (4.4-15.4 lbs), VESA sizes (75x75mm/100x100mm), and maximum screen size (27 inches).
10. Garantia i Suport
For warranty information and customer support, please refer to the Amazon Basics official weblloc web o contacteu directament amb el servei d'atenció al client d'Amazon. Conserveu el rebut de compra per a reclamacions de garantia.


