
Introducció
Gràcies per la compraasing the ADIUM Mini Lint Remover. This manual provides important information regarding the safe operation, maintenance, and troubleshooting of your new device. Please read this manual thoroughly before using the product and retain it for future reference.
Instruccions de seguretat
- Mantingueu el dispositiu fora de l'abast dels nens i les mascotes.
- Do not use the device on wet fabrics or in wet environments.
- Avoid direct contact with the rotating blades. Always ensure the protective mesh cover is securely in place before operation.
- No desmunteu ni intenteu reparar el dispositiu vosaltres mateixos. Poseu-vos en contacte amb personal qualificat per al servei tècnic.
- Turn off and unplug (if applicable) the device before cleaning or when not in use.
- Use only as intended for removing lint and fuzz from fabrics.
Producte acabatview
Familiarize yourself with the components of your Mini Lint Remover:
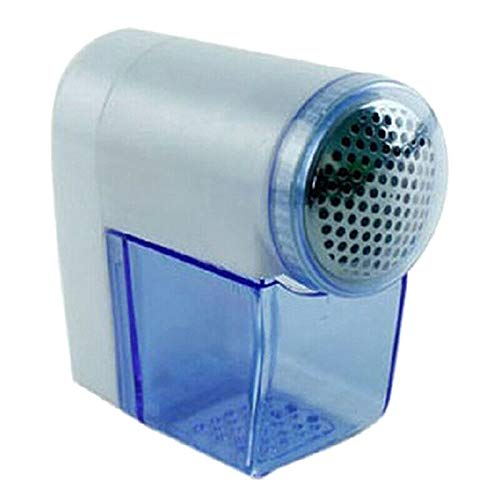
Figura 1: Davant view of the Mini Lint Remover, showing the lint collection bin and the protective metal mesh.
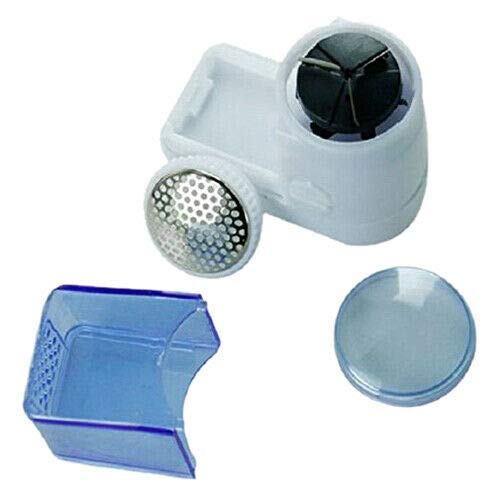
Figura 2: Desmuntat view of the Mini Lint Remover, showing the main unit with blades, the removable lint collection bin, and the protective cap.
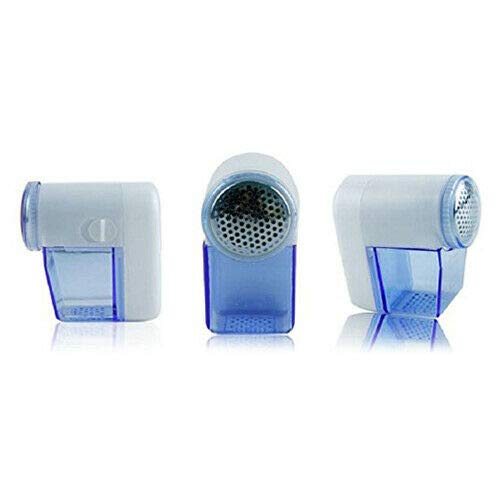
Figura 3: Three different angles of the Mini Lint Remover, illustrating its compact size and design.
The device typically consists of a main body housing the motor and blades, a protective metal mesh cover, and a transparent lint collection bin.
Configuració
- Desembalatge: Carefully remove the lint remover and any accessories from its packaging. Ensure all components are present, including the device and the lint collection bin.
- Font d'alimentació: If your model requires batteries, open the battery compartment (usually located at the back or bottom) and insert the required batteries, ensuring correct polarity (+/-). If it is rechargeable, ensure it is fully charged before first use according to manufacturer guidelines (charging cable not specified, so assume standard USB or similar).
- Inspecció: Before first use, inspect the device for any visible damage. Ensure the protective metal mesh is securely attached and the lint collection bin is properly seated.
Instruccions de funcionament
- Preparar la tela: Lay the fabric flat on a hard, smooth surface. Stretch the fabric taut to ensure the best contact with the shaver head and prevent damage.
- Activar: Locate the power switch (usually a slide switch or button) and turn the device ON. The blades will begin to rotate.
- Eliminació de pelusses: Gently press the metal mesh head against the fabric and move the device in small, circular motions or short, straight strokes. Do not apply excessive pressure, as this can damage the fabric or the device.
- Monitor Lint Bin: Periodically check the transparent lint collection bin. Empty it when it becomes full to maintain optimal performance.
- Apagar: Once you have finished removing lint, turn the device OFF and replace any protective caps if provided.
Consells per obtenir els millors resultats:
- For delicate fabrics, test on an inconspicuous area first.
- Move the shaver slowly and evenly over the fabric.
- Ensure the fabric is clean and dry before use.
Manteniment i Neteja
Regular cleaning ensures the longevity and efficiency of your lint remover.
- Apagar i desconnectar: Always ensure the device is turned OFF and any power source (batteries or charging cable) is disconnected before cleaning.
- Empty Lint Bin: Detach the lint collection bin and empty all accumulated lint and fuzz into a waste bin.
- Clean Blades and Mesh: Use a small brush (often included with the device) to carefully brush away any lint or debris from the metal mesh cover and the rotating blades. Be extremely cautious around the blades to avoid injury.
- Netejar l'exterior: Wipe the exterior of the device with a soft, dry cloth. Do not use water or harsh cleaning agents.
- Torneu a muntar: Once clean, reattach the lint collection bin and ensure the protective mesh cover is securely in place.
Resolució de problemes
| Problema | Causa possible | Solució |
|---|---|---|
| El dispositiu no s’encén. |
|
|
| Lint not being removed effectively. |
|
|
| Device makes unusual noise or vibrates excessively. |
|
|
Especificacions
- Número de model: EP-23410
- Marca: ADIUM
- Dimensions (LxWxH): 15 x 5 x 10 cm
- Components inclosos: Lint Remover, Case
- Fabricant: ADIUM
Garantia i Suport
This product comes with a standard manufacturer's warranty. Please refer to the product packaging or your purchase receipt for specific warranty terms and conditions. For technical support, troubleshooting assistance beyond this manual, or warranty claims, please contact ADIUM customer service through the retailer where the product was purchased or via the contact information provided on the product packaging.