
1. Introducció
This manual provides detailed instructions for the installation, operation, and maintenance of your VGEBY Motorcycle Driving Recorder. Please read this manual carefully before using the product to ensure proper function and safety.
The VGEBY Motorcycle Driving Recorder is designed to capture high-quality video footage from both the front and rear of your motorcycle. It features a waterproof design, smart parking monitoring, and a G-sensor for emergency recording, providing reliable documentation of your rides.
2. Què hi ha a la caixa
- Main Unit (Host)
- Cable d'alimentació
- Step-down Line
- Cable USB
- Button Switch Line
- Camera Connection Line
- 2 x Cameras (Front & Rear)
- Suport de muntatge
- 2 adhesius adhesius
- 6 x cargols
- Llave hexagonal
- Manual d'usuari
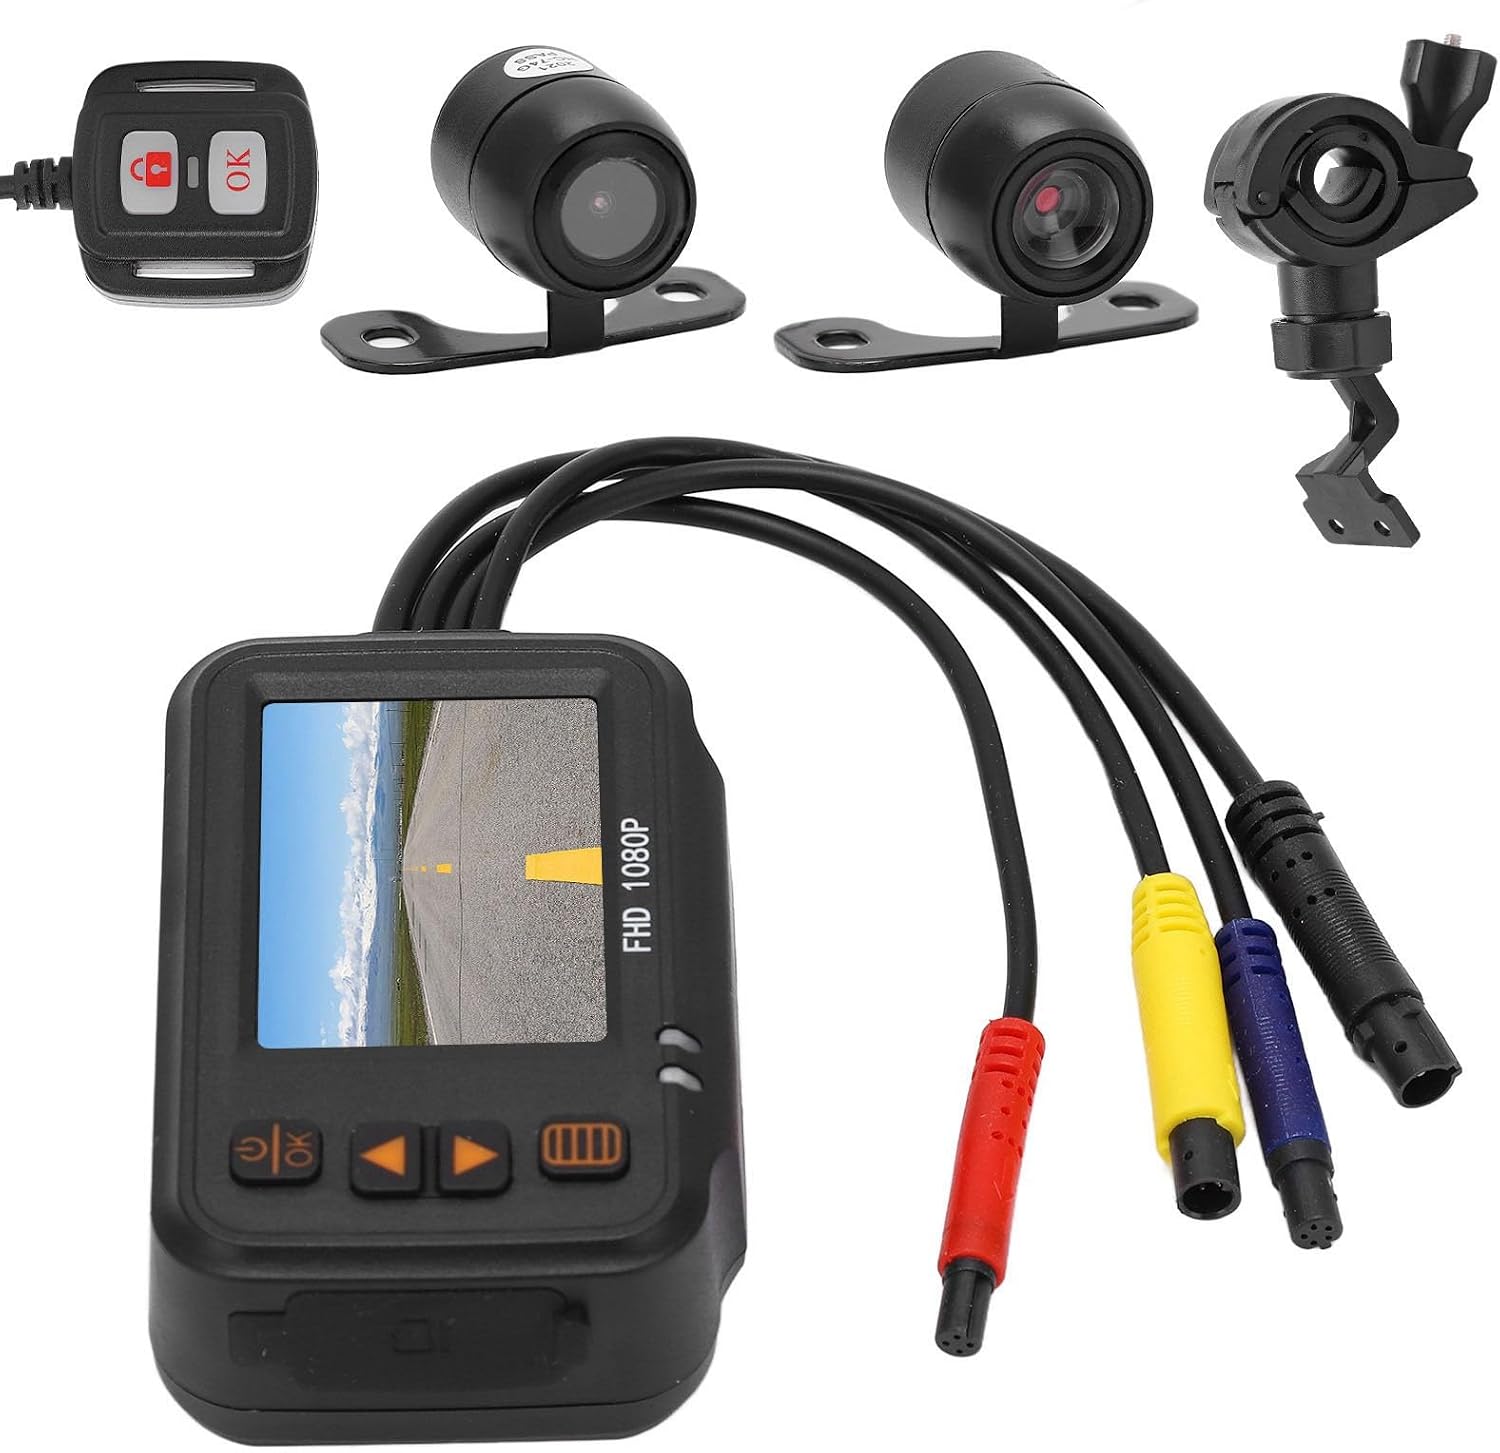
Figura 1: Tots els components inclosos al paquet.
3. Producte acabatview & Característiques
The VGEBY Motorcycle Driving Recorder is equipped with advanced features to enhance your riding safety and recording experience:
- Disseny totalment impermeable: The DVR host is IP65 waterproof, and the cameras and cables are IP67 waterproof, ensuring reliable operation in various weather conditions.
- Dual AHD Recording: Captures video in 1080p (front) and 720p (rear) resolutions with AHD chip technology for lossless transmission.
- Smart Parking Mode: Automatically initiates recording when the motorcycle detects a collision while parked, providing surveillance.
- Sensor G: An integrated G-sensor automatically locks video footage during emergencies such as vibrations or collisions, protecting critical evidence.
- Pantalla de 2.0 polzades: Features a clear 2.0-inch screen for real-time viewing i reproducció.
- Enregistrament en bucle: Supports loop recording in 1, 3, or 5-minute segments, ensuring continuous recording without manual deletion of old files.
- Controlador amb cable: Allows for manual recording and video locking.
4. Especificacions
| Especificació | Valor |
|---|---|
| Tipus d'element | Enregistrador de conducció de motos |
| Material | ABS |
| Color | Negre |
| Pantalla de visualització | 2.0 polzades |
| Angle de la càmera frontal | 120° |
| Angle de la càmera posterior | 90° |
| Waterproof Rating (Host) | IP65 |
| Waterproof Rating (Lens & Cable) | IP67 |
| Format de vídeo | AVI |
| Enregistrament en bucle | 1 minut, 3 minuts, 5 minuts |
| Velocitat de fotogrames | 30f/s |
| Suport per a targetes de memòria | 4GB-32GB (not included) |
| Font d'alimentació | 12-24V to 5V |
| Temperatura de funcionament | -10 ℃ a 60 ℃ |
| Tipus de bateria | Built-in high-temperature resistant polymer lithium battery 150mAh |
5. Configuració i instal·lació
Before permanent installation, it is recommended to test all components to ensure they are functioning correctly.
Video 1: General installation reference for a motorcycle dashcam (D6RL model shown, principles apply to VGEBYc392uqgf0d).
5.1. Main Unit Preparation
- Inseriu la targeta de memòria: Carefully insert a 4GB-32GB memory card (not included) into the card slot on the main unit. Ensure the correct direction to prevent damage.
- Col·loqueu el suport de muntatge: Screw the mounting bracket into the host hole on the main unit. Tighten the turnbuckle.
- Aplicar adhesiu: Attach the double-sided adhesive to the bracket.

Figure 2: Main unit with cables and bracket prepared for installation.
5.2. Connexió d'alimentació
The power cable needs to be connected to your motorcycle's battery and an ACC (Accessory) power source. It is recommended to test the power module connection before final installation.
Video 2: ACC power cable installation guide (D6RL model shown, principles apply to VGEBYc392uqgf0d).
- Connectar a la bateria: Connect the black wire of the power cable to the negative terminal of the motorcycle battery and the red wire to the positive terminal.
- Find ACC Power: Use a multimeter to identify a wire that receives 12V power when the motorcycle ignition is on and 0V when off. This is your ACC wire.
- Connect ACC Wire: Open the ACC port on the power cable module, tighten the front end of the yellow wire, and thread it into the port for fixation.
- Test Power Module: Turn on the motorcycle power. The power module's indicator light should illuminate. Turn off the power, and the light should go out. This confirms correct wiring.
- Secure Power Module: Tear off the adhesive tape from the power module and stick it in a suitable position on the motorcycle.

Figure 3: Wiring diagram for power connection.
5.3. Instal·lació de la càmera
- Prepare Cameras: Install adhesive tape on the back of both camera brackets.
- Muntar la càmera frontal: Install the front camera in a suitable position on the front of the motorcycle, ensuring a clear view. Arrange the cable neatly.
- Muntar la càmera posterior: Install the rear camera in a suitable position on the rear of the motorcycle, ensuring a clear view. Arrange the cable neatly.

Figure 4: Front camera installation.

Figure 5: Rear camera installation.
5.4. Wired Controller Installation
- Preparació del controlador: Stick adhesive tape on the back of the wired controller.
- Controlador de muntatge: Install the wired controller in a suitable and easily accessible position on the motorcycle handlebars.
5.5. Wiring Connections & Management
- Connectar càmeres: Connect the front and rear camera cables to the main unit. Pay attention to the labels (e.g.,
Ask a question about this manual
Ask about setup, troubleshooting, compatibility, parts, safety, or missing instructions. Manuals+ will review the question and use this page’s manual context to help answer it.