
1. Introducció
This manual provides detailed instructions for the setup, operation, and maintenance of your AMIR Projection Alarm Clock (Model WA146-AMUS). This digital alarm clock features a 7.9-inch LED display, a 180° rotatable projector, adjustable brightness, multiple alarm modes, and temperature display. Please read this manual thoroughly before use to ensure proper functionality and to maximize your product experience.

Imatge 1.1: Frontal view of the AMIR Projection Alarm Clock showing its 7.9-inch display and key features like time, alarm, 12/24H, snooze, projection, 4-level brightness, temperature, and night mode.
2. Contingut del paquet
Verifiqueu que tots els elements siguin presents al paquet:
- AMIR Projection Alarm Clock (WA146-AMUS)
- Cable de càrrega USB (1.5 metres)
- Manual d'usuari
3. Característiques del producte
- Pantalla LED d'7.9 polzades: Large, clear digital display for easy viewing.
- Projector giratori de 180°: Projects time onto walls or ceilings, adjustable for optimal viewing.
- Brillantor ajustable: Four levels of display brightness (Bright, Medium, Low, Off) to suit different environments.
- Múltiples modes d'alarma: Set alarms for Monday-Friday, Monday-Saturday, or Everyday.
- Funció de posposar: Customizable snooze interval from 1 to 60 minutes.
- Pantalla multifunció: Shows time, date, and indoor temperature.
- Format 12/24 hores: Easily switch between 12-hour and 24-hour time formats.
- Mode nocturn: Automatically dims the display between 18:00 and 6:00 (adjustable time range).
- Doble font d'alimentació: Operates via USB cable (for constant display) or 3 AAA batteries (for memory function during power outages).
4. Controls i pantalla
Familiarize yourself with the clock's buttons and display elements.

Imatge 4.1: posterior view of the alarm clock, indicating the power port, battery compartment, projection lamp, and control buttons (SWAP, +, -, ALARM, MODE, PROJECT/SNOOZE).
- Pantalla de visualització: Shows time, date, temperature, and alarm status.
- Projecció Lamp: Located on the side, projects time onto a surface.
- Port d'alimentació (5 V CC): For connecting the USB power cable.
- Compartiment de la bateria: Holds 3 AAA batteries for backup power.
- SWAP Button: Used for various settings adjustments.
- Botons '+' / '-': Adjust values during settings, or change display brightness.
- Botó ALARMA: Used to set and activate alarms.
- Botó MODE: Cycles through display modes and enters setting modes.
- PROJECT/SNOOZE Button: Activates/deactivates projection, or triggers snooze during an alarm.
5. Configuració
5.1 Engegar el rellotge
The alarm clock can be powered in two ways:
- USB Cable Power (Recommended): Connect the provided USB cable to the DC 5V power port on the back of the clock and plug the other end into a USB power adapter (not included) or a USB port. The LED screen will remain constantly on.
- Potència de la bateria: Insert 3 AAA batteries (not included) into the battery compartment. When powered by batteries, the display will turn off after a short period to conserve power. Press any button to activate the display. Batteries also provide a memory feature, retaining time settings during power outages when using USB power.
5.2 Preparació inicial
Before first use, ensure you remove the protective film from the display screen.
6. Instruccions de funcionament
6.1 Setting the Time and 12/24 Hour Format
- Manteniu premut el botó MODE button for 3 seconds. The 12/24H format will flash. Use the '+' or '-' botons per seleccionar el format que preferiu.
- Premeu MODE again. The hour digits will flash. Use '+' or '-' per ajustar l'hora.
- Premeu MODE again. The minute digits will flash. Use '+' or '-' per ajustar els minuts.
- Premeu MODE again to confirm and exit time setting.

Image 6.1: Visual guide for setting the time and selecting 12-hour or 24-hour format using the MODE, '+' and '-' buttons.
6.2 Configuració de l'alarma
- Manteniu premut el botó ALARMA button for 3 seconds. The alarm hour digits will flash. Use '+' or '-' per ajustar l'hora de l'alarma.
- Premeu ALARMA again. The alarm minute digits will flash. Use '+' or '-' to adjust the alarm minutes.
- Premeu ALARMA again. The snooze time (default 5 minutes) will flash. Use '+' or '-' to set the snooze interval from 1 to 60 minutes.
- Premeu ALARMA again. The alarm mode (1-5, 1-6, or 1-7) will flash. Use '+' or '-' seleccionar:
- 1-5: De dilluns a divendres
- 1-6: De dilluns a dissabte
- 1-7: Cada dia
- Premeu ALARMA again to confirm and exit alarm setting.

Image 6.2: Visual guide for setting the alarm time, snooze duration, and selecting one of the three alarm modes.
6.3 Activating/Deactivating Alarm
After setting the alarm, a small alarm icon will appear on the display, indicating the alarm is active. To deactivate the alarm, short press the ALARMA botó fins que la icona de l'alarma desaparegui.
6.4 Ús de la funció Snooze
Quan soni l'alarma, premeu el botó gran PROJECT/SNOOZE button to activate snooze. The alarm will pause for the set snooze interval and then sound again. To turn off the alarm completely, press any other button.

Image 6.3: Illustration of the snooze function, showing a person pressing the large PROJECT/SNOOZE button for extra sleep time.
6.5 Ajust de la brillantor de la pantalla
Premeu breument '+' or '-' buttons to cycle through the four display brightness levels: Bright, Medium, Low, and Off.

Image 6.4: Demonstrates the four adjustable brightness levels of the clock's display: Bright, Medium, Dim, and Off.
6.6 Using the Projection Feature
The clock can project the time onto a wall or ceiling. The projection distance ranges from 1.6ft to 16ft.
- Activate/Deactivate Projection: Premeu breument PROJECT/SNOOZE botó per activar o desactivar la projecció.
- Ajust de l'angle de projecció: Manually rotate the projection lamp on the side of the clock to adjust the projection angle.
- 180° Flip Projection: If the projected time appears upside down, press and hold the CANVI button to flip the projection 180 degrees.
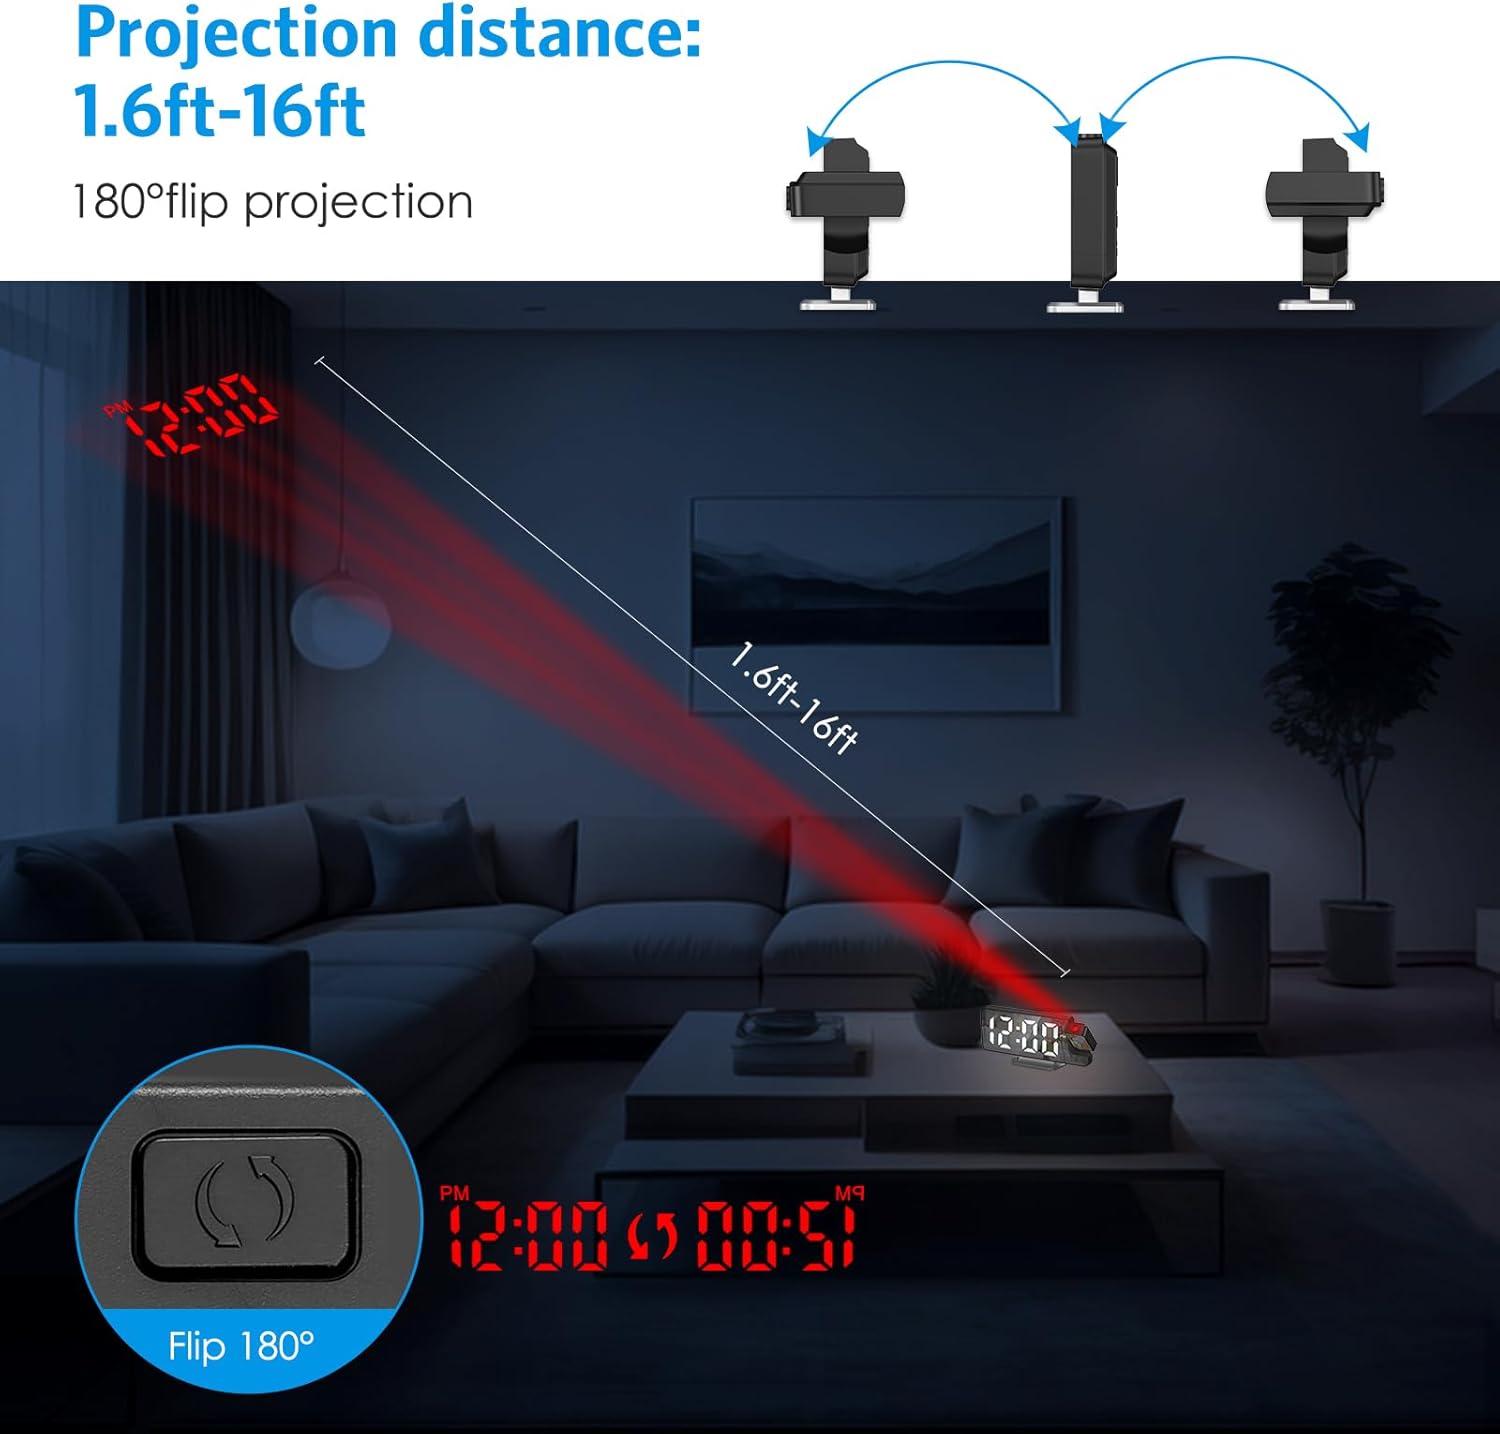
Image 6.5: Illustrates the projection distance range (1.6ft-16ft) and the 180° flip projection capability.
Video 6.1: This video demonstrates the AMIR Projection Alarm Clock's features, including 3 levels of brightness adjustment, time/date/temperature rotation on the main display, manual adjustment of projection angle, one-touch on/off projection, and 180-degree projection rotation.
6.7 Mode nocturn
Night mode automatically dims the display during a specified period to reduce light disturbance. The default night mode period is from 18:00 to 6:00.
- Activate/Deactivate Night Mode: Premeu el botó MODE button repeatedly until 'ON' or 'OFF' appears next to the night mode icon. Use '+' or '-' per alternar.
- Adjust Night Mode Time Range: When night mode is active, press and hold the MODE button until the start hour flashes. Use '+' or '-' to adjust. Press MODE to move to the start minute, then end hour, and end minute, adjusting each with '+' or '-'. Premeu MODE per salvar.

Image 6.6: The alarm clock operating in Night Mode, showing the display dimmed and time projected onto the wall.
7. Manteniment
To ensure the longevity and optimal performance of your AMIR Projection Alarm Clock, follow these maintenance guidelines:
- Neteja: Use a soft, dry cloth to wipe the display and exterior surfaces. Avoid abrasive cleaners or solvents, which can damage the finish.
- Col·locació: Col·loca el rellotge sobre una superfície estable i plana, allunyada de la llum solar directa, de temperatures extremes i d'alta humitat.
- Potència: If not using the clock for an extended period, remove the AAA batteries to prevent leakage.
8. Solució De Problemes
If you encounter issues with your alarm clock, refer to the following common problems and solutions:
| Problema | Causa possible | Solució |
|---|---|---|
| Display is off or intermittent (on battery power) | Battery saving mode activated. | Press any button to activate the display. For continuous display, use USB power. |
| Time changes randomly or is incorrect. | Power interruption or incorrect setting. | Ensure AAA batteries are installed for memory backup. Re-set the time following Section 6.1. Avoid placing near strong electromagnetic fields. |
| La projecció és borrosa o poc clara. | Incorrect focus or distance. | Adjust the projection lamp's focus ring (if available) or move the clock closer/further from the projection surface. Ensure the surface is flat and clear. |
| L'alarma no sona. | L'alarma no està activada o el volum és massa baix. | Verify the alarm icon is visible on the display. Check alarm settings (Section 6.2). Ensure alarm volume is not set to minimum (if adjustable). |
| Projection is upside down. | Cal ajustar l'orientació de la projecció. | Manteniu premut el botó CANVI button to flip the projection 180 degrees (Section 6.6). |
9. Especificacions
| Característica | Detall |
|---|---|
| Marca | AMIR |
| Número de model | WA146-AMUS |
| Tipus de visualització | LED digital |
| Mida de la pantalla | 7.9 polzades |
| Dimensions del producte (amplada x alçada) | 4.13"W x 1.25"H (Note: This seems to be a partial dimension, likely referring to height/depth. The main image shows 7.5in width.) |
| Font d'alimentació | USB Cable Power (DC 5V) or 3 AAA Batteries |
| Tipus de material | Acrilonitril butadiè estirè (ABS) |
| Característiques especials | 2 Alarms + 3 Levels Volume, Adjustable Brightness, Large Display, Snooze, USB/Battery Powered, 180° Rotatable Projector, Temperature Display, Night Mode |
10. Garantia i Suport
The AMIR Projection Alarm Clock (WA146-AMUS) comes with a Lifetime Warranty, ensuring long-term reliability. For any questions, technical assistance, or support needs, please contact AMIR customer service. Refer to the product packaging or the official AMIR weblloc per obtenir informació de contacte.