
1. Introducció
This manual provides detailed instructions for the ACEMIC ST-5 UHF Wireless Saxophone Microphone System. Please read this manual thoroughly before using the product to ensure proper operation and to maximize its performance and longevity.
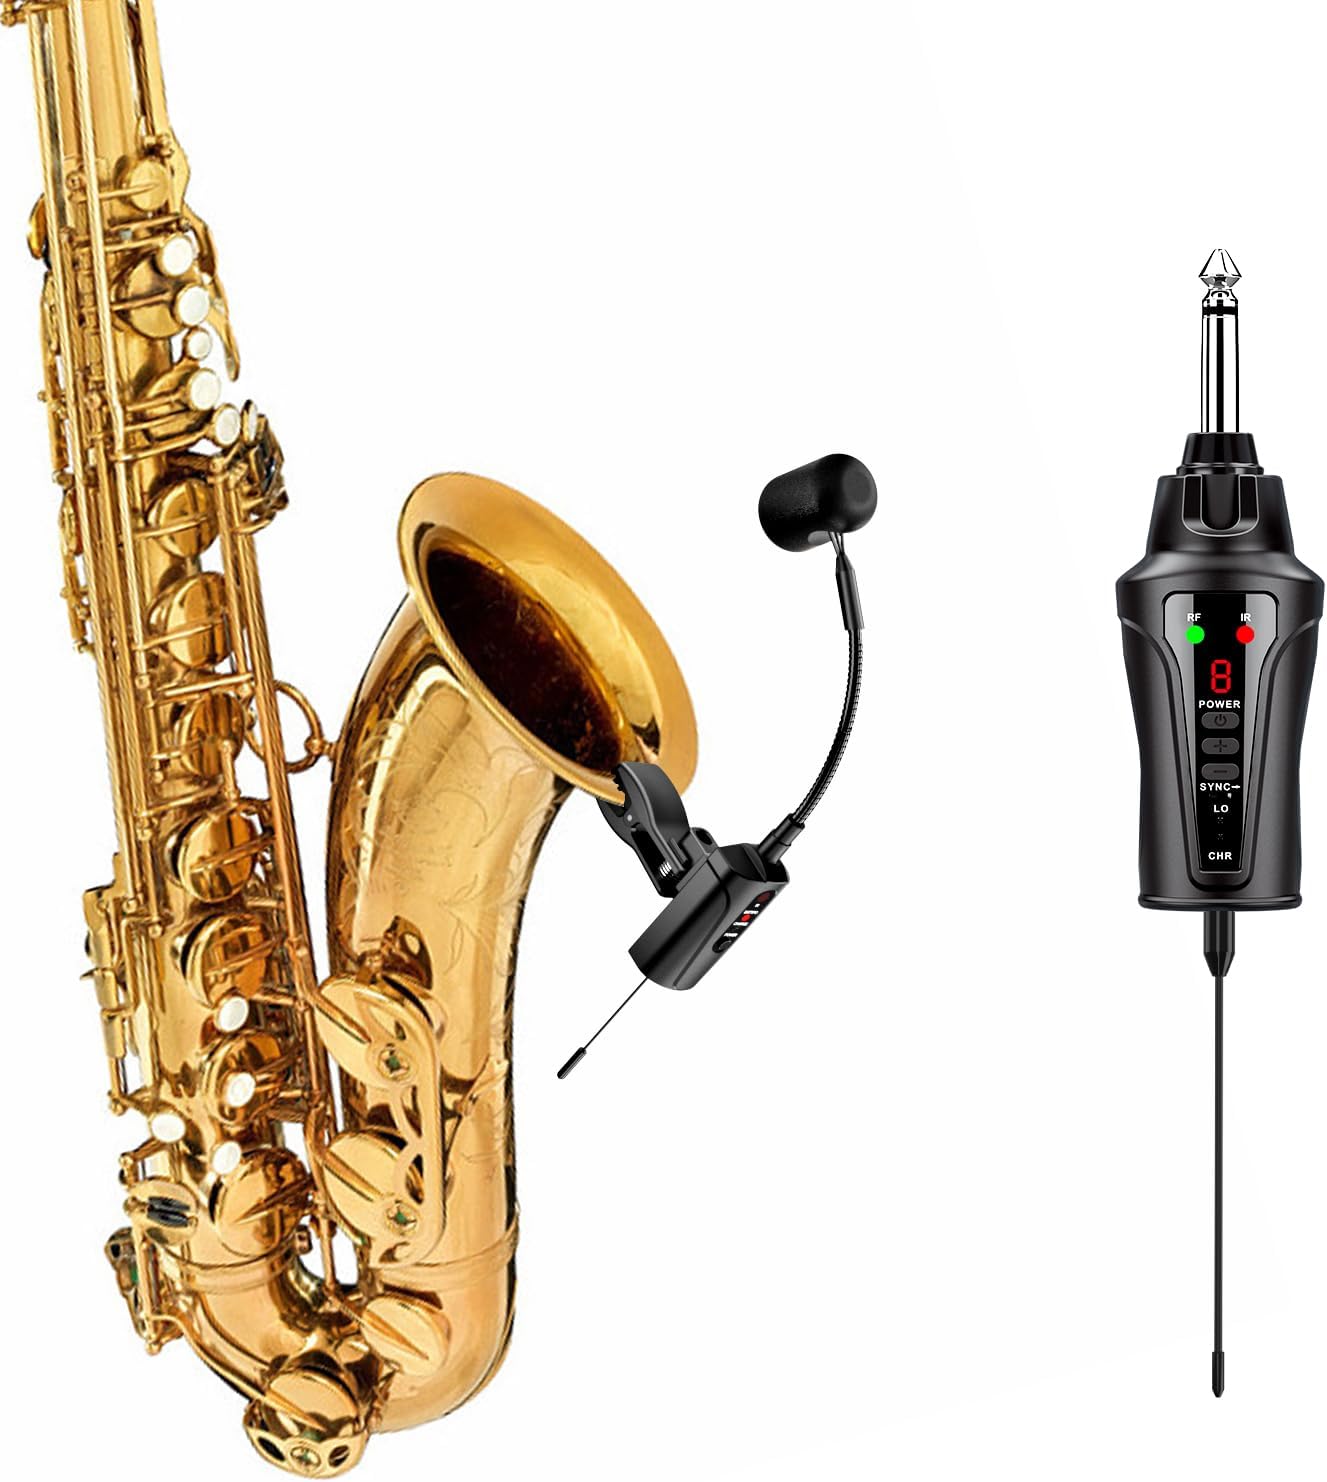
Image 1.1: ACEMIC ST-5 UHF Wireless Saxophone Microphone System components.
2. Contingut del paquet
Verifiqueu que tots els elements que s'enumeren a continuació s'inclouen al vostre paquet:
- 1 x Transmitter (with clip-on microphone)
- 1 x receptor
- 1 cable de càrrega USB 2 en 1
- 1 adaptador de 6.35 mm a 3.5 mm
- 1 x Maletí de transport
- 1 x Manual d'usuari

Image 2.1: All items included in the ACEMIC ST-5 package.
3. Característiques del producte
- UHF Stable Transmission: Utilizes UHF frequency and advanced digital audio transmission for stable, low-latency sound up to 130ft (40m) in open areas. Features infrared automatic pairing and a 48kHz samptaxa de ling.
- Reproducció de so d'alta qualitat: Built-in highly sensitive condenser microphone captures clear and realistic instrument sound.
- 16 Adjustable Channels: Offers 16 preset channels to avoid interference and supports up to 4 systems for simultaneous use.
- Disseny de coll de cisne flexible: Allows for precise microphone positioning with a stable, adjustable gooseneck and a shock-proof clip.
- Llarga vida útil de la bateria: Built-in rechargeable battery provides up to 6 hours of continuous use after a 2.5 to 3-hour charge.
- Àmplia compatibilitat: Compatible with various active PA systems, active speakers, amplifiers, and audio mixers via 6.35mm or 3.5mm connections.
4. Identificació de components
Familiarize yourself with the transmitter and receiver components:

Image 4.1: Detailed diagram of the transmitter and receiver components.
Components del transmissor:
- Micròfon de condensador: Captures audio from the instrument.
- Col de cisne flexible: Allows for precise microphone positioning.
- Instrument Clip: Securely attaches the transmitter to the instrument.
- IR Sync Button: Initiates infrared pairing with the receiver.
- Power/Low Power Indicator: Shows power status and low battery warning.
- Indicador de càrrega: S'il·lumina durant la càrrega.
- Botó d'encesa: Encén/apaga el transmissor.
- Antena: For wireless signal transmission.
- Interfície de càrrega: Port USB-C per carregar.
Components del receptor:
- Endoll de 6.35 mm: Connects to audio input devices.
- Indicador de RF: Shows radio frequency signal status.
- Pantalla digital: Shows current channel number.
- Botó d'encesa: Encén/apaga el receptor.
- Frequency Plus/Minus Buttons: Adjusts the channel frequency.
- Volum baixtage Indicador: Warns of low battery.
- IR Sync Button: Initiates infrared pairing with the transmitter.
- Indicador de càrrega: S'il·lumina durant la càrrega.
- Antena: For wireless signal reception.
5. Guia de configuració
5.1 Càrrega inicial
- Use the provided 2-in-1 USB charging cable to simultaneously charge both the transmitter and receiver.
- Connect the USB cable to a standard USB power adapter (not included).
- The charging indicators on both units will illuminate during charging.
- A full charge takes approximately 2.5 to 3 hours. The indicators will change or turn off once fully charged.

Image 5.1: Charging the transmitter and receiver.
5.2 Instal·lació de l'antena
Ensure the antenna on the bottom of the receiver is properly installed before use for optimal signal reception.
5.3 Encès/Apagat
Press and hold the Power Button on both the transmitter and receiver for a few seconds to turn them on or off.
5.4 Pairing the System (Infrared Automatic Pairing)
The system uses infrared automatic pairing for quick setup.
- Enceneu tant l'emissor com el receptor.
- Ensure the transmitter and receiver are close to each other (within a few inches).
- Press the IR Sync Button on both units. The units will automatically pair.
- The RF indicator on the receiver will light up steadily once paired.
5.5 Channel Adjustment (for multiple systems)
The system offers 16 adjustable channels to prevent interference, supporting up to 4 systems simultaneously.
- For the first system: Pair the transmitter and receiver as described in Section 5.4. Note the channel displayed on the receiver.
- For subsequent systems: Before pairing, use the Frequency Plus/Minus buttons on the receiver to select a new channel. It is recommended to choose a channel number that is at least 3 channels apart from any already paired systems to minimize interference.
- Once a new channel is selected on the receiver, press its IR Sync Button, then press the IR Sync Button on the corresponding transmitter to pair them.
- Repeat this process for each additional system.

Image 5.2: Channel adjustment for multiple systems.
5.6 Connexió a sistemes d'àudio
- Plug the 6.35mm plug of the receiver into the instrument input of your active PA system, active speaker, amplifier, or audio mixer.
- If your audio device requires a 3.5mm input, use the included 6.35mm to 3.5mm adapter.

Image 5.3: Compatibility with various musical instruments and audio systems.
5.7 Col·locació del micròfon
Attach the transmitter's clip to the bell of your instrument (e.g., saxophone, trumpet, tuba). Adjust the flexible gooseneck to position the microphone for optimal sound capture.
- Ensure the microphone angle is approximately 45 degrees or greater relative to the instrument's bell.
- Maintain a distance of at least 10cm (approximately 4 inches) between the microphone and the instrument's sound source for best results.
- The rubber padding on the clip protects your instrument from damage.

Image 5.4: Optimal microphone placement using the flexible gooseneck.
6. Funcionament
6.1 Ús bàsic
Once the transmitter and receiver are charged, paired, and connected to your audio system:
- Turn on your audio system (PA, speaker, ampmés viu).
- Adjust the volume on your audio system to a suitable level.
- Begin playing your instrument. The sound will be transmitted wirelessly to your audio system.

Image 6.1: Wireless transmission in action.
7. Manteniment
7.1 Cura de la bateria
- Recharge the units regularly, especially if they have not been used for an extended period.
- Eviteu descarregar completament la bateria amb freqüència per allargar-ne la vida útil.
- Store the units in a cool, dry place when not in use.
7.2 Neteja
- Wipe the exterior of the transmitter and receiver with a soft, dry cloth.
- No utilitzeu productes químics ni productes de neteja abrasius.
- Keep the microphone head clean and free from dust or debris.
8. Solució De Problemes
8.1 Sense so o mala qualitat de so
- Comproveu la potència: Ensure both the transmitter and receiver are powered on and charged.
- Comprova l'aparellament: Verify that the transmitter and receiver are successfully paired (RF indicator on receiver should be steady). Re-pair if necessary.
- Comproveu les connexions: Ensure the receiver is securely plugged into your audio system's input.
- Ajustar el volum: Increase the volume on your audio system and ensure the microphone is positioned correctly.
- Interferència: If experiencing static or dropouts, try changing the channel on the receiver and re-pairing the units (refer to Section 5.5).
- Distància: Ensure the transmitter and receiver are within the effective operating range (up to 130ft/40m in open areas). Obstacles can reduce this range.
- Col·locació del micròfon: Adjust the gooseneck to ensure the microphone is optimally positioned relative to the instrument (refer to Section 5.7).
8.2 Interference from Other Wireless Devices
- The ST-5 system operates on UHF frequencies. Other wireless devices operating on similar frequencies may cause interference.
- Change the operating channel of your ST-5 system (refer to Section 5.5) to find a clear frequency.
- Maintain a reasonable distance from other wireless equipment.
8.3 Durada curta de la bateria
- Ensure the units are fully charged before use (2.5-3 hours).
- El rendiment de la bateria pot degradar-se amb el temps amb un ús extensiu.
- Operating in extremely cold environments can temporarily reduce battery life.
9. Especificacions
| Característica | Especificació |
|---|---|
| Número de model | ST-5 |
| Tipus de transmissió | UHF sense fil |
| SampTarifa ling | 48 kHz |
| Canals | 16 Adjustable Channels |
| Interval d'operació | Fins a 40 m (130 peus) en zones obertes |
| Tipus de micròfon | Condensador |
| Tipus de bateria | Polímer de liti (inclòs) |
| Temps d'ús continu | Aproximadament 6 hores |
| Temps de càrrega | Aproximadament 2.5 - 3 hores |
| Tipus de connector | 6.35mm Plug, 3.5mm Jack (with adapter) |
| Pes de l'article | 1.06 lliures |
| Dimensions del paquet | 11.22 x 5.47 x 2.44 polzades |
10. Garantia i Suport
For warranty information and technical support, please refer to the documentation included with your purchase or contact ACEMIC customer service directly. Specific warranty terms may vary by region and retailer.