
Pard NS4-70/850/LRF
PARD Night Stalker 4K Night Vision Scope User Manual
Model: NS4-70/850/LRF
Introducció
This manual provides comprehensive instructions for the safe and effective operation, maintenance, and troubleshooting of your PARD Night Stalker 4K Night Vision Scope. Please read this manual thoroughly before using the device to ensure optimal performance and longevity.
The PARD Night Stalker 4K is an advanced day/night vision rifle scope featuring a 4K CMOS sensor, integrated ballistic calculator, 1000m rangefinder, and video recording capabilities. It is designed for enhanced target recognition and precision in various lighting conditions.
Contingut del paquet
Upon opening the package, please verify that all components are present and in good condition. If any items are missing or damaged, contact PARD customer support immediately.

Image: All components included in the PARD Night Stalker 4K package, including the scope, scope cover, rubber eyepiece, cleaning cloth, Type-C cable, Allen wrench set, mount rings, and user manual.
- PARD Night Stalker 4K Night Vision Scope
- Scope Cover
- Ocular de goma
- Drap de neteja
- Cable USB tipus C
- Conjunt de claus Allen
- Mount Rings (Picatinny/Weaver compatible)
- Manual d'usuari (aquest document)
Configuració
1. Muntatge de l'abast
The PARD Night Stalker 4K is designed for Picatinny or Weaver mounts. Ensure your rifle has a compatible rail system.
- Attach the provided mount rings to your rifle's Picatinny or Weaver rail. Ensure they are securely fastened using the Allen wrench.
- Place the Night Stalker 4K scope into the mount rings.
- Adjust the scope's position for optimal eye relief (approximately 100mm) and comfortable viewing.
- Tighten the mount ring screws evenly to secure the scope. Do not overtighten.
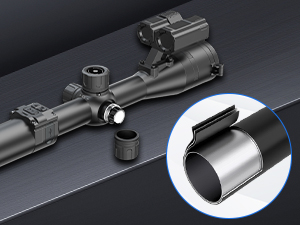
Image: Illustration of the scope mounting process, highlighting the secure attachment of the scope to the rifle's rail system using the provided rings.
2. Instal·lació de la bateria
The Night Stalker 4K uses rechargeable batteries. Ensure batteries are fully charged before first use.
- Locate the battery compartment, typically on the side or bottom of the scope.
- Insert the charged batteries according to the polarity indicators.
- Tanqueu de manera segura la tapa del compartiment de la bateria.
3. Initial Power On and Focus Adjustment
- Manteniu premut el botó d'engegada per encendre el dispositiu.
- Adjust the diopter on the eyepiece until the reticle appears sharp and clear.
- Adjust the objective lens focus ring to bring the target image into sharp focus.
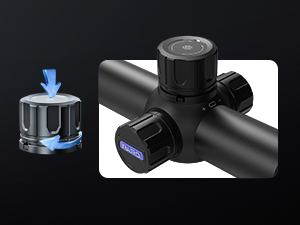
Image: Detail of the focus adjustment knob, indicating its location and function for achieving a clear image.
Instruccions de funcionament
1. Day and Night Modes
The Night Stalker 4K automatically or manually switches between day and night vision modes, providing optimal viewen diferents condicions de llum.

Image: Visual representation of the scope's performance in both daylight and night vision modes, demonstrating clear target acquisition.
2. Zeroing the Scope
Accurate zeroing is crucial for precise shooting. The Night Stalker 4K features a swift and simple zeroing process.
- Set up a target at your desired zeroing distance.
- Fire a shot and observe the point of impact.
- Access the zeroing menu (refer to on-screen prompts or user interface guide).
- Adjust the reticle's X and Y coordinates to align with the bullet's impact point.
- Save the zeroing data. The scope can store up to 5 sets of zeroing data for different firearms or distances.

Image: The scope's display during the zeroing process, illustrating how to adjust the reticle to match the point of impact.
3. Calculadora balística
The integrated ballistic calculator assists in precise aiming by computing trajectory parameters.
- Input relevant data such as projectile velocity, weight, and zero range into the scope's settings.
- The calculator will provide an adjusted aiming point based on these parameters and environmental factors.
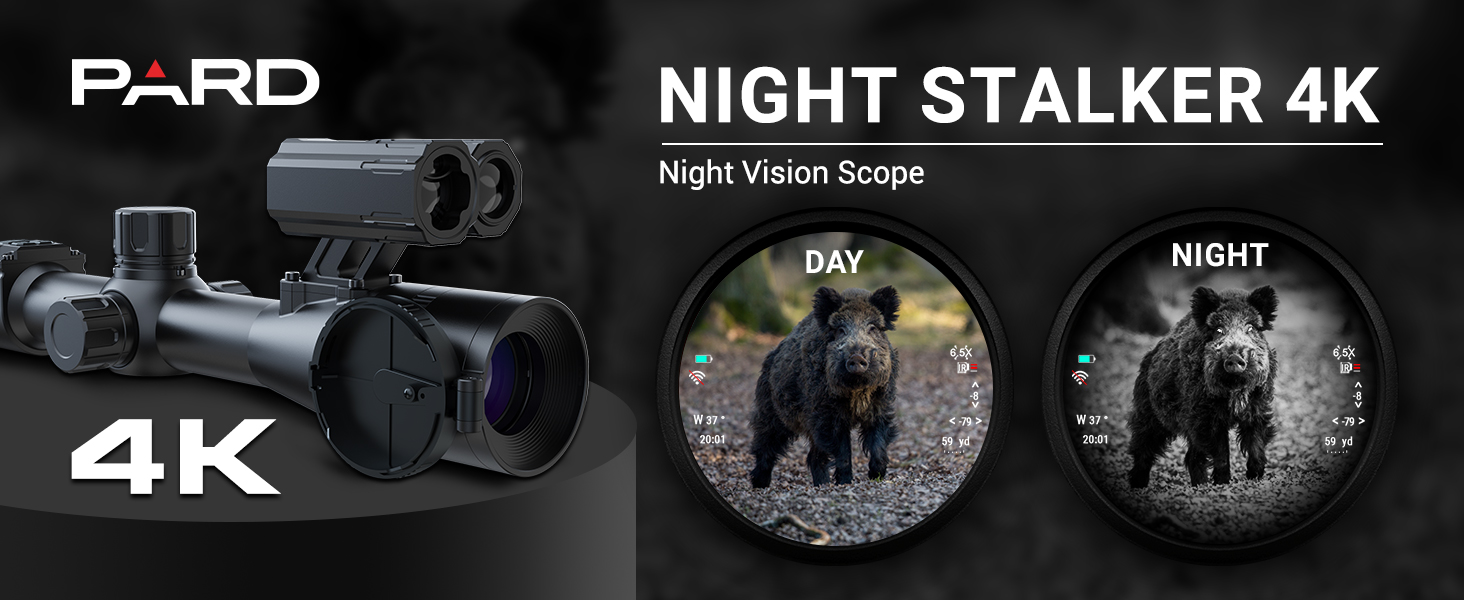
Image: A visual explanation of the ballistic calculator, demonstrating how it adjusts for bullet drop and other factors to ensure accurate shots.
4. Laser Rangefinder (LRF)
The 1000m LRF allows for quick and accurate distance measurement to targets.
- Activate the rangefinder function (refer to button layout).
- Aim the reticle at the target and press the measurement button.
- The distance will be displayed on the screen.

Image: The rangefinder display, showing a target and the measured distance, indicating its capability for long-distance measurements.
5. Integrated IR Illuminator
The built-in IR illuminator enhances visibility in low-light and complete darkness.
- Activate the IR illuminator via the designated button.
- Adjust the IR intensity level as needed for optimal illumination without overexposure.
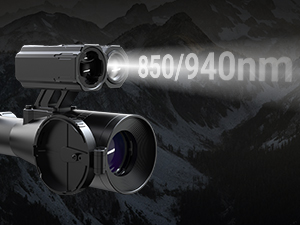
Image: The IR illuminator in operation, showing the emitted infrared light for enhanced night vision capabilities.
6. Video Recording and Picture-in-Picture (PIP)
Capture your observations with video recording and utilize the Picture-in-Picture function for enhanced detail.
- Gravació de vídeo: Press the record button to start/stop video capture. Files are saved to an internal memory or an inserted SD card (check specifications for compatibility).
- Imatge en imatge (PIP): Activate PIP mode to display a magnified view of the reticle area in a smaller window on the main screen, allowing for precise aiming while maintaining situational awareness.
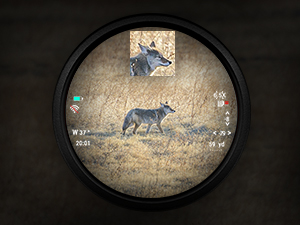
Image: The Picture-in-Picture display, showing a magnified view of the target within the main field of view.
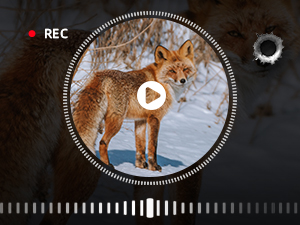
Image: The scope's display showing the active video recording indicator, confirming the device is capturing footage.
7. Wi-Fi Connectivity and Firmware Updates
Connect your scope to a mobile device via Wi-Fi for remote viewing, control, and firmware updates.
- Download the official PARD app to your smartphone or tablet.
- Enable Wi-Fi on the scope and connect to its network from your mobile device.
- Follow the app's instructions for remote operation and to check for and install the latest firmware updates.
Manteniment
- Neteja de lents: Use the provided cleaning cloth or a soft, lint-free cloth specifically designed for optics. Gently wipe the lens surfaces to remove dust and smudges. For stubborn dirt, use a specialized optical cleaning solution.
- Neteja corporal: Wipe the scope's body with a damp tela. Eviteu utilitzar productes químics o materials abrasius.
- Emmagatzematge: When not in use, store the scope in a dry, cool place, away from direct sunlight and extreme temperatures. Use the provided scope cover to protect the lenses and body.
- Cura de la bateria: Remove batteries if the device will not be used for an extended period. Store batteries in a cool, dry place.
- Classificació impermeable: The device has an IP65 waterproof rating, meaning it is protected against dust ingress and low-pressure water jets. Do not submerge the device in water.
Resolució de problemes
| Problema | Causa possible | Solució |
|---|---|---|
| El dispositiu no s'encén. | Bateria baixa o esgotada. Instal·lació incorrecta de la bateria. | Carregueu o substituïu les piles. Assegureu-vos que les piles estiguin inserides amb la polaritat correcta. |
| La imatge està borrosa o desenfocada. | Diopter or objective lens not adjusted correctly. Dirty lenses. | Adjust diopter and objective lens focus. Clean lenses with a soft cloth. |
| Scope does not hold zero. | Improper mounting. Recoil exceeding limits. | Ensure mount rings are securely tightened. Verify compatibility with firearm recoil (rated for 6000J). Re-zero the scope carefully. |
| L'il·luminador d'infrarojos no funciona. | IR function not activated. Low battery. | Activate IR illuminator in the menu. Check battery level. |
| No es pot connectar a la Wi-Fi. | Wi-Fi not enabled on scope. Incorrect password. App issues. | Enable Wi-Fi on the scope. Verify Wi-Fi password. Restart app and scope. |
Especificacions
| Característica | Detall |
|---|---|
| Nom del model | Night Stalker 4K (NS4-70/850/LRF) |
| Resolució del sensor | 3840 x 2160 (4K CMOS) |
| Magnification (Maximum) | 7x |
| Diàmetre de la lent objectiu | 30 mm |
| Alleujament ocular | 100 mm (3.94 polzades) |
| Rangefinder Range | Fins a 1000 m (1200 iardes) |
| Material | Aliatge d'alumini |
| Pes de l'article | 495 grams |
| Dimensions del producte | 6.9"L x 2.16"W x 2.75"H (410*88*95mm with long eyepiece) |
| Classificació impermeable | IP65 |
| Recoil Resistance | 6000J |
| Connectivitat | Wi-Fi |
| Components inclosos | Housing, Objective Lens, Mount Rings, USB Cable, Cleaning Cloth, User Manual |
Garantia i Suport
PARD offers a Garantia limitada d'2 any on the Night Stalker 4K Night Vision Scope. This warranty covers any manufacturer defects. For warranty claims or technical support, please contact PARD customer service.
PARD has a branch company in the United States that provides maintenance services. For service inquiries, please refer to the contact information provided on the official PARD weblloc web o la documentació de la compra.
For the most up-to-date information, firmware, and support resources, please visit the official PARD weblloc: www.pard.com
Ask a question about this manual
Ask about setup, troubleshooting, compatibility, parts, safety, or missing instructions. Manuals+ will review the question and use this page’s manual context to help answer it.