
1. Introducció
Thank you for choosing the OBZ USB Wired Desktop Barcode Scanner. This device is designed for efficient and reliable scanning of 1D and 2D barcodes, offering a hands-free operation experience. It is suitable for various applications including retail, inventory management, and point-of-sale systems. This manual provides essential information for the proper setup, operation, and maintenance of your scanner.

Imatge: The OBZ Desktop Barcode Scanner is versatile, suitable for diverse environments such as bookstores, supermarkets, retail outlets, and medical facilities, demonstrating its broad applicability.
2. Característiques clau
- Funcionament amb mans lliures: Designed for desktop use, eliminating the need to hold the scanner, thereby improving efficiency.
- Versatile Decoding: Capable of scanning 1D, 2D, and QR codes from labels, paper, and digital displays. It can decode challenging barcodes including blurred, damaged, distorted, colorful, or reflective types.
- Connectivitat Plug & Play: Requires no software or driver installation. Connects directly via USB cable to laptops, PCs, and POS systems.
- Automatic Smart Sensing: Features an auto-sensing scanning function that allows the device to enter a sleep mode when inactive and automatically wake up when an item is presented for scanning.
- High Resolution Scanning Module: Upgraded module ensures quick and accurate capture of moving codes.

Imatge: This image illustrates the hands-free advantage of the OBZ Desktop Barcode Scanner compared to traditional handheld scanners or mobile phone scanning, highlighting its convenience.
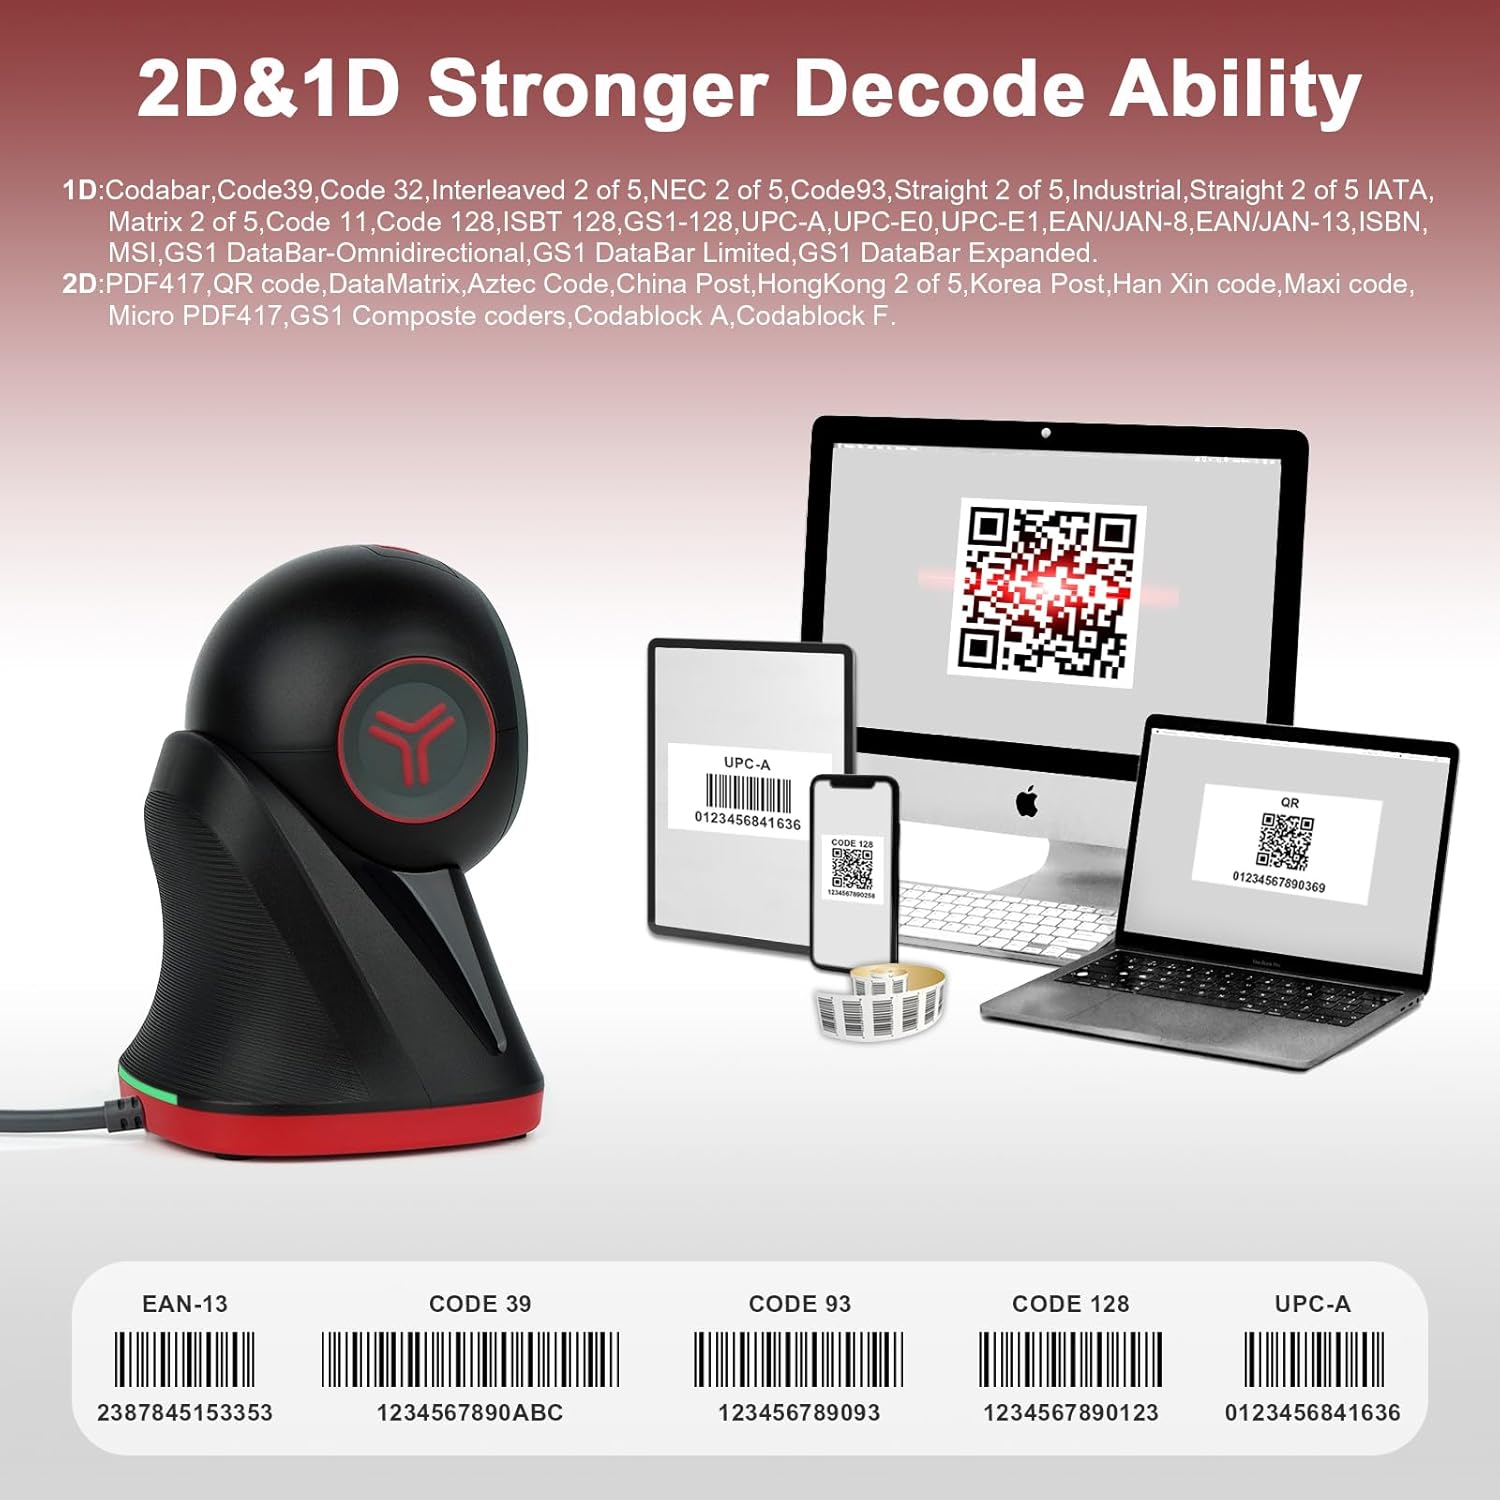
Imatge: The scanner is shown decoding multiple 1D and 2D barcode types, such as UPC-A, EAN-13, Code 39, Code 93, and Code 128, emphasizing its strong decoding capabilities.

Imatge: Un detallat view of the scanner highlights its high-resolution scanning module and the simple USB cable connection, indicating ease of use and advanced technology.
3. Instruccions de configuració
The OBZ Desktop Barcode Scanner is designed for simple plug-and-play installation. Follow these steps to set up your device:
- Desempaquetar l'escàner: Traieu amb cura l'escàner del seu embalatge.
- Connecteu el cable USB: Insert the USB cable from the scanner into an available USB port on your computer (Desktop, Laptop, or POS system).
- Reconeixement del sistema: Your operating system (Windows, Android, Mac OS, Linux) will automatically detect and install the necessary drivers. No manual software installation is required.
- A punt per al seu ús: Once recognized, the scanner is ready for immediate use.

Imatge: This image shows the scanner connected to a laptop, emphasizing its plug-and-play functionality and compatibility with Windows, Android, Linux, MAC, PC, Laptop, and POS systems. It also indicates incompatibility with iPad and iPhone.
4. Instruccions de funcionament
4.1 Escaneig bàsic
- Place the item with the barcode directly under the scanner's reading window.
- L'escàner detectarà automàticament el codi de barres i emetrà una indicació d'escaneig correcte (per exemple, un bip o un canvi de llum).
- Les dades escanejades es transmetran al dispositiu connectat com a entrada de teclat.
4.2 Automatic Smart Sensing
The scanner features an automatic sleep and wake-up function to conserve energy and enhance convenience:
- If the scanner is not used for a period, it will automatically enter a sleep mode, and the fill light will turn off.
- To wake the scanner, simply move an item with a barcode into its scanning area. The scanner will activate and read the barcode.

Imatge: This visual illustrates the scanner's automatic sleep and wake-up capabilities. The top panel shows the scanner in a dormant state, while the bottom panel depicts it activating upon detecting an object for scanning.
4.3 Configuració personalitzada
The scanner supports custom settings to tailor its output:
- Add/Hide Prefix or Suffix: You can configure the scanner to add specific characters before or after the scanned data.
- Add Keyboard Keys: Integrate keyboard keys such as TAB or CR (Carriage Return) after each scan for automated data entry.
- Refer to the separate programming guide (if provided) for detailed instructions on configuring these advanced settings.
5. Manteniment i seguretat
5.1 Neteja
- To clean the reading window, use a soft, dry cloth.
- Avoid using abrasive materials or harsh chemicals that could scratch or damage the window.
- Ensure the reading window remains clear of dust and debris for optimal scanning performance.
5.2 Atenció general
- The scanner is no impermeable. Avoid spilling liquids onto the device, especially near the reading window.
- Protect the scanner from extreme temperatures and direct sunlight.
- Do not drop or subject the scanner to strong impacts.
5.3 Avís de seguretat
- Do not stare directly into the LED light when the scanner is active, as it may cause eye discomfort.
6. Solució De Problemes
- L'escàner no respon: Assegureu-vos que el cable USB estigui connectat correctament tant a l'escàner com a l'ordinador. Proveu un port USB diferent.
- Barcode not scanning: Make sure the barcode is clean, undamaged, and properly aligned within the scanning window. Check for sufficient lighting.
- Sortida de dades incorrecta: Verify that the scanner is correctly recognized by your system. If custom settings were applied, ensure they are configured as intended.
- No beep sound: Check if the scanner's sound settings are enabled (if applicable, refer to advanced configuration options).
- If problems persist, try restarting your computer or contacting customer support.
7. Especificacions
| Marca | OBZ |
| Model | Escàner de codi de barres d'escriptori |
| Tecnologia de connectivitat | Cable USB |
| Dispositius compatibles | Desktop, Laptop, POS Systems |
| Font d'alimentació | Elèctric amb cable |
| Pes de l'article | 302 grams |
| Fabricant | GUANGZHOU XUNBAO ELECTRONICS TECHNOLOGY CO.LTD |
8. Garantia i Suport
For warranty information and technical support, please refer to the documentation provided with your purchase or contact your retailer. Keep your purchase receipt as proof of purchase for any warranty claims.