
1. Producte acabatview
The OUTDOORMASTER SHARK 3 Electric Air Pump is a high-performance, portable inflation and deflation device designed for various inflatables such as Stand-Up Paddleboards (SUPs), kayaks, air beds, and other high-pressure inflatable items. It features a built-in 74Wh battery, a maximum pressure of 20 PSI, an automatic stop function, and a pressure memory feature for convenient and efficient use.

Image 1.1: The OUTDOORMASTER SHARK 3 Electric Air Pump and its included accessories, including various nozzles for different inflatable valves.
Característiques principals:
- High-Speed Inflation: Inflates a 300L paddleboard to 15 PSI in approximately 5 minutes.
- Integrated 74Wh Battery: Allows inflation and deflation of up to 3 paddleboards on a single full charge, offering cordless convenience.
- Funció d'aturada automàtica: Automatically stops when the preset target pressure is reached, preventing over-inflation.
- Pressure Memory: Remembers the last set pressure for quick and easy repeated use across three modes (SUP, KITE, MAT).
- Real-time Pressure Monitoring: A digital LCD display shows current pressure and units (PSI/BAR) for precise control.
- 2-Way Charging: Supports 12V DC car charger input and Type-C input (up to 35W fast charging).
- Broquets versàtils: Includes 7 different nozzles to fit a wide range of inflatable products.
- Funció de deflació: Quickly deflates items for compact storage.
2. Instruccions de seguretat
Si us plau, llegiu i comprengui totes les instruccions de seguretat abans de fer servir el dispositiu. Si no segueix aquestes instruccions, es poden produir descàrregues elèctriques, incendis o lesions greus.
- No feu funcionar la bomba en condicions humides ni la submergiu en aigua.
- Mantingueu la bomba lluny dels nens i de les mascotes.
- Ensure the correct nozzle is securely attached to prevent air leakage and ensure efficient operation.
- Do not exceed the recommended pressure for your inflatable item. Refer to the inflatable product's manual for proper pressure settings.
- No bloquegeu l'entrada o la sortida d'aire durant el funcionament.
- Avoid continuous operation for extended periods to prevent overheating. Allow the pump to cool down if it becomes hot.
- Feu servir només els cables i adaptadors de càrrega proporcionats.
- Guardeu la bomba en un lloc fresc i sec quan no s'utilitzi.
- If the pump shows signs of damage or malfunction, discontinue use immediately and contact customer support.
3. Contingut del paquet
Verifiqueu que tots els elements siguin presents al vostre paquet:
- OUTDOORMASTER SHARK 3 Electric Air Pump
- Mànega d'alta pressió
- 7 x Universal Nozzles
- Cable d'alimentació de cotxe de 12 V CC
- Cable de càrrega tipus C.
- Manual d'usuari

Image 3.1: All components included with the OUTDOORMASTER SHARK 3 Electric Air Pump.
4. Configuració i càrrega
4.1 Charging the Pump
Before first use, fully charge the pump. The pump can be charged using either the 12V DC car power cable or a Type-C charging cable.
- Using 12V DC Car Power Cable: Connect the 12V DC cable to the car's cigarette lighter socket and the other end to the pump's 12V DC input port.
- Using Type-C Charging Cable: Connect the Type-C cable to a compatible USB power adapter (not included) and the pump's Type-C input port. The pump supports fast charging up to 35W.
The digital display will indicate the charging status. A full charge allows for inflating/deflating up to 3 paddleboards.

Image 4.1: The pump supports 12V DC and Type-C charging inputs, and also offers Type-C output.
4.2 Attaching the Hose and Nozzle
- Identify the correct nozzle for your inflatable item's valve. The pump comes with 7 universal nozzles.
- Attach the chosen nozzle securely to the high-pressure hose.
- For inflation, connect the hose to the 'INFLATE' port on the pump. For deflation, connect it to the 'DEFLATE' port.
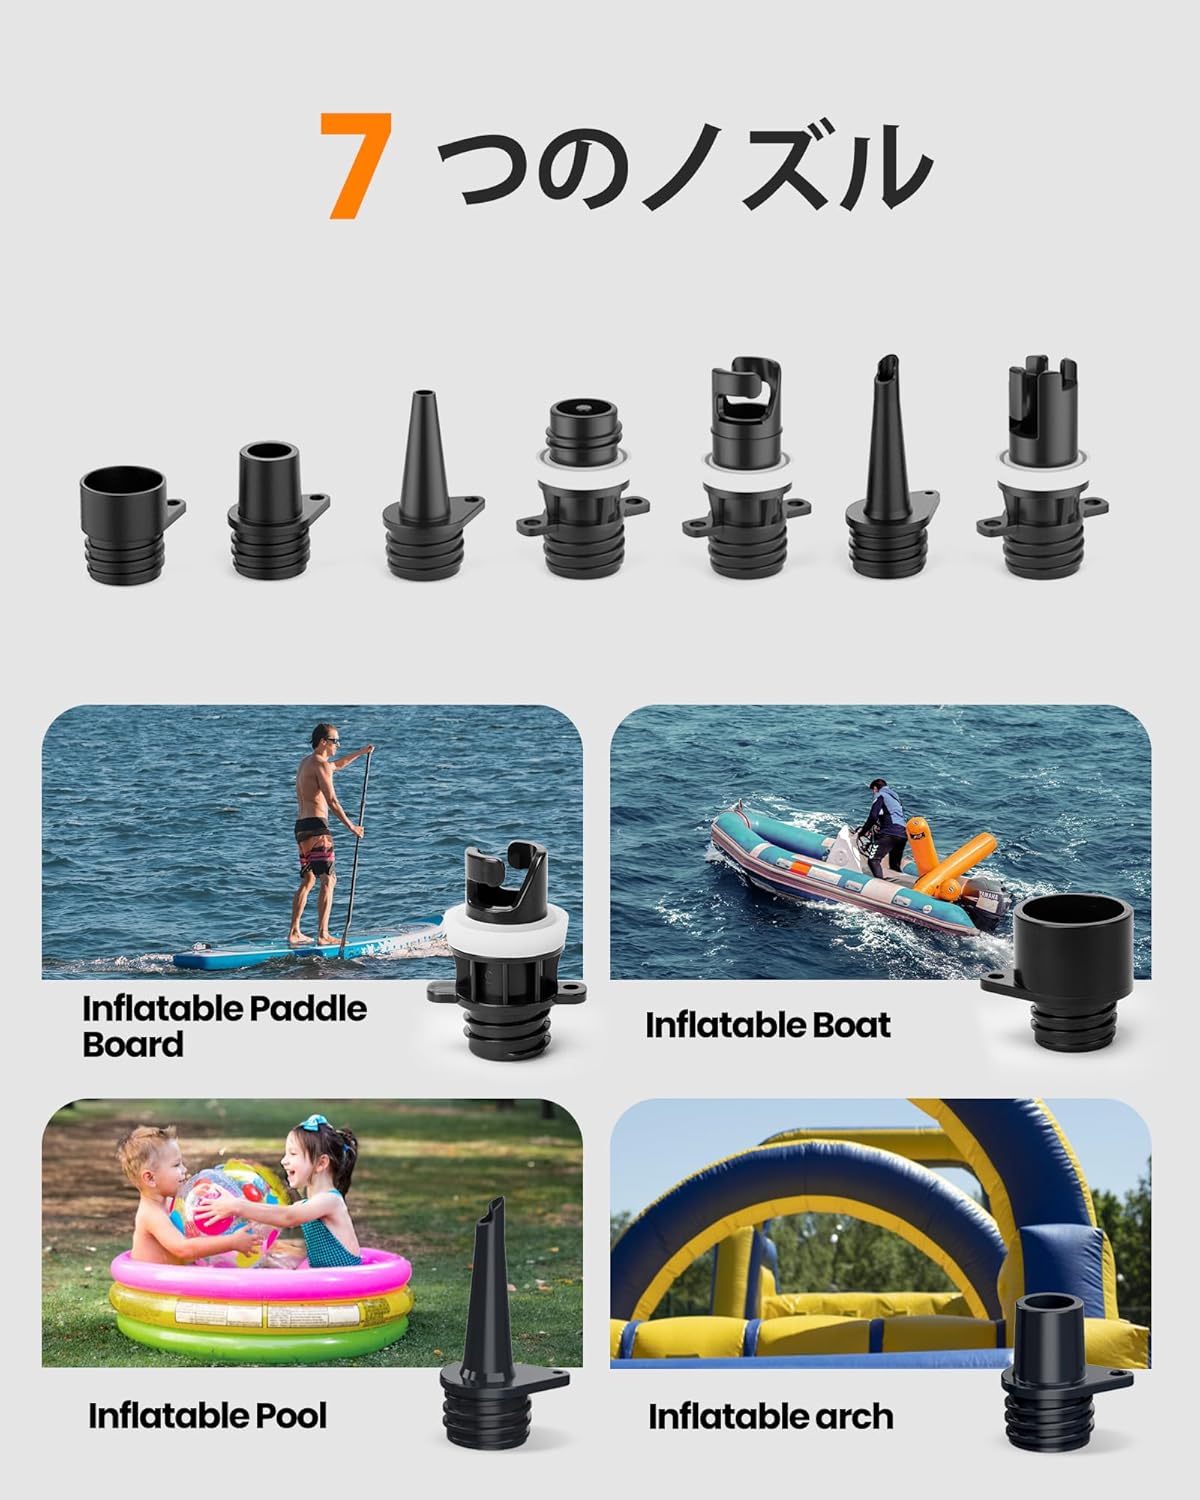
Image 4.2: A selection of the 7 universal nozzles provided for diverse inflatable applications.
5. Instruccions de funcionament
5.1 Procés d'inflació
- Ensure the pump is charged and the hose with the correct nozzle is connected to the 'INFLATE' port.
- Connect the nozzle to your inflatable item's valve.
- Press the power button to turn on the pump. The digital display will light up.
- Use the '+' and '-' buttons to set your desired pressure. The display shows pressure in real-time.
- Press the 'MODE' button to cycle through the three preset modes: SUP (Stand-Up Paddleboard), KITE (Kitesurfing/Inflatables), and MAT (Air Mat/Bed). Each mode remembers its last pressure setting.
- Once the desired pressure is set, press the power button again to start inflation. The pump will automatically stop when the target pressure is reached.
- Disconnect the nozzle from the inflatable and the hose from the pump.

Image 5.1: The digital display provides real-time pressure feedback and indicates when the auto-stop function is active.

Image 5.2: The pump offers three distinct operating modes for different inflatable types.
5.2 Deflation Process
- Connect the hose with the appropriate nozzle to the 'DEFLATE' port on the pump.
- Connect the nozzle to your inflatable item's valve.
- Premeu el botó d'encesa per encendre la bomba.
- Press the power button again to start the deflation process. The pump will extract air from the inflatable.
- Once deflated to your satisfaction, turn off the pump and disconnect the hose and nozzle.

Image 5.3: The pump features dedicated ports for both inflation and deflation.
6. Manteniment
6.1 Neteja
- Wipe the exterior of the pump with a soft, dry cloth.
- No utilitzeu productes químics ni productes de neteja abrasius.
- Ensure the air intake and outlet ports are free from dust and debris.
6.2 Emmagatzematge
- Store the pump and all accessories in a cool, dry place, away from direct sunlight and extreme temperatures.
- Keep the pump fully charged if storing for extended periods to maintain battery health. Recharge every 3-6 months if not in use.
- Ensure the hose and nozzles are clean and dry before storage.
7. Solució De Problemes
| Problema | Causa possible | Solució |
|---|---|---|
| La bomba no s'encén. | La bateria està esgotada. | Charge the pump using the 12V DC or Type-C cable. |
| Pump inflates slowly or not at all. | Incorrect nozzle or loose connection. | Ensure the correct nozzle is securely attached to the hose and the inflatable valve. |
| Air intake/outlet blocked. | Check and clear any obstructions from the air ports. | |
| Pump stops unexpectedly during operation. | Target pressure reached (auto-stop). | This is normal operation. If not, check battery level. |
| Protecció contra sobreescalfament activada. | Allow the pump to cool down for at least 15-20 minutes before resuming use. | |
| Lectura de pressió inexacta. | Connexió de mànega fluixa. | Ensure the hose is tightly connected to both the pump and the inflatable valve. |
8. Especificacions
| Característica | Detall |
|---|---|
| Model | SHARK 3 (Product Number: 804720-P-OMJP) |
| Marca | OUTDOORMASTER |
| Pressió màxima | 20 PSI |
| Capacitat de la bateria | 74 Wh |
| Entrada Voltage | 12V DC, Type-C (Max 35W) |
| Dimensions | 35.1 x 27.2 x 21.9 cm |
| Pes | 3.88 kg |
| Color | Black x Orange |
9. Garantia i Suport
OUTDOORMASTER products are manufactured to high-quality standards. For warranty information, product support, or any inquiries, please refer to the official OUTDOORMASTER weblloc web o contacteu directament amb el servei d'atenció al client. Conserveu el comprovant de compra per a reclamacions de garantia.