
1. Introducció
This manual provides essential information for the installation, operation, and maintenance of your GAMEON Emperor Midnight Series PC Gaming Case. Please read this manual thoroughly before beginning assembly to ensure proper setup and to maximize the performance and longevity of your product.
The GAMEON Emperor Midnight Series PC Gaming Case is a mid-tower chassis designed for high-performance gaming systems. It features tempered glass panels, pre-installed ARGB+PWM cooling fans, and extensive compatibility for various components, offering both aesthetic appeal and efficient thermal management.
2. Informació de seguretat
- Always disconnect power from all components before installation or maintenance.
- Manipuleu els panells de vidre temperat amb cura per evitar que es trenquin.
- Avoid exposing the case to extreme temperatures or humidity.
- Mantingueu les peces petites i els cargols fora de l'abast dels nens.
- Ensure proper grounding for all electrical components.
3. Contingut del paquet
Verifiqueu que tots els elements que s'enumeren a continuació siguin presents al vostre paquet:
- GAMEON Emperor Midnight Series PC Gaming Case (GO-EMPEROR-M)
- Caixa d'accessoris (cargols, brides de cable, separadors, etc.)
- Manual d'usuari (aquest document)
- ARGB+PWM Fan Controller (if separate)
- Remote Control for ARGB (if included)
4. Producte acabatview
Familiarize yourself with the key features and components of your gaming case.

Figura 4.1: Davant-esquerra view of the GAMEON Emperor Midnight Series PC Gaming Case, showcasing the tempered glass side panel and illuminated ARGB fans.

Figura 4.2: Interior view of the PC case, illustrating the spacious layout for motherboard installation and component mounting points.

Figura 4.3: Interior posterior view, highlighting the cable management area behind the motherboard tray and additional fan mounts.
4.1 ports d'E/S

Figura 4.4: Top panel I/O ports, including USB 3.0, USB 2.0, Type-C, HD Audio, Microphone, Reset, and Power buttons.
- Botó d'encesa: Encén/apaga el sistema.
- Botó de restabliment: Reinicia el sistema.
- Port USB 3.0 (x1): Transferència de dades d'alta velocitat.
- Port USB 2.0 (x1): Transferència de dades estàndard.
- Port tipus C (x1): Modern reversible connector for data.
- Preses d'àudio HD: Per a auriculars i micròfon.
4.2 Sistema de refrigeració
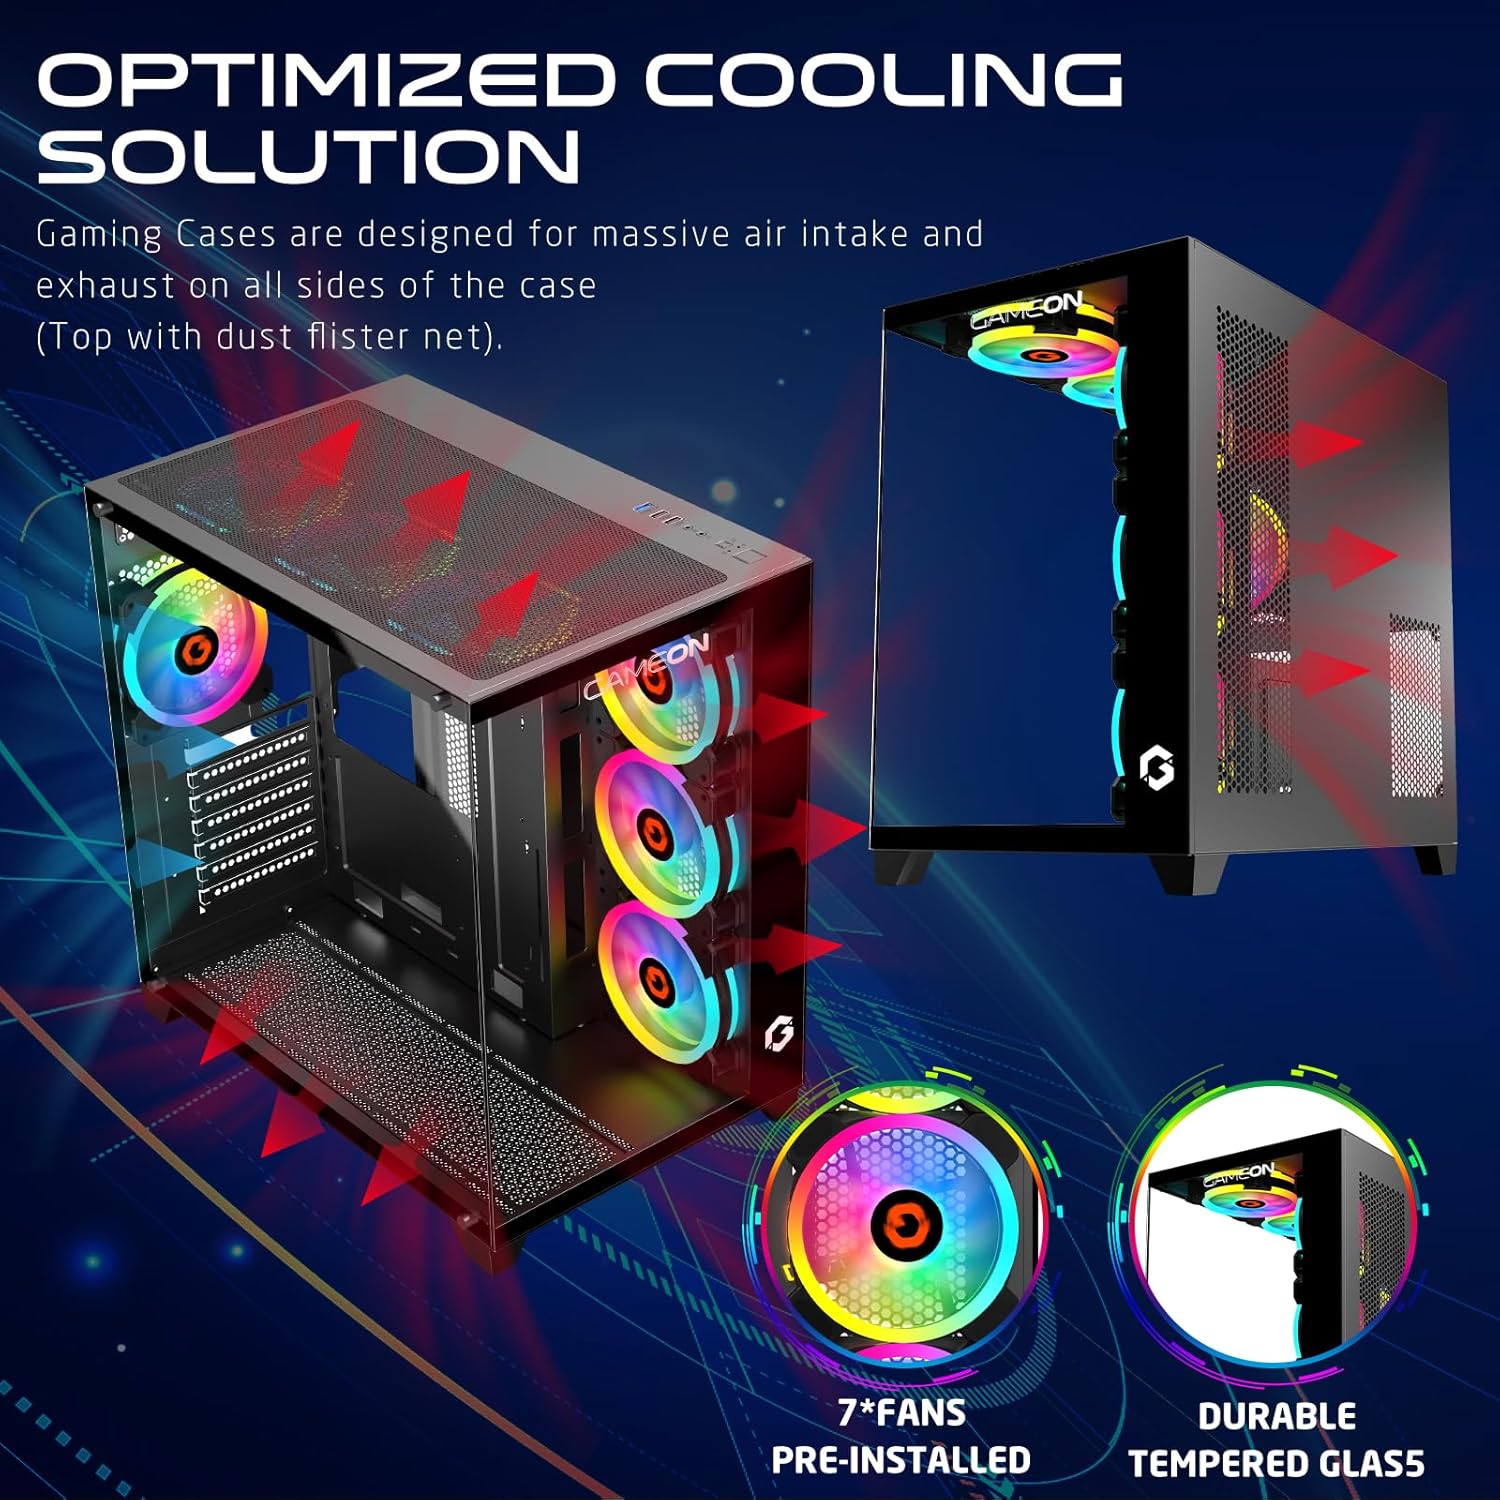
Figura 4.5: Optimized cooling solution diagram, illustrating airflow paths and the placement of pre-installed fans and dust filters.
The case comes with 7 pre-installed 120mm ARGB+PWM fans for optimal airflow. Additional fan and radiator support is available:
- Davant: 3x 120mm fans (pre-installed)
- A dalt: 3x 120mm fans or 360mm radiator support
- posterior: 1x 120mm fan (pre-installed)
- A baix: 3x 120mm fans
5. Configuració i instal·lació
Follow these steps for proper component installation:
5.1 Preparació del cas
- Col·loqueu la caixa sobre una superfície plana i estable.
- Carefully remove the tempered glass side panel by unscrewing the thumb screws and sliding it off.
- Identify the accessory box containing screws and other small parts.
5.2 Instal·lació de la placa base

Figura 5.1: Motherboard compatibility (ATX, M-ATX) and drive bay configurations (HDD/SSD).
- Install the necessary motherboard standoffs into the motherboard tray according to your motherboard's form factor (ATX, M-ATX).
- Place your motherboard onto the standoffs, aligning the screw holes.
- Fixeu la placa base amb els cargols proporcionats.
- Install the CPU cooler (if not already installed) ensuring it fits within the 165mm CPU clearance limit.
5.3 Instal·lació de la targeta gràfica (GPU)
- Remove the appropriate expansion slot covers from the rear of the case.
- Insert your graphics card into the PCIe slot on the motherboard.
- Secure the graphics card with screws. The case supports GPUs up to 410mm in length.
5.4 Instal·lació de la unitat d'emmagatzematge
The case supports 2 HDDs and 1 SSD, or 1 HDD and 2 SSDs.
- Locate the drive bays/mounts for 3.5" HDDs and 2.5" SSDs.
- Mount your drives using the provided screws.
5.5 Gestió de cables i connexions
- Connect all power supply cables to your components (motherboard, GPU, drives).
- Connect the front panel I/O cables (USB 3.0, USB 2.0, Type-C, HD Audio, Power, Reset) to the corresponding headers on your motherboard. Refer to your motherboard manual for header locations.
- Utilitzeu els retalls de cablejat i els punts d'amarratge que hi ha darrere de la safata de la placa base per gestionar els cables de manera ordenada.
- Connect the ARGB+PWM fan cables to the fan controller or directly to your motherboard's ARGB/PWM headers if supported.
6. Instruccions de funcionament
6.1 Encès
- Ensure all components are correctly installed and cables are securely connected.
- Connect your monitor, keyboard, and mouse to the system.
- Plug the power supply cable into a wall outlet and turn on the power supply switch.
- Press the Power button on the top I/O panel of the case.
6.2 Control d'il·luminació ARGB

Figura 6.1: ARGB+PWM fan control options, including motherboard sync compatibility and remote control functionality.
The pre-installed ARGB+PWM fans can be controlled in several ways:
- Comandament a distància: Use the included remote control to change lighting modes, colors, and fan speeds.
- Programari de la placa base: If connected to a compatible ARGB header on your motherboard, you can synchronize lighting effects using motherboard manufacturer software (e.g., ASUS Aura Sync, MSI Mystic Light Sync, GIGABYTE RGB Fusion, ASRock Polychrome RGB).
- Control PWM: Fan speeds are automatically adjusted based on system temperature via PWM (Pulse Width Modulation) signals from the motherboard or fan controller.
7. Manteniment
Un manteniment regular ajuda a garantir un rendiment òptim i una major longevitat de la carcassa del teu PC.
- Filtres de pols: The case includes dust filters. Regularly remove and clean these filters to maintain good airflow and prevent dust buildup inside the system. Use compressed air or a soft brush.
- Neteja del ventilador: Periodically clean the fan blades with compressed air to remove dust. Ensure fans are not spinning while cleaning.
- Neteja exterior: Wipe down the exterior surfaces and tempered glass panels with a soft, damp tela. Eviteu els netejadors abrasius.
8. Solució De Problemes
Si teniu problemes, consulteu els passos habituals següents per a la resolució de problemes:
| Problema | Causa possible | Solució |
|---|---|---|
| El sistema no s'encén. | Connexions d'alimentació soltes, font d'alimentació defectuosa, cablejat incorrecte del panell frontal. | Check all power cables (PSU to wall, PSU to motherboard/components). Verify front panel power button wiring to motherboard. Test power supply. |
| Els ventiladors no giren o la il·luminació ARGB no funciona. | Loose fan/ARGB connections, faulty fan controller, incorrect motherboard header connection. | Ensure all fan power and ARGB cables are securely connected to the controller or motherboard. Check remote control battery. Verify motherboard ARGB header settings in BIOS/software. |
| Flux d'aire deficient o temperatures elevades. | Blocked dust filters, incorrect fan orientation, insufficient cooling. | Clean dust filters. Ensure fans are oriented correctly for intake/exhaust. Consider adding more fans or upgrading cooling solutions if temperatures remain high. |
9. Especificacions
| Característica | Detall |
|---|---|
| Model | GO-EMPEROR-M |
| Tipus de cas | Torre mitja |
| Compatibilitat amb la placa base | ATX, M-ATX |
| Materials | SPCC, 0.7mm Tempered Glass |
| Dimensions (L x A x A) | 425 x 280 x 420 mm |
| Pes net | 5.8 KG |
| Límit de longitud de la GPU | 410 mm |
| Límit d'alçada del refrigerador de la CPU | 165 mm |
| Drive Bays | 2x HDD, 1x SSD (or 1x HDD, 2x SSD) |
| Ranures d'expansió | 7 |
| Ventiladors preinstal·lats | 7x 120mm ARGB+PWM Fans |
| Suport del ventilador (frontal) | 3x 120 mm |
| Suport del ventilador (superior) | 3x 120mm (or 360mm radiator) |
| Suport del ventilador (posterior) | 1x 120 mm |
| Suport del ventilador (part inferior) | 3x 120 mm |
| Ports d'E/S | 1x USB 3.0, 1x USB 2.0, 1x Type-C, HD Audio |
10. Garantia i Suport
For warranty information and technical support, please refer to the official GAMEON weblloc web o poseu-vos en contacte amb el vostre distribuïdor local. Conserveu el comprovant de compra per a reclamacions de garantia.
Per obtenir més ajuda, visiteu el GAMEON Store on Amazon.