
1. Introducció
This manual provides detailed instructions for the proper operation, maintenance, and troubleshooting of the INSTRUKART Lutron TU-2016 Turbidity Meter. Please read this manual thoroughly before using the device to ensure accurate measurements and safe operation.
The Lutron TU-2016 is designed for measuring turbidity in various water sources, including lakes, water tanks, rivers, and mangroves. It features a wide measurement range, high resolution, and a user-friendly interface, adhering to ISO 7027 standards.
2. Informació de seguretat
- Always handle the meter and its components with care to prevent damage.
- No exposeu el dispositiu a temperatures extremes, humitat ni llum solar directa durant períodes prolongats.
- Ensure the battery compartment is properly sealed to prevent water ingress.
- Keep the exterior of the test bottle clean and dry before insertion into the meter.
- Use only specified standard solutions for calibration.
- Dispose of batteries and solutions according to local regulations.
3. Contingut del paquet
En desempaquetar, comproveu que tots els elements que s'enumeren a continuació hi són presents i en bon estat:
- 1 Unit of TU-2016 Turbidity Meter
- 0 NTU standard solution
- 10 NTU standard solution
- Empty testing bottle (sample cuvette)
- Hard Carrying case
- Manual d'instruccions
- Certificat de calibratge de fàbrica
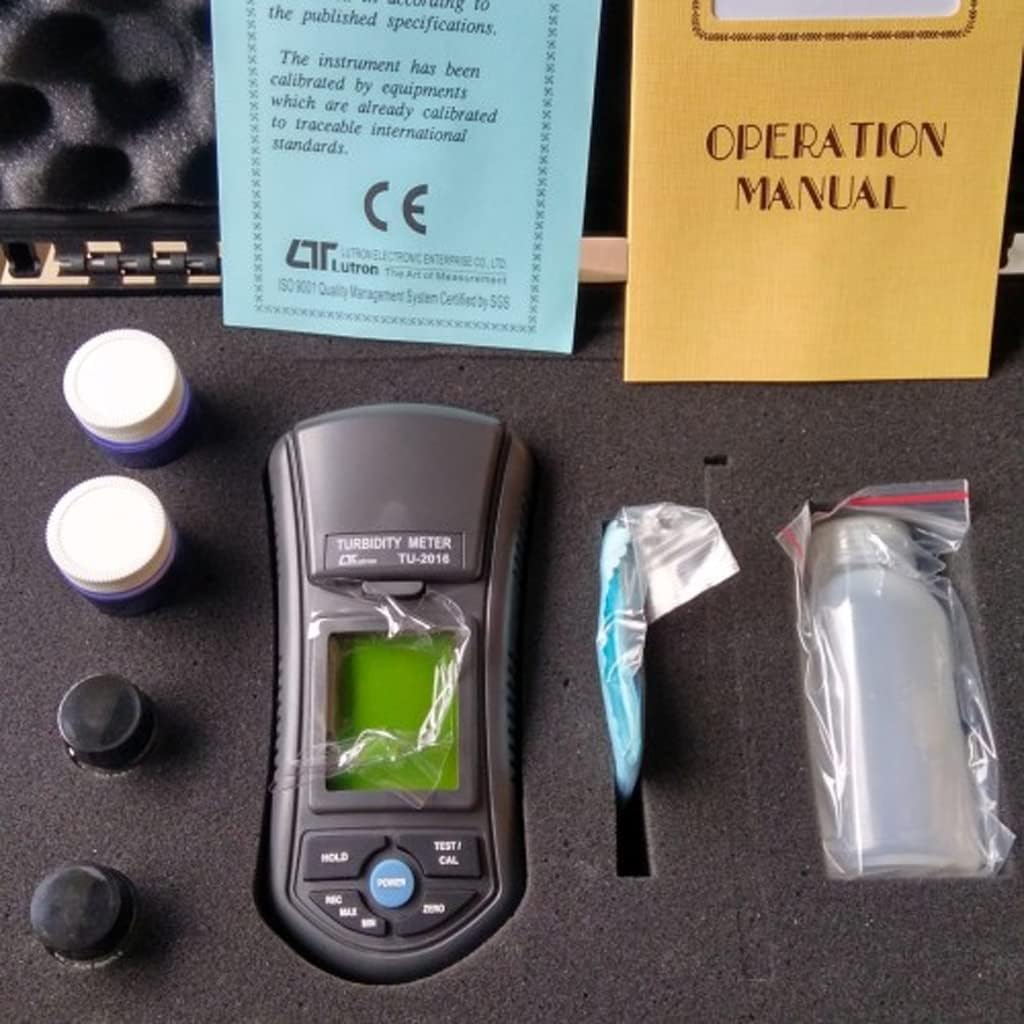
Figura 3.1: Contents of the TU-2016 Turbidity Meter package, neatly organized within its hard carrying case.

Figura 3.2: The TU-2016 Turbidity Meter along with its essential accessories for measurement and maintenance.
4. Producte acabatview
The Lutron TU-2016 Turbidity Meter is a portable, microprocessor-controlled device designed for precise turbidity measurements. Key features include:
- ISO 7027 Compliance: Designed to meet international standards for turbidity measurement.
- Unitat de mesura: NTU (Nephelometric Turbidity Unit).
- Wide Auto Measurement Range: 0 a 1,000 NTU.
- Alta resolució: 0.01 NTU (for 0.00 to 50.00 NTU range) and 1 NTU (for 50 to 1,000 NTU range).
- Unique Optics Structure: Enables accurate readings from low to high turbidity levels.
- Interfície fàcil d'utilitzar: Four operation buttons and three calibration points for easy use.
- Jumbo LCD Display: Large display for clear and easy readability.
- Microprocessor Circuit: Ensures maximum accuracy and provides special functions.
- Funciona amb piles: Ideal for field and on-site testing.
- Funció de retenció de dades: Freezes the displayed value.
- Recuperació de memòria: Records and recalls Maximum and Minimum readings.
- Tancament automàtic: Conserva la durada de la bateria.
- Disseny durador: Heavy-duty and compact housing with a hard carrying case.

Figura 4.1: Davant view of the TU-2016 Turbidity Meter, highlighting the display and control panel.

Figura 4.2: The TU-2016 Turbidity Meter held in hand, illustrating its compact and portable design.
5. Configuració
5.1 Instal·lació de la bateria
The meter operates on six DC 1.5 V AAA (UM4) batteries. To install or replace batteries:
- Localitzeu la tapa del compartiment de la bateria a la part posterior del mesurador.
- Open the cover and insert six AAA batteries, observing the correct polarity (+/-).
- Tanqueu bé la tapa del compartiment de la bateria.
5.2 Encès inicial
Premeu el botó PODER button to turn on the meter. The LCD display will illuminate and show a brief self-test before entering measurement mode.
6. Instruccions de funcionament
6.1 Preparing a Sample
- Ensure the empty testing bottle (cuvette) is clean and dry. Wipe the exterior with a lint-free cloth.
- Fill the testing bottle with the water sample to be measured. Avoid air bubbles.
- Securely cap the bottle.
6.2 Prendre una mesura
- Obriu el sample compartment lid on the top of the meter.
- Inseriu els preparatsample bottle into the compartment, ensuring it is seated correctly.
- Tanca el sampla tapa del compartiment.
- Premeu el botó TEST/CAL button to initiate a measurement. The turbidity reading will appear on the LCD display.
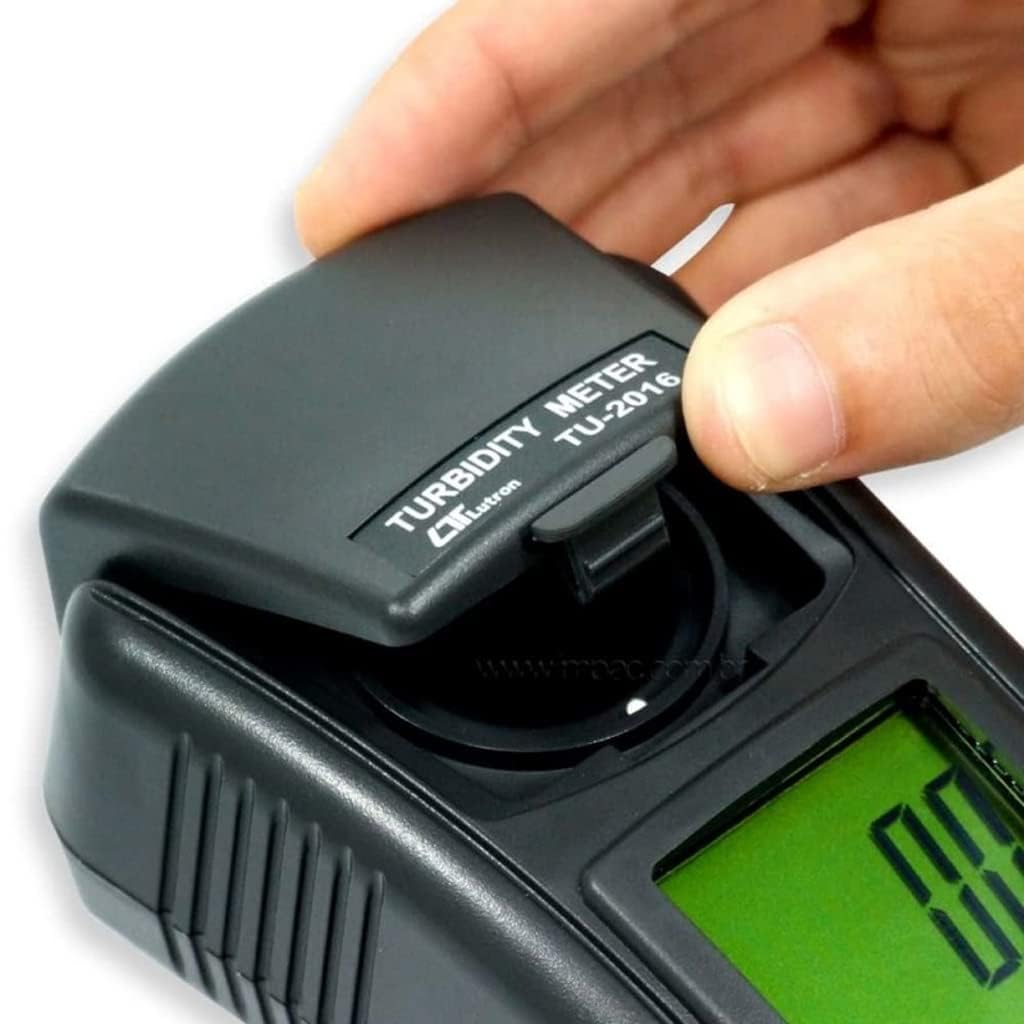
Figura 6.1: Opening the sampla tapa del compartiment.

Figura 6.2: Inserting a sample bottle into the meter.
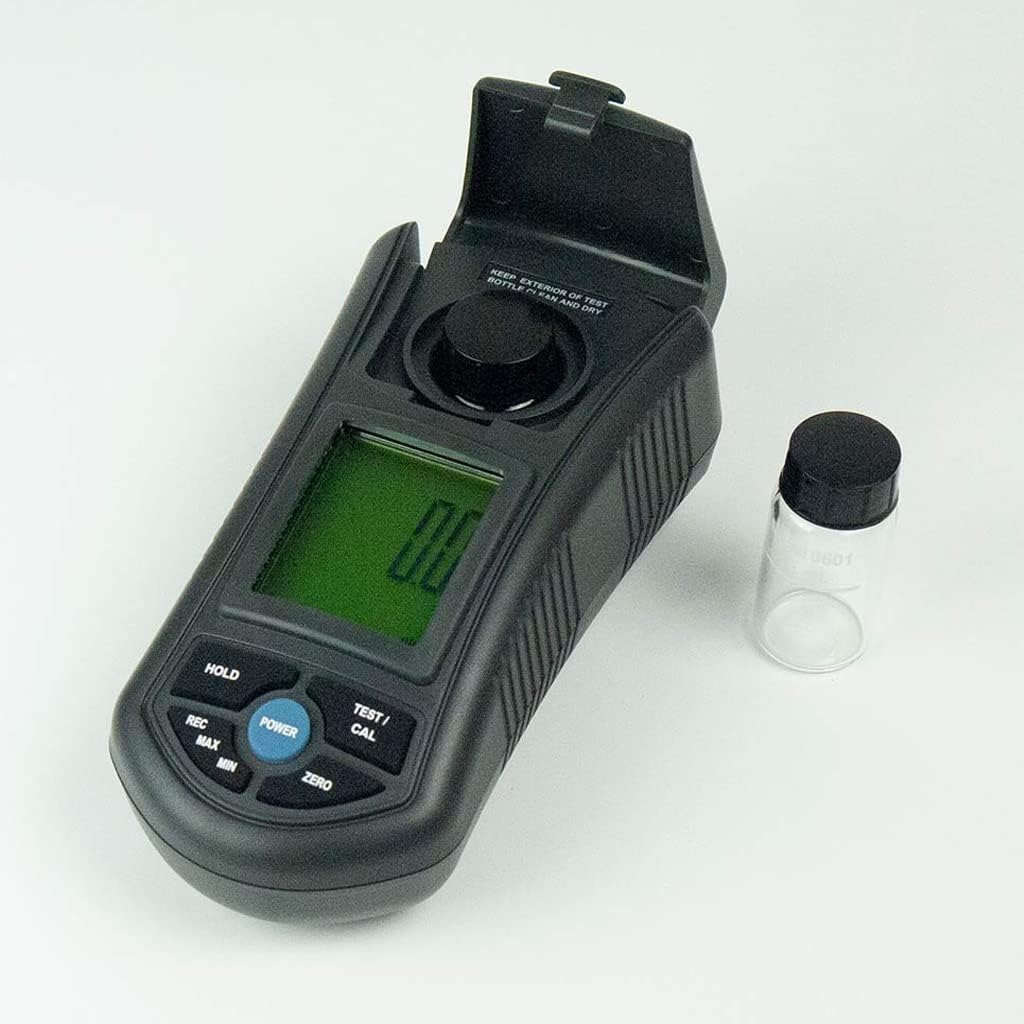
Figura 6.3: The meter with the sample compartment open, ready for sample insertion.
6.3 Funció de retenció de dades
Per congelar la lectura actual a la pantalla, premeu la tecla MANTENIM botó. Premeu-lo de nou per deixar-lo anar i reprendre el mesurament en directe.
6.4 Memory Recall (MAX/MIN)
The meter can record and recall the maximum and minimum turbidity readings:
- Premeu el botó REC Premeu el botó una vegada per mostrar el valor màxim enregistrat.
- Premeu el botó REC button again to display the minimum recorded value.
- Premeu el botó REC button a third time to exit memory recall mode.
6.5 Apagada automàtica
The meter features an auto shut-off function to conserve battery life. If no button is pressed for a certain period, the meter will automatically power off. This can be manually overridden by pressing the PODER botó per apagar el dispositiu.
7. Calibració
The TU-2016 features a three-point push-button calibration system. Regular calibration ensures the accuracy of your measurements. Use the provided 0 NTU and 10 NTU standard solutions for calibration.
- Enceneu el comptador.
- Insert the 0 NTU standard solution into the sampel compartiment.
- Manteniu premut el botó TEST/CAL button until the calibration mode is indicated on the display. Follow the on-screen prompts to calibrate the 0 NTU point.
- Remove the 0 NTU solution and insert the 10 NTU standard solution.
- Repeat the calibration process for the 10 NTU point.
- The third calibration point (if applicable) can be performed similarly with a higher NTU standard solution if available and required for your specific application.
- After successful calibration, the meter will return to measurement mode.
Note: Refer to the Factory Calibration Certificate for details on the initial calibration performed by the manufacturer.
8. Manteniment
8.1 Neteja del mesurador
- Netegeu l'exterior del mesurador amb un drap suau iamp tela. No utilitzeu netejadors abrasius ni dissolvents.
- Mantenir el sample compartment clean and free of debris.
- Ensure the exterior of the test bottles are always clean and dry before use.
8.2 Emmagatzematge
- When not in use, store the meter and its accessories in the provided hard carrying case.
- Emmagatzemar en un lloc fresc i sec, allunyat de la llum solar directa i de temperatures extremes.
- Si l'emmagatzemeu durant períodes prolongats, traieu les piles per evitar fuites.
9. Solució De Problemes
| Problema | Causa possible | Solució |
|---|---|---|
| El mesurador no s'encén. | Piles gastades o instal·lades incorrectament. | Canvieu les piles, assegurant-vos de la polaritat correcta. |
| Lectures inexactes. |
|
|
| Display shows "Err" or similar error. | Measurement range exceeded or internal error. | Assegurar sample is within 0-1000 NTU range. Power cycle the device. If error persists, contact support. |
10. Especificacions
| Paràmetre | Detall |
|---|---|
| Circuit | Custom one-chip of microprocessor LSI circuit |
| Mostra | Mida LCD: 41 mm x 34 mm |
| Interval de mesura | 0.00 to 50.00 NTU, 50 to 1,000 NTU (Auto range) |
| Resolució | 0.01 NTU (0.00 to 50.00 NTU), 1 NTU (50 to 1,000 NTU) |
| Precisió | ± 5 % F.S. or ± 0.5 NTU, whichever is greater |
| Font de llum | LED, 850 nm |
| Detector | Díode fotogràfic |
| Compliment estàndard | Meet ISO 7027 |
| Temps de resposta | Menys de 10 segons |
| Sample Volume Needed | 10 ml |
| Retenció de dades | Congela la lectura de la pantalla |
| Recuperació de la memòria | Valor màxim i mínim |
| Mostra Samptemps temps | Aprox. 1 segons |
| Apagueu | Apagat automàtic o apagat manual mitjançant polsador |
| Temperatura de funcionament | 0 a 50 °C |
| Humitat de funcionament | Menys del 85% HR |
| Font d'alimentació | DC 1.5 V battery (UM4, AAA) x 6 PCs |
| Power Current (Standby) | Aprox. CC 3.5 mA |
| Power Current (Testing) | Aprox. CC 36 mA |
| Pes | 320 g Approx. (0.71 lbs) |
| Dimensions | 155 x 76 x 62 mm (6.1 x 2.99 x 2.44 polzades) |
11. Assistència i garantia
For technical assistance, troubleshooting beyond this manual, or warranty inquiries, please contact INSTRUKART customer support. Refer to your purchase documentation for specific warranty terms and contact information.
The product comes with a Factory Calibration Certificate, ensuring its initial accuracy and compliance with international standards.