
TESUP atlas_body
TESUP Atlas Vertical Wind Turbine Generator User Manual
Model: atlas_body
1. Introducció
This manual provides essential information for the safe and efficient operation of your TESUP Atlas Vertical Wind Turbine Generator. The TESUP Atlas is designed as a 10 kW wind turbine generator body, featuring an integrated IoT charge controller and the capability for hand-crank emergency power generation. Please read this manual thoroughly before installation and operation.
Nota: Wind turbine blades are sold separately and are not included with this generator body.
2. Informació de seguretat
Always prioritize safety during installation, operation, and maintenance. Failure to follow these instructions may result in injury or damage to the equipment.
- Ensure all electrical connections are made by a qualified electrician.
- Disconnect all power sources before performing any maintenance or installation.
- Utilitzeu l'equip de protecció individual (EPI) adequat durant la instal·lació.
- Do not operate the generator if any parts are damaged or missing.
- Mantingueu els nens i el personal no autoritzat allunyats de la unitat durant el funcionament.
- The hand-crank mechanism is for emergency use only.
3. Què s'inclou
Your TESUP Atlas package includes the following components:
- TESUP Atlas Wind Turbine Generator Body (10 kW)
- Integrated IoT Charge Controller
- Hand-crank mechanism (for emergency power)
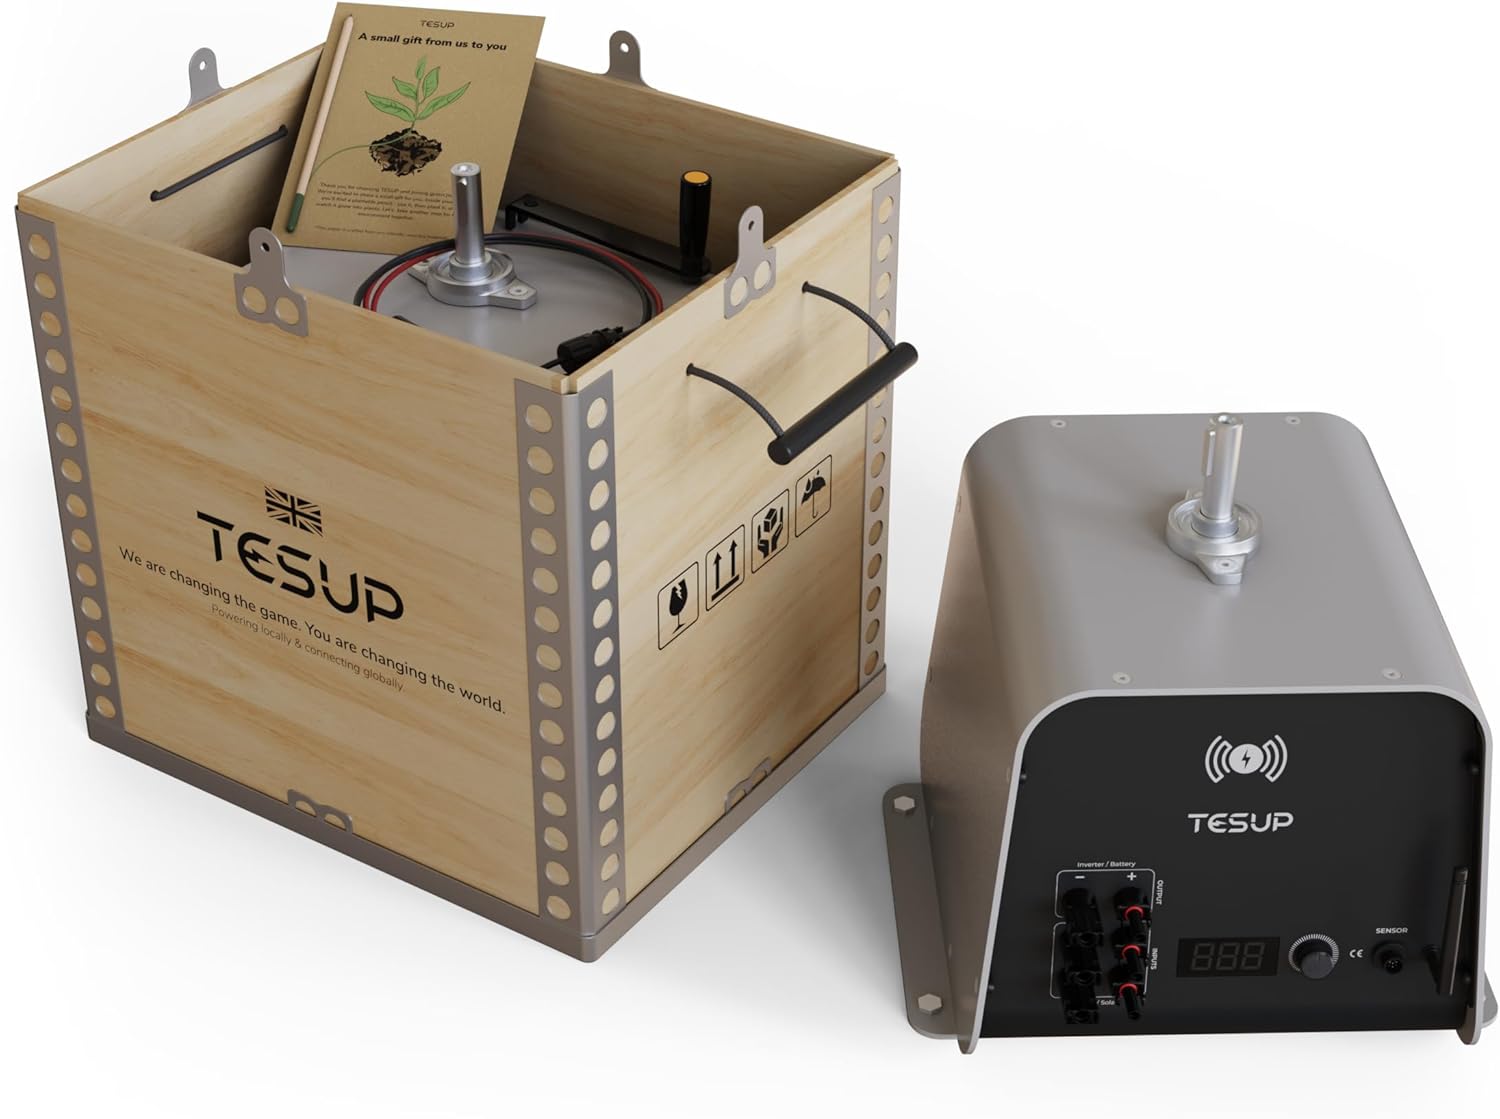
Figura 3.1: The TESUP Atlas Wind Turbine Generator body, shown both inside its protective wooden shipping crate and as a standalone unit. The crate includes handles for transport.
4. Configuració i instal·lació
Proper installation is crucial for the performance and longevity of your TESUP Atlas generator. This section outlines the general steps for setting up the unit. For detailed electrical wiring, consult a qualified professional.
4.1. Selecció de l'emplaçament
Choose a location with optimal wind exposure, free from obstructions like buildings or trees that could create turbulence. Ensure the site allows for secure mounting of the generator and any associated wind turbine blades (sold separately).
4.2. Mounting the Generator
The generator body should be securely mounted to a stable structure capable of withstanding wind loads. Use appropriate fasteners for the mounting surface. The base of the generator has pre-drilled holes for attachment.

Figura 4.1: Dimensional drawing of the TESUP Atlas generator body, indicating its length, width, height, and shaft diameter for planning installation and blade attachment.
4.3. Connexions elèctriques
The TESUP Atlas features an integrated IoT charge controller for seamless integration with your home's power system. It supports both AC and DC connections and can be integrated with solar panels and other wind turbines for a comprehensive energy solution.

Figura 4.2: Acabatview of on-grid connection possibilities for the TESUP Atlas, demonstrating how it integrates with an inverter, home electrical system, the main grid, solar panels, and other TESUP wind turbines. Data can be monitored via the 'My TESUP App'.
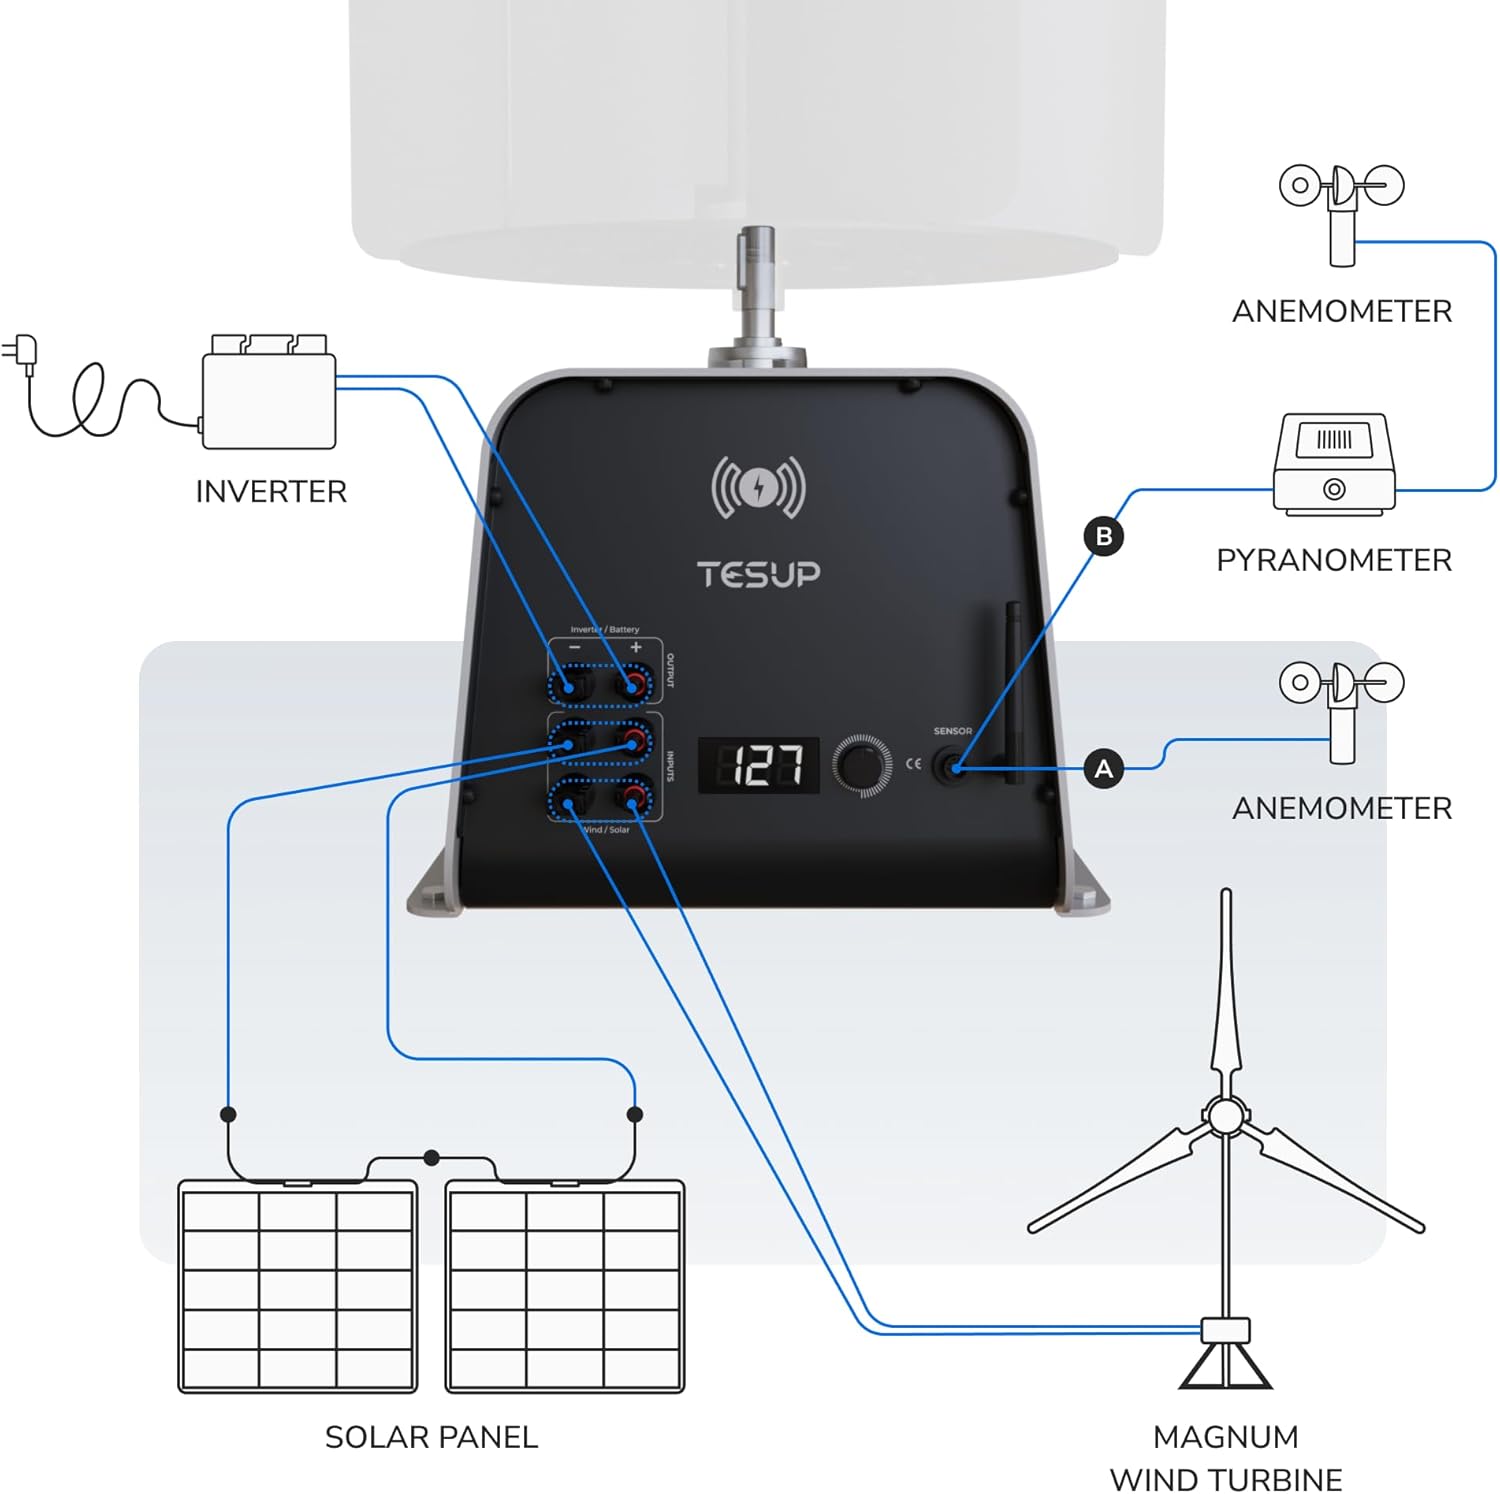
Figura 4.3: Detailed wiring diagram for the TESUP Atlas, illustrating connections for solar panels, an additional Magnum wind turbine, and environmental sensors (anemometer and pyranometer) to optimize energy generation and monitoring.
Connect the output of the wind turbine blades (not included) to the generator shaft. Then, connect the generator's electrical output to your inverter or charge controller system as per the wiring diagrams provided and local electrical codes.
5. Instruccions de funcionament
5.1. Wind Power Generation
Once properly installed with compatible wind turbine blades, the TESUP Atlas will begin generating electricity when sufficient wind speeds are present. The integrated IoT controller manages the charging process and allows for remote monitoring via the TESUP mobile application.
5.2. Emergency Hand-Crank Operation
In situations where wind is not available, the TESUP Atlas can be operated manually using the integrated hand-crank mechanism to provide emergency power. This feature is designed for backup power generation during outages o en llocs remots.
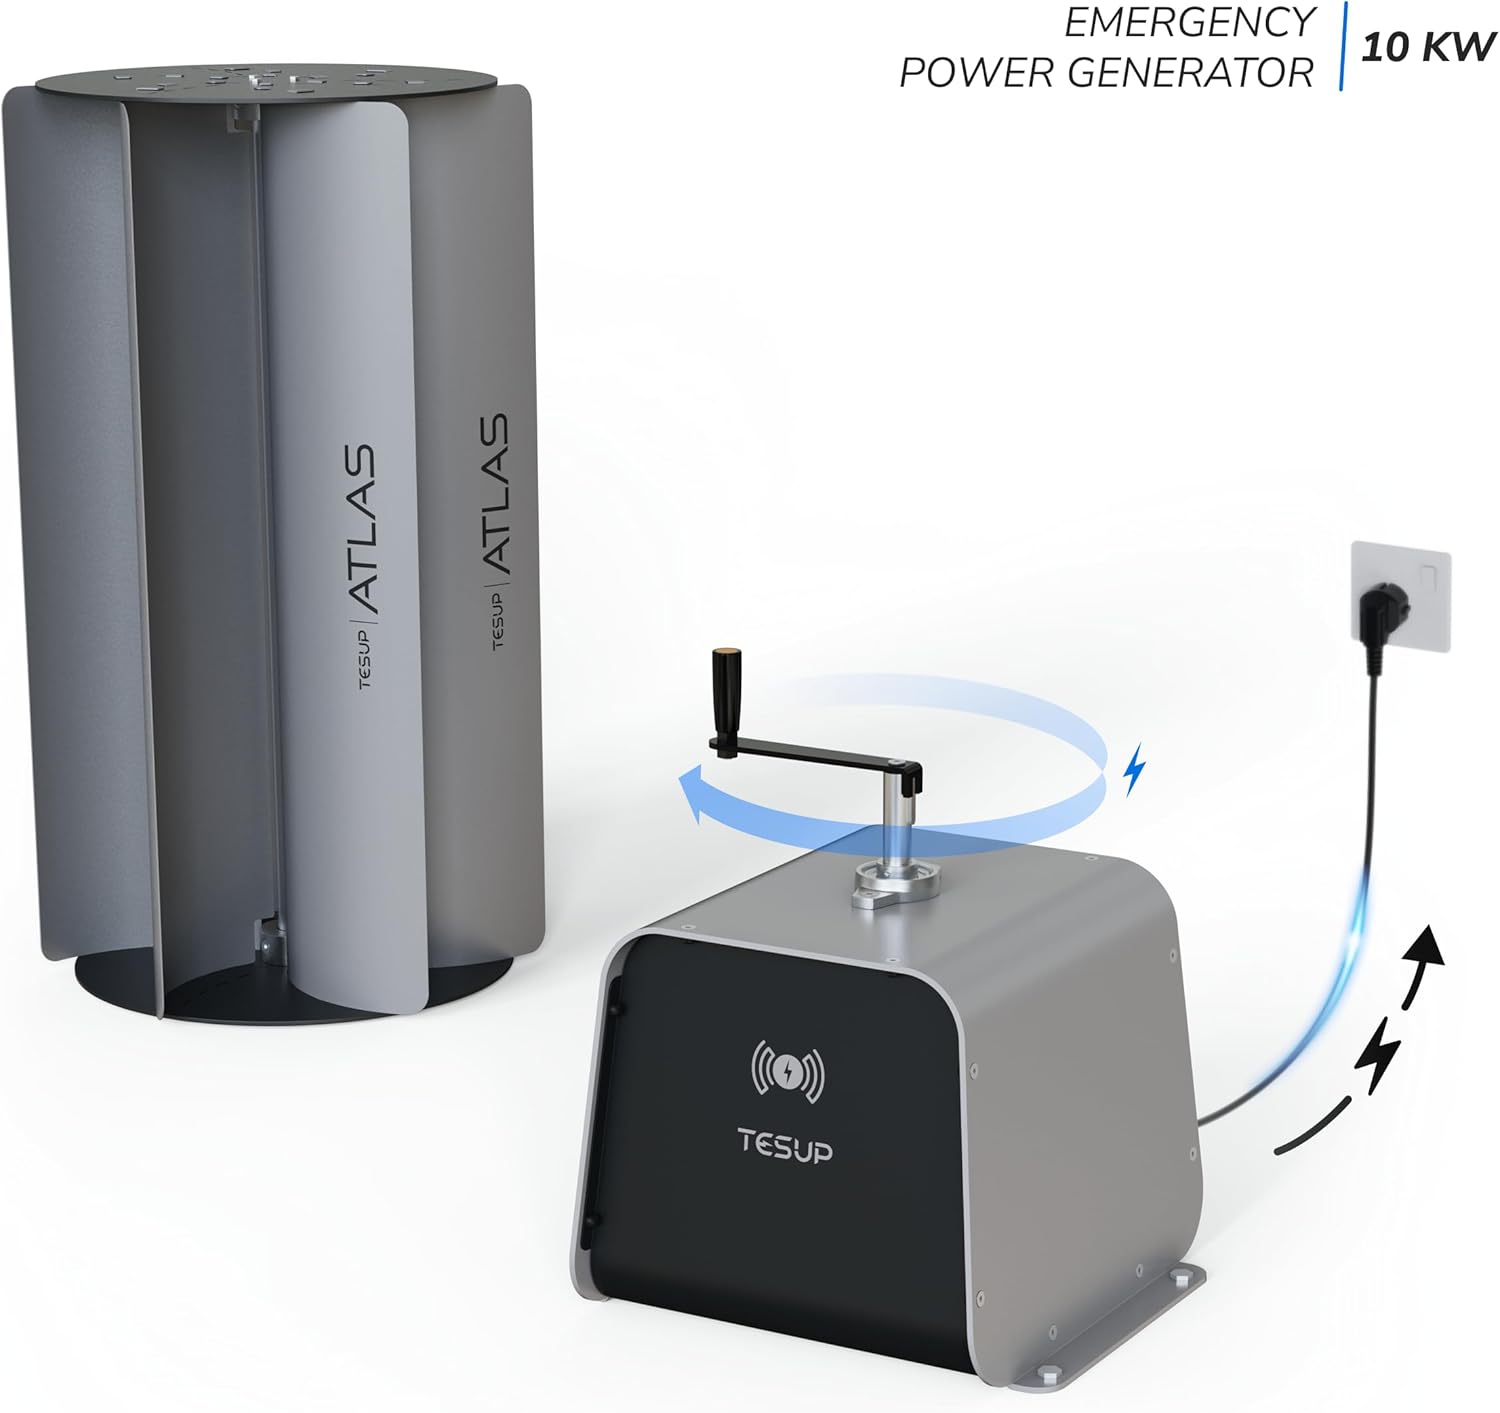
Figura 5.1: The TESUP Atlas generator demonstrating its hand-crank emergency power capability. Turning the crank generates electricity, which can be used to power devices.
To use the hand-crank: Locate the hand-crank attachment point on the generator body. Securely attach the crank and rotate it clockwise at a consistent speed to generate power. Monitor the output display on the unit or via the app.
6. Manteniment
Regular maintenance ensures optimal performance and extends the lifespan of your TESUP Atlas generator.
- Inspecció periòdica: Regularly inspect the generator body, mounting hardware, and electrical connections for any signs of wear, corrosion, or damage.
- Neteja: Keep the exterior of the generator clean from dust, dirt, and debris. Use a soft, damp tela. No utilitzeu netejadors abrasius ni dissolvents.
- Inspecció de la fulla (si escau): If using with wind turbine blades, inspect them for cracks, chips, or imbalance. Refer to the blade manufacturer's manual for specific maintenance.
- Hand-Crank Mechanism: Ensure the hand-crank mechanism operates smoothly. Lubricate moving parts if necessary with a suitable lubricant.
- Actualitzacions de programari: Keep the IoT charge controller firmware updated via the TESUP app to ensure optimal performance and security.
7. Solució De Problemes
| Problema | Causa possible | Solució |
|---|---|---|
| No power output from wind | Insufficient wind speed; Blades not attached or damaged; Loose electrical connections; Controller issue. | Check wind conditions; Ensure blades are correctly installed and undamaged; Verify all wiring connections; Consult TESUP support if controller error persists. |
| Hand-crank not generating power | Crank not attached correctly; Internal mechanism issue. | Ensure crank is fully engaged; Contact TESUP support for internal mechanism issues. |
| IoT app not connecting | Wi-Fi connectivity issue; App outdated; Controller not powered. | Check Wi-Fi signal and router; Update TESUP app; Ensure generator is receiving power. |
If you encounter problems not listed here or if the suggested solutions do not resolve the issue, please contact TESUP customer support.
8. Especificacions
| Model: | TESUP Atlas (atlas_body) |
| Fabricant: | TESUP |
| Dimensions (L x A x A): | 33.2 x 31.6 x 32 cm (13.07 x 12.44 x 12.6 polzades) |
| Pes: | 29 quilos (63.9 lliures) |
| Material: | Steel, Aluminum, or Cast Iron |
| Tipus de potència: | Wind Powered |
| Potència nominal de sortida: | 10 kW |
| Voltage: | 200 volts (CC) |
| Característiques especials: | Hand-crank emergency power, Integrated IoT Charge Controller |
| Components inclosos: | Wind turbine generator body |
| Ús recomanat: | Domèstic |
9. Garantia i Suport
For warranty information, technical support, or spare parts inquiries, please contact TESUP directly. Refer to the official TESUP website or your purchase documentation for the most current contact details and warranty terms.
Fabricant: TESUP
Weblloc: www.tesup.com
Ask a question about this manual
Ask about setup, troubleshooting, compatibility, parts, safety, or missing instructions. Manuals+ will review the question and use this page’s manual context to help answer it.