
Introducció
This manual provides detailed instructions for the installation, operation, and maintenance of your Aigo Q2507 Mini-Tower PC Case. Please read this manual thoroughly before beginning any installation to ensure proper assembly and safe usage. This PC case is designed to house standard desktop components, supporting M-ATX and ITX motherboards.
Informació de seguretat
- Desconnecteu sempre l'alimentació de la presa de corrent abans d'instal·lar o treure qualsevol component per evitar descàrregues elèctriques.
- Porteu una polsera antiestàtica per evitar danys per descàrrega electrostàtica (ESD) als components sensibles.
- Handle components carefully. Avoid touching pins or circuit boards directly.
- Ensure all cables are routed properly and do not obstruct airflow or moving parts.
- Keep the case away from sources of heat, direct sunlight, and moisture.
- No intenteu modificar l'estructura de la carcassa, ja que això podria anul·lar la garantia i suposar riscos per a la seguretat.
Contingut del paquet
Si us plau, verifiqueu que tots els elements siguin presents al vostre paquet:
- Aigo Q2507 Mini-Tower PC Case
- Accessory kit (screws, standoffs, cable ties)
- Manual d'usuari (aquest document)
Configuració
1. Preparació del cas
Before installation, remove both side panels of the case. Typically, these are secured with thumbscrews at the rear of the case.

Imatge: Anglesa view of the Aigo Q2507 Mini-Tower PC Case, showing the front panel and the side panel removed, revealing the internal structure.
2. Instal·lació de la placa base
- Install the necessary motherboard standoffs onto the motherboard tray. The Q2507 supports M-ATX and ITX motherboards.
- Col·loca amb cura la placa base sobre els separadors, alineant els forats dels cargols.
- Secure the motherboard with the provided screws. Do not overtighten.

Imatge: Interna view of the Aigo Q2507 PC Case, highlighting the motherboard tray area with pre-drilled holes for standoffs.
3. Instal·lació de la unitat d'emmagatzematge
The case supports 1 x SSD and 1 x HDD.
- Locate the drive bays. SSDs typically mount on the motherboard tray or dedicated brackets, while HDDs use a cage.
- Secure your SSD(s) and HDD(s) using the appropriate screws from the accessory kit.

Imatge: Interna view of the Aigo Q2507 PC Case, showing the designated areas for installing storage drives (SSD and HDD).
4. Expansion Card Installation (VGA)
The case features 4 expansion slots.
- Traieu les cobertes de les ranures necessàries de la part posterior de la carcassa.
- Insert your graphics card (VGA) or other expansion cards into the corresponding PCIe slots on your motherboard.
- Secure the card(s) with screws. The maximum VGA length supported is 250 mm.

Image: Rear internal view of the Aigo Q2507 PC Case, showing the four expansion slots and the rear fan mount.
5. Cooling Fan Installation
The case supports one 120 mm fan on the side and one 80 mm fan on the rear.
- Mount the fans to their designated positions using fan screws.
- Connect the fan power cables to your motherboard or power supply.

Image: Angled front-side view of the Aigo Q2507 PC Case, with an internal fan visible through the side panel vent.
6. Connexions del panell frontal
Connect the front panel cables (USB 2.0, Audio, Microphone, Power button, Reset button, Power LED, HDD LED) to the corresponding headers on your motherboard. Refer to your motherboard manual for header locations.
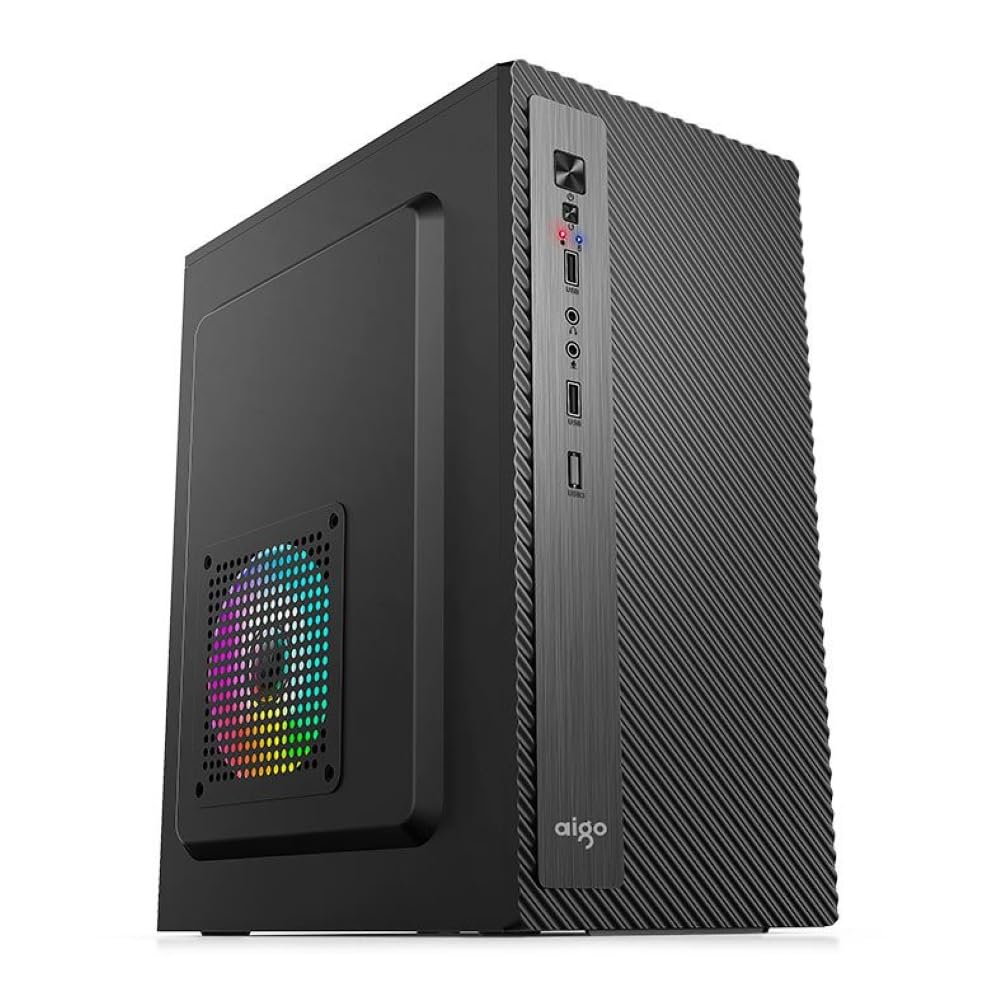
Imatge: Primer pla frontal view of the Aigo Q2507 PC Case, showing the front I/O panel with USB 2.0 ports, audio jacks, and power/reset buttons.
7. Gestió de cables
Route all cables neatly behind the motherboard tray or through designated cutouts to improve airflow and aesthetics. Use cable ties if necessary.
8. Tancament del cas
Un cop instal·lats tots els components i gestionats els cables, torneu a fixar els panells laterals i fixeu-los amb els cargols de polze.
En funcionament
After completing the setup, connect your monitor, keyboard, mouse, and power cable to your assembled PC. Press the power button on the front panel to start your system. Ensure all peripherals are functioning correctly.
Manteniment
- Neteja: Regularly clean dust from the case interior and fan filters using compressed air or a soft brush. Dust buildup can impede airflow and lead to overheating.
- Flux d'aire: Ensure the case has adequate ventilation. Do not block the air intake or exhaust vents.
- Gestió de cables: Periodically check cable routing to ensure no cables are interfering with fans or obstructing airflow.
Resolució de problemes
- El sistema no s'encén: Check all power connections, including the power supply to the wall, motherboard 24-pin, and CPU 8-pin connectors. Ensure front panel power switch cable is correctly connected to the motherboard.
- Sobreescalfament: Verify that all fans are spinning correctly and are not obstructed. Clean any dust buildup. Ensure proper thermal paste application on the CPU cooler.
- Sense pantalla: Confirm that your graphics card is properly seated in its PCIe slot and that the monitor cable is securely connected to the graphics card.
- Ports USB que no funcionen: Check the front panel USB cable connection to the motherboard header.
Especificacions

Image: Diagram illustrating the dimensions of the Aigo Q2507 Mini-Tower PC Case: 26.5 cm (depth) x 16.5 cm (width) x 34 cm (height).
| Característica | Especificació |
|---|---|
| Marca | aigo |
| Nom del model | P2507 |
| Tipus de cas | Mini-torre |
| Color | Negre |
| Material | Steel Alloy, Tempered Glass (0.4mm SPCC) |
| Compatibilitat amb la placa base | M-ATX, Mini ITX |
| Badies d'unitats internes | 1 x SSD, 1 x HDD (Total 2) |
| Ranures d'expansió | 4 |
| Ports d'E / S frontals | 1 x USB 2.0, Microphone, Audio |
| Mètode de refrigeració | Aire |
| Fans recolzats | Side: 1 x 120 mm, Rear: 1 x 80 mm (Total 2) |
| Alçada màxima del refrigerador de la CPU | 150 mm |
| Longitud màxima de VGA | 250 mm |
| Dimensions (L x A x A) | 26.5 cm x 16.5 cm x 34 cm |
| Dispositius compatibles | Standard Desktop Components |
Garantia
This Aigo Q2507 Mini-Tower PC Case comes with a 12 mesos de garantia from the date of purchase. This warranty covers manufacturing defects and material faults under normal use. It does not cover damage caused by misuse, accidents, unauthorized modifications, or improper installation. Please retain your proof of purchase for warranty claims.
Suport
For technical assistance, warranty claims, or further inquiries, please contact your retailer or visit the official Aigo website for support resources. When contacting support, please have your product model (Q2507) and proof of purchase readily available.
Recursos en línia: www.aigo.com (Exampl'enllaç, si us plau, verifiqueu-ho oficialment weblloc)