
1. Introducció
Thank you for choosing the ACEZUK 7000A Car Jump Starter & 150PSI Air Compressor. This device is a versatile tool designed for emergency vehicle jump-starting, tire inflation, and as a portable power bank. Please read this manual thoroughly before use to ensure safe and optimal operation. Keep this manual for future reference.

Image 1.1: The ACEZUK 7000A Car Jump Starter and Air Compressor, ready for use with jumper cables.
2. Instruccions de seguretat
Always observe the following safety precautions to prevent injury or damage to the device and your vehicle:
- Do not operate the jump starter if the battery clamps o cables estan danyats.
- Ensure proper polarity when connecting the jumper cables to the vehicle battery (red to positive, black to negative). Reverse polarity can cause sparks and damage.
- No engegueu una bateria congelada.
- Mantingueu el dispositiu lluny dels nens.
- No exposeu el dispositiu a la pluja ni a temperatures extremes.
- Eviteu curtcircuitar el cl de la bateriaamps.
- Feu servir protecció ocular quan treballeu amb bateries de vehicles.
- Do not use the air compressor continuously for more than 10 minutes to prevent overheating. Allow it to cool down between uses.
- Guardeu el dispositiu en un lloc fresc i sec quan no l'utilitzeu.

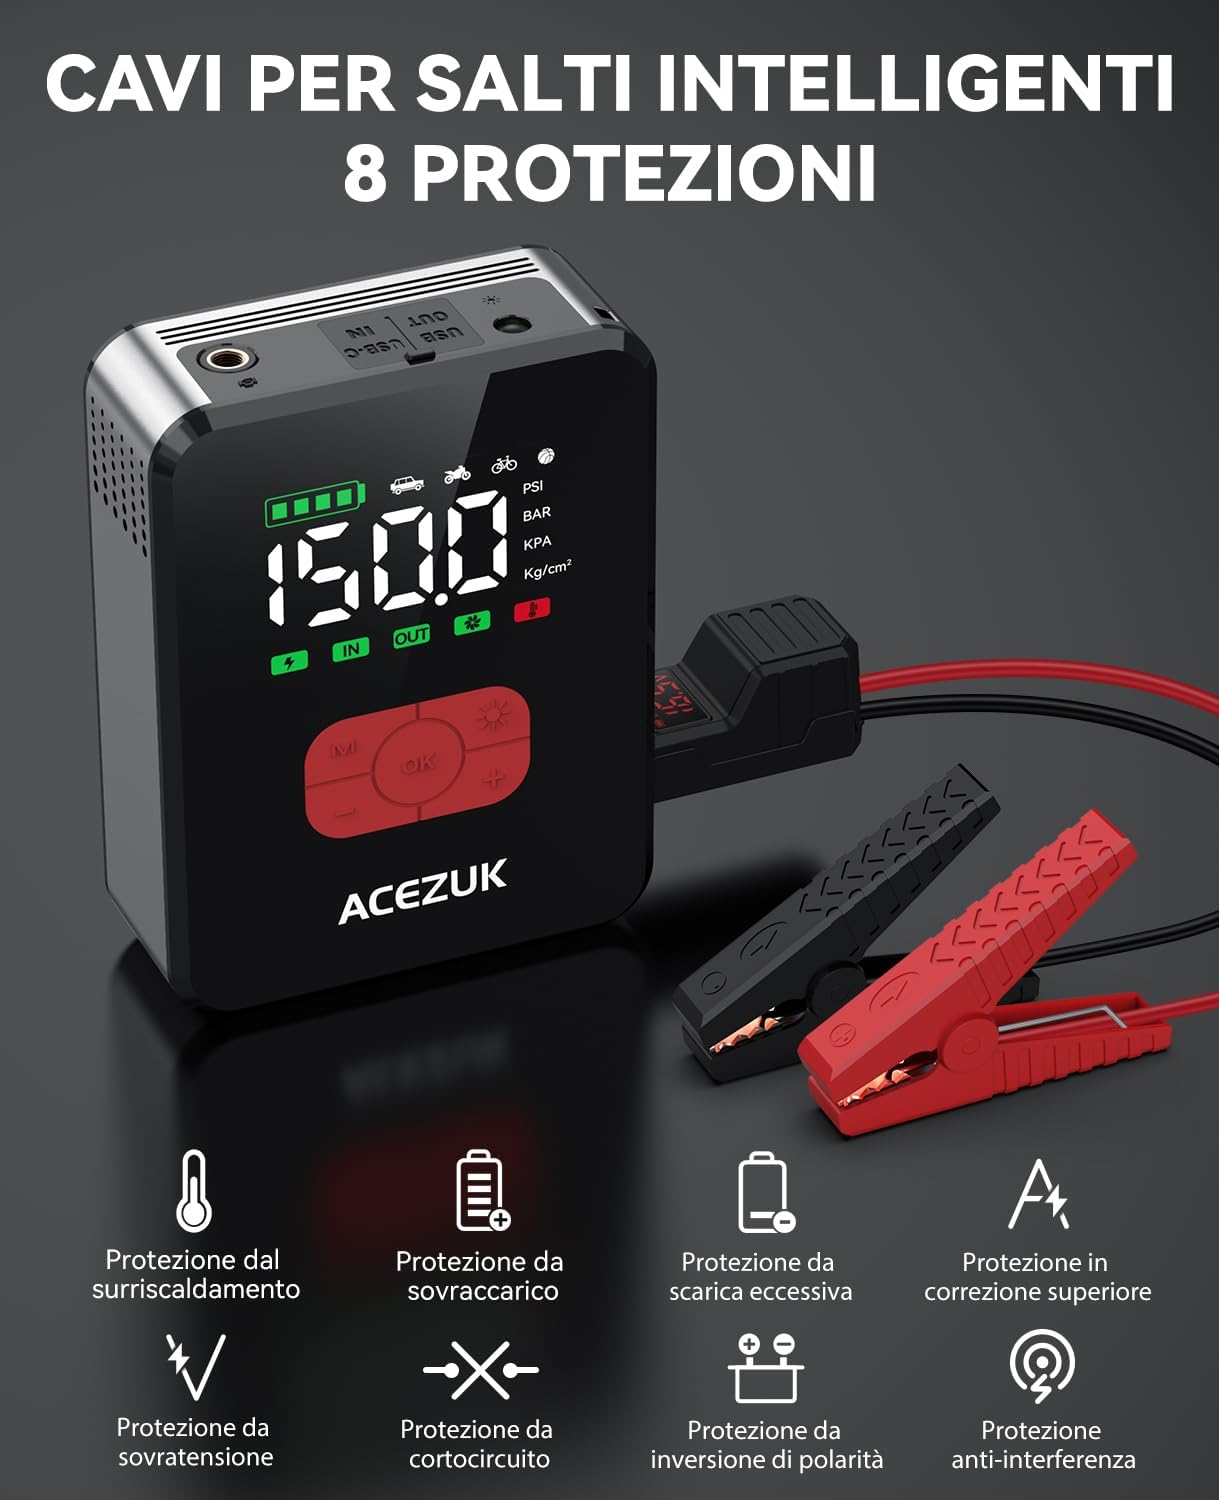
Image 2.1: The smart jumper cables feature 8 protection mechanisms for safe operation, including protection against overheating, overcharging, over-discharge, overcurrent, overvoltage, short circuits, reverse polarity, and anti-interference.
3. Contingut del paquet
Verifiqueu que tots els elements siguin presents al paquet:
- ACEZUK Jump Starter & Air Compressor Unit
- Cables de pont intel·ligents
- Mànega d'aire
- Cable de càrrega USB tipus C
- Various Nozzle Adapters (for balls, bicycles, inflatable toys)
- Bossa d'emmagatzematge
- Manual d'usuari (aquest document)

Image 3.1: The complete package contents, including the main unit, jumper cables, air hose, charging cable, various adapters, and a storage bag.
4. Producte acabatview
Familiarize yourself with the components and controls of your ACEZUK device.
4.1 Unitat principal
- 3.4" LCD Display: Shows battery level, tire pressure, and operating modes.
- Botons de control: M (Mode), OK (Power/Confirm), +/-(Adjust Pressure), Light (LED).
- Port d'arrencada ràpida: For connecting smart jumper cables.
- Port de la mànega d'aire: Per connectar la mànega d'aire.
- Ports de sortida USB (x2): Per carregar dispositius externs.
- Type-C Input Port (x1): Per carregar la unitat d'arrencada.
- Llum LED: Llanterna integrada amb múltiples modes.

Image 4.1: The control panel of the ACEZUK device, highlighting the LCD display and function buttons.

Image 4.2: The device's display provides real-time information on battery level and tire pressure.
5. Configuració
5.1 Càrrega del dispositiu
Before first use, fully charge the ACEZUK jump starter. Connect the provided USB Type-C cable to the device's Type-C input port and a suitable USB power adapter (not included). The LCD display will show the charging status. A full charge is indicated when the battery icon is full.
Important: Ensure the device is fully charged before attempting to jump-start a vehicle.
6. Instruccions de funcionament
6.1 Arrencada amb salt d'un vehicle
- Assegureu-vos que l'arrencador estigui carregat com a mínim al 50%.
- Turn off your vehicle's ignition and all accessories.
- Insert the smart jumper cable plug into the jump start port on the ACEZUK unit.
- Connecteu el cl vermell (+).amp al terminal positiu de la bateria del vostre vehicle.
- Connecteu el negre (-) clamp al terminal negatiu de la bateria del vostre vehicle.
- Once connected, the smart cable indicator light will show its status. If it's green, it's safe to proceed. If it's red or flashing, check connections and battery status.
- Engega el motor del teu vehicle.
- Once the engine starts, immediately remove the jumper cables from the vehicle battery (black first, then red), and then disconnect the cable from the jump starter unit.
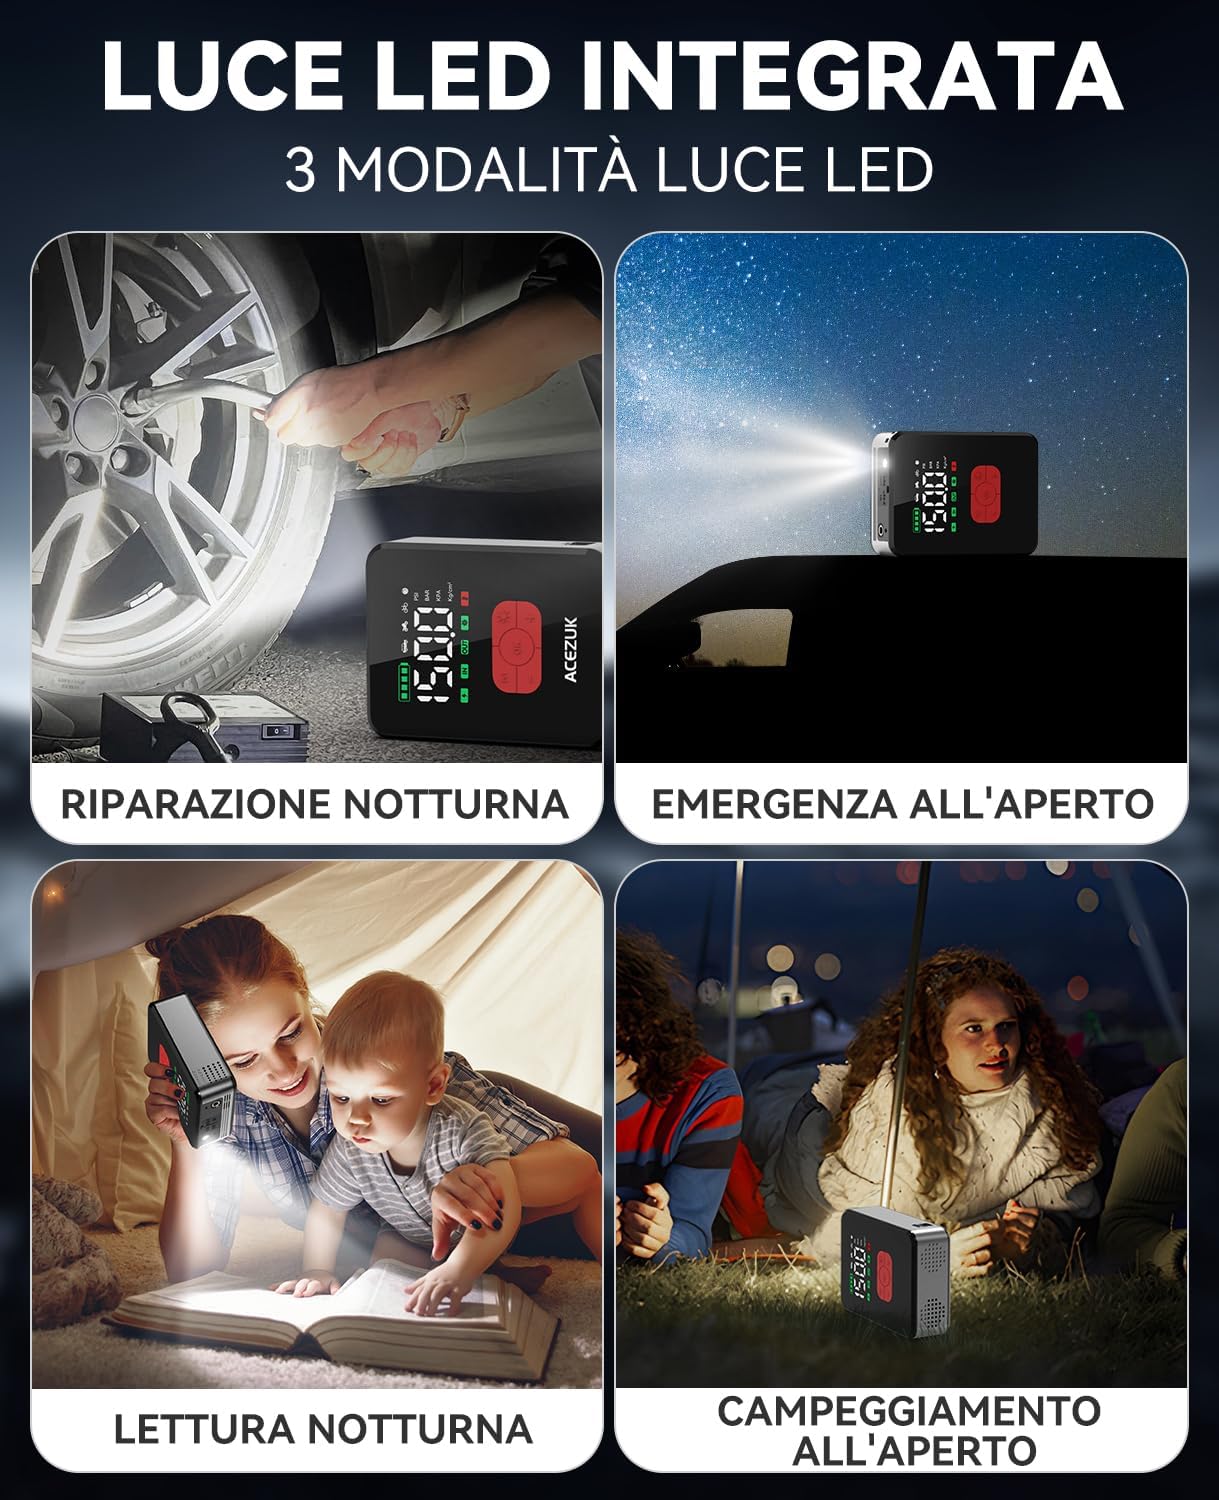
Image 6.1: The jump starter connected to a car battery, illustrating the correct setup for jump-starting.
6.2 Ús del compressor d'aire
- Connect the air hose to the air hose port on the ACEZUK unit.
- Attach the other end of the air hose to the tire valve or use the appropriate nozzle adapter for other inflatables.
- Press the "OK" button briefly to turn on the compressor. The LCD will display the current pressure.
- Press the "M" button to cycle through inflation modes (Car, Motorcycle, Bicycle, Ball, Manual). Each mode has a preset pressure range.
- Use the "+" and "-" buttons to adjust the target pressure. Press briefly to change by small increments, or long-press for rapid adjustment.
- Press the "OK" button to start inflation. The compressor will automatically stop once the target pressure is reached.
- Disconnect the air hose from the tire/inflatable and the unit.
Note: Do not operate the compressor for more than 10 minutes continuously. Allow a 10-minute cool-down period after each 10 minutes of use.

Image 6.2: The device actively inflating a car tire using its integrated air compressor function.

Image 6.3: Step-by-step guide for using the air compressor to inflate a tire.

Imatge 6.4: acabatview of preset inflation modes and their respective pressure ranges.
6.3 Ús de la llum LED
The integrated LED light has three modes: Bright, Strobe, and SOS.
- Press the Light button briefly to turn on the LED light (Bright mode).
- Press again to cycle through Strobe mode.
- Premeu una tercera vegada per al mode SOS.
- Press a fourth time to turn off the LED light.
Imatge 6.5: Ex.amples of the LED light's utility in various situations, including night repairs and outdoor activities.
6.4 Ús com a bateria externa
The device can charge other electronic devices via its USB output ports.
- Connect your electronic device (smartphone, tablet, etc.) to one of the USB output ports using a compatible USB cable.
- The ACEZUK unit will automatically begin charging your device.

Image 6.6: The device functioning as a portable power bank, charging various electronic gadgets.
7. Manteniment
- Netegeu el dispositiu amb un drap sec i suau. No utilitzeu productes químics agressius ni netejadors abrasius.
- Recarrega el dispositiu cada 3-6 mesos, fins i tot si no l'utilitzes, per mantenir la bateria en bon estat.
- Store the device in a cool, dry environment, away from direct sunlight and extreme temperatures.
- Inspect jumper cables and air hose for any damage before each use.
8. Solució De Problemes
| Problema | Causa possible | Solució |
|---|---|---|
| El vehicle no arrenca després de l'arrencada auxiliar. | Low charge on jump starter; incorrect cable connection; vehicle battery severely damaged; other vehicle issues. | Ensure jump starter is fully charged. Check cable connections for correct polarity. If issues persist, consult a mechanic. |
| El compressor d'aire no s'infla. | Air hose not properly connected; target pressure not set; device not turned on; hose or nozzle leak. | Ensure all connections are secure. Set target pressure and press OK to start. Check for leaks in the hose or nozzle. |
| La pantalla LCD està en blanc. | Device is off; battery is completely drained. | Press the OK button to turn on. Charge the device if the battery is drained. |
| El dispositiu no carrega dispositius externs. | Device battery low; incorrect USB cable; external device issue. | Charge the ACEZUK unit. Use a different USB cable or try another external device. |
9. Especificacions
| Característica | Detall |
|---|---|
| Marca | ACEZUK |
| Número de model | M06 |
| Corrent màxima | 7000A |
| Pressió del compressor d'aire | Fins a 150 PSI |
| Tipus de bateria | Ió de liti |
| Voltage | 12 Volts |
| Compatible Vehicle Types | Tots els motors de gasolina, fins a motors dièsel de 12L |
| Llum LED | 600 Lumens, 3 Modes (Bright, Strobe, SOS) |
| Mostra | LCD de 3.4 polzades |
| Pes | 1200 grams |
| Sortida USB | 2 ports |
| Entrada tipus C | 1 port |
10. Garantia i Suport
ACEZUK products come with a standard manufacturer's warranty. For specific warranty details, please refer to the warranty card included in your package or contact ACEZUK customer support.
If you encounter any issues or have questions regarding your product, please contact our customer support team through the retailer where you purchased the product or visit the official ACEZUK weblloc per obtenir informació de contacte.
Conserveu el vostre comprovant de compra per a reclamacions de garantia.