
1. Introducció
This manual provides detailed instructions for the installation, operation, and maintenance of your REDTIGER F7N Elite 4K HDR Dash Cam. This device features a front 4K camera and a rear 1080P camera, STARVIS 2 Sensor, 5.8GHz WiFi, voice control, and includes a 128GB SD card and an OBD hardwire kit for continuous power and parking monitoring. Please read this manual thoroughly before use to ensure proper functionality and safety.
2. Contingut del paquet
Verifiqueu que tots els elements siguin presents al paquet:
- REDTIGER F7N Elite Front Dash Cam
- Rear Camera with connection cable
- OBD Hardwire Kit (Type-C USB)
- Targeta MicroSD de 128 GB
- Muntatge del parabrisa
- Manual d'usuari
- Cable Clips (if included)
- Pry Tool (if included)
3. Producte acabatview
Familiarize yourself with the main components of the dash cam system.
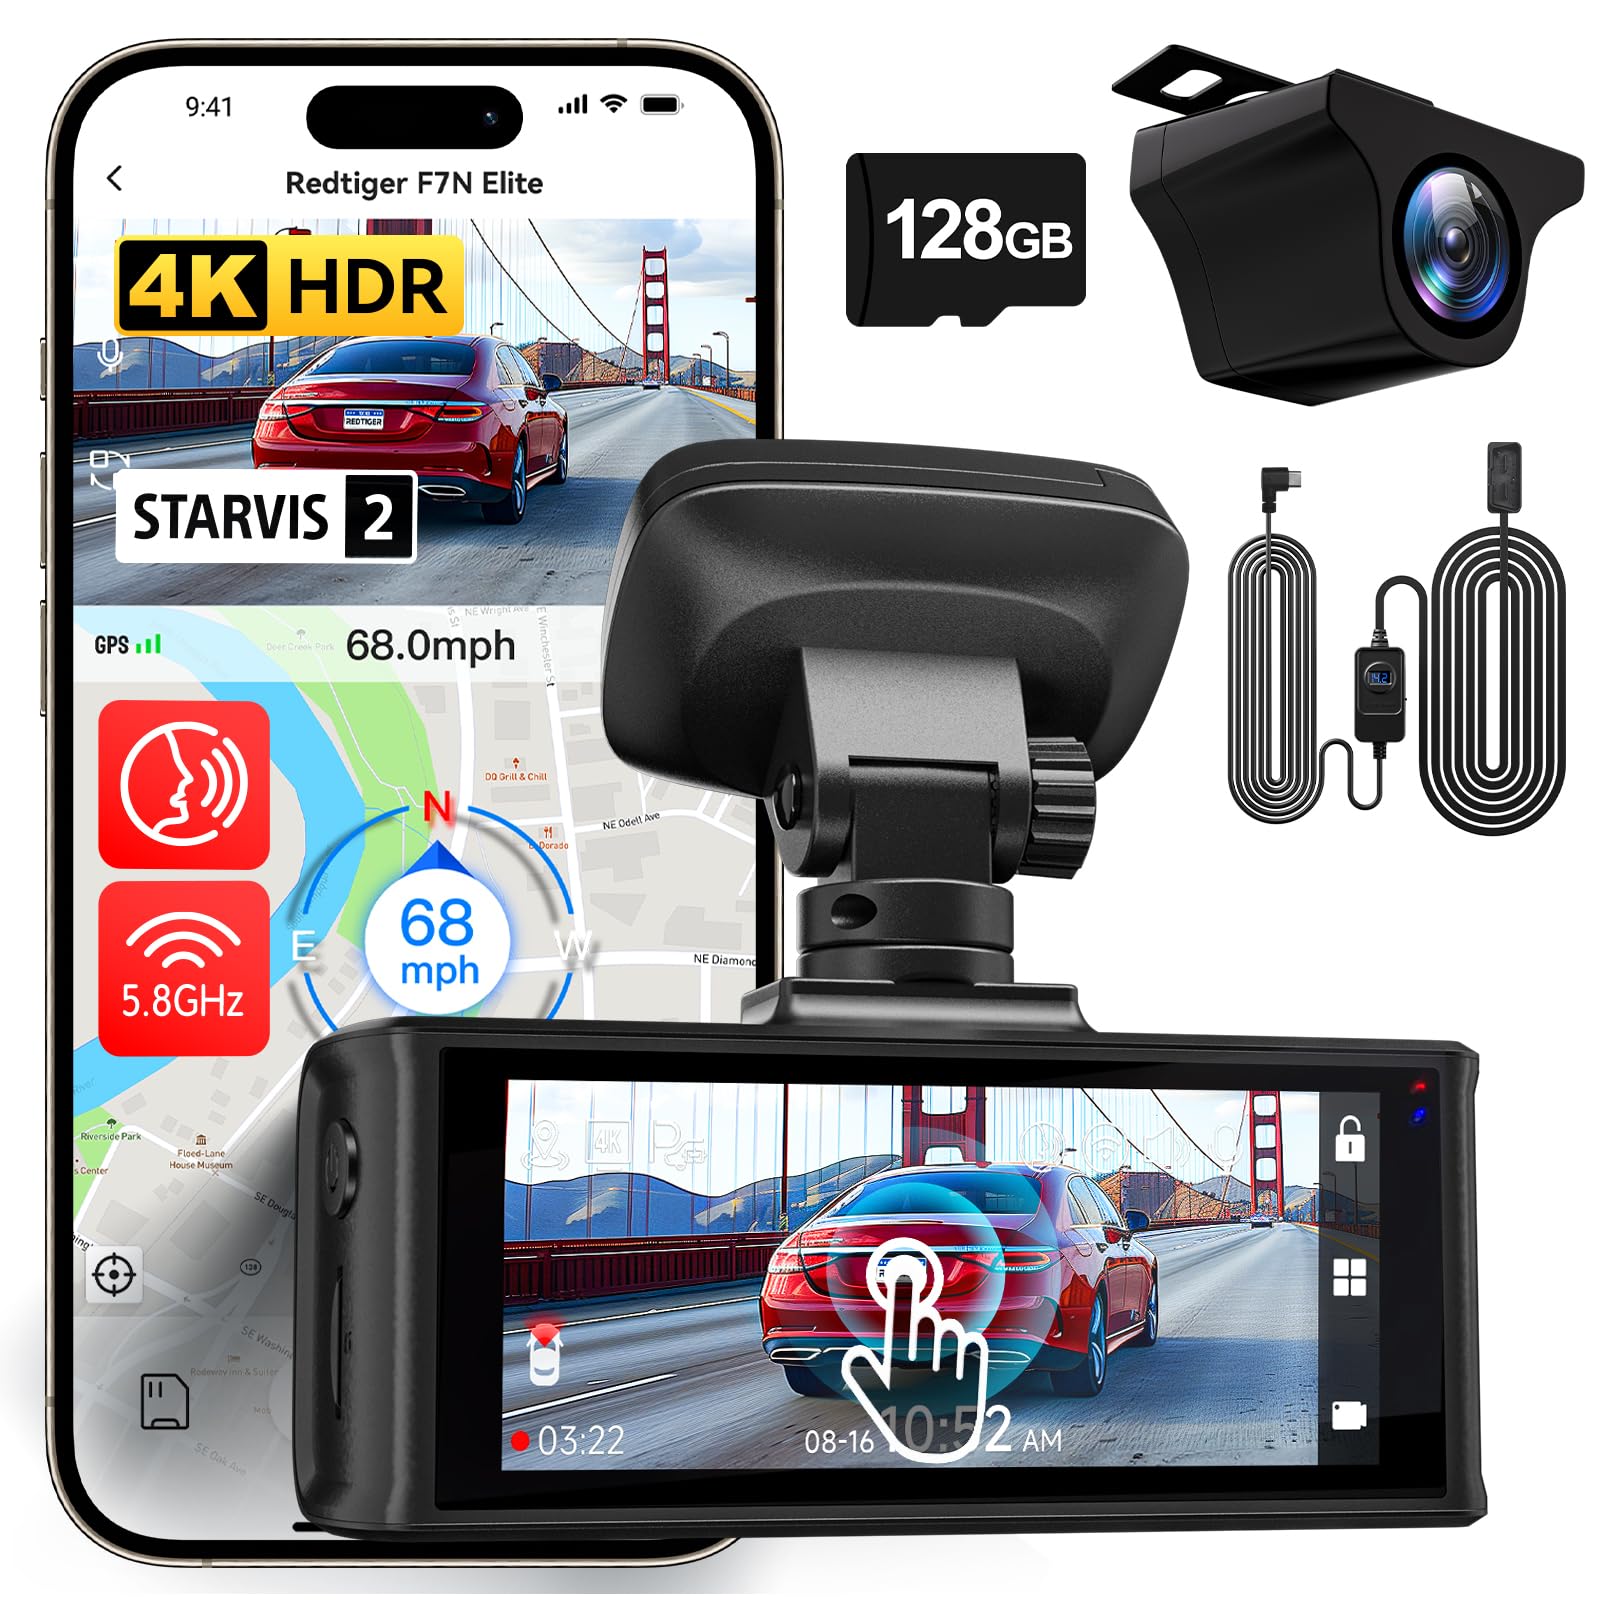
Imatge: Més deview of the REDTIGER F7N Elite Dash Cam, showing the front camera unit and the rear camera.
Càmera frontal
- Lent: Records 4K video.
- Visualització: Touchscreen for interaction.
- Ranura de muntatge: For attaching to the windshield mount.
- Port d'alimentació: Type-C USB for power input.
- Port de la càmera posterior: For connecting the rear camera.
- Ranura per a targeta MicroSD: Per a la inserció de targetes de memòria.
- Micròfon: For audio recording and voice control.
Càmera posterior
- Lent: Records 1080P video.
- Cable de connexió: For connecting to the front camera.
Kit de cablejat OBD
- OBD Plug: Es connecta al port OBD-II del vehicle.
- Hardwire Kit Switch: For adjusting low voltage configuració de protecció.
- Type-C USB Output: Connects to the dash cam.

Imatge: Detallada view of the OBD Hardwire Kit, showing the OBD plug, the hardwire kit switch with voltage display, and the Type-C USB connector.
4. Configuració i instal·lació
4.1. Inserció de la targeta MicroSD
- Assegureu-vos que la càmera del salpicader estigui apagada.
- Insert the provided 128GB MicroSD card into the MicroSD card slot until it clicks into place.
- Nota: For optimal performance, format the MicroSD card within the dash cam settings before first use and periodically thereafter.
4.2. Instal·lació de la càmera frontal
- Netegeu la zona del parabrisa on es muntarà la càmera del salpicader.
- Attach the windshield mount to the front dash cam.
- Traieu la pel·lícula protectora de la coixinet adhesiva del suport.
- Premeu fermament el suport contra el parabrisa, idealment darrere de la part posteriorview mirall, garantint una claredat view of the road. Hold for 30 seconds.
- Adjust the camera lens angle to capture the road ahead.
4.3. Instal·lació de la càmera posterior
- Munteu la càmera posterior al parabrisa posterior, assegurant una visió clara view.
- Route the rear camera cable to the front dash cam. Use the provided cable clips to secure the cable along the headliner and A-pillar.
- Connect the rear camera cable to the designated port on the front dash cam.
4.4. Power Connection with OBD Hardwire Kit
- Locate your vehicle's OBD-II port (usually under the dashboard on the driver's side).
- Plug the OBD plug of the hardwire kit into the vehicle's OBD-II port.
- Route the Type-C USB cable from the hardwire kit to the front dash cam's power input port.
- Secure any excess cable.
- Adjusting Low Voltage Protecció: The OBD Hardwire Kit Switch allows adjustment of the vehicle battery's low voltage cutoff. Refer to the image below for settings. Slide the switch to the desired voltage protection level (e.g., 12.0V for 12V vehicles, 24.0V for 24V vehicles). This prevents the dash cam from draining your car battery when parked.

Image: Diagram illustrating the adjustable low voltage protection settings on the OBD Hardwire Kit switch for both 12V and 24V vehicles.
5. Instruccions de funcionament
5.1. Encendre/apagar
- The dash cam will automatically power on and begin recording when the vehicle's ignition is turned on (with OBD hardwire kit).
- It will power off automatically when the ignition is turned off, or enter parking monitoring mode if configured.
5.2. Enregistrament bàsic
- Upon power-on, the dash cam automatically starts continuous loop recording.
- Front camera records in 4K (3840x2160) and rear camera in 1080P (1920x1080).

Image: Illustration of the dual recording capability, showing the front camera capturing 4K footage and the rear camera capturing 1080P footage simultàniament.
5.3. Interfície de pantalla tàctil
Navigate through settings and playback using the touchscreen display.

Image: Depiction of the dash cam's touchscreen interface and examples of voice commands like "Take Picture", "Lock the Video", and "Show front camera".
5.4. Control per veu
The dash cam supports voice commands for hands-free operation. Common commands include:
- "Fes una foto"
- "Bloqueja el vídeo"
- "Mostra la càmera frontal"
- "Mostra la càmera posterior"
- "Activa el Wi-Fi"
- "Desactiva el Wi-Fi"
5.5. Wi-Fi Connectivity and App
The dash cam features 5.8GHz Wi-Fi for faster data transfer to your smartphone via the REDTIGER app.
- Download the "REDTIGER" app from the Apple App Store or Google Play Store.
- Enable Wi-Fi on the dash cam (via touchscreen or voice command).
- Connecteu el vostre telèfon intel·ligent a la xarxa Wi-Fi de la càmera del salpicader (l'SSID i la contrasenya es mostren a la pantalla de la càmera del salpicader).
- Utilitzeu l'aplicació per view viu footage, descarregar gravacions i ajustar la configuració.

Image: Visual representation of 5.8GHz Wi-Fi for faster downloads and GPS tracking functionality, including route and speed display on a map.
5.6. Seguiment GPS
The built-in GPS module records driving route and speed data, which can be viewed via the REDTIGER app or a dedicated PC player.
5.7. Parking Monitoring (24H/48H)
With the OBD hardwire kit, the dash cam can provide continuous parking surveillance.
- Enregistrament activat per sensor G: If the G-sensor detects a sudden impact while parked, the dash cam will automatically record a locked video segment.
- Gravació per lapse de temps: Condenses hours of parking footage into short, reviewable clips, saving storage space.

Image: Graphic indicating 24-hour and 48-hour parking monitoring capabilities, powered by the OBD hardwire kit.

Image: Illustration of key protection features including G-Sensor for impact detection, Loop-Recording for continuous coverage, and Time-Lapse for efficient review of long periods.
6. Característiques clau
- 4K HDR Front Camera: Captures high-resolution video with improved clarity in varying light conditions.
- Càmera posterior de 1080P: Proporciona un clar view de la part posterior del vostre vehicle.
- STARVIS 2 Sensor: Enhances low-light performance for clearer night recordings.
- Wi-Fi de 5.8 GHz: Offers faster video download speeds to your mobile device.
- Control de veu: Allows hands-free operation for common functions.
- Sensor G: Detecta automàticament les col·lisions i bloqueja el vídeo actual file per evitar la sobreescriptura.
- Enregistrament en bucle: Continuously records by overwriting the oldest unlocked footage quan la targeta de memòria estigui plena.
- Gravació per lapse de temps: Compresses long periods of recording into short videos, useful for parking surveillance.
- OBD Hardwire Kit with Low Voltage Protecció: Provides continuous power for parking monitoring while protecting your vehicle's battery from excessive discharge.
- Seguiment GPS: Records location and speed data.
7. Manteniment
7.1. Cura de la targeta MicroSD
- Format the MicroSD card monthly to maintain optimal performance and prevent data corruption.
- Replace the MicroSD card every 6-12 months, as continuous overwriting can degrade its lifespan.
7.2. Cleaning the Dash Cam
- Use a soft, dry cloth to clean the camera lenses and display screen.
- No utilitzeu netejadors abrasius ni dissolvents.
7.3. Actualitzacions de firmware
Consulta l'oficial de REDTIGER webVisiteu el lloc web periòdicament per obtenir actualitzacions de firmware per assegurar-vos que la càmera del salpicader tingui les darreres funcions i correccions d'errors.
8. Solució De Problemes
8.1. La càmera del salpicader no s'encén
- Ensure the OBD hardwire kit is securely connected to both the vehicle's OBD-II port and the dash cam.
- Check the vehicle's ignition status.
- Verifica el volum de la bateria del vehicletage està per sobre del baix voltage protection threshold set on the hardwire kit.
8.2. Recording Issues (e.g., freezing, corrupted files)
- Format the MicroSD card within the dash cam settings.
- Ensure the MicroSD card is a high-speed (Class 10 or U3) card.
- Replace the MicroSD card if issues persist.
8.3. Problemes de connexió Wi-Fi
- Assegureu-vos que el Wi-Fi estigui activat a la càmera del salpicader.
- Confirm you are connecting to the correct Wi-Fi network displayed on the dash cam.
- Reinicieu tant la càmera del salpicader com el telèfon intel·ligent.
8.4. El control per veu no respon
- Speak clearly and directly towards the dash cam.
- Ensure the vehicle's interior is not excessively noisy.
- Check dash cam settings to ensure voice control is enabled.
9. Especificacions
| Característica | Detall |
|---|---|
| Marca | TIGRE VERMELL |
| Nom del model | Elit |
| Resolució de vídeo frontal | 4K (3840x2160) |
| Resolució de vídeo posterior | 1080p (1920x1080) |
| Tecnologia de sensors òptics | CMOS (STARVIS 2 Sensor) |
| Camp de View | 170 graus (davant i darrere) |
| Tecnologia de connectivitat | Wi-Fi de 5.8 GHz |
| Mètode de control | Voice, Touchscreen |
| Tipus de muntatge | Muntatge del parabrisa |
| Tipus de memòria flash | MicroSD Card (128GB included) |
| Max Flash Memory Supported | 128 GB |
| Tipus de visualització | Pantalla tàctil |
| Estàndards suportats | H.264, H.265, USB |
| Velocitat de fotogrames | 24, 30, 60 fps (depending on resolution) |
| Entrada de potència | 12V-24V to 5V (via OBD Hardwire Kit) |
10. Garantia i Suport
For warranty information and technical support, please refer to the official REDTIGER weblloc web o contacteu directament amb el seu servei d'atenció al client. Conserveu el rebut de compra com a comprovant de compra.
REDTIGER Official Weblloc: www.redtiger.com
11. Recursos de vídeo
No s'han trobat vídeos oficials rellevants del producte del venedor a les dades proporcionades per incrustar en aquest manual.

