ANCHEER ANCHEER 26" Commuter Electric Bicycle
ANCHEER 26" Commuter Electric Bicycle User Manual
Model: 48V 500Wh EBike
Introducció
Welcome to the ANCHEER Electric Bicycle user manual. This guide provides essential information for the safe assembly, operation, and maintenance of your new 26-inch commuter electric bicycle. Please read this manual thoroughly before your first ride to ensure optimal performance and safety. Your ANCHEER e-bike is designed for comfortable and efficient commuting, featuring a powerful 48V 500Wh motor, a long-range removable battery, and a responsive 7-speed gear system.

Figure 1: ANCHEER 26" Commuter Electric Bicycle
Informació de seguretat
Your safety is paramount. Always adhere to local traffic laws and regulations. Wear a helmet and appropriate safety gear when riding. Perform regular safety checks as outlined in the maintenance section.
- Porteu sempre un casc homologat.
- Ensure tires are properly inflated before each ride.
- Check brake functionality and adjust if necessary.
- Familiaritzeu-vos amb tots els controls abans de conduir.
- No conduïu sota els efectes de l'alcohol o les drogues.
- Avoid riding in adverse weather conditions.
- Mantingueu les mans i els peus allunyats de les parts mòbils.
Muntatge i muntatge
The following steps detail the assembly process for your ANCHEER electric bicycle. For a visual guide, please refer to the assembly video provided below.
Video 1: ANCHEER Electric Bike Assembly Guide. This video demonstrates the complete assembly process from unboxing to final checks.
1. Desembalatge i identificació de components
Carefully open the package and remove all components. Verify that all parts listed in the packing list are present. Remove all protective packaging materials from the bike frame and components.

Figure 2: Steps for installing the front basket, including putting on the shim, buckling it on the handlebar, tightening screws, aligning the slot track, and pushing the lock button.
2. Instal·lació del manillar
Insert the handlebar stem into the fork tube. Ensure the stem is aligned with the front wheel. Tighten the bolts securely. Important: The adjustment range of the handlebar stem should not exceed the limit line marked on the stem.
3. Rear Fender and Rack Installation
Attach the rear fender to the designated mounting points on the frame. Secure it with the provided screws. Then, install the rear rack, ensuring both sides are aligned with the threaded holes before tightening.
4. Controller and Battery Installation
Install the controller onto its mounting plate. Slide the removable battery along its rail on the rear rack until it clicks firmly into place, connecting it to the controller. Ensure the battery is securely locked.

Figure 3: Location of the 48V 10.4AH battery power switch. "O" is power off, "-" is power on. It can be switched off when the e-bike is not in use.
5. Instal·lació del seient
Insert the seat post into the seat tube. Adjust the seat height to a comfortable riding position. Important: When adjusting the height of the seat tube, do not exceed the marked safety scale range.
6. Instal·lació de la roda davantera
Turn the e-bike upside down, resting it on the compression-resistant foam to protect the handlebars. Remove the long bolt from the fork (it's for protection during shipping and not needed for installation). Unplug the stopper from the front wheel. Carefully align the front wheel with the fork dropouts and insert the quick-release skewer. Ensure the quick-release is properly installed and tightened. After installation, turn the wheel to ensure smooth rotation; adjust the gap on both sides of the disc brake appropriately if needed.
7. Kickstand Installation
Attach the kickstand to the designated mounting points near the rear wheel. Securely tighten the bolts.
8. Headlight and Front Fender Installation
Mount the headlight to the front fork using the provided hardware. Ensure it is securely fastened and pointed correctly. Then, install the front fender, making sure to use the washers as shown in the diagram for proper spacing and stability.
9. Bell and Front Reflector Installation
Install the bell on the handlebar in an easily accessible position. Attach the front reflector to the handlebar or front fork, ensuring it is visible.
10. Instal·lació del pedal
Identify the left (L) and right (R) pedals. The right pedal screws in clockwise, and the left pedal screws in counter-clockwise. Carefully thread each pedal into its respective crank arm and tighten with a wrench.
Instruccions de funcionament
Powering On Your E-Bike
To power on your ANCHEER electric bicycle, first turn on the battery power switch located on the battery pack. Then, press and hold the power button on the LCD digital display for a few seconds until the display illuminates.
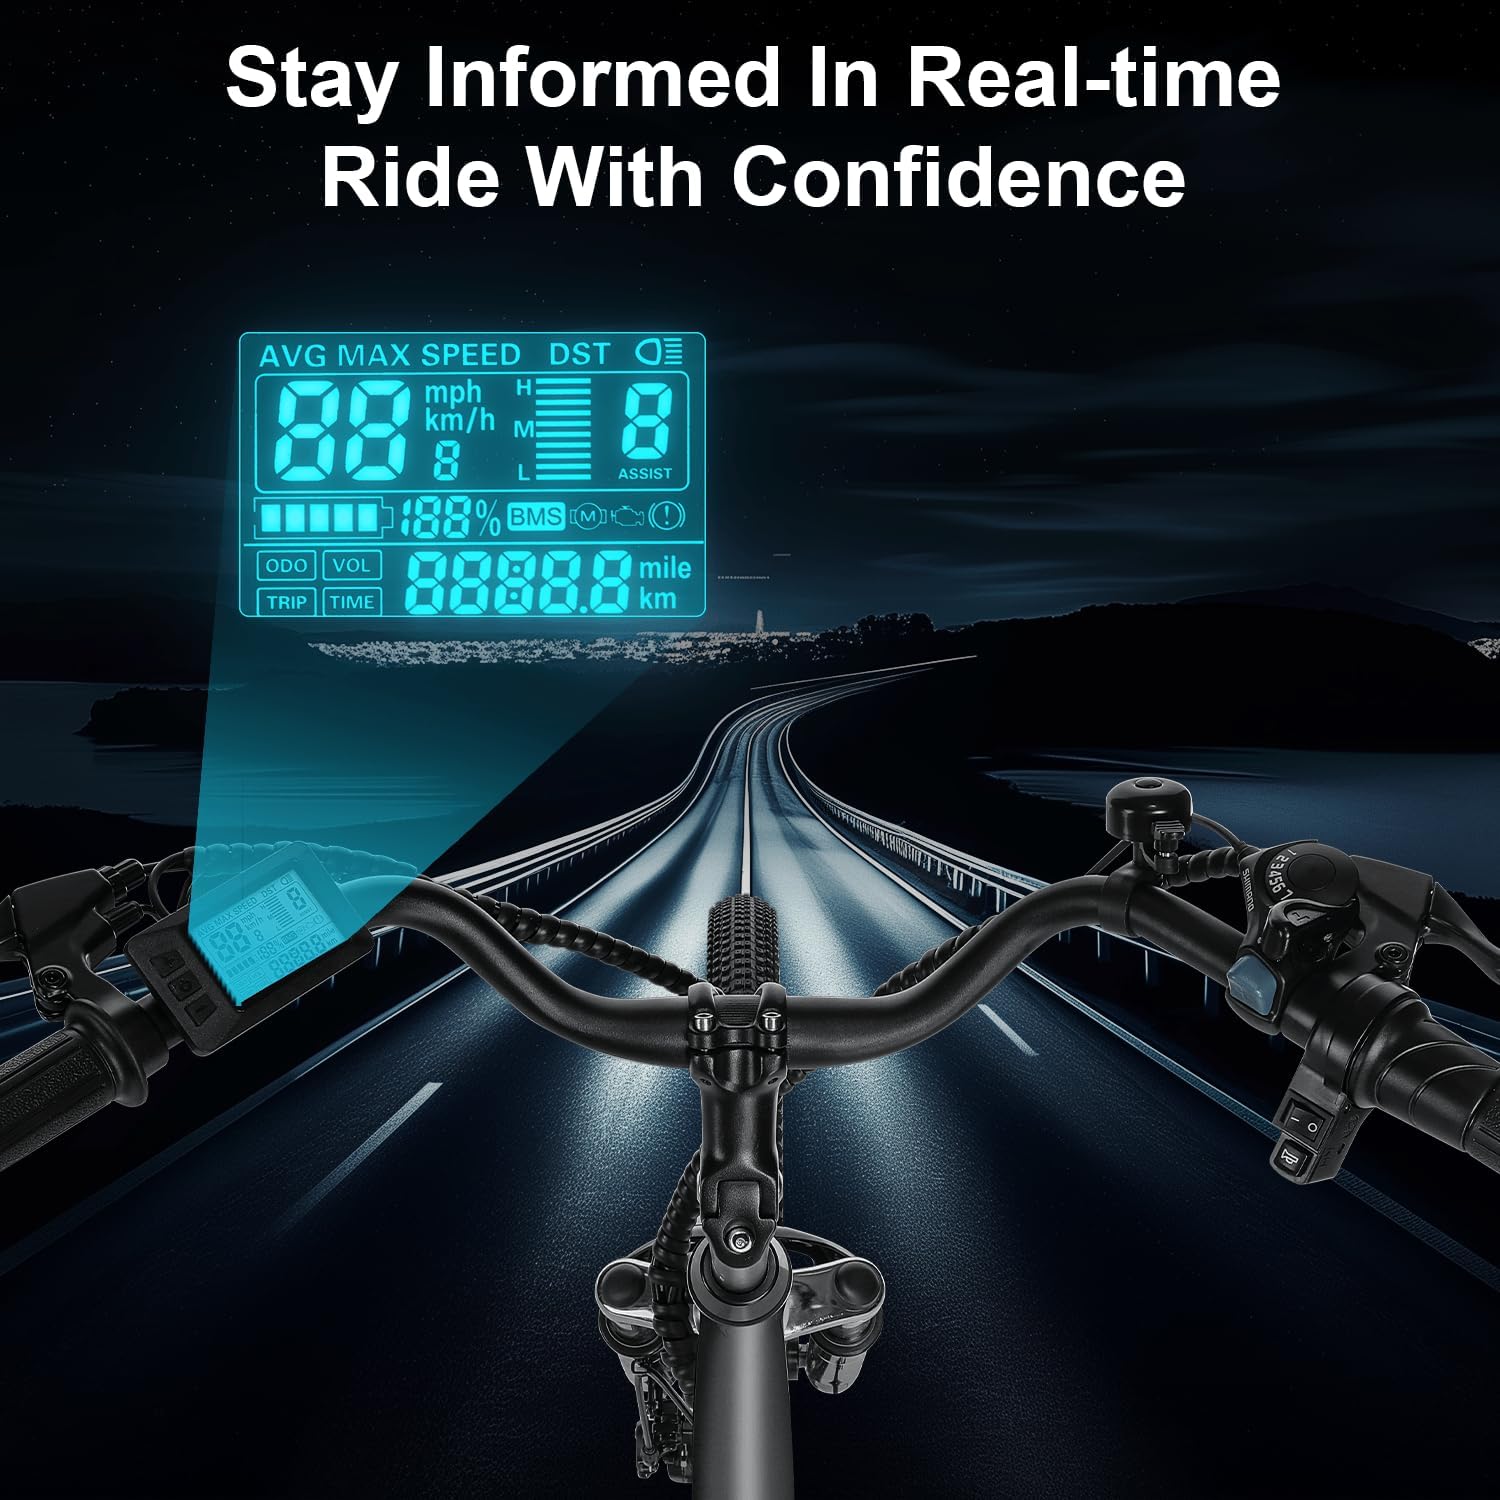
Figure 4: LCD Digital Display showing battery level, current speed, assist levels, mileage, and cruise control status.
Riding Modes and Pedal Assist
Your ANCHEER e-bike offers multiple riding modes for a versatile experience:
- Pure Electric Cruise Mode: Max 20 MPH.
- Assistència a la marxa: Provides low-speed assistance for walking alongside the bike.
- 5 Levels Pedal Assist (PAS Mode): Provides motor assistance while pedaling, with adjustable levels up to Max 20 MPH. Mode 0 indicates no assistance.
- Stepless Throttle Mode: Allows for acceleration without pedaling.
- Classic Bicycle Mode: Ride as a traditional bicycle with no electric assistance.

Figure 5: Diagram illustrating the four working modes: Walk Assist, Throttle Mode, Pedal Assist (5 levels), and Bicycle Mode, along with Cruise Control.
Control de creuer
In pure electric mode, when maintaining a stable speed for 8-10 seconds, the automatic cruise mode is engaged, allowing for effortless riding without continuous throttle input.

Figure 6: Visual representation of the effortless cruise control feature.
Característiques i components clau
Sistema de bateries
The ANCHEER e-bike is equipped with an advanced 48V/10.4Ah removable battery, providing a remarkable range of up to 60 miles per charge. The lightning-fast charger ensures a quick full charge time of 3-3.5 hours.

Figura 7: Detallada view of the 48V/10.4Ah battery with 500Wh capacity and fast charging capability.
Motor
Experience powerful and efficient rides with the 350W brushless motor. This motor provides high speed and low consumption, ensuring a smooth and reliable performance.

Figure 8: Illustration of the 350W brushless motor, highlighting its 500W peak power, 20mph top speed, and 40N.m torque.
Suspension and Comfort
The e-bike features a suspension fork and an extra-thick cushion seat with shock absorption springs, providing an exceptional riding experience and reducing fatigue on various terrains.

Figure 9: Close-up of the front fork suspension and the extra-thick cushion seat with shock absorption springs, designed for enhanced comfort.
Braking System and Gears
Equipped with dual disc brakes for reliable stopping power and a 7-speed gear system for seamless shifting, allowing you to efficiently and freely ride in various conditions.

Figura 10: View of the dual disc brake system and the 7-speed gear shifter for efficient and free riding.
Manteniment
Un manteniment regular garanteix la longevitat i el funcionament segur de la teva bicicleta elèctrica.
- Pneumàtics: Check tire pressure weekly. Recommended pressure is usually indicated on the tire sidewall.
- Frens: Inspect brake pads for wear and ensure proper brake lever tension. Adjust as needed.
- Cadena: Keep the chain clean and lubricated to prevent rust and ensure smooth gear changes.
- Bateria: Charge the battery regularly, even if not in use, to maintain its health. Store in a cool, dry place.
- Neteja: Netegeu la bicicleta regularment amb anuncisamp drap. Eviteu rentar directament els components elèctrics a alta pressió.
- Elements de fixació: Periodically check all bolts and nuts for tightness, especially after the first few rides.
Resolució de problemes
Aquesta secció tracta problemes comuns que podeu trobar.
| Problema | Causa possible | Solució |
|---|---|---|
| La bicicleta elèctrica no s'encén | Battery switch off; Battery not charged; Loose connections | Turn on battery switch; Charge battery; Check all electrical connections. |
| El motor no ajuda | PAS level 0; Throttle not engaged; Motor connection issue | Increase PAS level on display; Engage throttle; Check motor cable connection. |
| Brakes squealing or ineffective | Worn brake pads; Misaligned calipers; Contaminated rotors | Inspect/replace brake pads; Adjust caliper alignment; Clean rotors with disc brake cleaner. |
| Les marxes no canvien suaument | Derailleur misalignment; Dirty chain; Worn chain/cassette | Adjust derailleur; Clean and lubricate chain; Consult a bike mechanic for worn components. |
Especificacions
| Característica | Especificació |
|---|---|
| Tipus de bicicleta | Bicicleta elèctrica |
| Interval d'edat (descripció) | Adult |
| Marca | ANCHEER |
| Nombre de velocitats | 7 |
| Color | Blanc |
| Contingut d'energia de la bateria de liti | 499 Watt Hours (48V/10.4Ah) |
| Fabricant | Shenzhen Vanpowers Intelligent Technology Co., Ltd. |
| Alçada recomanada | 1,25 m - 1,98 m |
| Load Capacity Max | 265 lliures |
| Pes de la bicicleta | Aprox. 61 lliures |

Figure 11: Visual representation of e-bike dimensions and key specifications.
Garantia i Suport
ANCHEER provides a limited warranty for its electric bicycles. Please refer to the warranty card included with your product for specific terms and conditions. For technical support, troubleshooting assistance, or parts inquiries, please contact ANCHEER Customer Service. Contact information can be found on the official ANCHEER weblloc web o la documentació de la compra.

Figure 12: Certifications for the ANCHEER e-bike components, including UL 62368-1 for Charger, ISO 13849 for Display, UL 2271 for Battery, and UL 2849 for Ebike and Display.
Ask a question about this manual
Ask about setup, troubleshooting, compatibility, parts, safety, or missing instructions. Manuals+ will review the question and use this page’s manual context to help answer it.