
1. Informació important de seguretat
Please read all instructions carefully before using the KEENSTAR 20Bar Espresso Machine. Retain this manual for future reference.
- Assegureu-vos que l'aparell estigui connectat a una presa de corrent amb connexió a terra i el volum correctetage.
- No submergiu la màquina, el cable d'alimentació ni l'endoll en aigua ni en altres líquids.
- Keep hands and cords away from hot surfaces, such as the steam wand and heated cup holder.
- Desendolleu la màquina abans de netejar-la i quan no l'utilitzeu.
- Aquest aparell només és per a ús domèstic. No utilitzar a l'aire lliure.
- Do not operate the machine with a damaged cord or plug. Contact customer service for repairs.
2. Producte acabatview
The KEENSTAR 20Bar Espresso Machine is designed to deliver rich, aromatic espresso, hot coffee, and cold brew beverages. It features a 20-bar professional pump, a powerful steam wand for milk frothing, and an intuitive touch screen interface.

Image: KEENSTAR 20Bar Espresso Machine, Z-Silver model, showcasing its sleek design and touch screen interface.
3. Components
The following components are included with your KEENSTAR Espresso Machine:
- Unitat de màquina d'espresso
- Portafiltre amb nansa
- 1-Shot Filter Basket
- 2-Shot Filter Basket
- cullera de cafè i Tamper
- Safata de degoteig extraïble
- Water Tank (40oz / 1.2L capacity)
- Manual d'instruccions
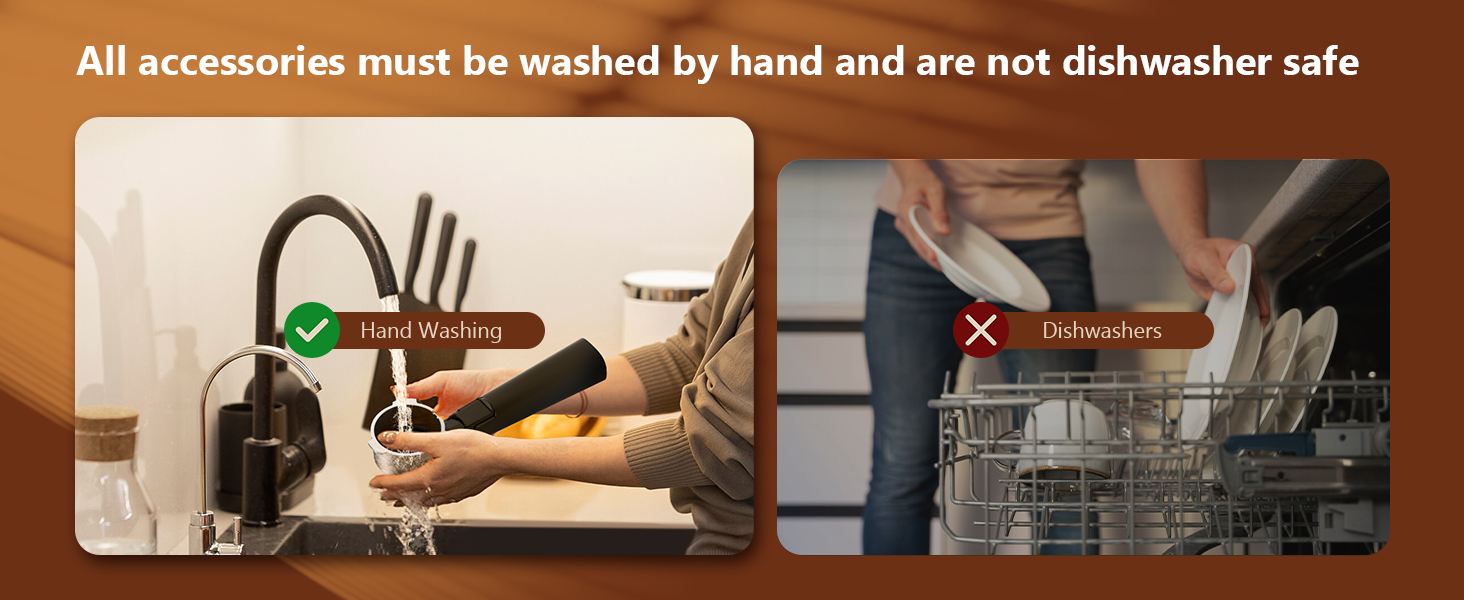
Image: Diagram illustrating the various parts and included accessories of the espresso machine, such as the control panel, water tank, steam knob, portafilter, and drip tray.
4. Configuració i primer ús
Before using your espresso machine for the first time, follow these steps to prepare it for operation and ensure proper function.
- Desempaquetar i netejar: Remove all packaging materials. Wash the water tank, portafilter, and filter baskets with warm, soapy water. Rinse thoroughly and dry.
- Omplir el dipòsit d'aigua: Fill the detachable water tank with fresh, cold water. Do not exceed the 'MAX' fill line. Ensure the water tank is properly seated in the machine.
- Encès: Plug the machine into a suitable power outlet. Press the ON/OFF button on the touch screen. The indicator light will blink, signifying preheating.
- Drain Air from System: To ensure optimal performance and prevent brewing failure, it is essential to drain any air from the internal pipes during the first use or after prolonged inactivity. Once the machine has preheated (indicator light is steady), turn the steam knob to the "ON" position. Allow water to run out from the steam wand until a steady stream is observed. Then, turn the steam knob to the "OFF" position.
- Preheat Cup (Optional): Place your espresso cup on the heated cup holder on top of the machine to warm it, which helps maintain coffee temperature.

Image: Step-by-step visual guide for the initial setup process, including filling the water tank, powering on, and draining air from the steam wand.
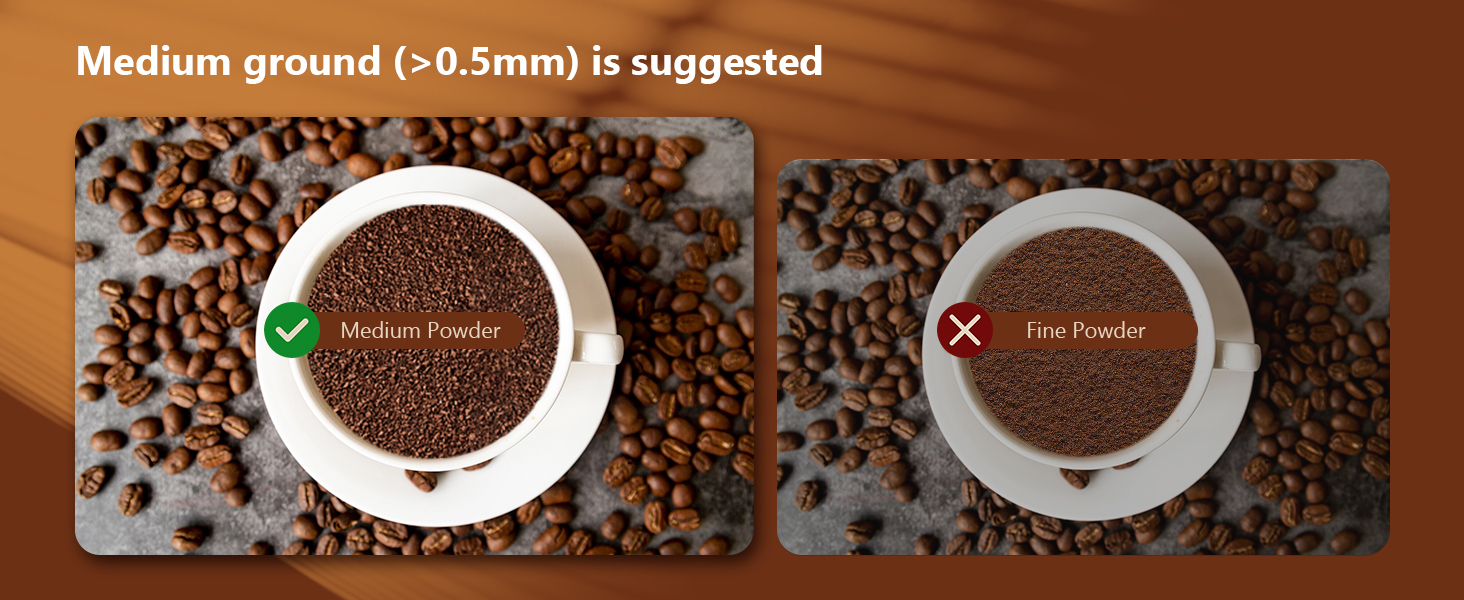
Image: Illustration demonstrating the correct water level for the water tank, indicating not to exceed the maximum fill line.
5. Instruccions de funcionament
5.1 Preparació d'espresso (individual o doble)
Follow these steps to brew a perfect shot of espresso:
- Preparar el cafè: Use medium-ground coffee (recommended >0.5mm). Select the 1-shot or 2-shot filter basket and place it into the portafilter. Fill with ground coffee (1 flat scoop for single, 2 for double) and tamp fermament.
- Connecteu el portafiltre: Insert the portafilter into the group head and turn it to the right until it is securely locked. Ensure it is fully locked to prevent leaks during extraction.
- Col·loca la copa: Position your espresso cup(s) on the drip tray directly under the portafilter spouts.
- Elaboració d'espresso: Once the machine is preheated (indicator light is steady), press the 'Espresso' button for a single shot or '2 X Espresso' for a double shot on the touch screen. The machine will begin brewing.
- Atura la cervesa: The machine will automatically stop when the programmed volume is reached. You can also manually stop brewing by pressing the button again.
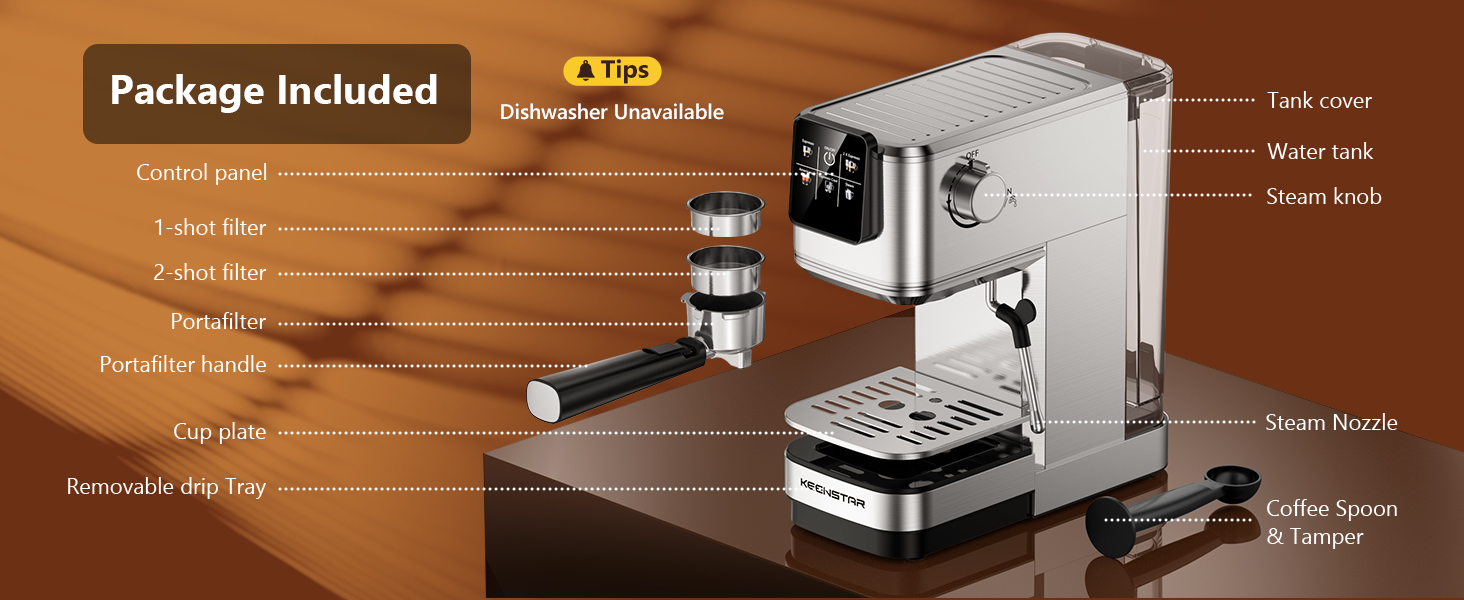
Image: A visual guide detailing the five steps to prepare espresso, from filling the water tank and loading coffee to pressing the brew button.

Image: Illustrates the recommended medium grind size for coffee, comparing it to fine powder for optimal extraction.
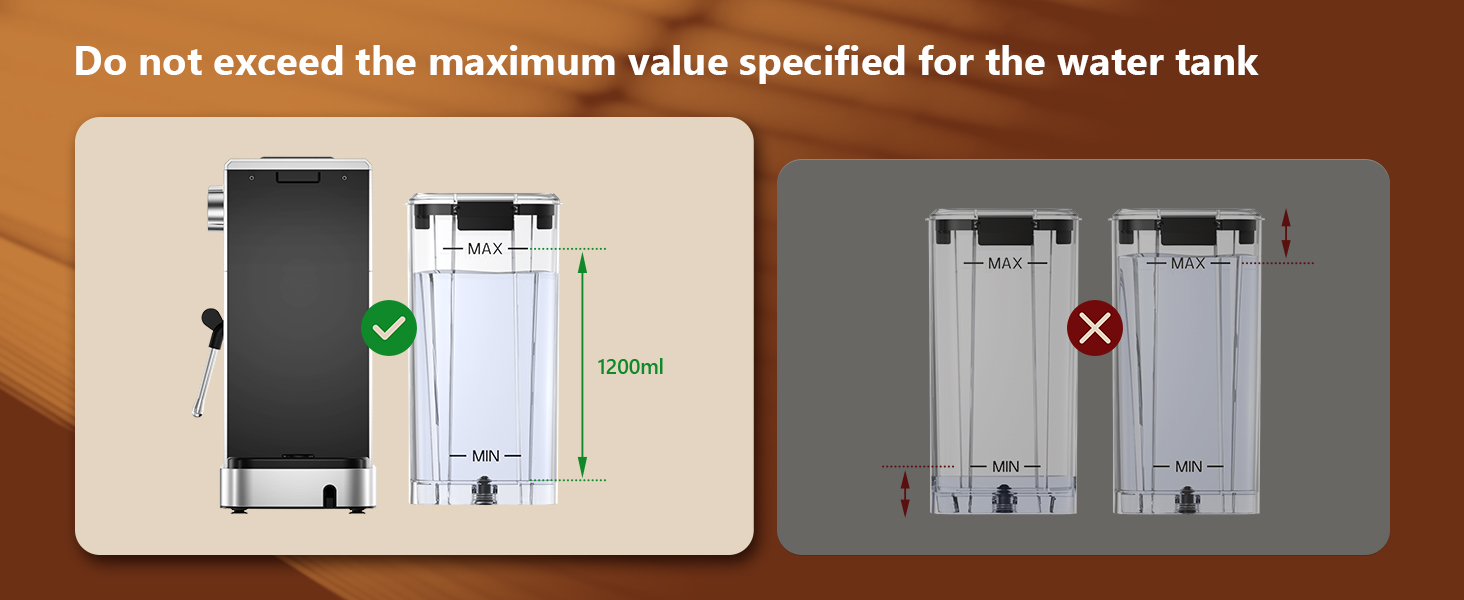
Image: Visual representation of a correctly locked portafilter versus an unlocked one, emphasizing the importance of secure attachment before brewing.
5.2 Making Cold Brew Espresso
The KEENSTAR machine offers a rapid cold brew function:
- Prepare Water Tank: Fill the water tank 2/3 full with ice cubes, then add cold water to the 'MAX' line.
- Preparar el cafè: Load ground coffee into the portafilter as you would for hot espresso.
- Brew Cold Espresso: Once the machine is preheated, press the 'Espresso Cool' button on the touch screen. The machine will brew a smooth, fresh cold brew.

Image: The espresso machine preparing a cold brew espresso, with ice cubes visible in the water tank and a glass of iced coffee.
5.3 Elaboració d'americà
To make an Americano:
- Elaboració d'espresso: First, brew a single or double shot of espresso into your cup as described in section 5.1.
- Afegir aigua calenta: Press the 'Americano' button on the touch screen. The machine will dispense hot water into your cup, combining with the espresso to create an Americano.
5.4 Using the Milk Frother (Steam Wand)
The powerful steam wand allows you to create creamy milk foam for lattes and cappuccinos:
- Preheat Steam: Ensure the machine is powered on and preheated. Press the 'Steam' button on the touch screen. The indicator will blink during preheating and become steady when ready.
- Preparar la llet: Fill a stainless steel frothing pitcher with cold milk (dairy or non-dairy). Do not fill more than halfway to allow for expansion.
- Vareta de vapor de purga: Before frothing, turn the steam knob to the "ON" position briefly to release any condensed water from the wand. Turn it off once steam appears.
- Escuma de llet: Insert the steam nozzle approximately 1 inch into the milk's surface. Turn the steam knob to the "ON" position. Move the pitcher up and down slowly to create foam. Once desired texture and temperature are reached, turn the steam knob to the "OFF" position.
- Neteja la vareta de vapor: Netegeu immediatament la vareta de vapor amb aiguaamp drap per evitar que s'assequin els residus de llet. Purgueu de nou la vareta breument per eliminar la llet que hi hagi a dins.

Image: The espresso machine's steam wand in action, frothing milk in a pitcher to create creamy foam for coffee beverages.
6. Manteniment i Neteja
Una neteja regular garanteix la longevitat i el rendiment òptim de la teva màquina d'espresso.
- Safata de degoteig: The drip tray should be emptied and cleaned regularly. It is removable for easy access. Wash with warm, soapy water and rinse thoroughly.
- Portafiltres i cistelles de filtre: After each use, remove the portafilter and discard used coffee grounds. Rinse the portafilter and filter basket under running water. Use a brush to remove any stubborn coffee residue.
- Dipòsit d'aigua: Clean the water tank periodically with warm, soapy water. Rinse well to remove any soap residue.
- Exterior: Netegeu l'exterior de la màquina amb un damp tela. No utilitzeu netejadors abrasius ni fregalls.
- Descalcificació: Depending on water hardness and frequency of use, descaling may be required every 2-3 months. Refer to the full manual for detailed descaling instructions.
Nota important:
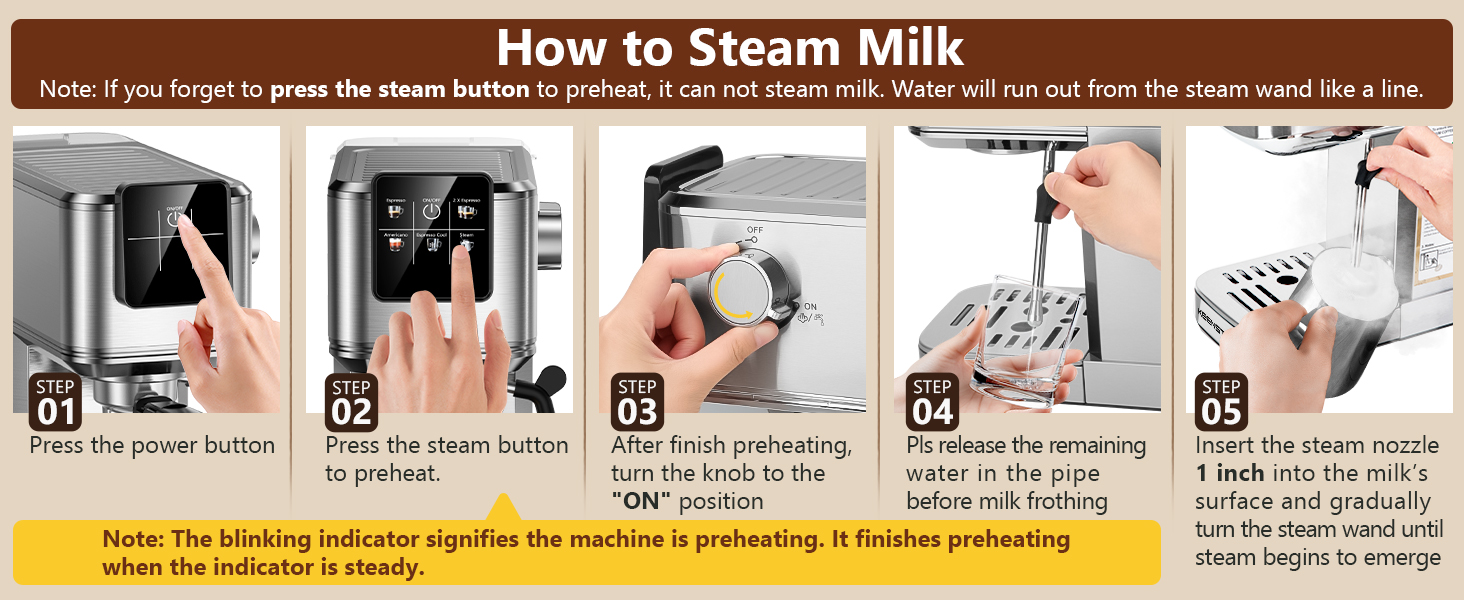
Image: Visual guide indicating that all accessories must be washed by hand and are not safe for dishwashers.
All accessories, including the portafilter, filter baskets, and water tank, must be washed by hand. They are not dishwasher safe.
7. Solució De Problemes
If you encounter issues with your espresso machine, refer to the table below for common problems and solutions.
| Problema | Causa possible | Solució |
|---|---|---|
| No hi ha dispensadors de cafè | Water tank empty; machine not preheated; portafilter not locked correctly; coffee too finely ground. | Fill water tank; wait for steady indicator light; ensure portafilter is fully locked; use medium-ground coffee. |
| Cafè fluix o aquos | Insufficient coffee grounds; coffee too coarsely ground; tamping not firm enough. | Increase coffee amount; use medium-ground coffee; tamp fermament. |
| No hi ha vapor que surti de la vareta | Steam function not preheated; steam wand clogged. | Press 'Steam' button and wait for steady indicator; clean steam wand thoroughly. |
| Fuites de màquina | Portafilter not locked correctly; seal ring worn; water tank not seated properly. | Ensure portafilter is fully locked; contact customer service for seal replacement; reseat water tank. |
If the problem persists after attempting these solutions, please contact KEENSTAR customer service for further assistance.
8. Especificacions
| Característica | Especificació |
|---|---|
| Marca | KEENSTAR |
| Nom del model | JH-C5010E |
| Sistema de pressió | Bomba professional de 20 bars |
| Wattage | 1350W |
| Capacitat del dipòsit d'aigua | 1.1 litres (aprox. 37 oz) |
| Dimensions del producte (P x A x A) | 11.8" x 5.5" x 12.6" (30 cm x 14 cm x 32 cm) |
| Pes de l'article | 10 lliures |
| Material | Acer inoxidable |
| Tipus d'entrada de cafè | Cafè Mòlt |
| Tipus de filtre | Reutilitzable |
9. Garantia i Suport
KEENSTAR provides the following support for your espresso machine:
- Garantia de devolució de 30 dies: Si no esteu satisfets amb la vostra compra, podeu retornar-la en un termini de 30 dies per obtenir un reemborsament complet.
- Substitució gratuïta durant 1 any: The product is eligible for a free replacement within 1 year from the date of purchase for manufacturing defects.
- Lifetime After-Customer Service: KEENSTAR offers lifetime customer service to assist with any questions or issues you may encounter with your machine.
For warranty claims or customer support, please refer to the contact information provided on the KEENSTAR official weblloc web o la documentació de la compra.