1. Informació important de seguretat
Si us plau, llegiu i enteneu totes les instruccions abans de començar la instal·lació. Si no seguiu aquestes instruccions, podeu patir descàrregues elèctriques, incendis o lesions personals.
- Assegureu-vos que l'alimentació estigui apagada a l'interruptor automàtic abans de la instal·lació o el manteniment.
- Tot el cablejat ha de complir amb els codis elèctrics nacionals i locals.
- The ceiling fan must be mounted to a structure capable of supporting a minimum of 35 lbs (15.9 kg).
- No feu funcionar el ventilador amb les pales o la carcassa danyades.
- Mantingueu les mans, la roba i altres objectes allunyats de les aspes del ventilador quan aquest estigui en funcionament.
- Aquest ventilador està dissenyat només per a ús interior.
2. Contingut del paquet
Verify that all components listed below are included in your package. If any parts are missing or damaged, contact LEDLUX customer support before proceeding with installation.
- Muntatge de la carcassa del motor
- Pales de ventilador (8 peces)
- Downrods (4.5", 12", 24" options)
- Suport de muntatge
- Comandament a distància i receptor
- Paquet de maquinari (cargols, volanderes, femelles de cable)
- Manual d'instruccions
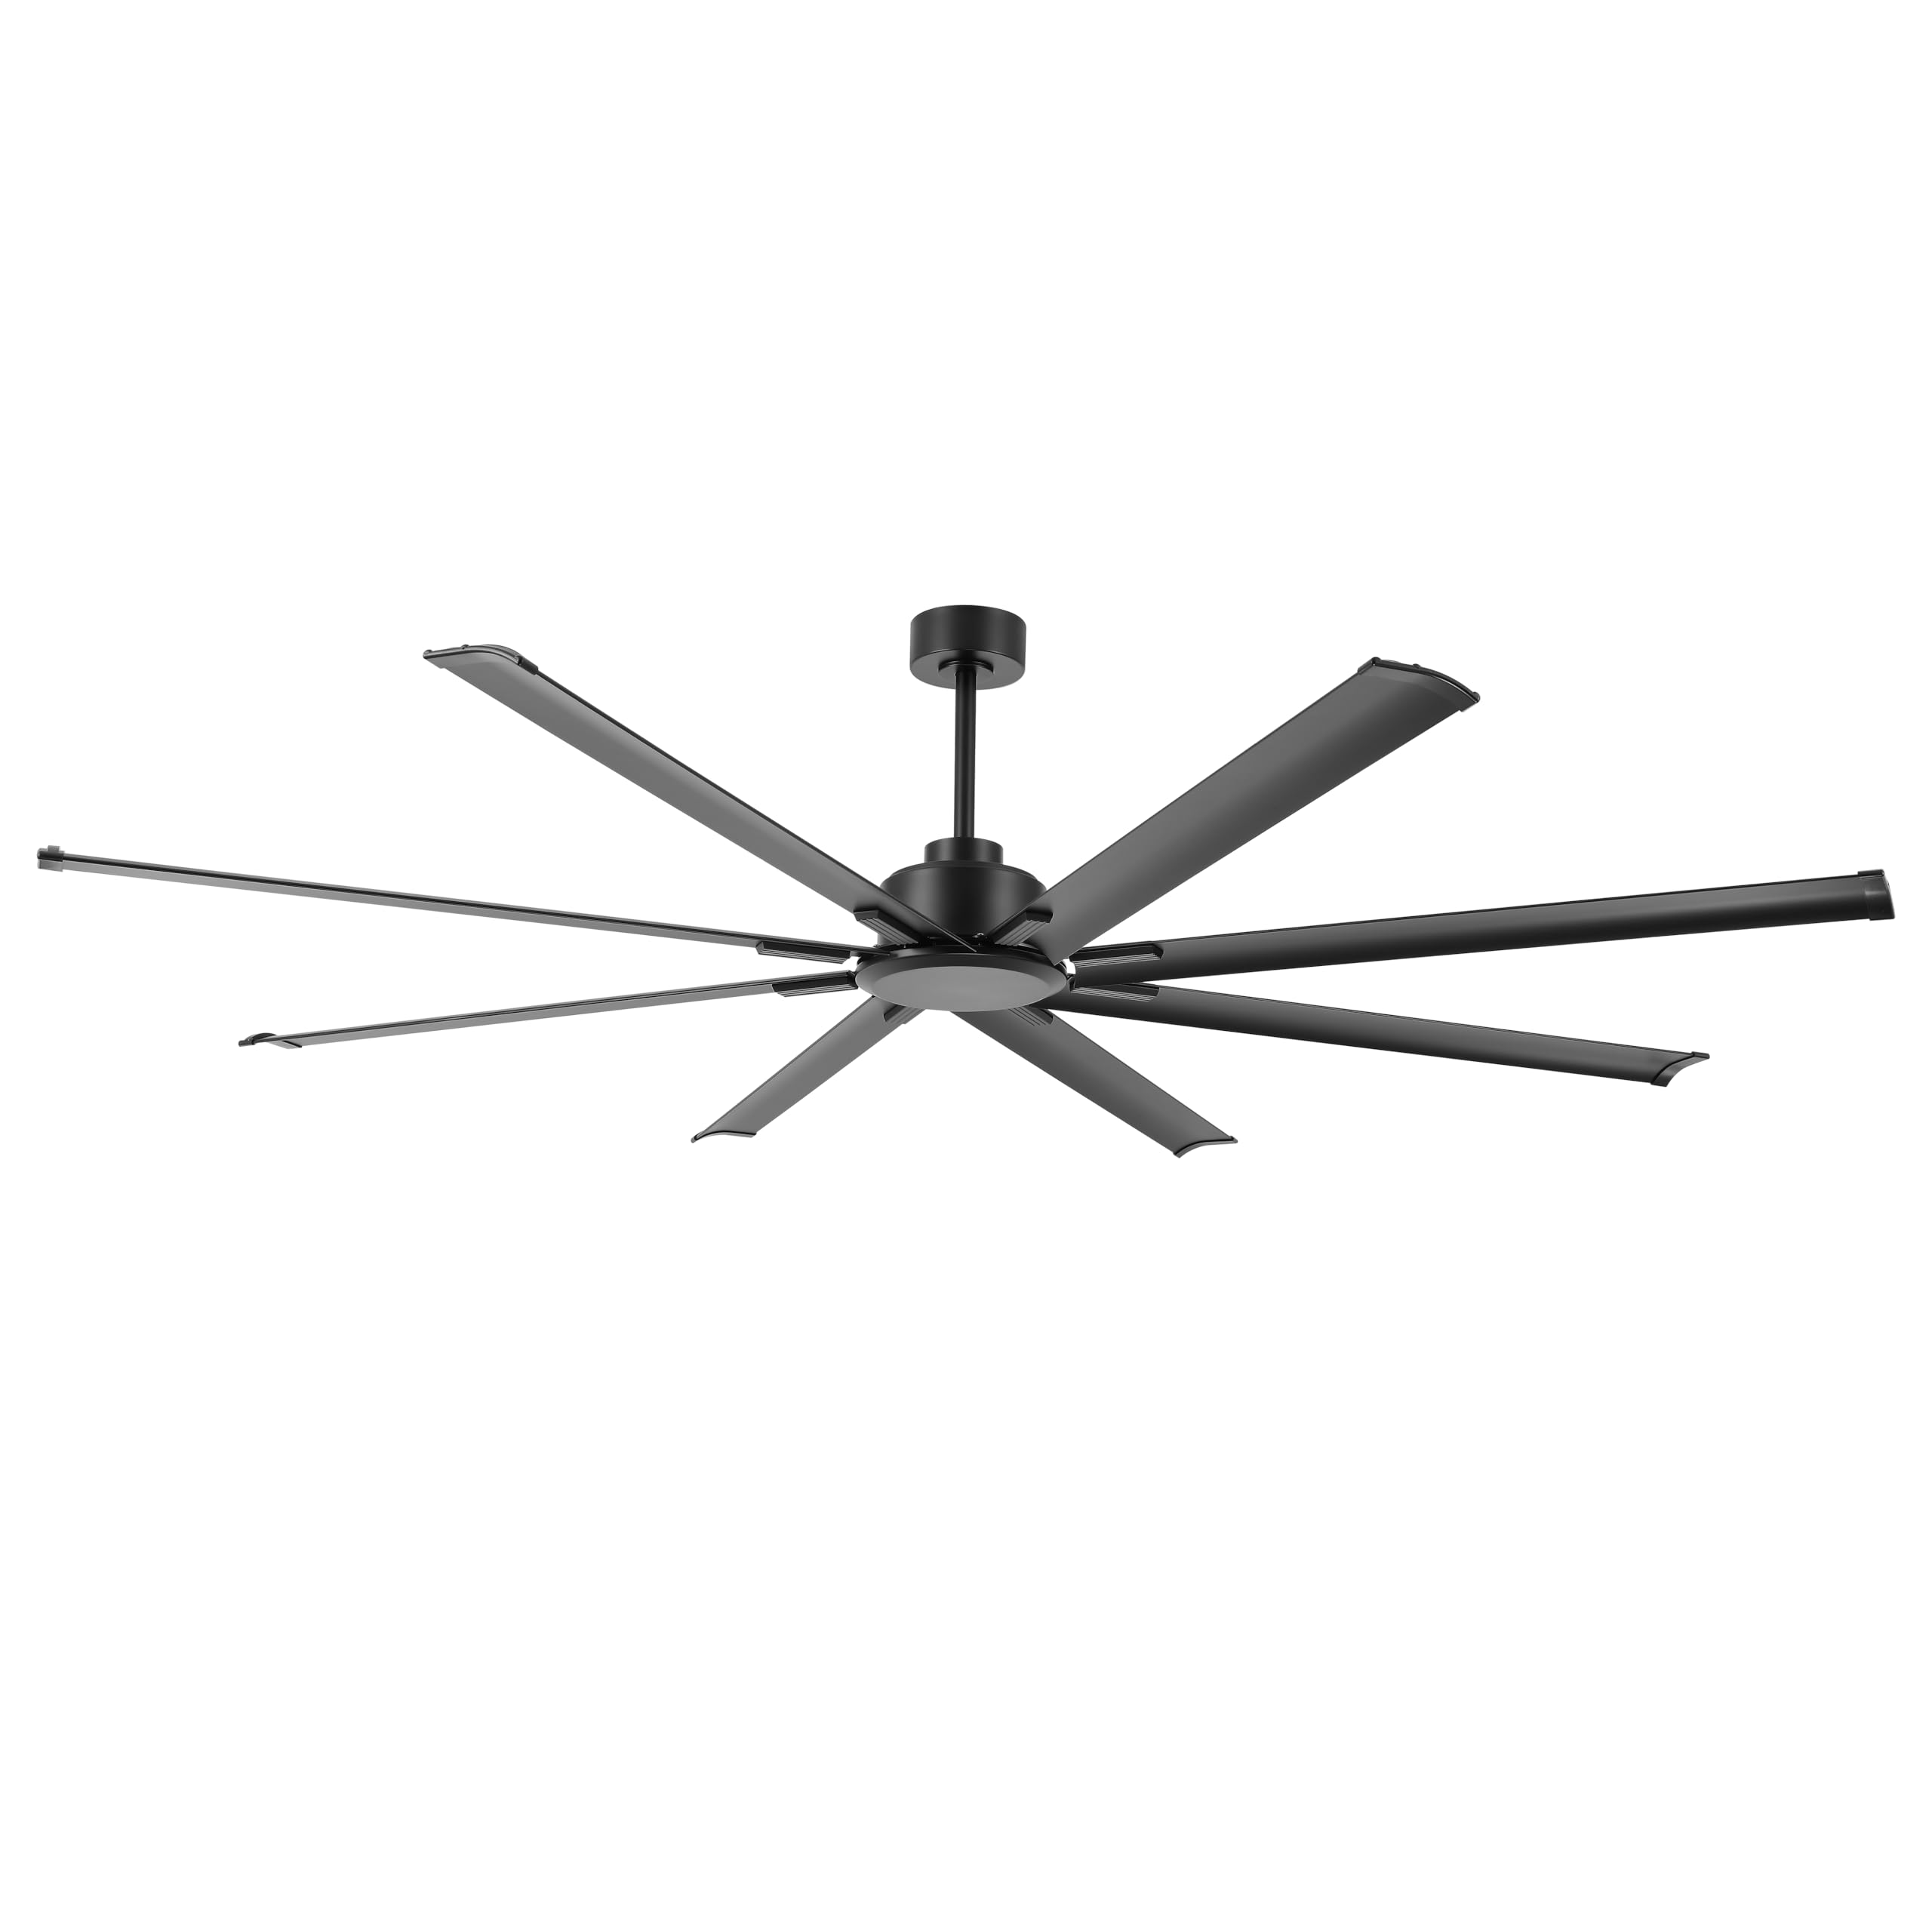
Image: The LEDLUX 96-inch ceiling fan, showcasing its eight black aluminum blades, central motor housing, and the included remote control. This image provides an overview of the main product components.
3. Configuració i instal·lació
Follow these steps carefully for proper installation of your LEDLUX ceiling fan.
3.1 Llista de comprovació prèvia a la instal·lació
- Desconnecteu l'alimentació a l'interruptor principal.
- Ensure the mounting location can support the fan's weight.
- Reuneix les eines necessàries (tornavís, pelador de cables, escala, etc.).
3.2 Muntatge del ventilador
- Attach the mounting bracket to the ceiling junction box. Ensure it is securely fastened to a structural beam.
- Select the appropriate downrod (4.5", 12", or 24") for your ceiling height.
- Feed the fan wires through the chosen downrod.
- Secure the downrod to the motor housing.
- Aixequeu amb cura el conjunt del ventilador i pengeu-lo al suport de muntatge.

Image: A diagram illustrating the overall dimensions of the 96-inch ceiling fan, including its width and height with different downrod lengths (12.7", 20.3", 32.5"). It also shows how the fan can be mounted on both flat and sloped ceilings, along with the three included downrod sizes (4.5", 12", 24").

Image: This image displays the LEDLUX ceiling fan installed in three different room settings: a high ceiling, a low ceiling, and a slanted ceiling, demonstrating its versatility for various architectural styles.
3.3 Connexions de cablejat
- Connect the fan's wires to the household wiring according to the wiring diagram provided in the full manual. Use wire nuts to secure connections.
- Install the remote receiver into the mounting bracket canopy.
- Connect the receiver wires to the fan and household wires as instructed.
3.4 Fixació de les fulles
- Attach each of the 8 fan blades to the motor housing using the provided screws and washers. Ensure all screws are tightened securely.
4. Instruccions de funcionament
Your LEDLUX ceiling fan is controlled by the included remote control. Ensure batteries are installed correctly in the remote.
4.1 Funcions de control remot

Imatge: Una imatge detallada view of the remote control for the LEDLUX ceiling fan, highlighting buttons for speed adjustment (1-6), fan on/off, forward/reverse function, natural wind mode, and timer settings (1H/2H/4H/8H).
- Botó On/Off: Encén o apaga el ventilador.
- Botons de velocitat (1-6): Ajusta la velocitat del ventilador de baixa (1) a alta (6).
- Botó endavant/marrere: Canvia la direcció de rotació de la fulla.
- Timer Buttons (1H/2H/4H/8H): Configura el ventilador perquè s'apagui automàticament després de la durada seleccionada.
- Natural Wind Button: Simulates a natural breeze by cycling through various speeds.
4.2 Funció reversible (mode estiu/hivern)
The fan features a reversible DC motor, allowing for year-round use to optimize air circulation.
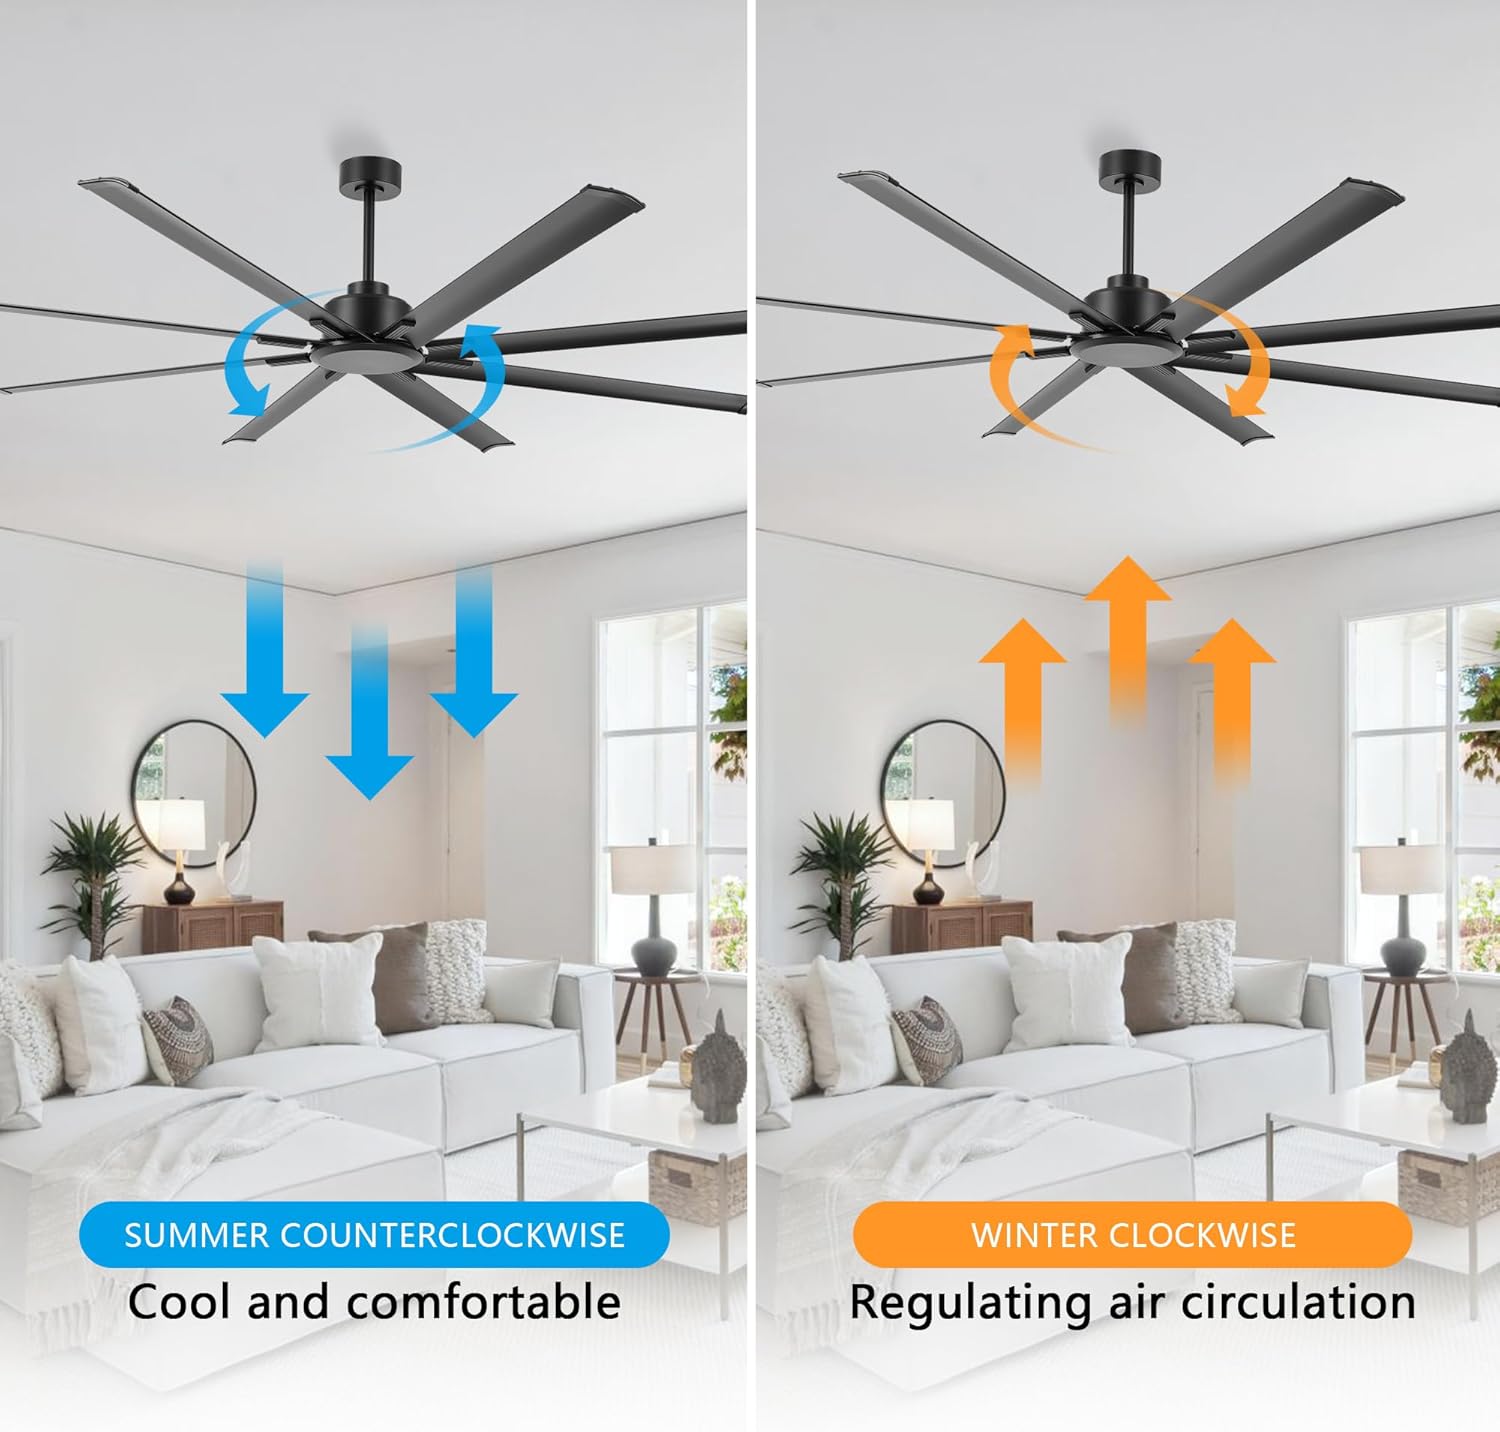
Image: This image illustrates the reversible function of the ceiling fan. On the left, blue arrows indicate counter-clockwise rotation for a cooling downdraft in summer. On the right, orange arrows show clockwise rotation for an updraft to circulate warm air in winter.
- Mode d'estiu (sentit antihorari): Press the reverse button to make the blades rotate counter-clockwise, creating a downward airflow that produces a cooling effect.
- Mode d'hivern (en sentit horari): Press the reverse button again to make the blades rotate clockwise, creating an upward airflow that helps circulate warm air trapped near the ceiling.
4.3 Funció de temporitzador
Use the timer buttons on the remote control to set the fan to operate for a specific duration before automatically turning off.

Image: This graphic highlights the silent operation of the fan, stating sound is less than 35dB, and illustrates the available timer settings: 1 hour, 2 hours, 4 hours, and 8 hours.
- Press the 1H, 2H, 4H, or 8H button to activate the timer. The fan will run for the selected time and then shut off.
- To cancel the timer, press the fan On/Off button or select a different timer setting.
5. Manteniment
Un manteniment regular garanteix un rendiment òptim i una llarga vida útil del ventilador de sostre.
- Neteja: Netegeu periòdicament les aspes del ventilador i la carcassa del motor amb un drap suau i sec.amp tela. No utilitzeu netejadors abrasius ni dissolvents.
- Cargols de tensió: Check all screws on the fan blades and mounting hardware annually to ensure they are secure.
- Equilibri de la fulla: If the fan wobbles, ensure all blades are securely attached and consider using a blade balancing kit (not included) if necessary.
6. Solució De Problemes
Si teniu problemes amb el ventilador, consulteu els següents problemes i solucions habituals:
| Problema | Causa possible | Solució |
|---|---|---|
| El ventilador no arrenca | Sense energia al ventilador | Check circuit breaker and wall switch. Ensure all wiring connections are secure. |
| El comandament a distància no funciona | Dead batteries or incorrect pairing | Replace remote batteries. Refer to the full manual for remote pairing instructions. |
| El ventilador tremola excessivament | Loose blades or unbalanced blades | Ensure all blade screws are tight. Check for bent blades. Use a blade balancing kit if needed. |
| Funcionament sorollós | Loose screws or motor issues | Estrenyeu tots els cargols. Si el soroll persisteix, contacteu amb el servei d'atenció al client. |
7. Especificacions
| Característica | Detall |
|---|---|
| Marca | LEDLUX |
| Número de model | SYCF9605 |
| Color | Negre |
| Tipus de muntatge | Muntatge al sostre |
| Nombre de velocitats | 6 |
| Voltage | 12 volts (CC) |
| Ús interior/exterior | Interior |
| Mètode de control | Remot |
| Eficiència | Alta eficiència |
| Nombre de fulles | 8 |
| Material de la fulla | Alumini |
8. Garantia i Suport
LEDLUX stands behind the quality of its products.

Image: A graphic detailing the LEDLUX "Worry-Free Promise," which includes a 3-Year Full Warranty on all parts and a 10-Year Motor Warranty.
- Garantia del motor: The DC motor is covered by a 10-year free replacement warranty.
- Garantia de les peces: All other parts of the fan are covered by a full 3-year warranty.
For warranty claims, technical assistance, or missing parts, please contact LEDLUX customer support through the retailer where the product was purchased or visit the official LEDLUX weblloc.