Introducció
This manual provides detailed instructions for the assembly, operation, and maintenance of your Patiowell 8 x 12 FT Plastic Outdoor Storage Shed. Designed for durability and spacious storage, this shed is an ideal solution for organizing your garden tools, lawn equipment, and other outdoor items. Please read these instructions carefully before beginning assembly and retain them for future reference.
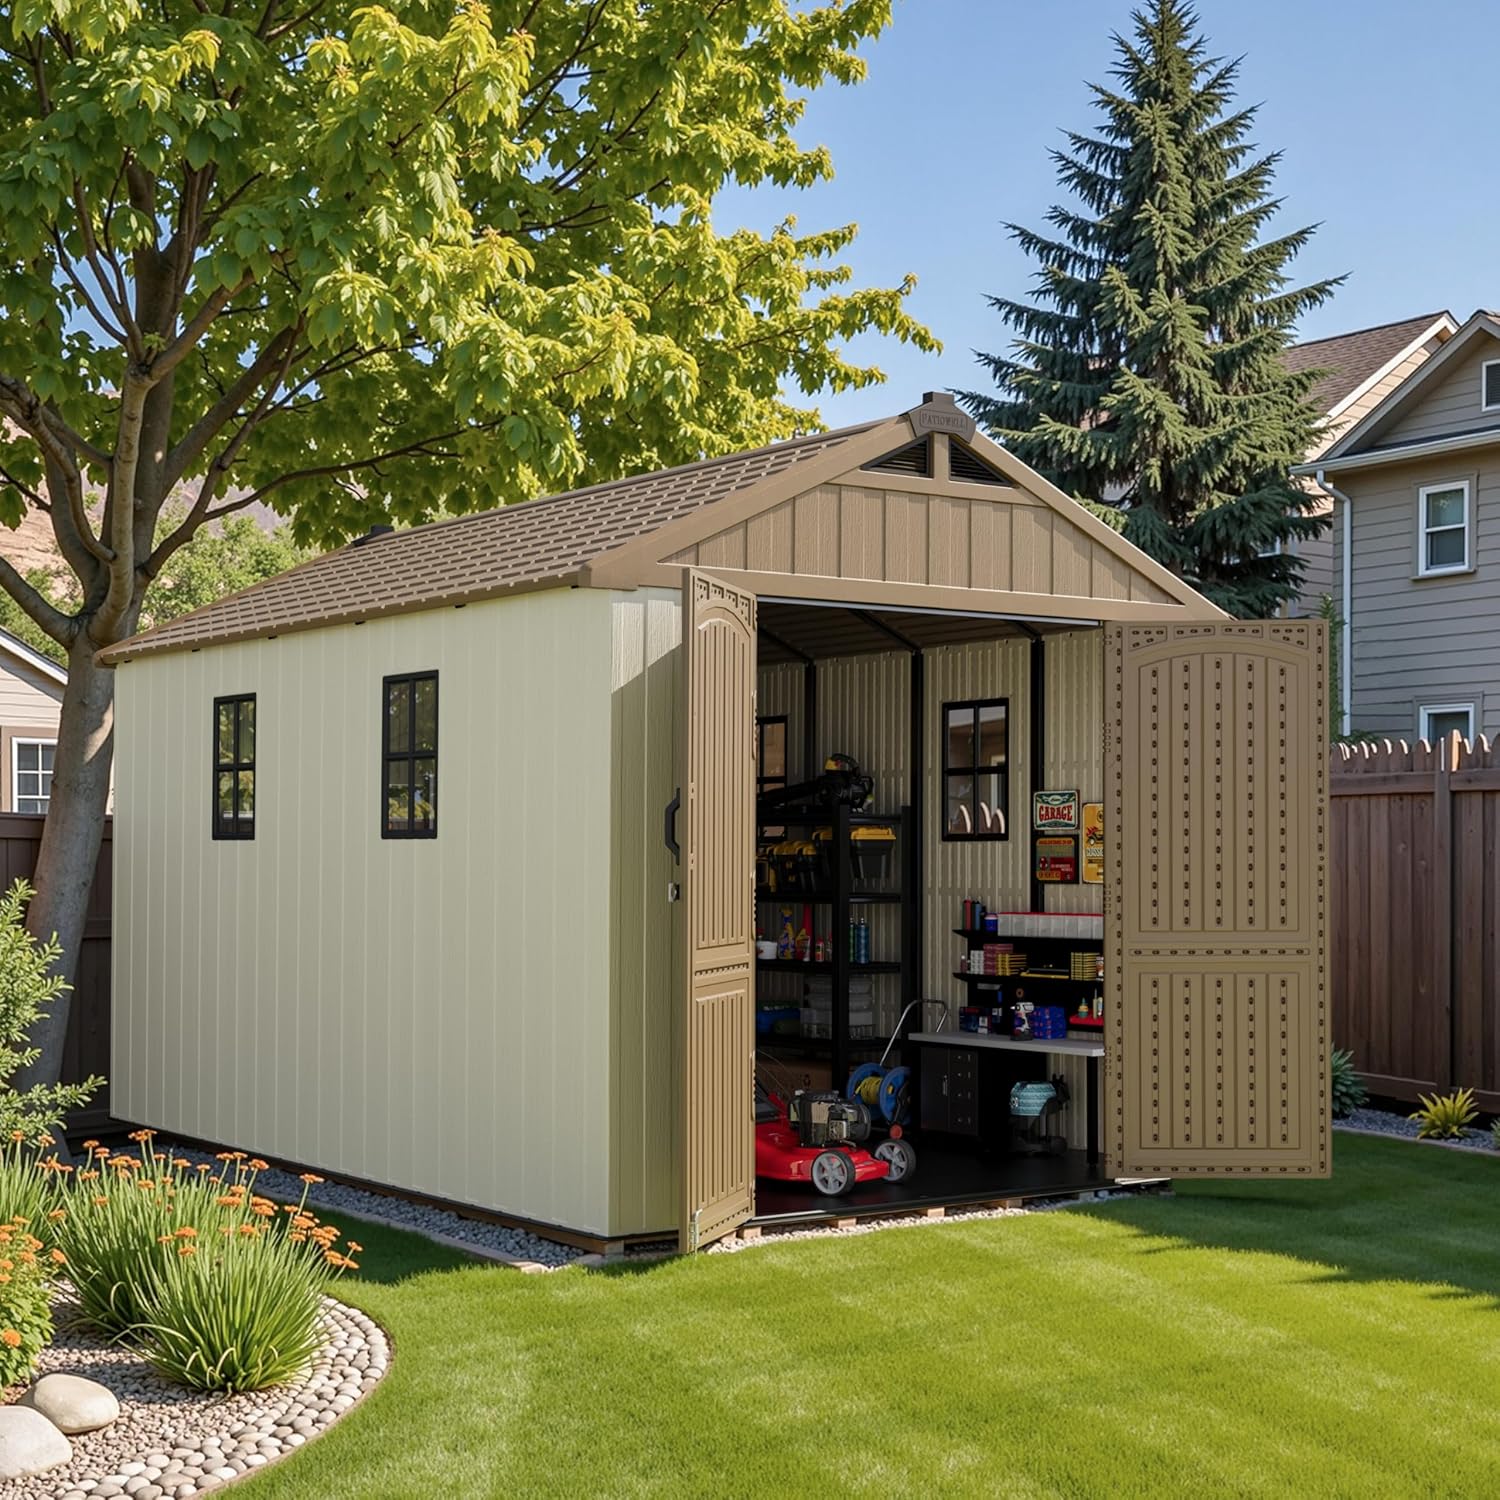
Image: The Patiowell 8x12 FT Plastic Outdoor Storage Shed, brown in color, situated in a well-maintained backyard with green grass and trees.
Informació important de seguretat
- Ensure the shed is assembled on a level and stable surface to prevent structural instability and door misalignment.
- Sempre utilitzeu l'equip de seguretat adequat, com ara guants, durant el muntatge.
- Assembly typically requires two or more people for safety and ease, especially when handling larger components like the roof and wall panels.
- Do not exceed the maximum weight capacity of 1300 pounds for the shed's contents.
- Before installation, check local Homeowners Association (HOA) policies and building codes to ensure compliance.
- Mantingueu els nens i les mascotes allunyats de la zona de reunió.
- Do not store flammable liquids or hazardous materials inside the shed without proper ventilation and safety precautions.
Contingut del paquet
Your Patiowell storage shed is delivered in multiple packages (typically 7). Please verify all components against the included parts list before beginning assembly. If any parts are missing or damaged, contact customer support immediately.
- Storage Shed Panels (Walls, Roof, Floor)
- Hardware Set (screws, bolts, etc.)
- Tool Gloves
- Product Instruction Manual (this document)
Muntatge i muntatge
The Patiowell shed features an innovative "Kick-it" installation process designed to reduce the number of screws needed by 35%, making assembly quicker. However, careful attention to detail and proper preparation are crucial for a successful build.
1. Preparació del lloc
- Choose a flat, level area for the shed. An uneven base can lead to door misalignment and structural issues.
- Clear the area of debris, rocks, and vegetation.
2. Floor Assembly
- Assemble the plastic floor base according to the diagrams in the included product instruction sheet. This step is generally quick, taking approximately 15 minutes.
- Ensure all floor panels are securely interlocked and form a stable foundation.

Image: The Patiowell shed with its double doors open, showcasing the spacious interior and the sturdy plastic floor base. Various tools and equipment are stored inside, demonstrating its capacity.
3. Wall Panel Installation ("Kick-it" Method)
- Begin by positioning the first wall panel. It is crucial to ensure this panel is correctly seated and stable, as it can easily pop out of place when installing subsequent panels. Some users find it helpful to temporarily secure the first panel.
- For each wall panel, align the bottom edge with the ground slots of the floor base.
- Apply firm, downward pressure with a "kicking" action to fully insert the wall panel into the floor slots until it clicks securely into place.
- Continue this process for all wall panels. Once the first two panels are correctly installed, the remaining panels typically fit more easily.

Image: A visual guide demonstrating the "Kick-it" installation method. Three sequential images show a foot applying pressure to the base of a wall panel, ensuring it securely locks into the floor foundation.
4. Roof and Truss Installation
- This step often requires at least two, and ideally three, people due to the size and weight of the roof components and the initial flexibility of the walls.
- Install the metal trusses onto the walls. The walls may be flexible at this stage, requiring careful handling to keep them upright while securing the trusses.
- Attach the roof panels, ensuring they align with the metal supports. Some holes may require minor adjustments or pre-drilling for proper screw insertion.
- Secure the triangular gables to the front and back walls.
5. Instal·lació de la porta
- Refer to the detailed diagrams in your instruction sheet for precise door assembly.
- Insert the hinge rod through the door until it is flush with the circular ring at the bottom. The rod will extend approximately two inches from the top of the door.
- Position the door inside the shed, parallel to the long walls. Slide the door edge without the hinge through the notch in the top metal bracket.
- Set the circular ring at the bottom of the door into the corresponding socket on the floor.
- Tap the hinge rod downwards until the top of the door can be fully moved into the metal bracket.
- Install the plastic cap over the top of the rod and screw it into place to secure the hinge rod.
- Ensure the wall panel adjacent to the door is positioned behind/inside the door. If not, gently push it into place from the outside. Install the metal plate on the inside wall to prevent it from popping out.

Imatge: Detallada views of the shed's protective features, including a vent for air circulation, a waterproof roof design to prevent leaks, and the integrated lockable door mechanism for security.
6. Comprovacions finals
- Verify all screws and fasteners are tightened.
- Check that doors open and close smoothly and latch securely.
- Ensure all panels are properly seated and stable.
Instruccions de funcionament
- Portes: The shed features double hinged, lockable doors. To open, disengage the lock and pull the handles. To close, push the doors firmly until they latch, then engage the lock for security.
- Windows: The shed includes two windows that allow natural light into the interior. These windows are fixed and do not open for ventilation. Their position can be adjusted during assembly by placing them in different wall panels as desired.
- Ventilació: Integrated vents are designed to provide air circulation. Ensure these vents are not obstructed to maintain proper airflow and reduce moisture buildup.

Image: A composite image highlighting key design elements: a window providing natural light, the sturdy internal metal frame for structural integrity, and the aesthetic wood-textured plastic panels.
Manteniment
- Neteja: Clean the shed exterior periodically with mild soap and water. Avoid abrasive cleaners or harsh chemicals that could damage the plastic material.
- Inspecció: Regularly inspect the shed for any loose screws, damaged panels, or signs of wear. Tighten fasteners as needed.
- Ventilació: Ensure vents remain clear of obstructions to allow for proper air circulation and prevent excessive heat buildup, especially in warm climates.
- Nivell: Periodically check that the shed remains level. If the ground settles, minor adjustments may be necessary to ensure doors operate correctly.
Resolució de problemes
| Problema | Causa possible | Solució |
|---|---|---|
| Les portes no tanquen ni es tanquen correctament. | Uneven base; wall panels not fully seated; hinge rods misaligned. | Ensure the shed is on a perfectly level surface. Recheck all wall panel connections. Verify hinge rods are correctly installed and lubricated if necessary. |
| Fuita d'aigua dins del cobert. | Improper roof panel installation; damaged seals; obstructed vents. | Inspect roof panels for proper overlap and secure fastening. Check for any cracks or gaps in the plastic. Ensure vents are clear. |
| Shed interior gets excessively hot. | Obstructed ventilation. | Clear any debris or items blocking the shed's vents to allow for proper airflow. |
| Wall panels feel flimsy or unstable. | Not all panels fully "kicked" into place; internal metal supports not installed or secured. | Re-check all wall panel connections, ensuring they are fully seated into the floor base. Verify that all internal metal supports are correctly installed and tightened. |
Especificacions
- Dimensions del producte (P x A x A): 144.3" x 91.3" x 94.5"
- Capacitat d'emmagatzematge: 630 peus cúbics
- Capacitat de pes: 1300 lliures
- Material: Durable Plastic & Resin (UV-resistant)
- Material del marc: Metall
- Color: marró
- Estil de la porta: Double Hinged, Lockable
- Amplada de la porta: 55.1 polzades
- Alçada de la porta: 70.9 polzades
- Nivell de resistència a l'aigua: Resistent a l'aigua
- Pes de l'article: 487 lliures
- Número de model: 0404A-812BN

Image: A detailed diagram illustrating the dimensions of the Patiowell 8x12 FT shed, including width, depth, height, door measurements, and window sizes.
Garantia i assistència al client
Patiowell is committed to providing quality products. If you encounter any quality problems or require assistance with your shed, please contact our customer support team. We are available to help resolve any issues you may experience.
For support, please refer to the contact information provided with your purchase documentation or visit the official Patiowell weblloc.


