ODK B020217SPD01001USDF-1
ODK 53-Inch L-Shaped Desk User Manual
Model: B020217SPD01001USDF-1 | Brand: ODK
1. Introducció
Thank you for choosing the ODK 53-Inch L-Shaped Desk. This versatile desk is designed to enhance your workspace, whether for gaming, studying, or home office use. It features integrated storage, built-in power outlets, and adjustable LED lighting to create a functional and aesthetically pleasing environment. This manual provides detailed instructions for assembly, operation, maintenance, and troubleshooting to ensure you get the most out of your new desk.
2. Informació de seguretat
Si us plau, llegiu i comprengui totes les instruccions de seguretat abans del muntatge i l'ús. Si no segueix aquestes instruccions, pot patir lesions o danys al producte.
- Ancoratge correcte: Ensure proper anchoring to prevent tipping. Do not exceed weight limits.
- Seguretat elèctrica: Keep electrical components dry and avoid contact with water. Do not overload the power outlets.
- Muntatge: For ease and safety, we recommend two people for assembly. Check that all parts are included and in good condition before starting.
- Distribució de pes: Distribute weight evenly across the desk surface and shelves.
- Col·locació: Place the desk on a flat, stable surface. Adjustable foot pads are provided to ensure stability on uneven floors.
3. Contingut del paquet
Verify that all components listed below are present before beginning assembly. Refer to the assembly diagrams for visual identification of parts.
- Desk Panels (L-shaped main top, shelf panels, CPU stand)
- Steel Frame Components (legs, support bars)
- Hardware Pack (screws, bolts, adjustable foot pads, Allen wrench, open-end wrench)
- Power Outlet Unit (with 3 AC outlets and 2 USB ports)
- LED Light Strip (with remote/controller)
- Ganxo per accessoris
- Bossa d'emmagatzematge
- Manual d'instruccions
4. Configuració i muntatge
The entire assembly process typically takes about 45 minutes to 1 hour. Follow the steps carefully, referring to the provided diagrams and video for guidance. All necessary tools are included.
4.1 Guia de vídeo de muntatge
Official ODK L Shaped Desk with Desktop Shelf Installation Guide. This video provides a step-by-step visual walkthrough of the assembly process, including frame construction, desktop installation, and accessory attachment.
4.2 Muntatge pas a pas
Step 1: Assemble Desk Frames
Install the adjustable foot pads onto the bottom of the main frame components (A, B, C). Use screws to connect the horizontal support bars (H, I) between the vertical frames. Ensure all connections are secure but do not fully tighten until all frame pieces are in place.
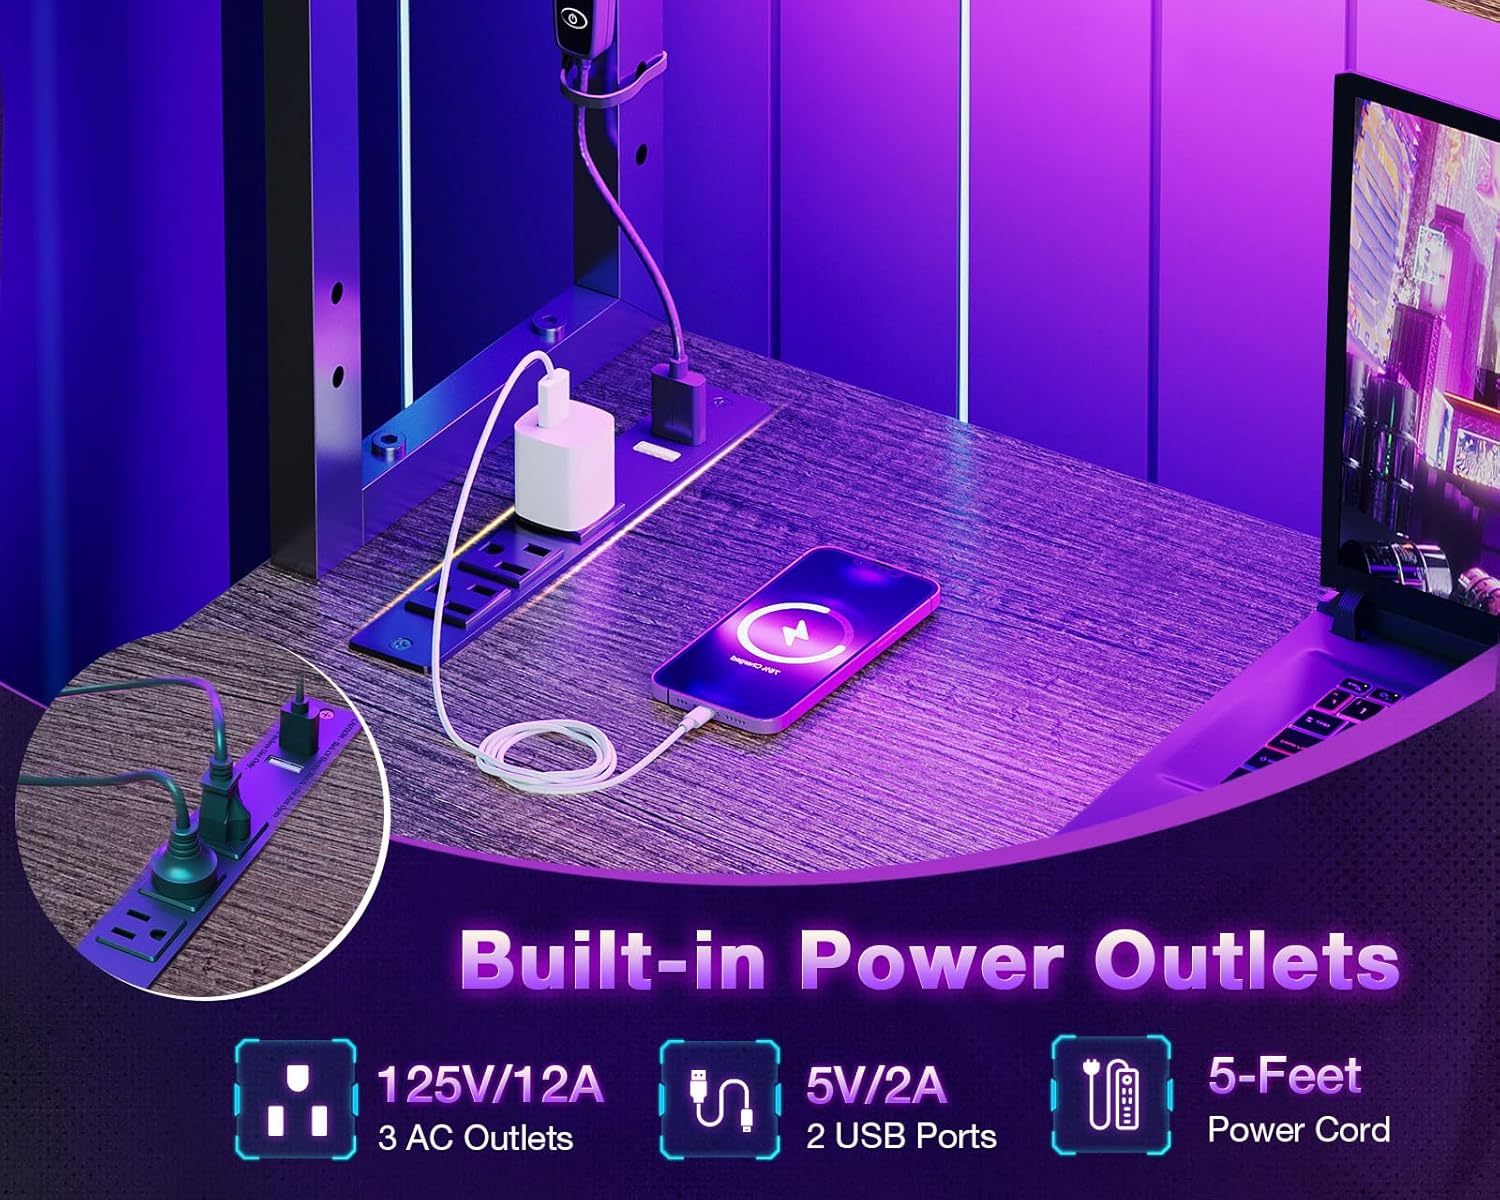
Image showing the sturdy X-shaped steel frame and adjustable foot pads, highlighting the robust construction of the desk.
Step 2: Connect Main Desk Sections
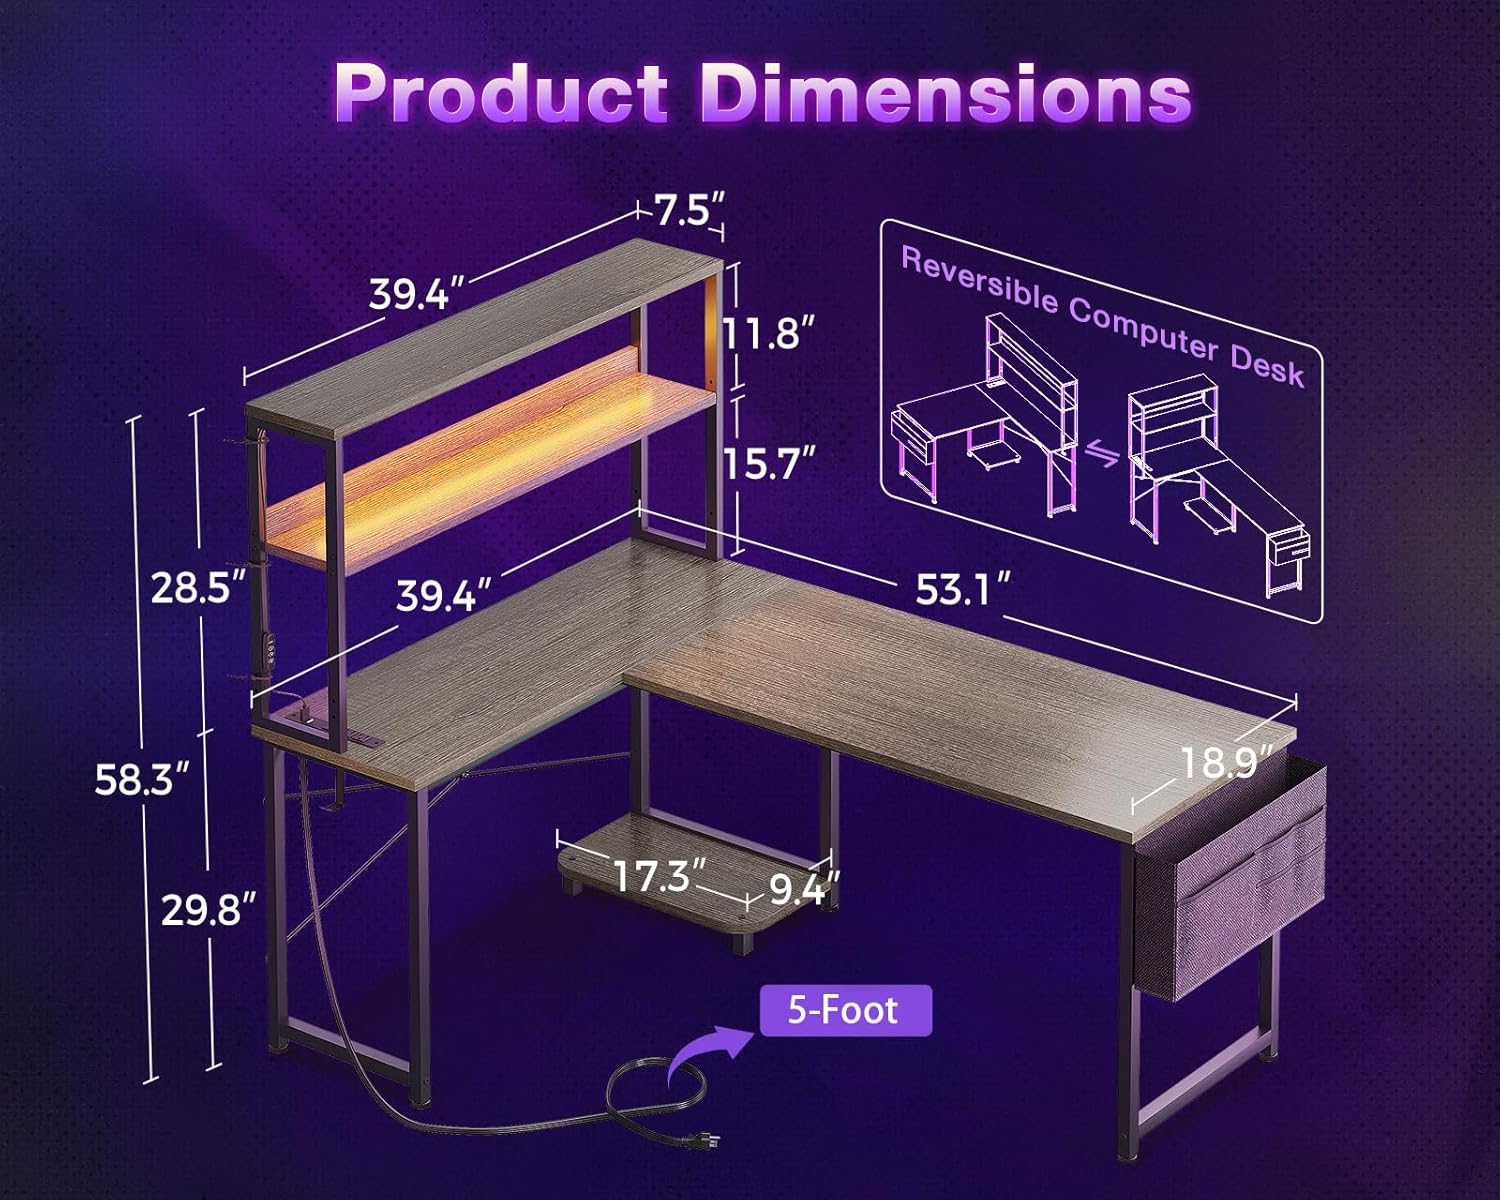
Connect the two main desk frame sections using the provided screws and support bars (F, G). Pay close attention to the orientation of the screw holes to ensure proper alignment for the L-shape configuration. The desk is reversible, allowing you to choose left or right placement for the L-shaped section.
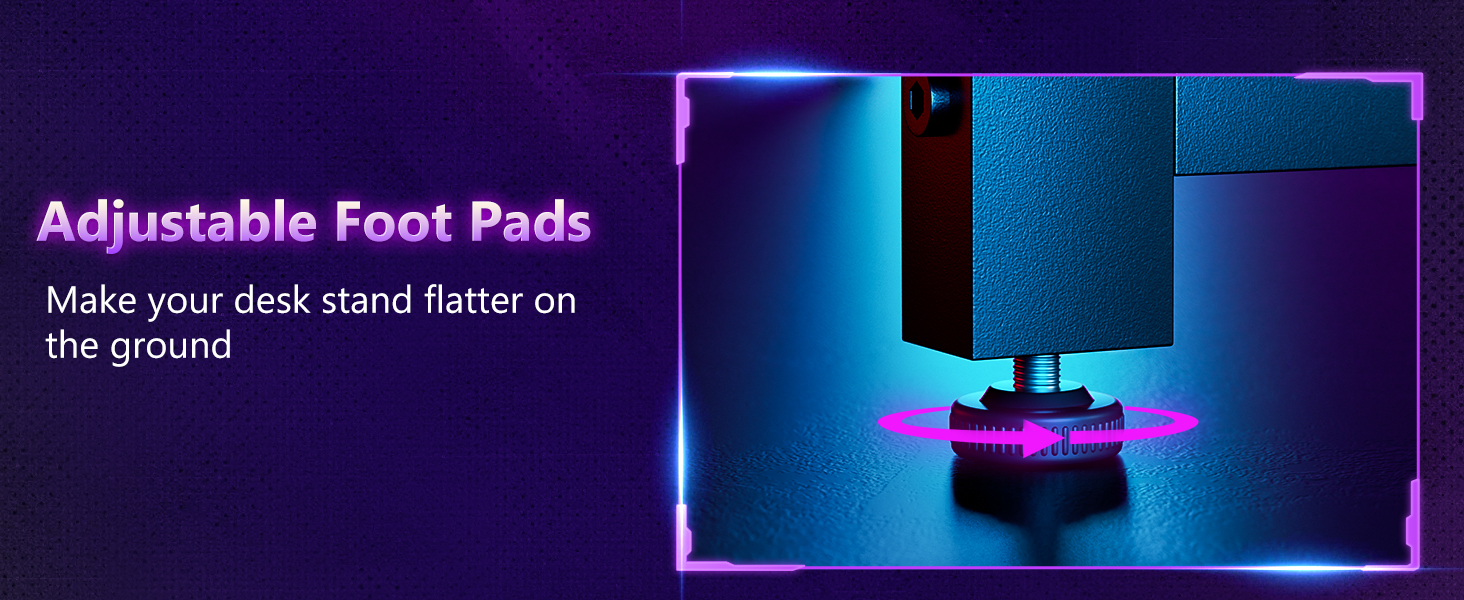
Diagram illustrating the reversible design of the L-shaped desk, showing both left and right corner configurations.
Step 3: Install CPU Stand
Attach the CPU stand (T) to the designated area of the desk frame using the specified screws. Ensure it is securely fastened to provide a stable base for your computer tower.
Step 4: Attach Desktop Panels
Carefully place the main desktop panels (M, N) onto the assembled frame. Align the pre-drilled holes on the panels with the holes on the frame and secure them using the provided screws. Ensure a snug fit for a stable work surface.
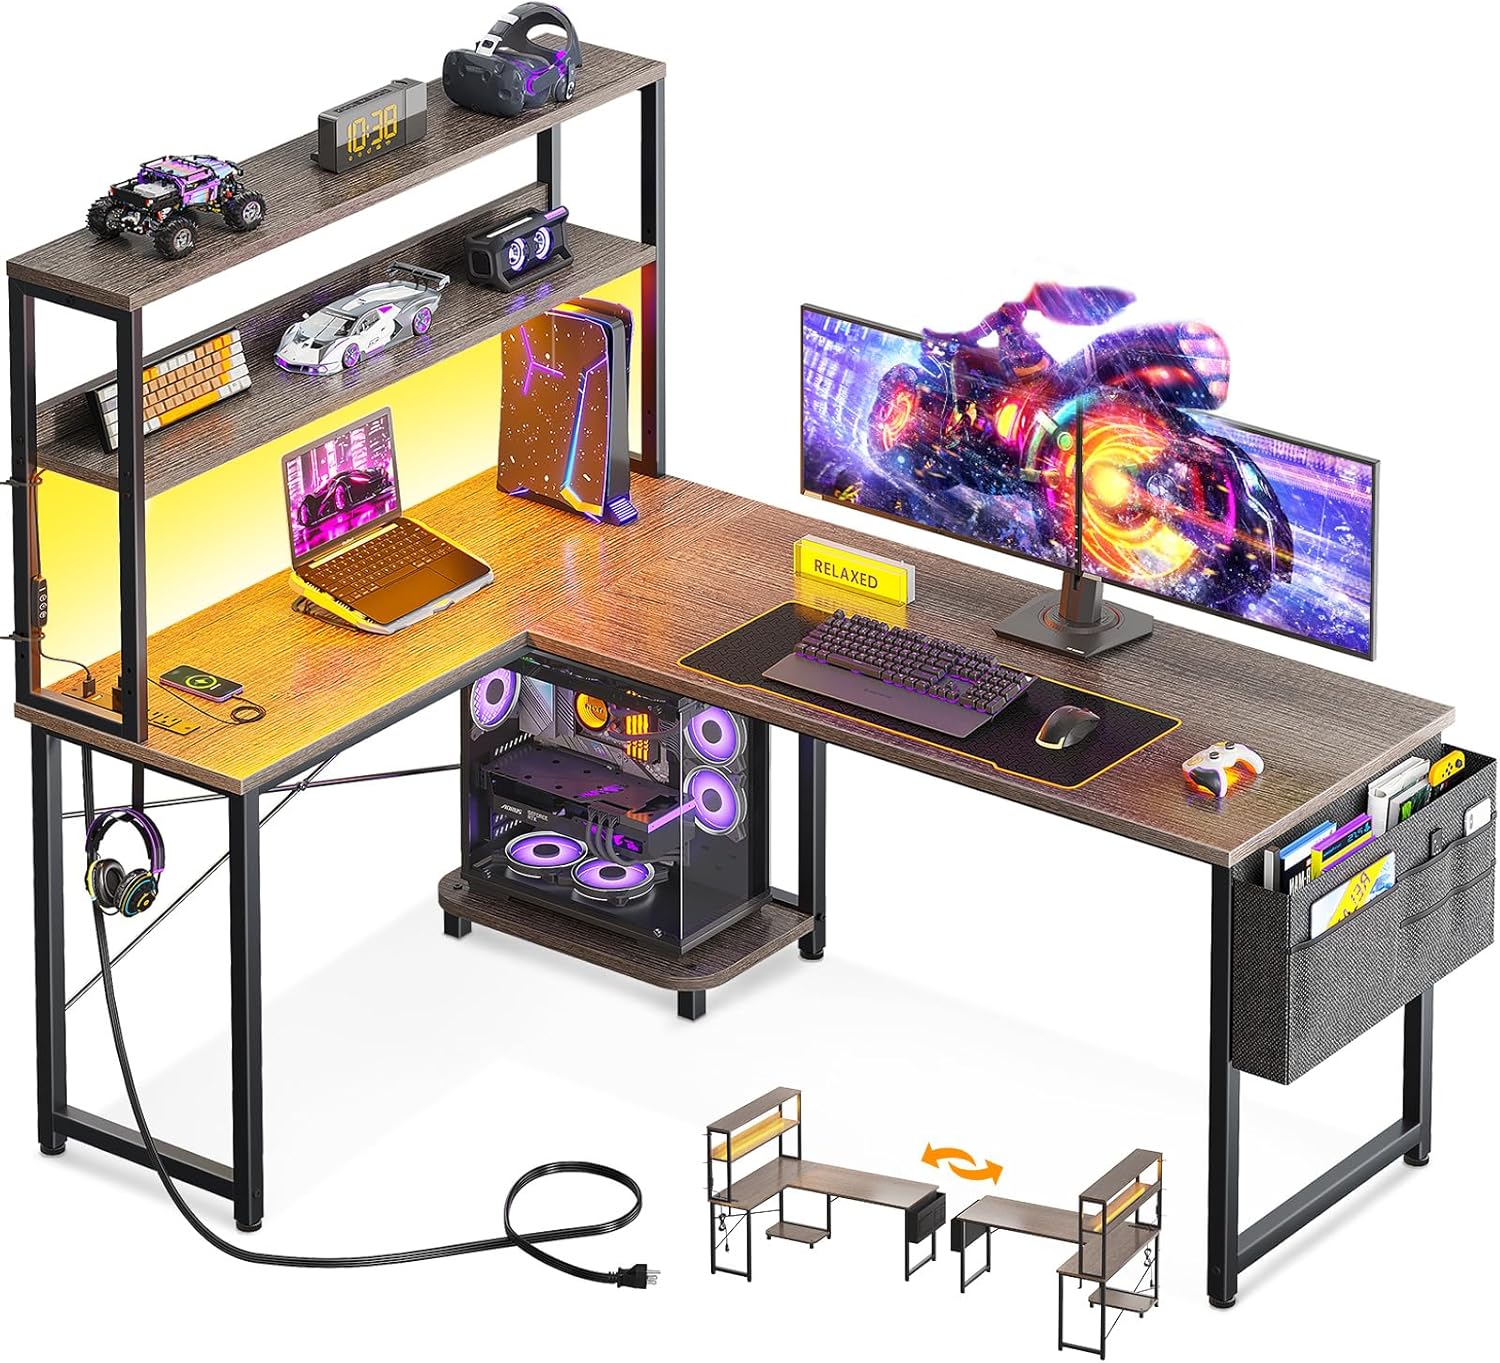
Un complet view of the ODK L-shaped desk, showcasing the spacious desktop, integrated shelves, and accessory bag.
Step 5: Install Fabric Bag and Iron Hook
Attach the fabric storage bag (U) to the side of the desk using the designated screws. The iron hook (11) can be installed on either side of the desk frame for hanging headphones or bags. Screw through the cloth bag or hook directly into the steel frame.
Detail of the integrated power outlets and USB ports, showing how devices can be conveniently charged directly from the desk.
Step 6: Install Desktop Shelf
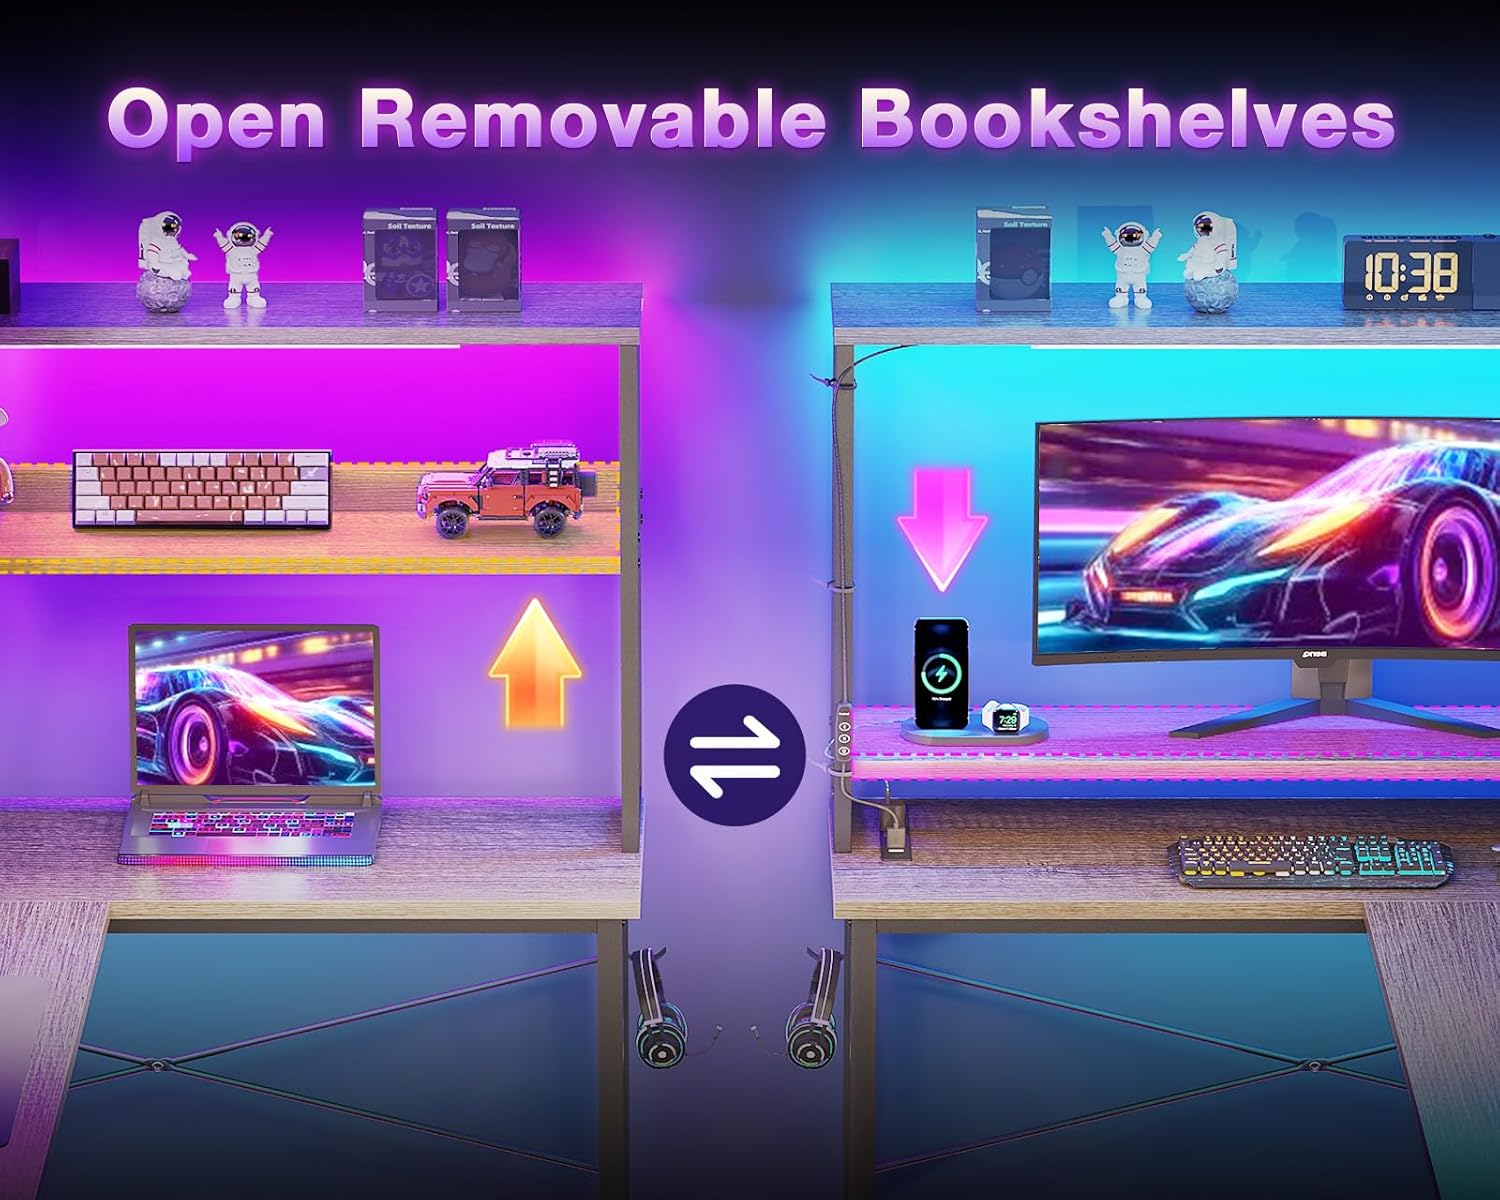
Assemble the desktop shelf components (J, K, O, P) according to the diagrams. The shelf can be mounted at different heights to meet various needs, functioning as a bookshelf or monitor stand. Secure it to the main desk using the appropriate screws and nuts.
The desk features open removable bookshelves, demonstrating how the height can be adjusted for different uses, such as a monitor stand or storage.
Step 7: Install Light Strip and Socket
Attach the LED light strip (13) to the underside of the desktop shelf using the adhesive backing. The light strip can be positioned according to personal preference. Secure the power outlet unit (12) to the designated area on the desk frame using screws. Use the provided straps (14) to manage and fix the wires of the light strip, ensuring a tidy setup.

Close-up of the LED light strip, showcasing its excellent durability, light diffusion, and the controller for adjusting colors and modes.
5. Instruccions de funcionament
5.1 Il·luminació LED
The integrated RGB LED strip offers customizable lighting to enhance your environment.
- Encès/apagat: Use the power button on the inline controller to turn the lights on or off.
- Selecció de color: Cycle through 10 static color presets using the 'C' button.
- Ajust de brillantor: Adjust the brightness with 8 grades using the brightness control buttons.
- Modes dinàmics: Select from 10 dynamic modes using the 'M' button for various lighting effects.
- Funció de memòria: The light strip retains your last setting when powered off.
5.2 Power Outlets
The built-in power strip provides convenient access to power for your devices.
- Preses de CA: Features 3 standard AC outlets (125V/12A) for laptops, monitors, and other electronics.
- Ports USB: Includes 2 USB ports (5V/2A) for charging mobile devices, tablets, and other USB-powered accessories.
- Gestió de cables: Utilize the cable management channels to keep your workspace organized and free from clutter.
5.3 Disseny reversible
The L-shaped configuration of the desk is reversible, allowing you to set up the longer or shorter side on either the left or right, depending on your room layout and preference. This flexibility is determined during the assembly process (refer to Section 4.2, Step 2).
6. Manteniment
To ensure the longevity and appearance of your ODK L-Shaped Desk, follow these maintenance guidelines:
- Neteja: Netegeu les superfícies amb un suau, damp drap. Eviteu productes químics agressius o netejadors abrasius que puguin danyar l'acabat.
- Vessaments: Clean up spills immediately to prevent staining or damage to the engineered wood surface.
- Maquinari: Periodically check and tighten all screws and bolts to maintain stability.
- Calor: Eviteu col·locar objectes calents directament sobre la superfície de l'escriptori. Feu servir posagots o coixinets protectors.
- Llum solar: L'exposició prolongada a la llum solar directa pot causar decoloració o esvaïment.
7. Solució De Problemes
If you encounter any issues with your ODK L-Shaped Desk, refer to the following common problems and solutions:
| Problema | Causa possible | Solució |
|---|---|---|
| L'escriptori està inestable. | Cargols solts; terra irregular. | Tighten all assembly screws. Adjust the foot pads on the bottom of the legs to stabilize the desk on uneven surfaces. |
| Les peces no s'alineen durant el muntatge. | Orientació incorrecta de les peces. | Double-check the assembly diagrams and ensure all parts are oriented correctly before tightening screws. Some parts may look similar but have different hole alignments. |
| Els llums LED no funcionen. | Loose connection; power issue; faulty strip. | Ensure the light strip is properly plugged into the power outlet. Check the connection between the strip and its controller. If issues persist, contact customer support. |
| Power outlets not providing power. | Not plugged in; circuit breaker tripped; faulty unit. | Ensure the desk's power cord is securely plugged into a working wall outlet. Check your home's circuit breaker. Avoid overloading the outlets. |
8. Especificacions
| Característica | Detall |
|---|---|
| Marca | ODK |
| Número de model | B020217SPD01001USDF-1 |
| Dimensions del producte | 53.15 "P x 39.37" W x 58.27" H |
| Color | Roure gris |
| Estil | Modern |
| Material base | Acer d'aliatge |
| Tipus de material superior | Fusta d'enginyeria |
| Tipus d'acabat | Recobert de pols |
| Característica especial | L shaped |
| Tipus de muntatge | Autònom |
| Pes de l'article | 46.1 lliures |
| Components inclosos | Outlet incorporat |
| Nombre de prestatgeries | 2 |
| Muntatge requerit | Sí |
| Inclou totes les eines de muntatge | Sí |
| Opcions d'emmagatzematge | Dual shelves, CPU stand, accessory hook, tool bag |
9. Garantia i assistència
The ODK 53-Inch L-Shaped Desk comes with a Garantia limitada. For specific details regarding warranty coverage, terms, and conditions, please refer to the warranty information provided with your purchase or contact ODK customer service.
If you have any questions, require assistance with assembly, or experience issues with your product, please do not hesitate to contact our professional pre-sale and after-sale service team. We are committed to resolving any problems within 24 hours.
Contact ODK Support:
- Visit the official ODK Store on Amazon: ODK Store
- Consulteu la documentació de compra per conèixer els mètodes de contacte directe.
Ask a question about this manual
Ask about setup, troubleshooting, compatibility, parts, safety, or missing instructions. Manuals+ will review the question and use this page’s manual context to help answer it.