
Jesverty SPS-12003 & JDS210
Manual d'usuari
Jesverty DC Power Supply Variable 0-120V 0-3A & 100MHz Digital Oscilloscope - 2 Channel
Models: SPS-12003 & JDS210
1. Introducció
This manual provides essential information for the safe and effective operation of your Jesverty DC Power Supply (SPS-12003) and Jesverty Digital Oscilloscope (JDS210). Please read this manual thoroughly before use and retain it for future reference.
2. Informació de seguretat
Observeu sempre les següents precaucions de seguretat per evitar lesions o danys a l'equip:
- Ensure proper grounding for both devices.
- No opereu en mullat o damp condicions.
- Avoid exposing the devices to direct sunlight or extreme temperatures.
- No obriu la c.asing; no hi ha peces a l'interior que l'usuari pugui reparar. Demaneu totes les tasques de manteniment a personal qualificat.
- Desconnecteu l'alimentació abans de fer qualsevol connexió o desconnexió.
- Feu servir només els cables d'alimentació i els accessoris especificats.
- Tingueu en compte l'alt voltage and current when operating the power supply.
3. Contingut del paquet
Verifiqueu que tots els elements siguin presents al vostre paquet:
- 1 x Jesverty SPS-12003 DC Power Supply
- 1 x Jesverty JDS210 Digital Oscilloscope
- 1 x Power Cord for DC Power Supply
- 1 x Power Cord for Oscilloscope
- 1 x Output Cable Set for DC Power Supply (Red/Black)
- 2 x Oscilloscope Probes (100MHz)
- 1 x USB Cable (for Oscilloscope data transfer)
- 1 x Manual d'usuari (aquest document)
4. Producte acabatview
4.1 Jesverty SPS-12003 DC Power Supply
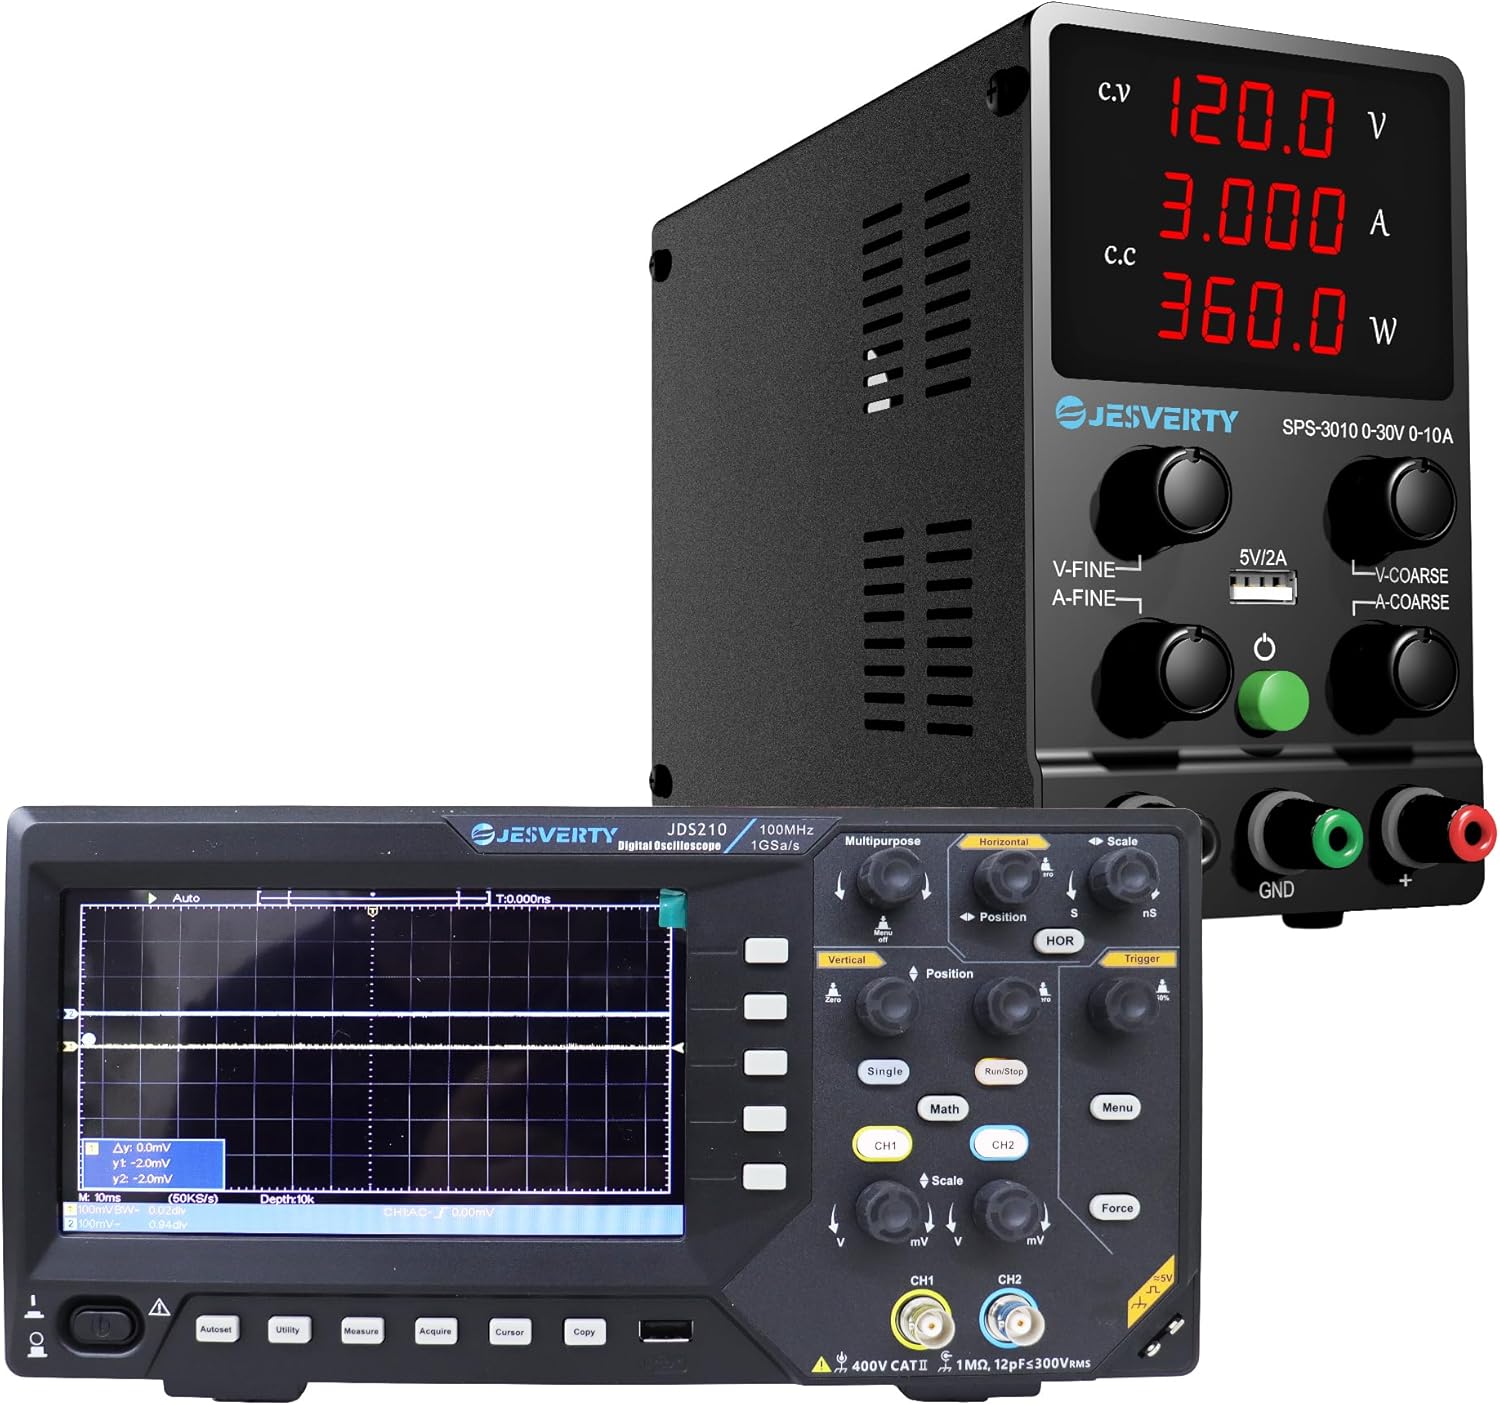
Figura 4.1: The Jesverty DC Power Supply (top) and Digital Oscilloscope (bottom) as a combined unit.

Figura 4.2: Davant view of the Jesverty SPS-12003 DC Power Supply, showing the display and control knobs.

Figura 4.3: Interna view highlighting the intelligent temperature-controlled fans and radiators for extended product life and various protection features.

Figura 4.4: Detailed diagram of the Jesverty SPS-12003 DC Power Supply with numbered components and their names.
The Jesverty SPS-12003 is a variable DC power supply designed for precision applications. It features a 4-digit LED display for real-time voltage (V), current (A), and power (W) readings. It supports both Constant Voltage (C.V.) and Constant Current (C.C.) modes, automatically switching based on load changes. The unit includes coarse and fine adjustment knobs for precise control and a 5V/2A USB charging port.
Components clau (vegeu la figura 4.4):
- Voltage Visualització
- Pantalla actual
- Pantalla de potència
- Indicador de mode CV
- Indicador de mode CC
- VoltagManeta e (Ajust aproximat)
- Botó de corrent (ajust aproximat)
- Voltagbotó e (ajust fi)
- Botó de corrent (ajust fi)
- Port de càrrega USB (5V/2A)
- Terminal de sortida + (vermell)
- Terminal de connexió a terra (verd)
- Terminal de sortida - (Negre)
- Interruptor d'alimentació
- Ventilador de refrigeració
- Entrada d’alimentació de CA.
- Caixa de fusibles (fusible de recanvi a l'interior)
4.2 Jesverty JDS210 Digital Oscilloscope

Figura 4.5: Davant view of the Jesverty JDS210 Digital Oscilloscope, showing the 7-inch TFT LCD and control panel.

Figura 4.6: lateral view of the Jesverty JDS210 Digital Oscilloscope, illustrating its compact design.
The Jesverty JDS210 is a dual-channel digital oscilloscope with a 100MHz bandwidth and 500 MS/s real-time sampling rate. It features a 7-inch TFT LCD (800x480 resolution) for clear waveform display. The oscilloscope supports various cursor modes for accurate measurements and offers USB storage for data transfer. It is compatible with 1X/10X/100X/1000X probes and includes auto-ranging for simplified setup.
Característiques principals:
- 7-inch TFT LCD (800x480 resolution)
- 100MHz Bandwidth, 2 Channels
- 500 MS/s Real-Time SampTarifa ling
- 2 ns/Div to 1000s/Div Time Base Range
- 20 mV/Div~5 V/Div Vertical Scaling
- USB Drive Storage for Waveforms
- 4 Cursor Modes (ΔV, ΔT, ΔV+ΔT, auto-tracking)
- Auto-Ranging for horizontal/vertical adjustments
5. Configuració
5.1 DC Power Supply (SPS-12003) Setup
- Place the power supply on a stable, level surface with adequate ventilation.
- Assegureu-vos que l'interruptor d'alimentació (14) estigui en la posició OFF.
- Connect the provided AC power cord to the AC Power Inlet (16) on the rear of the unit and then to a grounded wall outlet.
- Connect the red output cable to the Output Terminal + (11) and the black output cable to the Output Terminal - (13). If grounding is required, connect the green cable to the Grounding Terminal (12).
- Connect the other end of the output cables to your load or circuit, ensuring correct polarity.
5.2 Digital Oscilloscope (JDS210) Setup
- Place the oscilloscope on a stable, non-slip surface.
- Connect the provided AC power cord to the power input on the rear of the oscilloscope and then to a grounded wall outlet.
- Attach the oscilloscope probes to the BNC input connectors (CH1, CH2) on the front panel. Ensure the probe's ground clip is connected to the circuit's ground.
- Calibrate the probes if necessary, following the instructions in the oscilloscope's on-screen menu or a dedicated probe calibration section (not detailed here, refer to general oscilloscope usage guides).
6. Instruccions de funcionament
6.1 Operating the DC Power Supply (SPS-12003)
- Encès: Flip the Power Switch (14) to the ON position. The LED display will illuminate.
- Configuració Voltage: Utilitzeu el voltagManeta (gruixuda) (6) per a ajustos grans i el volumtage Knob (Fine) (8) for precise adjustments. Observe the Voltage Display (1) to set the desired output voltage.
- Setting Current Limit: Use the Current Knob (Coarse) (7) and Current Knob (Fine) (9) to set the maximum output current. This acts as a safety limit to protect your circuit. Observe the Current Display (2).
- C.V. and C.C. Modes:
- Quan la sortida voltage is stable and below the set current limit, the C.V. Mode Indicator (4) will light up, indicating Constant Voltagmode e.
- If the load draws more current than the set limit, the power supply will automatically switch to Constant Current (C.C.) mode, and the C.C. Mode Indicator (5) will light up. The output voltage will drop to maintain the set current.
- Port de càrrega USB: The 5V/2A USB Charging Port (10) can be used to charge compatible devices. This port operates independently of the main output voltage/Configuració actual.
- Apagar: Before disconnecting the load, turn the output voltage and current knobs to their minimum settings, then flip the Power Switch (14) to the OFF position.

Figura 6.1: Illustration of the 5V/2A USB charging port on the Jesverty SPS-12003 DC Power Supply, compatible with various devices.
6.2 Operating the Digital Oscilloscope (JDS210)
- Encès: Press the power button on the front panel. The display will light up.
- Connexió de sondes: Connect the probe to the BNC input (CH1 or CH2) and attach the probe tip to the test point and the ground clip to the circuit ground.
- Classificació automàtica: Press the "Auto" button for automatic adjustment of vertical and horizontal settings to display a stable waveform.
- Controls verticals: Use the "Vertical" knobs (mV/Div, V/Div) to adjust the vertical scale (voltage per division) and "Position" to shift the waveform vertically.
- Controls horitzontals: Use the "Horizontal" knobs (ns/Div, s/Div) to adjust the horizontal scale (time per division) and "Position" to shift the waveform horizontally.
- Activació: Adjust the "Trigger" level to stabilize the waveform display. The trigger ensures the waveform starts at a consistent point on the screen.
- Mides: Use the "Measure" button to access automatic measurements (e.g., Vpp, Vrms, Frequency, Period). Use the "Cursor" button to enable manual cursors for precise voltage (ΔV) and time (ΔT) measurements.
- Emmagatzematge USB: Connect a USB drive to the USB port on the side of the oscilloscope to save waveform data or screenshots. Use the "Copy" or "Save" function from the menu.
- Selecció de canals: Use the CH1 and CH2 buttons to enable or disable channels and access their individual settings.
7. Manteniment
- Neteja: Disconnect power before cleaning. Use a soft, dry cloth to wipe the exterior of both devices. Do not use abrasive cleaners or solvents.
- Ventilació: Ensure the cooling vents on both devices remain clear of obstructions to prevent overheating.
- Emmagatzematge: Store the devices in a cool, dry place away from direct sunlight and excessive dust when not in use.
- Fuse Replacement (SPS-12003): If the power supply does not turn on, check the fuse located in the Fuse Box (17) at the rear. Replace with a fuse of the same type and rating only.
8. Solució De Problemes
8.1 DC Power Supply (SPS-12003) Troubleshooting
| Problema | Causa possible | Solució |
|---|---|---|
| Sense alimentació/pantalla | Power cord disconnected, power switch off, blown fuse. | Check power cord connection, ensure switch is ON, replace fuse if blown. |
| Sense sortida voltage/actual | Output cables disconnected, voltage/current knobs set to zero, overload protection activated. | Check output cable connections, adjust knobs, reduce load or increase current limit. |
| Power supply switches to C.C. mode unexpectedly | Load current exceeds set current limit. | Increase the current limit setting or reduce the load. |
8.2 Digital Oscilloscope (JDS210) Troubleshooting
| Problema | Causa possible | Solució |
|---|---|---|
| No es mostra cap forma d'ona | Probe not connected, signal too small/large, incorrect trigger settings, channel off. | Check probe connection, adjust vertical scale (mV/Div), adjust trigger level, ensure channel is enabled. |
| Unstable waveform | Incorrect trigger source or level. | Adjust trigger level, select appropriate trigger source (CH1/CH2). Use "Auto" button. |
| Forma d'ona distorsionada | Probe compensation incorrect, signal exceeding input limits. | Calibrate probe compensation, adjust vertical scale. |
9. Especificacions
9.1 Jesverty SPS-12003 DC Power Supply
| Paràmetre | Valor |
|---|---|
| Vol. De sortidatage | 0-120V (ajustable) |
| Corrent de sortida | 0-3A (Ajustable) |
| Mostra | 4-Digit LED (V/A/W) |
| Voltage Resolució de la pantalla | 0.01 V |
| Resolució de pantalla actual | 0.001A |
| Power Display Resolution | 0.1W |
| Sortida USB | 5V/2A |
| Modes de funcionament | Vol. Constanttage (C.V.), Constant Current (C.C.) |
9.2 Jesverty JDS210 Digital Oscilloscope
| Paràmetre | Valor |
|---|---|
| Ample de banda | 100 MHz |
| Canals | 2 |
| Temps real SampTarifa ling | 500 MS/s |
| Mostra | 7-inch TFT LCD (800x480 resolution) |
| Interval de base de temps | 2 ns/Div to 1000s/Div |
| Vertical Scaling | 20 mV/Div~5 V/Div |
| Emmagatzematge | USB Drive (Waveforms, Screenshots) |
| Compatibilitat de la sonda | 1X/10X/100X/1000X |
10. Garantia i Suport
Jesverty products are designed and manufactured to the highest quality standards. For warranty information and technical support, please refer to the warranty card included with your product or visit the official Jesverty website. Please have your model number (SPS-12003 & JDS210) and purchase date ready when contacting support.
Per a més ajuda, podeu visitar el Jesverty Store on Amazon.
Ask a question about this manual
Ask about setup, troubleshooting, compatibility, parts, safety, or missing instructions. Manuals+ will review the question and use this page’s manual context to help answer it.