
Introducció
This manual provides detailed instructions for the setup, programming, and operation of your RESTMO Sprinkler Timer, Model O-HT-1AW. Please read this manual thoroughly before use to ensure proper function and longevity of the device.
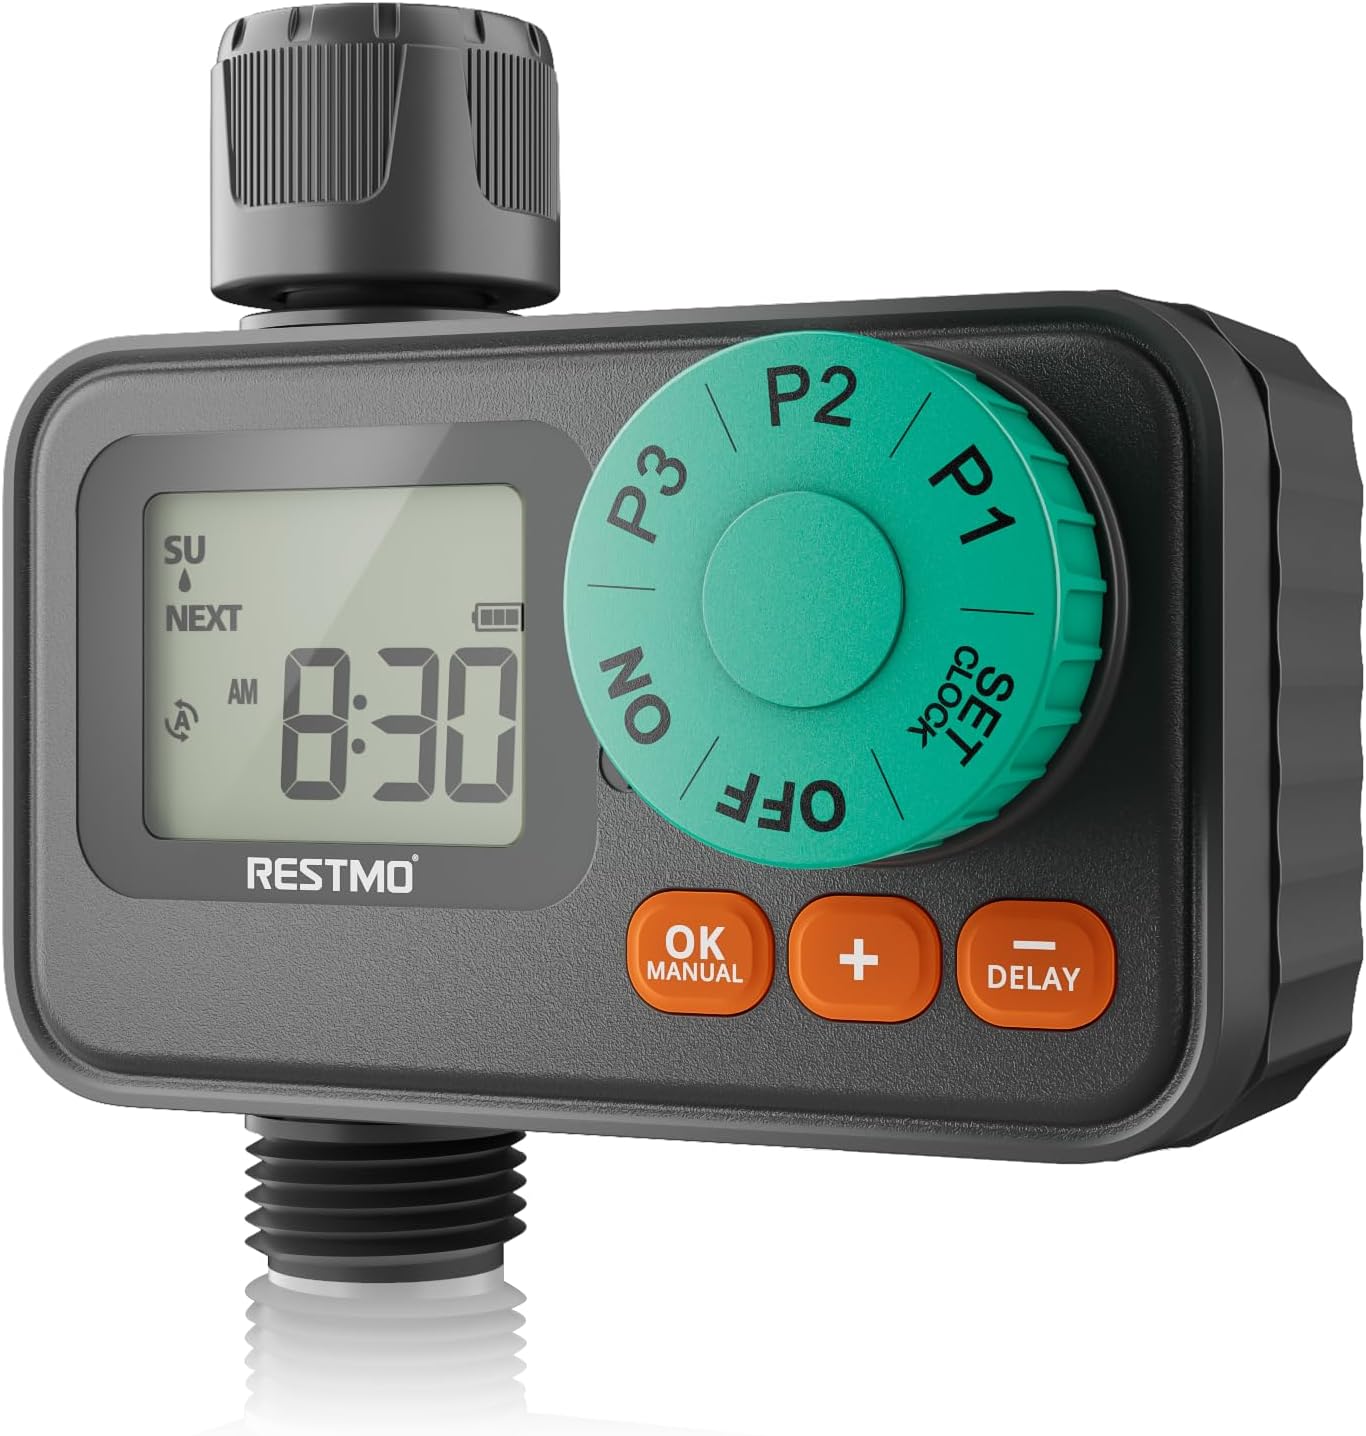
Image: RESTMO Sprinkler Timer, Model O-HT-1AW, connected to a garden faucet and hose, ready for use.
Característiques clau
- 3 Independent Programs: Customize start times, durations (1 min - 4 hrs 59 mins), and frequencies (specific days) for diverse watering needs.
- Weekly Schedule Mode: Set exact days and times for irrigation, ideal for specific plant care or local watering regulations.
- Upgraded Waterproof & Durability: Seamless embedded screen prevents water ingress, and a rugged textured panel ensures longevity. IP55 waterproof protection.
- Mode de retard per pluja: Suspend watering for 24, 48, or 72 hours without losing programmed settings.
- Mode de reg manual: Initiate immediate watering from 1 minute to 299 minutes.
- Configuració fàcil: Oversized dial and large LCD screen for intuitive programming and monitoring.
- Compatibilitat: Single outlet with solenoid valve, fitting for 3/4" hose and faucet. Operates with 8-120 psi water pressure.

Image: Visual representation of the timer's main features, including timed watering, manual control, rain delay, and waterproof design.
Guia de configuració
1. Instal·lació de la bateria
The timer requires 2 x AAA Alkaline Batteries (not included). Ensure your hands are dry when handling batteries and the battery compartment to prevent moisture ingress.
- Open the waterproof battery compartment cover located on the back of the timer.
- Insert two fresh AAA alkaline batteries, observing the correct polarity (+/-).
- Securely close the battery compartment cover to maintain its waterproof seal.
Video: Official guide demonstrating battery installation and initial setup steps for the RESTMO Sprinkler Timer.
2. Connexió del temporitzador
Connect the timer to your outdoor faucet and garden hose.
- Screw the timer's inlet (top connection) onto a standard 3/4" outdoor faucet. Ensure the built-in metal filter is in place to prevent debris from entering the timer.
- Screw your garden hose onto the timer's outlet (bottom connection).
- Tighten all connections by hand to prevent leaks. Do not overtighten.

Image: The sprinkler timer installed on a faucet with hoses attached, illustrating proper connection.
3. Configuració del rellotge
- Gireu el dial a CONFIGURA EL RELOJ.
- Utilitza el + / - buttons to set the current time (hour and minute).
- Premeu el botó OK button to switch between setting the hour and minute.
- Turn the dial to another position (e.g., ON) to save the changes.
Programació d'horaris de reg
The timer features three independent programs (P1, P2, P3). Each program can be set with a unique start time, duration, and watering days.
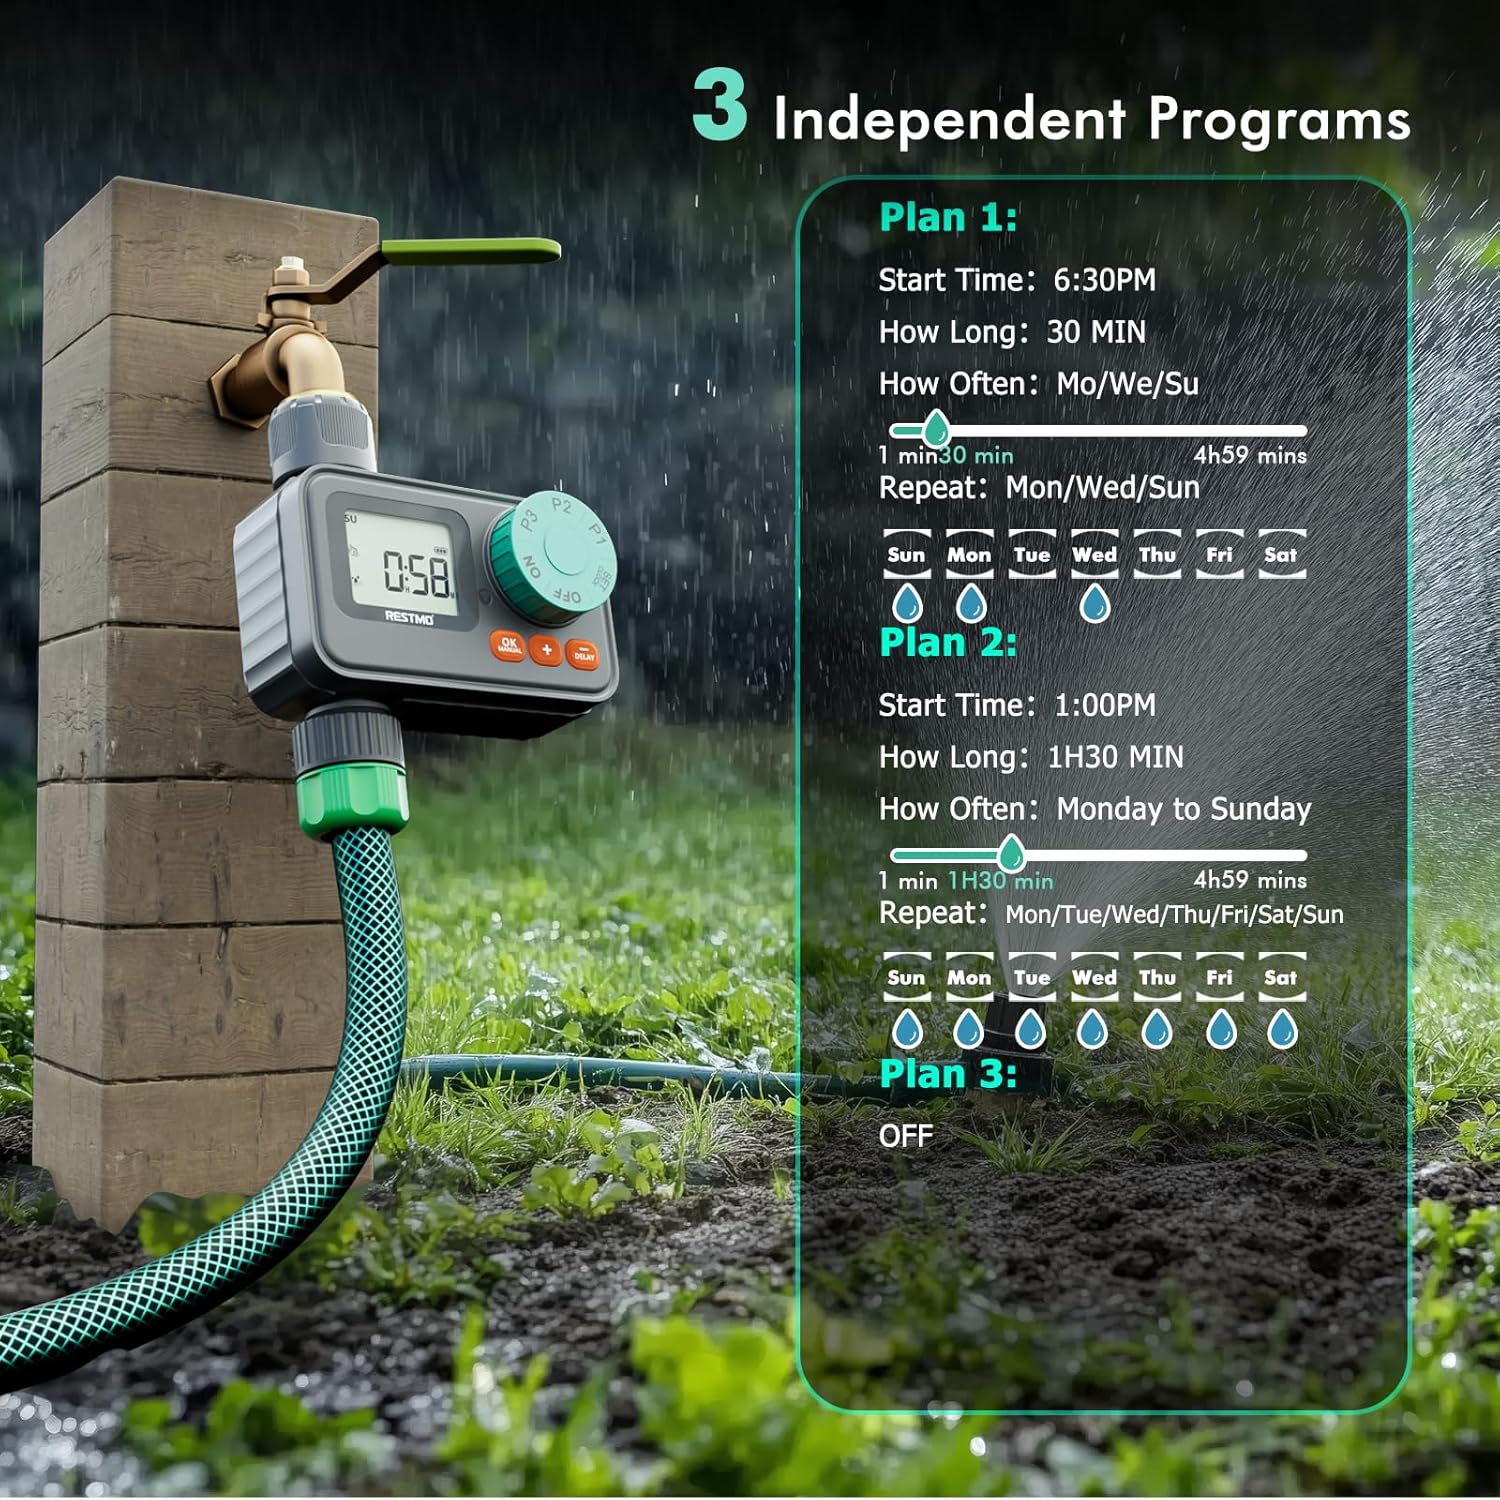
Imatge: Un cop mésview of the three independent programming options (P1, P2, P3) and their customizable settings.
Setting Program 1 (P1)
- Gireu el dial a P1.
- Utilitza el + / - botons per configurar el HORA D'INICI. Premeu OK to confirm and move to QUANT TEMPS.
- Utilitza el + / - buttons to set the watering QUANT TEMPS (duration). Press OK to confirm and move to DIA DE L'AIGUA.
- Utilitza el + button to select desired watering days and the - button to unselect days.
- Turn the dial to another position (e.g., ON) to save the changes.
Setting Program 2 (P2)
Follow the same steps as Program 1, but turn the dial to P2 to set its independent schedule.
Setting Program 3 (P3)
Follow the same steps as Program 1, but turn the dial to P3 to set its independent schedule. To turn P3 off, keep pressing the - button until 'OFF' is displayed for the watering days.
Modes de funcionament
Reg automàtic
Once programs are set, turn the dial to ON to activate automatic watering. The LCD screen will flash between the next watering start time and the current time when watering is OFF. When watering is ON, the LCD screen displays the remaining time of the current watering program.
Reg manual
To initiate manual watering:
- With the dial at ON and the timer not actively watering, long press the OK MANUAL botó durant 3 segons.
- Utilitza el + / - buttons to select the desired watering duration (1 min to 299 mins).
- Premeu el botó OK botó per iniciar el reg manual.
- To cancel manual watering, turn the dial to OFF i després torna a ON.
Reg retard de pluja
To temporarily pause scheduled watering due to rain:
- With the dial at ON and the timer not actively watering, long press the RETARD botó durant 3 segons.
- Utilitza el + / - buttons to select a delay of 24, 48, or 72 hours.
- Premeu el botó OK button or wait for 3 seconds for the rain delay to start automatically.
- To cancel rain delay, turn the dial to OFF i després torna a ON.

Image: The timer's display showing the rain delay function, allowing selection of 24, 48, or 72-hour delays.
Manteniment
Cleaning the Filter Washer
The timer includes a built-in metal filter to prevent debris from entering the system. Periodically check and clean this filter to ensure optimal water flow and prevent blockages.
- Tanqueu el subministrament d'aigua a l'aixeta.
- Desenrosqueu el temporitzador de l'aixeta.
- Traieu la rentadora del filtre de l'entrada.
- Esbandiu el filtre amb aigua corrent per eliminar qualsevol residu acumulat.
- Reinsert the clean filter washer and reattach the timer to the faucet.
Emmagatzematge d'hivern
Durant temperatures de congelació, traieu el temporitzador de l'aixeta i guardeu-lo a l'interior per evitar danys per l'expansió del gel.
Resolució de problemes
- Sense flux d'aigua: Check if the faucet is fully open. Ensure the filter washer is clean and not blocked. Verify that the timer is set to ON and a program is active or manual watering is engaged.
- Timer not turning on/off: Check battery levels and replace if necessary. Ensure the battery compartment is securely closed. Verify that programs are correctly set and the dial is on ON.
- Fuites de les connexions: Ensure all connections are hand-tightened. Check if rubber washers are properly seated and not damaged. Replace washers if worn.
- Problemes de visualització: If the LCD screen is dim or unresponsive, replace batteries. If water intrusion is suspected, ensure the battery compartment is sealed and the screen is not damaged.
Especificacions
| Número de model | O-HT-1AW |
| Marca | Restmo |
| Material | Plàstic |
| Dimensions del producte | 5 "P x 3" W x 5" H |
| Pes de l'article | 0.27 quilos |
| Durada del reg | 1-299 minuts |
| Freqüència de reg | Monday to Sunday (7-day programmable) |
| Classificació impermeable | IP55 |
| Pressió de treball | 8-120 PSI (0.5-8.0 bar) |
| Fil d'entrada | 3/4" NH |
| Màx. Velocitat de flux | 10 GPM (35 L/Min) |
| Interval de temperatura | De 38 a 120 °C (3 a 50 °F) |

Image: Detailed diagram illustrating the timer's dimensions and key technical specifications.
Garantia i Suport
For warranty information or technical support, please refer to the contact details provided with your product packaging or visit the official Restmo weblloc. Conserveu el rebut de compra per a reclamacions de garantia.