
Introducció
This manual provides comprehensive instructions for the setup, operation, and maintenance of your Vrriis Wireless HDMI Transmitter and Receiver system (1TX 3RX). Please read this manual thoroughly before using the product to ensure proper functionality and to maximize your experience.
Producte acabatview
The Vrriis Wireless HDMI Transmitter and Receiver system allows for wireless transmission of high-definition video and audio signals. This package includes one transmitter (TX) and three receivers (RX), enabling a 1-to-3 connection for distributing HDMI signals to multiple displays without the need for extensive cabling.
Les característiques clau inclouen:
- Full HD 1080p @60Hz resolution support.
- Wireless transmission range up to 1300 feet (in open field).
- Dual antenna design for stable 2.4/5G transmission.
- IR pass-back function (20-60KHz) for remote control of source devices.
- Local HDMI loop-out on the transmitter.
- Built-in ESD electrostatic protection.
- Low latency (0.05s).
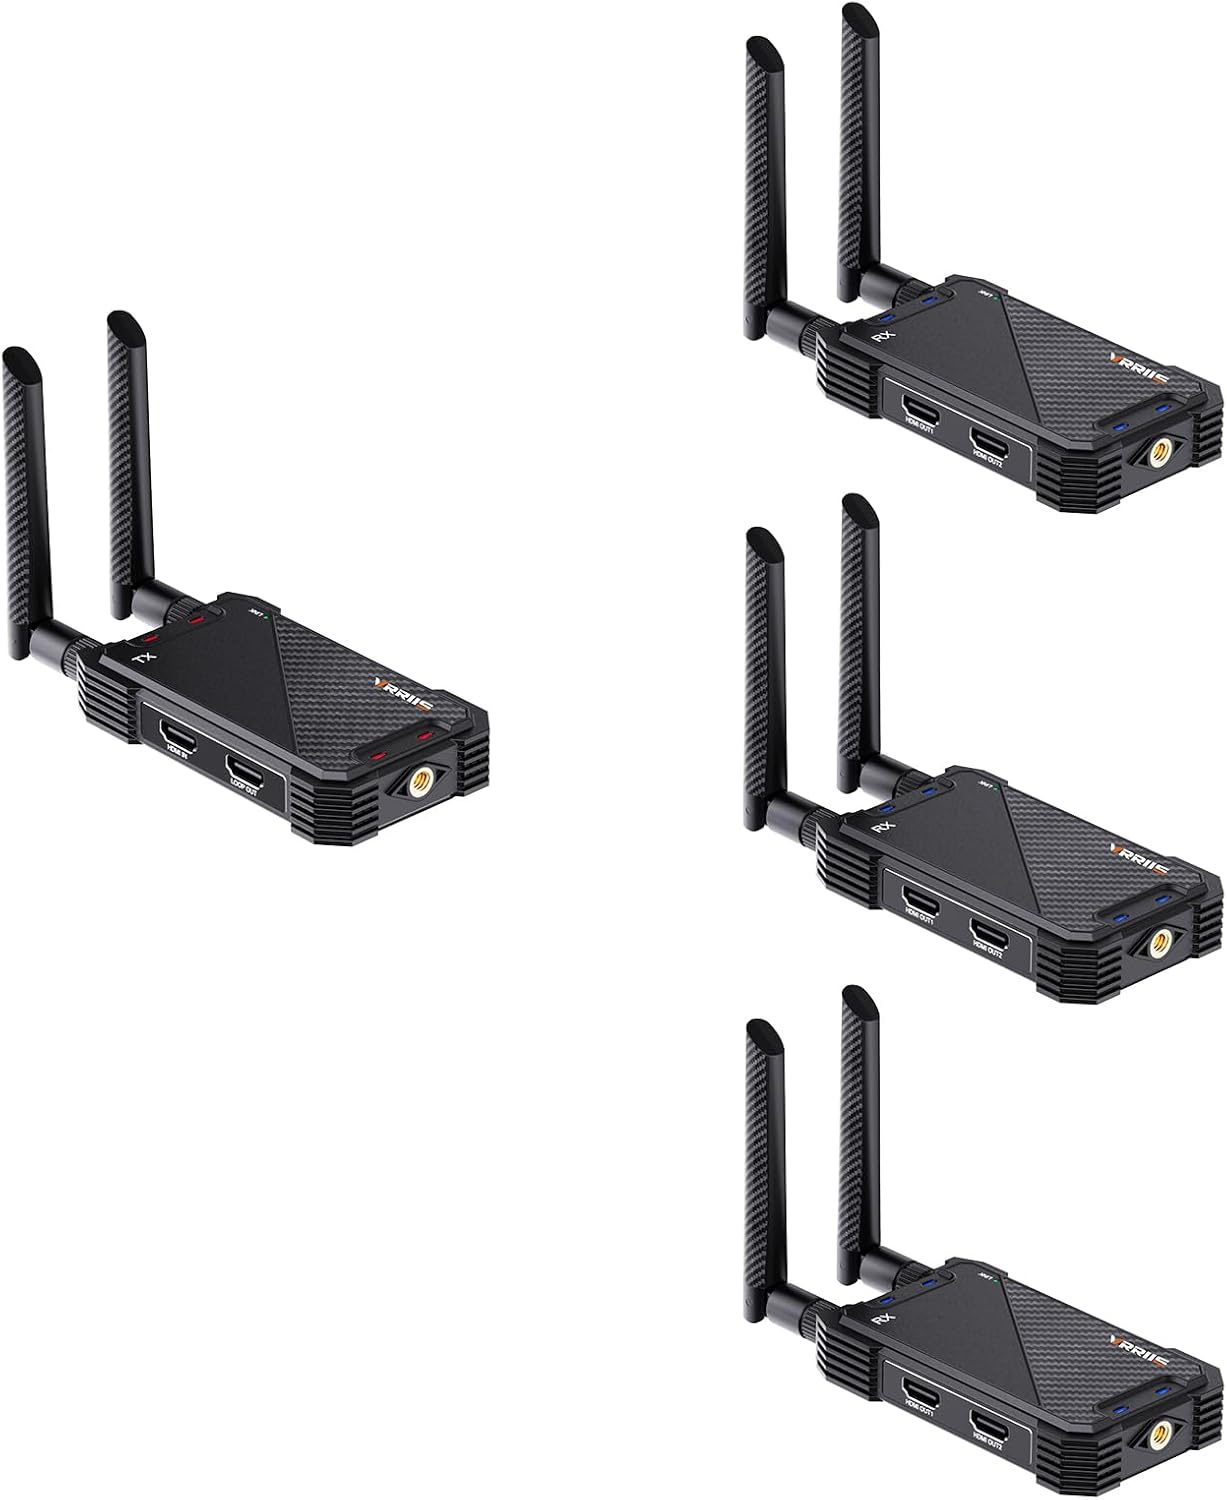
Image: The Vrriis Wireless HDMI system, showing one transmitter and three receivers.

Image: Illustration highlighting the Full HD 1080P resolution support and 2.4GHz/5GHz wireless frequencies.

Image: Depiction of the system's capability to support up to 5 receivers from a single transmitter, indicating scalability.
Instruccions de configuració
This section details the initial setup and pairing process for your Vrriis Wireless HDMI system, especially for the separately packaged receivers.
1. Initial Pairing of Additional Receivers
Important: The two separately packaged receivers must be paired with the transmitter from the main kit before first use. Follow these steps carefully.
- Encès: Connect the power adapters to both the Transmitter (TX) and one Receiver (RX). Ensure the green indicator light on both units turns on.
- Connecta HDMI: Use an HDMI cable to connect the HDMI IN port on the Transmitter (TX) to the HDMI OUT 1 port on the Receiver (RX).
- Observe Pairing: After a short moment, both the green light on the TX and RX units will flash simultaneously, indicating successful pairing. If the lights do not flash, the pairing has failed.
- Repeat for other Receivers: Disconnect the first paired receiver and repeat steps 1-3 for each additional receiver you wish to pair with the transmitter.

Image: A visual guide emphasizing the need to pair separately packaged receivers with the transmitter.

Image: Detailed diagram illustrating the connection points and indicator lights for the pairing process between a transmitter and a receiver.
2. Connecting to Source and Display Devices
- Connexió del transmissor:
- Connect your HDMI source device (e.g., DVD player, set-top box, laptop) to the Entrada HDMI port on the Transmitter (TX) using an HDMI cable.
- (Optional) If you require a local display, connect an HDMI cable from the SORTIDA HDMI LOOP port on the TX to a local monitor or TV.
- Connect the power adapter to the TX unit.
- Connexió del receptor:
- Connect your display device (e.g., HDTV, projector, monitor) to the SORTIDA HDMI port on each Receiver (RX) using an HDMI cable.
- Connect the power adapter to each RX unit.
- Encès: Ensure all devices (source, TX, RX, displays) are powered on. The system should automatically establish a wireless connection and display the source content on the connected screens.

Image: Diagram illustrating the connection of the wireless HDMI transmitter to a source device with a loop-out, and the receiver to various display devices.
Instruccions de funcionament
Funcionament bàsic
Once the transmitter and receivers are powered on and connected, the system operates automatically. The wireless connection will be established, and the video/audio from your source device will be transmitted to all connected displays.
Funció de control remot IR
The system supports IR pass-back, allowing you to control your HDMI source device from the location of the receiver. This is useful for changing channels on a set-top box or navigating menus on a DVD player from a remote viewzona d'ing.
- Connect IR Emitter (TX): Plug the IR emitter cable into the IR OUT port on the Transmitter. Position the emitter head directly in front of the IR sensor of your source device.
- Connect IR Receiver (RX): Plug the IR receiver cable into the IR IN port on the Receiver. Position the receiver head in a location where it can receive signals from your remote control.
- Control: Point your source device's remote control at the IR receiver head on the RX unit. The signal will be transmitted back to the TX unit and then to your source device, enabling remote control.
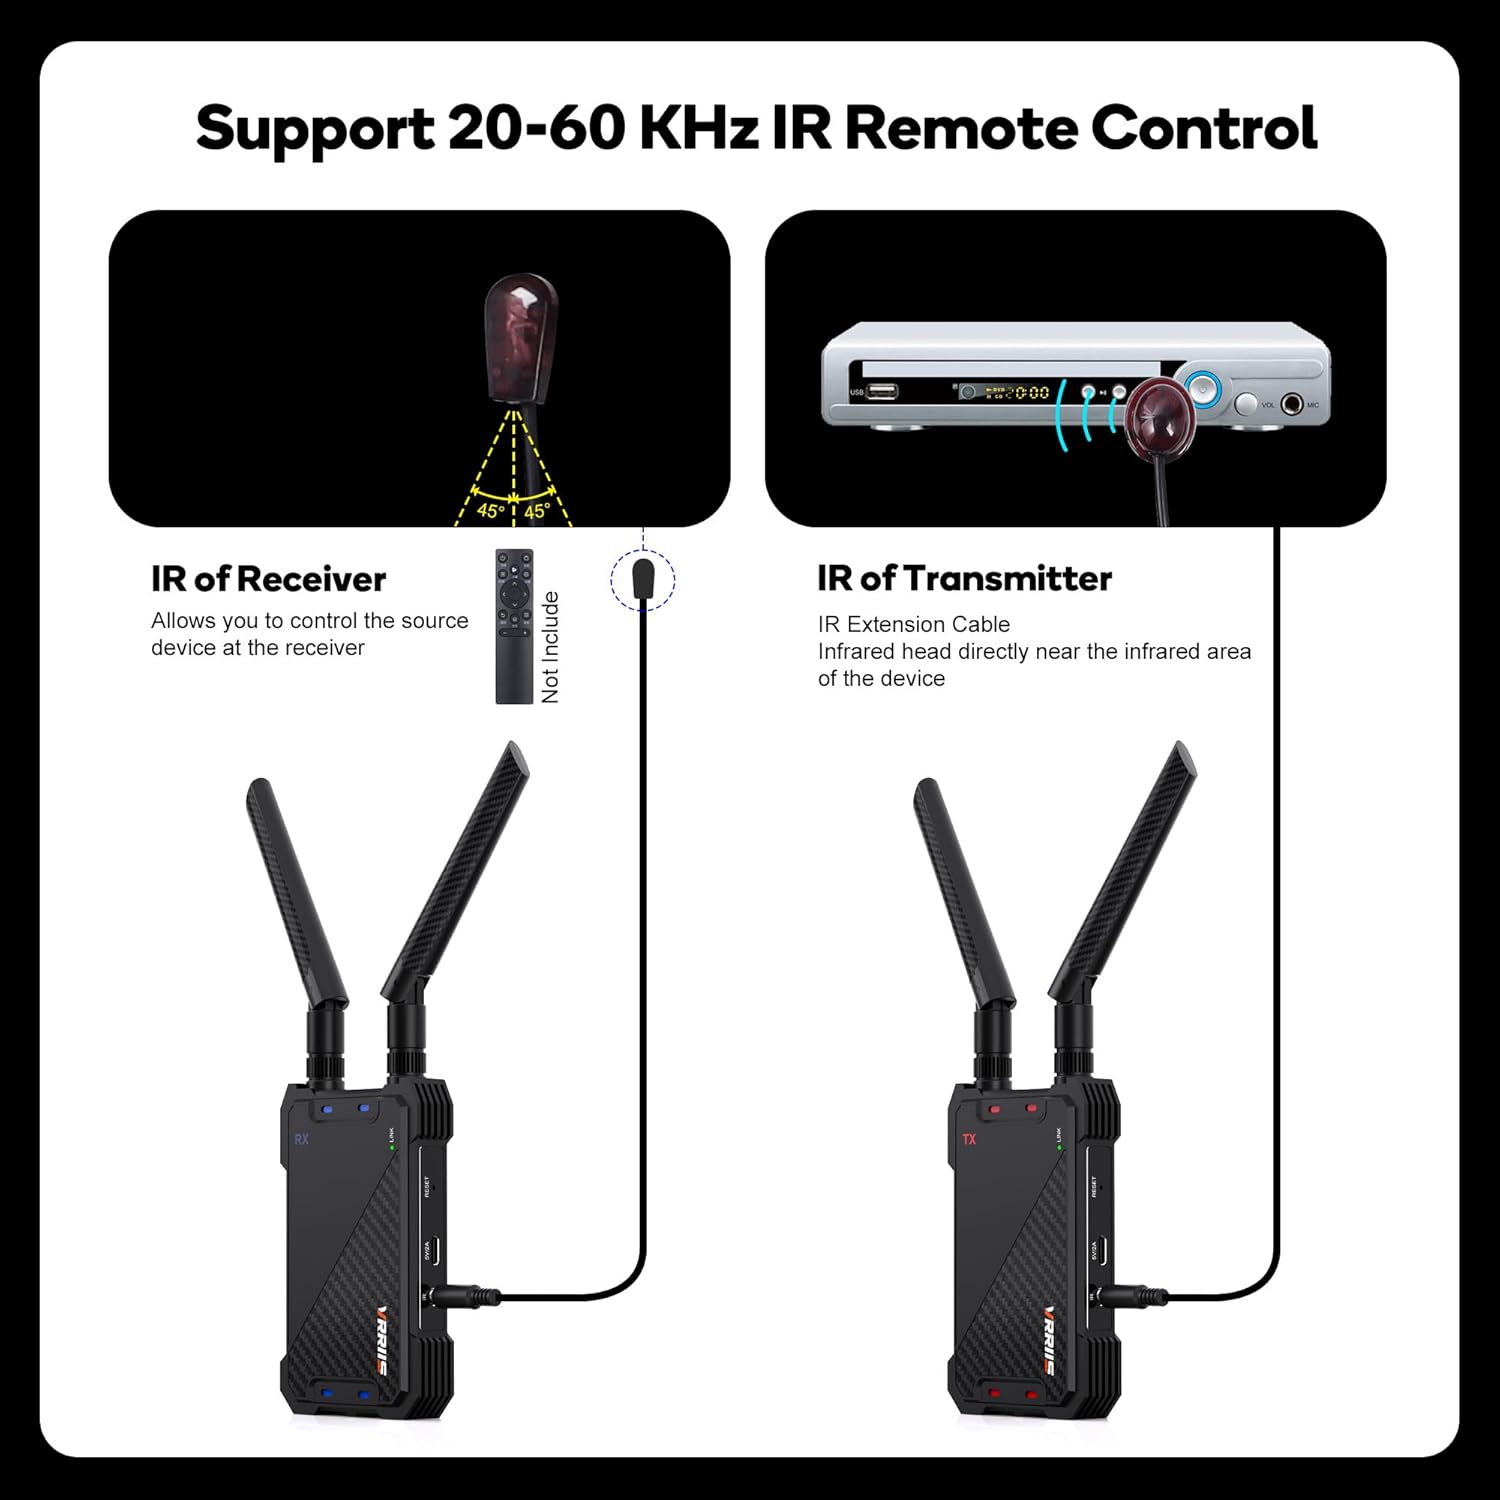
Image: Diagram showing the connection and placement of IR cables for both the receiver (IR IN) and transmitter (IR OUT) to enable remote control functionality.
HDMI Loop-Out Function
The transmitter unit includes an HDMI Loop-Out port. This allows you to connect a local display directly to the transmitter, mirroring the content being sent wirelessly to the receivers. This is useful for monitoring the source content or for a local viewconfiguració.
Manteniment
To ensure the longevity and optimal performance of your Vrriis Wireless HDMI system, follow these maintenance guidelines:
- Neteja: Use a soft, dry cloth to clean the units. Avoid using liquid cleaners or abrasive materials.
- Ventilació: Ensure the units are placed in well-ventilated areas to prevent overheating. Do not block ventilation openings.
- Emmagatzematge: When not in use for extended periods, store the units in a cool, dry place away from direct sunlight and extreme temperatures.
- Potència: Always use the provided power adapters. Disconnect power during electrical storms or when not in use.
Resolució de problemes
If you encounter issues with your Vrriis Wireless HDMI system, refer to the following troubleshooting tips:
| Problema | Causa possible | Solució |
|---|---|---|
| No picture/sound on display. |
|
|
| Senyal intermitent o de mala qualitat. |
|
|
| IR remote control not working. |
|
|
Nota: Metal, walls, bricks, or glass can significantly shorten signal coverage or cause severe signal loss. For optimal performance, ensure a clear line of sight or minimal obstructions between the transmitter and receivers.
Especificacions
| Característica | Detall |
|---|---|
| Model | 1TX 3RX |
| Suport a la resolució | Up to 1080p @60Hz (Full HD) |
| Freqüència sense fil | 2.4 GHz / 5 GHz |
| Distància de transmissió | Fins a 400 metres (1300 peus) en camp obert |
| Latència | 0.05 segons |
| Freqüència IR | 20-60KHz |
| Protecció ESD | Built-in electrostatic protection circuit |
| Compatibilitat | HDMI-equipped devices (DVDs, DVRs, IPTV, CCTV, Blu-ray players, set-top boxes, cable/satellite boxes, computer systems, game consoles, HDTVs, projectors, monitors) |
Garantia i Suport
Vrriis products are designed for reliability and performance. For information regarding warranty coverage, please refer to the warranty card included with your product or visit the official Vrriis weblloc.
If you require technical assistance or have questions not covered in this manual, please contact Vrriis customer support through the retailer's platform or the official brand website. Please have your product model number and purchase details ready when contacting support.