
1. Introducció
Thank you for choosing the Ströme Cooler 12 Portable Air Conditioner. This manual provides essential information for the safe and efficient operation, installation, and maintenance of your unit. Please read it thoroughly before use and retain it for future reference.

Image: The Ströme Cooler 12 Portable Air Conditioner positioned in a living room, demonstrating its compact design and exhaust hose setup.
2. Informació de seguretat
Observeu sempre les precaucions de seguretat següents per reduir el risc d'incendi, descàrrega elèctrica o lesions.
- Assegureu-vos que la font d'alimentació coincideixi amb el voltags'especifica a l'etiqueta de classificació de la unitat.
- No feu servir la unitat amb un cable o un endoll danyats.
- Mantingueu l'entrada i sortida d'aire lliures d'obstruccions.
- No introduïu objectes a les sortides d'aire.
- Desconnecteu la unitat abans de netejar-la o fer-ne el servei.
- Aquest aparell no està pensat per ser utilitzat per persones (inclosos nens) amb capacitats físiques, sensorials o mentals reduïdes, o amb manca d'experiència i coneixements, tret que hagin rebut la supervisió o instruccions sobre l'ús de l'aparell per una persona responsable de la seva seguretat.
- Els nens han de ser supervisats per assegurar-se que no juguin amb l'aparell.
3. Producte acabatview
The Ströme Cooler 12 is a versatile portable air conditioner designed for rooms between 16-23 m². It offers cooling, dehumidification, and fan functions.
3.1 Components principals
- Main Unit with integrated wheels and carrying handles.
- Exhaust Hose for expelling warm air.
- Window Kit (adaptor and plate, not explicitly listed but implied by exhaust hose).
- Control remot.
- Washable Air Filters.
- Control Panel with LCD display.
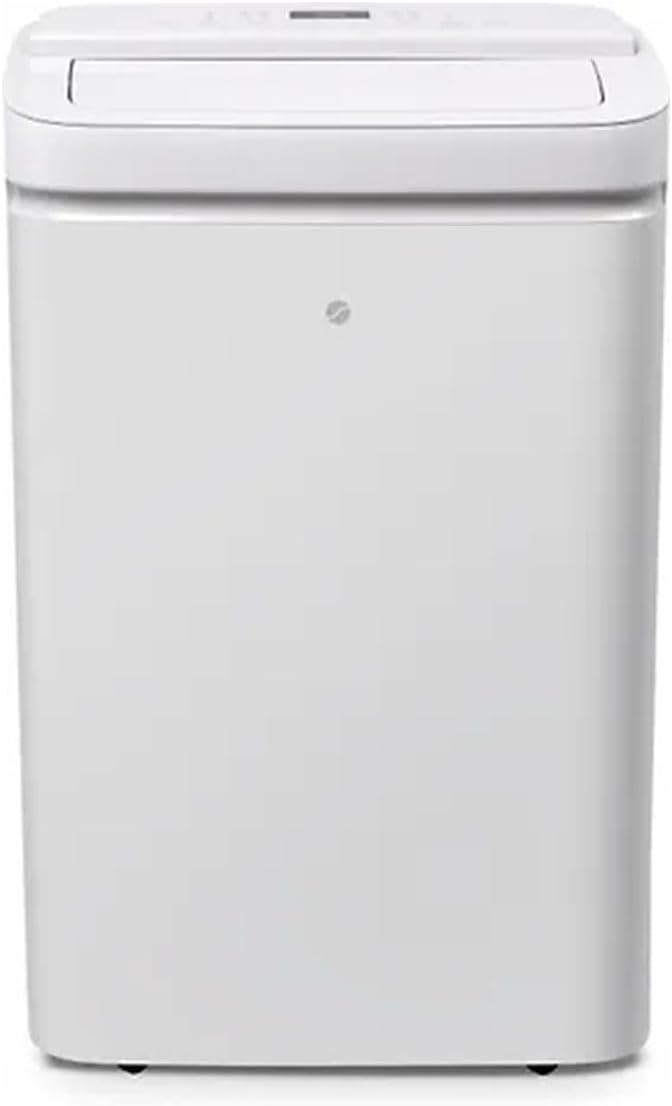
Imatge: Frontal view of the Ströme Cooler 12 unit, showcasing el seu elegant disseny blanc.

Image: Close-up of the top control panel with an LCD display and various function buttons.
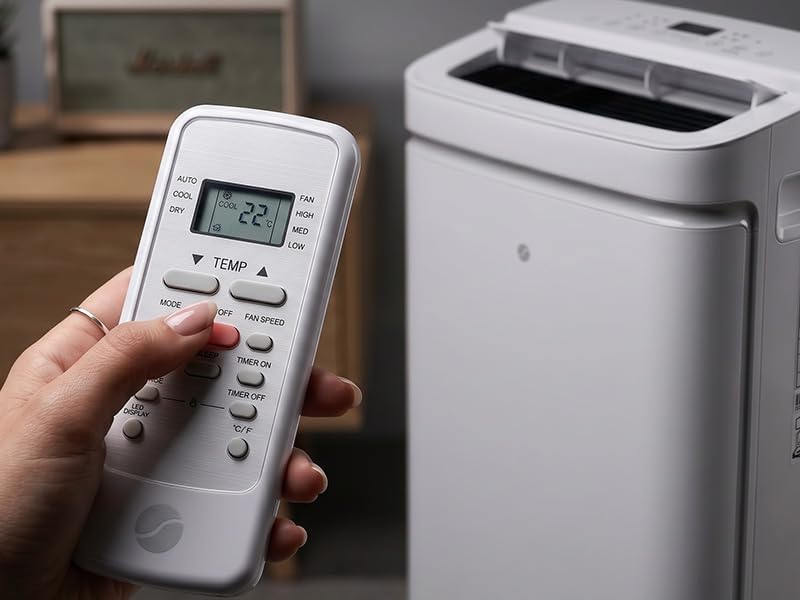
Image: The remote control for the Ströme Cooler 12, showing buttons for mode, temperature, fan speed, and timer.
4. Configuració
Follow these steps for initial setup of your portable air conditioner.
- Desembalatge: Carefully remove the unit from its packaging. Retain packaging for storage or transport.
- Posicionament: Place the unit on a flat, stable surface. Ensure there is at least 30 cm (12 inches) of space around the unit for proper airflow. The integrated wheels allow for easy movement between rooms.
- Instal·lació de la mànega d’escapament:
- Connecteu la mànega d'escapament a la sortida d'aire de la part posterior de la unitat.
- Esteneu la mànega d'escapament fins a la finestra o obertura més propera.
- Secure the window kit adaptor to the end of the hose and install it in the window opening to seal off the gap and prevent warm air from re-entering the room.

Image: A person connecting the exhaust hose to a window opening, ensuring proper ventilation.
- Connexió d'alimentació: Connecteu el cable d'alimentació a una presa elèctrica amb connexió a terra.
5. Instruccions de funcionament
The Ströme Cooler 12 offers multiple operating modes and settings for optimal comfort.
5.1 Tauler de control i comandament a distància
The unit can be operated using the control panel on top of the unit or the included remote control. The LCD display shows current settings.

Imatge: Detallada view of the control panel, highlighting the mode and fan speed buttons.
5.2 Modes de funcionament
- Mode de refrigeració: Select 'Cool' to activate the air conditioning function. Adjust the desired temperature using the temperature up/down buttons. The unit will cool the room to the set temperature.
- Mode de deshumidificació: Select 'Dry' to remove excess moisture from the air. In this mode, the fan speed is typically fixed, and temperature cannot be adjusted.
- Mode de ventilador: Select 'Fan' to circulate air without cooling. Choose from three fan speeds (Low, Medium, High).
5.3 Velocitat del ventilador
In Cooling and Fan modes, you can select from three fan speeds: Low, Medium, or High, to adjust airflow intensity.
5.4 Funció de temporitzador
The 24-hour timer allows you to set the unit to turn on or off automatically after a specified period. Use the 'Timer On' or 'Timer Off' buttons on the remote control to set the desired duration.
5.5 Funció de balanceig
Activate the 'Swing' function to enable automatic oscillation of the air outlet louvers, distributing air evenly throughout the room.
6. Manteniment
Regular maintenance ensures optimal performance and extends the lifespan of your Ströme Cooler 12.
6.1 Cleaning the Air Filters
The washable filters should be cleaned regularly, typically every two weeks, depending on usage and air quality.
- Apagar: Desconnecteu sempre la unitat abans de netejar-la.
- Elimina els filtres: Locate and carefully remove the air filters from the back of the unit.
- Neteja els filtres: Renteu els filtres amb aigua tèbia i un detergent suau. Esbandiu-los bé.
- Filtres secs: Allow the filters to air dry completely before reinserting them. Do not expose them to direct sunlight or heat.
- Reinstal·lar els filtres: Place the dry filters back into their original position.

Image: The rear of the Ströme Cooler 12, indicating the location of the exhaust port and the washable air filters.
6.2 Neteja de l'exterior de la unitat
Netegeu l'exterior de la unitat amb un damp tela. No utilitzeu productes químics aggressivs ni netejadors abrasius.
7. Solució De Problemes
If you encounter issues with your Ströme Cooler 12, refer to the following common problems and solutions.
| Problema | Causa possible | Solució |
|---|---|---|
| La unitat no s'encén | Sense font d'alimentació El cable d'alimentació no està connectat | Comproveu la presa de corrent Assegureu-vos que el cable d'alimentació estigui ben connectat |
| Refrigeració insuficient | Els filtres d'aire estan bruts Mànega d'escapament no instal·lada correctament Mida de l'habitació massa gran Finestres/portes obertes | Netegeu els filtres d'aire Assegureu-vos que la mànega d'escapament estigui segellada Verify room size is within 16-23 m² Tanqueu totes les finestres i portes |
| La unitat és sorollosa | La unitat no està sobre una superfície plana Obstrucció al ventilador | Col·loqueu la unitat sobre una superfície plana Comproveu i elimineu qualsevol obstrucció |
| Fuga d'aigua | Drain plug not properly sealed Water tank full (if applicable) | Assegureu-vos que el tap de drenatge estigui ben fixat Drain water tank as per manual (if applicable) |
8. Especificacions
| Característica | Detall |
|---|---|
| Marca | Ströme |
| Número de model | Nevera 12 |
| Capacitat de refrigeració | 12,000 BTU (3.5 kW) |
| Mida recomanada de l'habitació | 16-23 m² |
| Funcions | Refrigeració, Deshumidificació, Ventilador |
| Velocitats del ventilador | 3 (Baix, Mitjà, Alt) |
| Temporitzador | 24 hores |
| Nivell de soroll | Màxim 64 dB |
| Color | Blanc |
| Material | Plàstic |
| ASIN | B0F7XMXYDJ |

Image: The energy efficiency label for the Ströme Cooler 12, detailing its performance metrics.
9. Garantia i Suport
For warranty information and customer support, please refer to the documentation included with your purchase or contact Ströme customer service. Keep your proof of purchase for warranty claims.