
1. Introducció
Thank you for choosing the Fafeicy PD13 3D Hologram Projector. This device is designed to create vivid, true-color 3D holographic imagery without the need for special glasses, making it suitable for retail displays, events, and home decor. This manual provides essential information for the safe and efficient use of your projector, including setup, operation, maintenance, and troubleshooting.
2. Producte acabatview
2.1 Característiques clau
- Compact 3D Holographic Display: Features an 88x88mm viewing area with LED holographic technology.
- High-Definition Visual Performance: 48 LED array delivers 480x480 resolution for true-color 3D projection.
- Opcions d'instal·lació flexibles: Includes an acrylic stand for tabletop use and supports wall-mount capability.
- Intuitive Media Control: Comes with 16GB storage and an IR remote for effortless video switching and content management.
- Simple Connectivity: USB-powered operation with included adapter, supporting direct video uploads from computers.
2.2 Contingut del paquet
Si us plau, verifiqueu que tots els elements siguin presents al vostre paquet:
- 1 × Fafeicy PD13 Hologram Projector
- 1 cable USB
- 1 × Acrylic Stand
- 1 × 16GB TF Card
- 1 × IR Remote Control (batteries included)

Figure 1: Included accessories: remote control, card reader, power cord, and acrylic base.
3. Configuració
3.1 Instal·lació física
The PD13 projector offers versatile placement options:
- Ús de taula: Attach the provided acrylic stand to the base of the projector. Ensure the stand is securely fitted for stability. Place the projector on a flat, stable surface.
- Muntatge en paret: The projector can be mounted on a wall. Use appropriate mounting hardware (not included) suitable for your wall type and the device's weight. Ensure the device is installed out of reach to prevent accidental contact with the rotating LED array.

Figure 2: Desktop installation of the PD13 projector using the acrylic stand.
3.2 Connexió d'alimentació
Connect the provided USB cable to the projector's power input port and then to the included 5V/2A power adapter. Plug the adapter into a standard electrical outlet (100-240V).
3.3 Engegada inicial
Once connected to power, the projector should automatically power on and begin displaying content from the pre-installed 16GB TF card. If it does not, ensure all connections are secure.
4. Funcionament
4.1 Funcions de control remot
The included IR remote control allows for convenient management of the projector's functions. Ensure the remote has batteries installed and is pointed towards the projector's IR receiver.
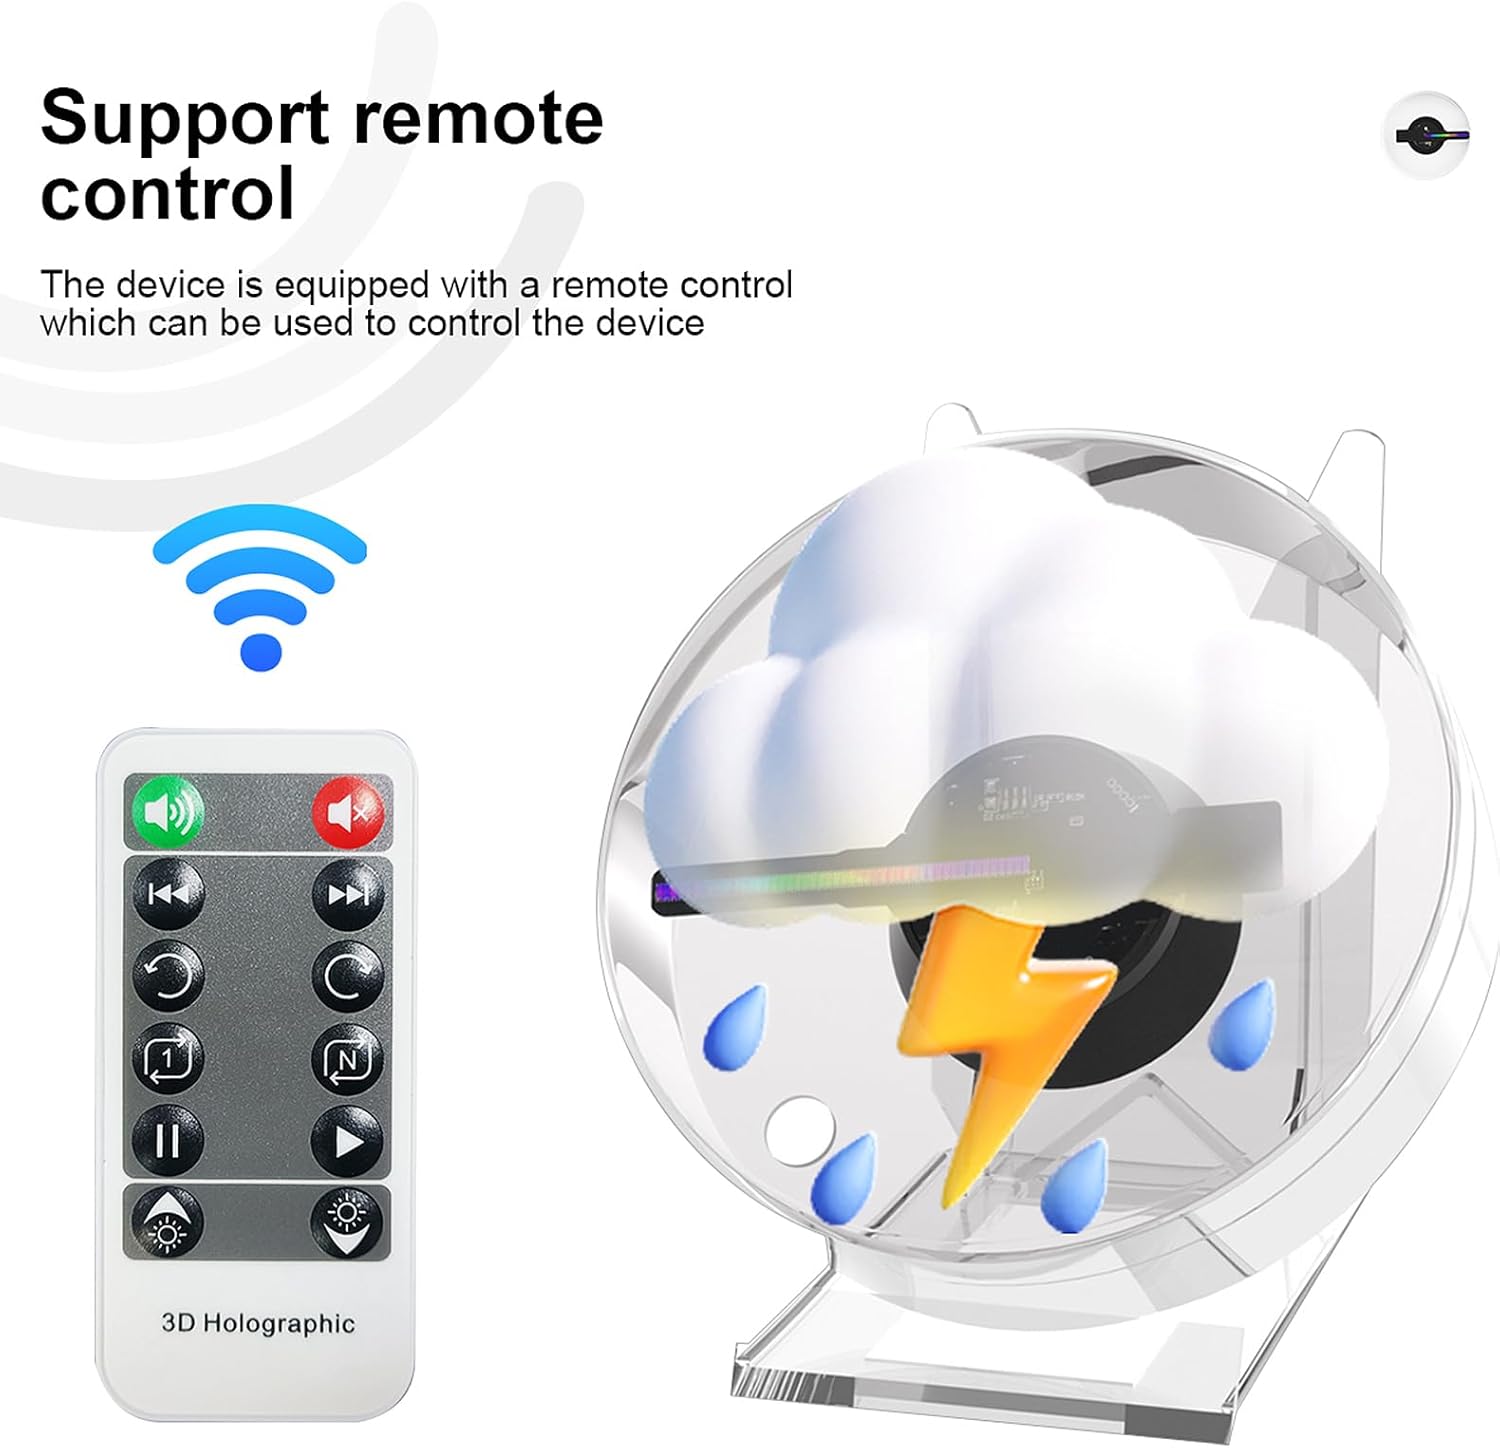
Figure 3: The projector and its remote control, illustrating remote functionality.
Common remote functions include:
- Encès/apagat: Encén o apaga el dispositiu.
- Reproduir/pausa: Controla la reproducció de suports.
- Següent/Anterior: Navigates through stored content.
- Ajust de brillantor: Ajusta la brillantor de la pantalla.
- Ajust d'angle: Modifies the display angle for optimal viewing.
4.2 Reproducció multimèdia
The projector automatically plays content stored on the inserted 16GB TF card. Use the remote control to switch between different videos or images.
5. Gestió de mitjans de comunicació
5.1 Uploading Content
To upload new content to your Fafeicy PD13 projector:
- Remove the TF card from the projector.
- Insert the TF card into a card reader (included).
- Connect the card reader to your computer's USB interface.
- Access the TF card's storage on your computer.
- Use the '5DDisplayer' software (if provided or available for download) or directly copy compatible media files (MP4/AVI/JPG/PNG) to the TF card.
- Safely eject the TF card from your computer and reinsert it into the projector.

Figure 4: Process of uploading content to the projector via a computer and TF card.
5.2 Formats de suports admesos
The projector supports MP4, AVI, JPG, and PNG file formats for holographic display.
6. Manteniment
6.1 Neteja
To maintain optimal visual clarity, regularly clean the acrylic protective cover and the LED guide plate. Use a soft, dry, lint-free cloth. For stubborn smudges, a slightly damp Es pot utilitzar un drap amb un netejador suau i no abrasiu, i assecar-lo immediatament.

Figure 5: Key components of the projector, including areas to clean.
6.2 Emmagatzematge
When not in use, store the projector in a cool, dry place, away from direct sunlight and extreme temperatures. If storing for extended periods, consider placing it back in its original packaging to protect it from dust and damage.
7. Solució De Problemes
If you encounter issues with your Fafeicy PD13 projector, refer to the following common solutions:
- Sense pantalla: Ensure the power cable is securely connected and the power adapter is plugged into a working outlet. Check if the TF card is properly inserted.
- El comandament a distància no respon: Verify that the remote control batteries are correctly installed and have sufficient charge. Ensure there are no obstructions between the remote and the projector's IR receiver.
- Mala qualitat d'imatge: Ensure the acrylic protective cover and LED guide plate are clean. Check if the media files are of sufficient resolution (480x480 recommended). Adjust brightness and angle using the remote.
- Content Not Playing: Confirm that the media files on the TF card are in a supported format (MP4/AVI/JPG/PNG). Re-upload content if necessary.
Si els problemes persisteixen després d'intentar aquestes solucions, poseu-vos en contacte amb l'atenció al client.
8. Especificacions
| Característica | Detall |
|---|---|
| Model | PD13 |
| Àrea de visualització | 88x88mm |
| Matriu LED | 48 LED |
| Resolució | 480 x 480 |
| Entrada de potència | 100-240V |
| Potència de sortida | 5V/2A |
| Potència nominal | 18W |
| Emmagatzematge | Targeta TF de 16 GB (inclosa) |
| Mitjans suportats | MP4, AVI, JPG, PNG |
| Controls | IR Remote, Brightness/Angle Adjustment |
| Dimensions | 12.3 × 12.3 × 7 cm (approx. 4.84"L x 4.84"W x 2.76"H) |
| Pes de l'article | 400 g (aprox. 0.88 lliures) |
| Temperatura de funcionament | -20 °C a 60 °C (-4 °F a 140 °F) |
| Tipus de muntatge | Muntatge de taula, muntatge de paret |
| Material | Acrílic |

Figure 6: Additional features such as energy saving and long lifespan.
9. Informació de seguretat
Si us plau, llegiu i seguiu les següents pautes de seguretat per evitar lesions o danys al dispositiu:
- Instal·lació: Install the projector out of reach, especially if children are present, or use a protective cover to prevent contact with the rotating LED array.
- Ús interior: This device is recommended for indoor use only. Avoid exposure to moisture, rain, or extreme environmental conditions.
- Ventilació: Assegureu-vos que hi hagi una ventilació adequada al voltant del projector per evitar el sobreescalfament. No bloquegeu les obertures de ventilació.
- Font d'alimentació: Use only the provided power adapter and USB cable. Do not use damaged cables or adapters.
- Manipulació: Manipuleu el dispositiu amb cura. Eviteu deixar-lo caure ni sotmetre'l a impactes forts.
- Desmuntatge: No intenteu desmuntar ni reparar el projector vosaltres mateixos. Encarregueu totes les tasques de manteniment a personal qualificat.
10. Garantia i Suport
Specific warranty details for the Fafeicy PD13 3D Hologram Projector may vary by region and retailer. Please refer to your purchase documentation or contact your point of sale for warranty information.
For technical support, troubleshooting assistance beyond this manual, or inquiries regarding replacement parts, please contact Fafeicy customer service through the retailer where you purchased the product or visit the official Fafeicy brand store online.