
1. Introducció
This manual provides detailed instructions for the installation, operation, and maintenance of your Wisoqu PRIME H410M K Motherboard. This M-ATX motherboard is designed to support 10th generation Intel Core and Celeron series 14nm CPUs with an LGA 1200 socket. It features two DDR4 memory slots, PCI Express 3.0, Gigabit Ethernet, and 7.1 channel audio. Please read this manual thoroughly before proceeding with installation.
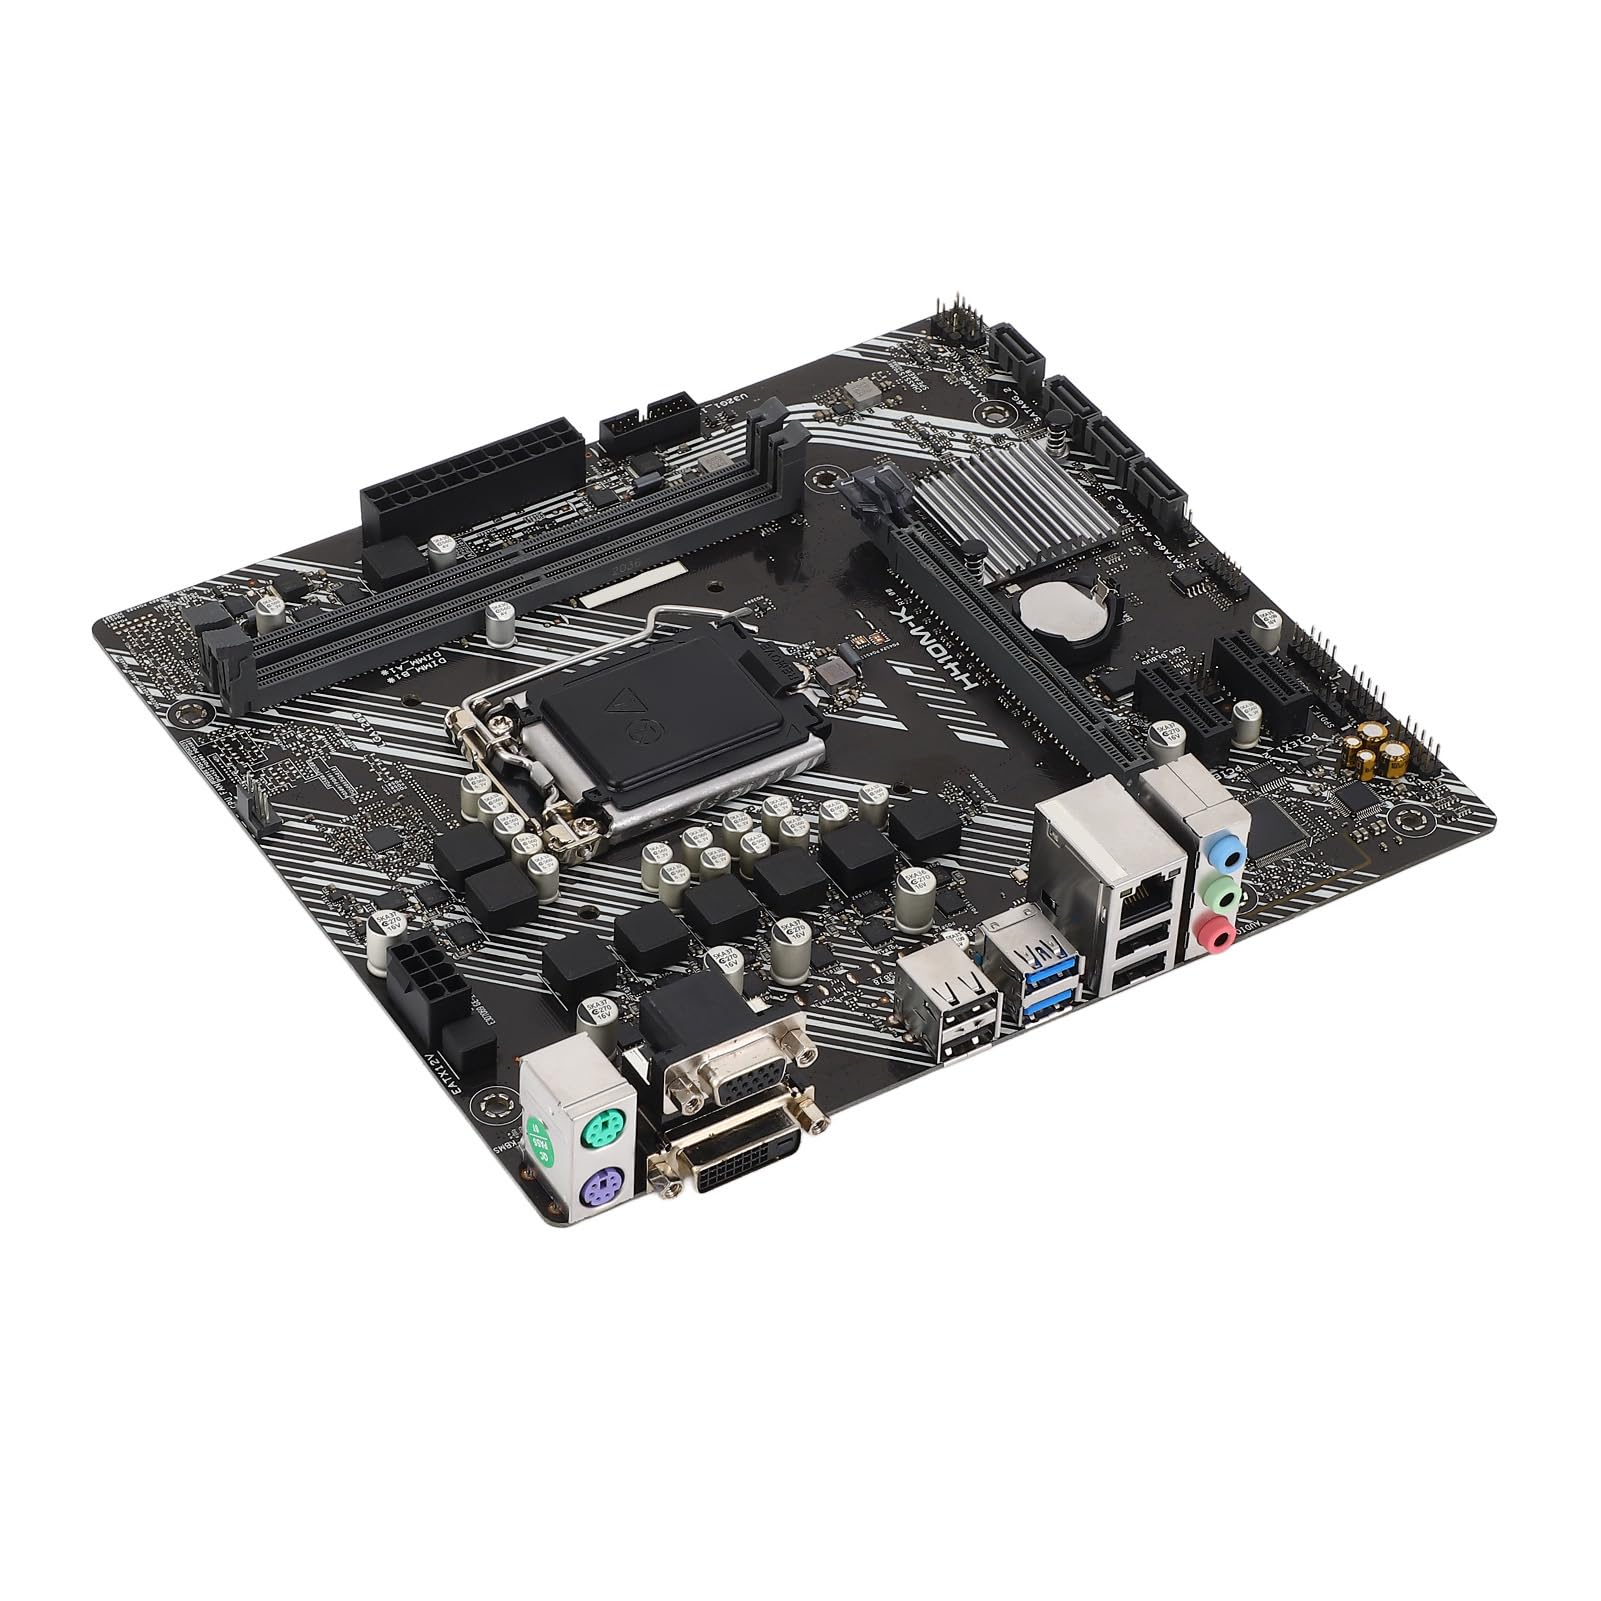
Figura 1: Mésview of the Wisoqu PRIME H410M K Motherboard.
2. Configuració i instal·lació
Follow these steps to properly install your motherboard and its components.
2.1. Instal·lació de la CPU
- Prepareu el sòcol: Gently lift the load lever on the LGA 1200 CPU socket.
- Alinear la CPU: Carefully align your 10th generation Intel Core or Celeron CPU with the socket, ensuring the triangular mark on the CPU matches the mark on the socket. Do not force the CPU into place.
- Assegura la CPU: Lower the CPU into the socket. Close the load plate and push down the load lever until it clicks into place.

Figura 2: De dalt a baix view highlighting the CPU socket area.
2.2. RAM (Memory) Installation
- Clips de retenció oberts: Push open the retention clips at both ends of the DDR4 memory slots.
- Alinea el mòdul de memòria: Alineeu l'osca del mòdul de memòria DDR4 amb la clau de la ranura de memòria.
- Inserir memòria: Press down firmly on both ends of the memory module until the retention clips snap into place. The motherboard supports dual-channel DDR4 memory up to 64GB across two slots.
2.3. Connexió del dispositiu d'emmagatzematge
Connect your SATA III storage devices (HDDs/SSDs) to the available SATA 6Gb/s ports.
- The motherboard provides 4 x Serial Advanced Technology Attachment III (SATA 6Gb/s) interfaces.
- Use SATA data cables to connect your storage devices to these ports.
- Assegureu-vos que els cables d'alimentació de la font d'alimentació estiguin connectats als dispositius d'emmagatzematge.

Figura 3: Detallada view of SATA ports and PCI Express slots.
2.4. Instal·lació de la targeta d'expansió
The motherboard features PCI Express 3.0 slots for expansion cards:
- 1 x PCI Express x16 slot (for graphics cards)
- 2 x PCI Express x1 slots (for other expansion cards like network or sound cards)
- Open Retention Clip: For the PCIe x16 slot, open the retention clip at the end of the slot.
- Insereix la targeta: Align your expansion card with the slot and press down firmly until it is fully seated and the retention clip (if applicable) locks into place.
- Targeta segura: Secure the card to your PC case with a screw.
2.5. Connexions d'alimentació
Connecteu els cables de la font d'alimentació (PSU) a la placa base:
- Connector d'alimentació ATX de 24 pins: Connect the main 24-pin power cable from your PSU to the corresponding connector on the motherboard.
- Connector d'alimentació ATX de 8 pins i 12 V: Connect the 8-pin CPU power cable from your PSU to the connector near the CPU socket.
2.6. Connexions d'E/S del panell frontal i posterior
Connect your case's front panel connectors (power button, reset button, USB ports, audio jacks) to the appropriate headers on the motherboard. Refer to your PC case manual for specific pin assignments.

Figure 4: Rear I/O panel with various ports.
El panell d'E/S posterior inclou:
- 2 x USB 3.2 Gen1 ports
- 4 x ports USB 2.0
- 1 x port DVI-D
- 1 x port VGA
- 1 x port RJ45 Gigabit Ethernet
- 3 x Audio jacks (for 7.1 channel sound)
- 1 x PS/2 Mouse port
- 1 x port de teclat PS/2
- 1 x port COM
3. Instruccions de funcionament
3.1. Arrencada inicial
- Després de muntar tots els components, connecteu el monitor, el teclat i el ratolí.
- Connect the power cord to your PSU and turn on the power switch on the PSU.
- Press the power button on your PC case. The system should power on and display the BIOS/UEFI screen or boot into your operating system.
3.2. Configuració de la BIOS/UEFI
Per accedir a la utilitat de configuració de la BIOS/UEFI, premeu la tecla DEL or F2 key repeatedly during the initial boot-up sequence. From the BIOS/UEFI, you can configure system settings, boot order, and monitor hardware status.
3.3. Instal·lació del controlador
After installing your operating system, install the necessary drivers for optimal performance. Drivers for the H410 chipset, Realtek ALC887 audio, and Realtek RTL8111H Gigabit Ethernet can typically be found on the manufacturer's website or included with your operating system installation media.
4. Manteniment
Un manteniment regular ajuda a garantir la longevitat i el funcionament estable de la placa base.
- Neteja de pols: Netegeu periòdicament la pols de la placa base i altres components amb aire comprimit. Assegureu-vos que el sistema estigui apagat i desendollat abans de netejar-lo.
- Actualitzacions de la BIOS: Comproveu el del fabricant website for BIOS/UEFI updates. Updates can improve compatibility, stability, and performance. Follow the provided instructions carefully when updating the BIOS.
- Bateria CMOS: The motherboard includes a built-in 240mAh CR2032 battery. If you experience issues with system time or BIOS settings resetting, the CMOS battery may need replacement. This should be performed by a qualified technician.
5. Solució De Problemes
Aquesta secció tracta problemes comuns que podeu trobar.
- Sense alimentació/Sense arrencada:
- Assegureu-vos que tots els cables d'alimentació (ATX de 24 pins, CPU de 8 pins) estiguin connectats correctament.
- Verify the PSU is switched on and functioning correctly.
- Comproveu la connexió del botó d'engegada del panell frontal a la placa base.
- Sense pantalla:
- Confirm the monitor is connected to the correct video output (motherboard DVI/VGA or discrete graphics card).
- Reseat the graphics card (if installed) and memory modules.
- Test with a different monitor or video cable.
- Sense connexió de xarxa:
- Ensure the Ethernet cable is securely connected to the RJ45 port.
- Verify that the Realtek RTL8111H Gigabit network adapter drivers are installed.
- Comproveu la configuració de xarxa al vostre sistema operatiu.
- Sense àudio:
- Confirm speakers/headphones are connected to the correct audio jacks.
- Verify that the Realtek ALC887 audio drivers are installed.
- Check audio settings in your operating system.
Si els problemes persisteixen, consulteu els recursos d'assistència del fabricant o un tècnic qualificat.
6. Especificacions
| Característica | Especificació |
|---|---|
| Model de placa base | PRIME H410M K |
| Chipset | Intel H410 |
| Socket de CPU | LGA 1200 |
| Supported CPUs | 10th Gen Intel Core, Celeron series 14nm CPU |
| Ranures de memòria | 2 DIMM DDR4 |
| Capacitat màxima de memòria | 64GB (Dual Channel) |
| Freqüències de memòria | 2933 / 2800 / 2666 / 2400 / 2133MHz |
| PCIe tragamonedas | 1 x PCI E X16 (3.0), 2 x PCI E X1 (3.0) |
| Interfícies d'emmagatzematge | 4 x SATA III 6Gb/s |
| Ports USB (posteriors) | 2 x USB 3.2 Gen1, 4 x USB 2.0 |
| USB Ports (Front Headers) | 2 x USB 3.2 Gen1, 2 x USB 2.0 |
| Sortides de vídeo | 1 x DVI, 1 x VGA |
| Xip d'àudio | Realtek ALC887 àudio HD de 7.1 canals |
| Xip LAN | Realtek RTL8111H Gigabit Ethernet |
| Connectors d'alimentació | 1 x 24-pin ATX, 1 x 8-pin ATX 12V |
| Factor de forma | M-ATX |
| Bateria CMOS | Built-in 240mAh CR2032 |
7. Garantia i Suport
7.1. Informació de la garantia
For specific warranty terms and conditions, please refer to the documentation provided with your purchase or contact the seller directly. Warranty coverage typically applies to manufacturing defects under normal use.
7.2. Suport tècnic
If you encounter issues that cannot be resolved using the troubleshooting guide, please contact Wisoqu customer support or the retailer from whom you purchased the product. Have your product model (PRIME H410M K) and purchase information ready when seeking support.