
1. Introducció
This manual provides essential instructions for the safe and efficient operation of your Panda PAN80SWR1 Portable Washing Machine. This 2.0 Cu.ft fully automatic compact top-load washer is designed for small living spaces such as apartments, condos, RVs, vacation homes, and dormitories. It connects easily to a standard kitchen faucet and drains into a sink, eliminating the need for permanent plumbing installations. Please read this manual thoroughly before using the appliance and retain it for future reference.
2. Informació de seguretat
Seguiu sempre les precaucions de seguretat bàsiques quan utilitzeu aparells elèctrics per reduir el risc d'incendi, descàrrega elèctrica o lesions a les persones.
- Ensure the washing machine is connected to a properly grounded 110V three-prong outlet.
- No feu funcionar la màquina si el cable d'alimentació o l'endoll estan danyats.
- Keep children away from the appliance during operation. The Child Lock feature should be activated when children are present.
- Do not wash items that are soiled with flammable or explosive substances.
- Never reach into the washing machine while it is operating.
- Desconnecteu l'alimentació abans de realitzar qualsevol manteniment o neteja.
- No instal·leu ni emmagatzemeu l'aparell en llocs on estigui exposat a la intempèrie o a temperatures de congelació.
3. Producte acabatview
3.1 Dimensions del producte
The Panda PAN80SWR1 washing machine is designed for compact spaces. Refer to the image below for detailed dimensions.

3.2 Tauler de control
The control panel allows you to select wash programs, water temperature, and other functions. Familiarize yourself with the buttons and indicators.

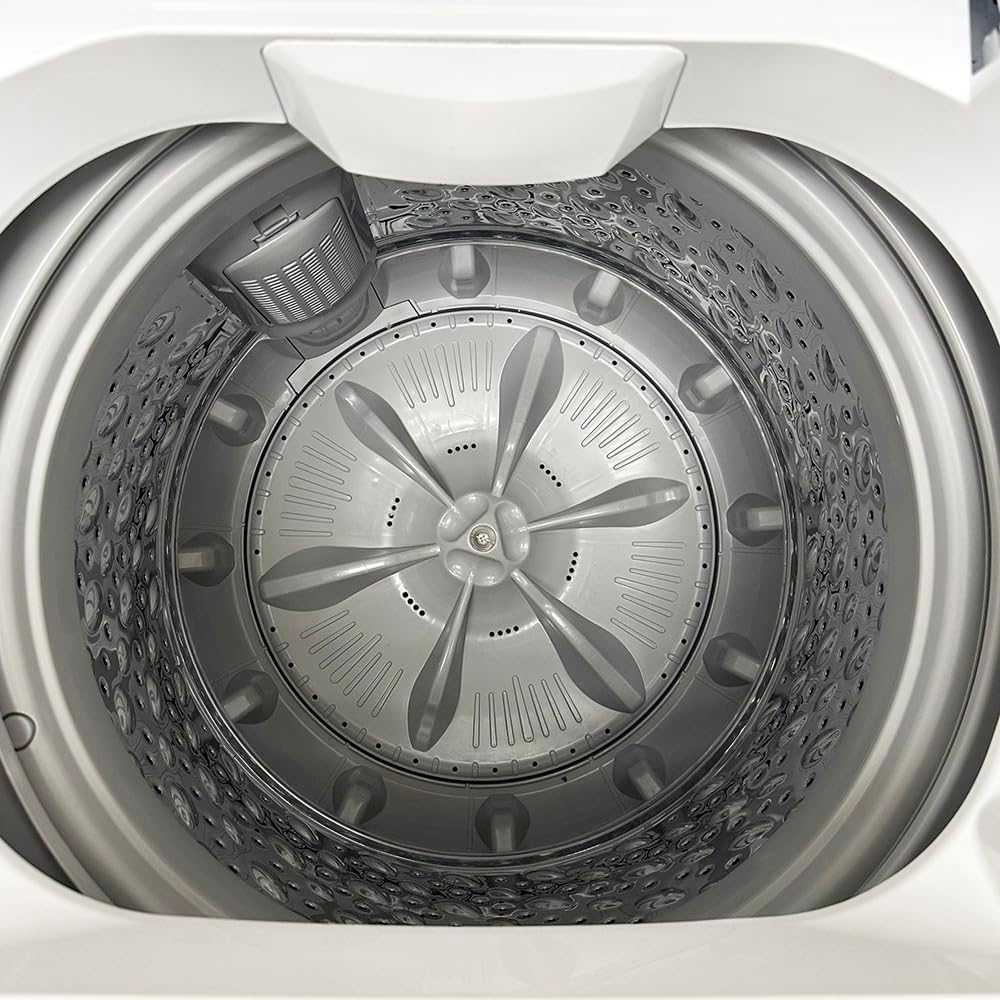
3.3 Interior and Components
The washing machine features a durable stainless steel tub and a transparent viewing lid.


4. Configuració
4.1 Desembalatge i col·locació
- Traieu amb cura tots els materials d'embalatge.
- Place the washing machine on a firm, level surface. The machine has two built-in rollers on the back bottom for easier movement.
- Assegureu-vos que hi hagi prou espai al voltant de la màquina per a la ventilació i el funcionament.
4.2 Connexió d'entrada d'aigua
The washer can be connected to a standard kitchen or bathroom faucet using the included quick connect adapter kit. Two identical hoses are provided for hot and cold water supplies, though only one is typically used for cold water connection in portable setups.

- Attach the faucet adapter to your kitchen or bathroom faucet. If using internal threads, remove the black rubber washer from the adapter.
- Connect the quick adapter to the faucet adapter.
- Connect one end of the inlet hose to the quick adapter.
- Connect the other end of the inlet hose to the 'COLD' inlet valve at the back of the washing machine.
- If only using cold water, block the 'HOT' inlet valve using the provided cap.
- Turn on the cold water faucet to check for leaks.
4.3 Connexió de la mànega de drenatge
- Attach the drain hose securely to the drain outlet on the back of the machine.
- Position the other end of the drain hose into a sink or a suitable drain. Ensure the hose is secured to prevent it from dislodging during the drain cycle.
4.4 Connexió d'alimentació
- Plug the power cord into a grounded 110V three-prong electrical outlet.
- No utilitzeu cables d'extensió ni adaptadors.
5. Instruccions de funcionament
5.1 Càrrega de la roba
- Obriu la tapa transparent.
- Load clothes loosely into the tub, ensuring not to overload. The maximum capacity is 15.6 lbs.
- Tanqueu la tapa amb seguretat.
5.2 Addició de detergent
- Add the appropriate amount of high-efficiency (HE) detergent directly into the tub with the clothes.
- Avoid using excessive detergent to prevent oversudsing.
5.3 Selecting Wash Programs
Press the 'On/Off' button to power on the machine. Use the 'Program' button to cycle through the available wash programs:
- Normal: Per a la bugada diària.
- Pesat: Per a articles molt bruts.
- Delicat: For fragile garments.
- Ràpid: Per a peces lleugerament brutes o càrregues petites.
- voluminós: For large items like blankets or jackets.
- Només gir: To extract excess water from clothes.
5.4 Ajust de la temperatura de l'aigua
Press the 'Temp' button to select the desired water temperature:
- Calent: For white and heavily soiled items.
- càlid: For colored items and moderately soiled laundry.
- Fred: For delicate items and dark colors.
5.5 Using Delay Start
The Delay Start function allows you to set a delayed start time for your wash cycle.
- Select your desired wash program and temperature.
- Press the 'Delay' button repeatedly to set the desired delay time in hours.
- Press 'Start/Pause' to activate the delay timer. The machine will start automatically after the set time.
5.6 Funció de bloqueig infantil
To prevent accidental operation by children, activate the Child Lock.
- To activate: Press and hold the 'Temp' and 'Program' buttons simultaneously for three seconds. The 'Control Lock' indicator will illuminate.
- To deactivate: Press and hold the 'Temp' and 'Program' buttons simultaneously for three seconds again. The 'Control Lock' indicator will turn off.
5.7 Inici d'un cicle de rentat
- After loading laundry, adding detergent, and selecting your desired program and settings, press the 'Start/Pause' button to begin the wash cycle.
- The transparent lid allows you to monitor the wash cycle progress.
6. Manteniment
6.1 Neteja de l'exterior
- Netegeu les superfícies exteriors amb un damp tela.
- No utilitzeu netejadors abrasius ni dissolvents.
6.2 Neteja de la banyera
- Periodically run a 'Bulky' cycle with hot water and a washing machine cleaner (or a cup of white vinegar) to clean the tub and remove detergent residue.
- Leave the lid open after each use to allow the tub to air dry and prevent odors.
6.3 Neteja del filtre de drenatge
- Locate the drain filter access at the bottom rear of the machine (refer to Image 4).
- Desenrosqueu la tapa del filtre i retireu el filtre amb cura.
- Clean any lint, debris, or foreign objects from the filter under running water.
- Reinsert the filter and screw the cover back on tightly.
- Clean the drain filter regularly to ensure efficient drainage.
7. Solució De Problemes
| Problema | Causa possible | Solució |
|---|---|---|
| La màquina no arrenca | Power cord not plugged in; Lid not closed; 'On/Off' button not pressed; Child Lock active. | Ensure power cord is securely plugged in; Close the lid completely; Press 'On/Off' button; Deactivate Child Lock. |
| Sense ingesta d'aigua | Water faucet closed; Inlet hose kinked; Water pressure too low; Incorrect inlet hole connected. | Open water faucet; Straighten inlet hose; Ensure adequate water pressure; Connect hose to 'COLD' inlet. |
| L'aigua no drena | Drain hose kinked or blocked; Drain filter clogged; Drain hose positioned too high. | Straighten or clear drain hose; Clean drain filter; Ensure drain hose is at an appropriate height (below 39 inches). |
| Vibració / soroll excessius | Màquina no anivellada; Càrrega desequilibrada; Cargols d'enviament no retirats (si escau). | Adjust leveling feet; Redistribute laundry evenly; Refer to setup instructions for shipping bolt removal. |
| Fuites d'aigua | Hose connections loose; Drain hose not secured; Excessive suds. | Tighten all hose connections; Secure drain hose in sink/drain; Reduce detergent amount. |
8. Especificacions
| Característica | Detall |
|---|---|
| Número de model | PAN80SWR1 |
| Capacitat | 2.0 Cu.ft (15.6 lbs) |
| Dimensions (P x A x A) | 57.2 x 55.9 x 94.6 cm (22.5 x 22 x 37.25 polzades) |
| Velocitat del motor | 780 RPM |
| Voltage | 110 V |
| Programes de rentat | Normal, Heavy, Delicate, Quick, Bulky, Spin Only |
| Configuració de la temperatura de l'aigua | Hot, Warm, Cold |
| Components inclosos | Drain Hose, Inlet Hoses, Quick Connect Adapter Kit |
| Material de la banyera | Acer inoxidable |
9. Garantia i Suport
For warranty information or technical support, please refer to the documentation provided with your purchase or contact Panda customer service. Keep your purchase receipt for warranty claims.


