Introducció
This manual provides detailed instructions for the installation, operation, and maintenance of your JOMISE A80 4K Dual Dash Cam. Please read this manual thoroughly before using the device to ensure proper functionality and safety. Keep this manual for future reference.
Què hi ha a la caixa
Verifiqueu que tots els elements que s'enumeren a continuació s'inclouen al vostre paquet. Si falta algun element o hi ha algun malmès, poseu-vos en contacte amb l'atenció al client.

Image: All components included in the JOMISE A80 Dash Cam package.
- 1 x JOMISE A80 4K Dash Cam (with pre-installed 64GB Card)
- 1 cable d'alimentació de 11.48 peus amb carregador de cotxe
- 1 x Clip de cable
- 1 x 1080P In-car Rear Camera
- 1 cable de càmera posterior de 18.04 peus
- 1 x Car Mount
- 1 x Suction Cup Mount with Built-in GPS
- 1 x Crowbar (Pry Tool)
- 1 adhesius electrostàtics
- 1 x Mount Tool
- 1 x Manual d'usuari
Producte acabatview i Característiques
The JOMISE A80 is a high-performance dual dash camera system designed to record your driving in 4K resolution for the front camera and 1080P for the rear camera. It integrates advanced features for enhanced safety and convenience.
Ultra HD 4K+1080P Dual Recording
Capture clear footage with the 4K front camera and 1080P rear camera. Equipped with STARVIS 2 sensors and wide-angle lenses, the system records detailed video day and night.

Image: Visual representation of the 4K front and 1080P rear camera recording capabilities with wide field of view.
Dual Mode Operation: Button & Touchscreen
The A80 features a 3.2-inch IPS touchscreen and offers both button and touch control for flexible and intuitive operation.
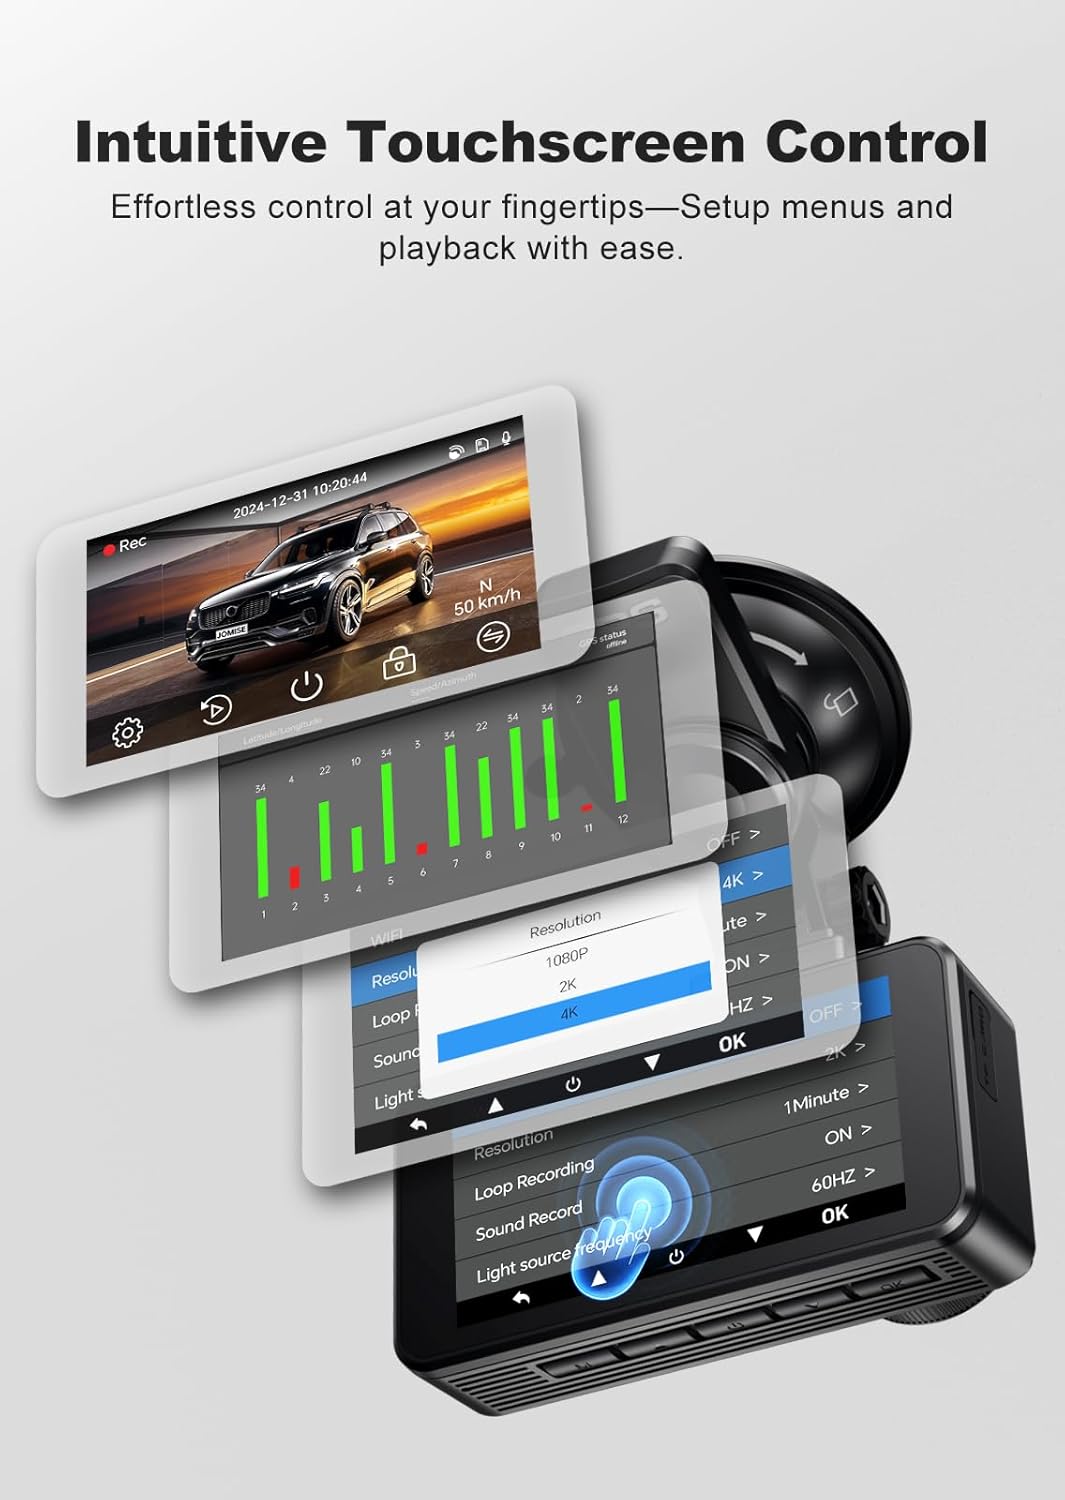
Image: The dash cam's touchscreen interface showing menu navigation and settings.
Built-in GPS & 5.8GHz High-Speed WiFi
The integrated GPS module accurately logs speed and driving routes. The 5.8GHz Wi-Fi allows for fast video transfer to your smartphone via the companion app for easy playback and sharing.

Image: GPS route tracking and video playback on connected devices.
Visió nocturna millorada
Featuring STARVIS 2 sensors, the dash cam provides clear footage even in low-light conditions, improving safety during nighttime driving.

Image: Visual representation of the dash cam's enhanced night vision capabilities.
Loop Recording & Impact Detection Lock
Seamless loop recording ensures continuous recording by overwriting the oldest files. The built-in G-sensor automatically locks footage upon impact, preserving critical evidence.
Vigilància d'aparcament 24/7
Stay protected around the clock with motion detection and time-lapse parking modes. A hardwire kit (sold separately) is required for continuous parking monitoring.

Image: Parking monitoring features, including G-sensor and time-lapse modes.
Configuració i instal·lació
Follow these steps for proper installation of your JOMISE A80 Dash Cam.
1. Prepareu-vos per a la instal·lació
- Netegeu la zona del parabrisa on es muntarà la càmera del salpicader.
- Ensure the engine is off before beginning installation.
2. Instal·leu la càmera frontal del salpicader
- Attach the suction cup mount to the front dash cam.
- Mount the dash cam on the windshield, preferably behind the rearview mirall, assegurant-vos que no us obstrueixi view.
- Adjust the camera angle to capture the road ahead clearly.
3. Instal·leu la càmera posterior
- Connecteu el cable de la càmera posterior a la unitat principal de la càmera del salpicader.
- Route the rear camera cable discreetly along the headliner and pillar trim to the rear of the vehicle.
- Munteu la càmera posterior al parabrisa posterior, assegurant una visió clara view.
- Adjust the rear camera angle as needed. The rear camera supports mirror and vertical flip options in settings.

Image: Adjustable rear camera with mirror and vertical flip display options.
4. Connexió d'alimentació
- Connect the power supply cable to the dash cam.
- Connecteu el carregador del cotxe a la presa de l'encenedor del vostre vehicle.
- Route the power cable neatly to avoid interference with driving. Use the included cable clips and pry tool for a clean installation.

Image: Installation diagram showing front and rear camera placement and power connection.
Instruccions de funcionament
Encès/Apagat
- Automàtic: The dash cam will power on and begin recording automatically when your vehicle's engine starts.
- manual: Premeu i manteniu premut el botó d'engegada per encendre o apagar manualment el dispositiu.
Gravació
- Gravació normal: The dash cam records continuously in a loop. When the memory card is full, the oldest unlocked files es sobreescriuen.
- Gravació d'emergència: The built-in G-sensor detects sudden impacts or collisions and automatically locks the current video segment to prevent it from being overwritten.
Navegació pel menú
- Use the 3.2-inch touchscreen to navigate through menus and settings.
- Alternatively, use the physical buttons on the device for navigation and selection.
Using the Companion App (Wi-Fi)
- Download the dedicated JOMISE app on your smartphone.
- Enable Wi-Fi on the dash cam and connect your phone to the dash cam's Wi-Fi network.
- A través de l'aplicació, pots view viu footage, reproducció de vídeos gravats, descàrrega files al telèfon i ajusteu la configuració.

Image: Smartphone app interface for controlling the dash cam and accessing footage via 5.8GHz Wi-Fi.
Configuració
Access the settings menu via the touchscreen or physical buttons to customize your dash cam's functions.
- Resolució de vídeo: Select recording resolution for front (e.g., 4K) and rear (e.g., 1080P) cameras.
- Enregistrament en bucle: Set the duration of video segments (e.g., 1, 3, or 5 minutes).
- Sensibilitat del sensor G: Adjust the sensitivity of the impact detection. Higher sensitivity will lock footage more easily.
- Mode d'aparcament: Choose between motion detection or time-lapse recording for parking surveillance. Requires a hardwire kit (sold separately).
- Enregistrament d'àudio: Activa o desactiva l'enregistrament del micròfon.
- Wi-Fi: Turn Wi-Fi on/off and view network details for app connection.
- Data/Hora: Set the correct date and time. GPS will automatically synchronize this.
- Salvapantalles: Set the display to turn off after a period to avoid distraction.
Manteniment
- Targeta de memòria: Format the memory card regularly (e.g., once a month) to ensure optimal performance and prevent data corruption. Use a high-quality Class 10 or U3 microSD card.
- Neteja: Use a soft, dry cloth to clean the camera lenses and screen. Avoid abrasive cleaners.
- Temperatura: The dash cam is designed to operate in a wide range of temperatures due to its supercapacitor. However, avoid prolonged exposure to extreme heat or cold when not in use.
Resolució de problemes
| Problema | Possible solució |
|---|---|
| La càmera del salpicader no s'encén. | Check the power connection to the car charger and ensure the car charger is securely plugged into the cigarette lighter. Verify the vehicle's power outlet is functional. |
| L'enregistrament s'atura o es congela. | Format the microSD card. Ensure you are using a high-speed (Class 10 or U3) memory card. Try a different memory card. |
| La qualitat del vídeo és deficient. | Clean the camera lenses. Ensure the protective film has been removed. Check video resolution settings. |
| Problemes de connexió Wi-Fi. | Ensure Wi-Fi is enabled on the dash cam. Restart both the dash cam and your smartphone. Ensure your phone is within range. |
| El GPS no fa seguiment. | Assegureu-vos que el mòdul GPS estigui connectat correctament i que tingui una vista clara view of the sky. It may take a few minutes to acquire a signal. |
| El mode d'aparcament no funciona. | A hardwire kit (sold separately) is required for continuous parking monitoring. Ensure it is correctly installed and connected. |
Especificacions
| Característica | Detall |
|---|---|
| Nom del model | JOMISE A80 |
| Resolució de la càmera frontal | 4K (2160p) |
| Resolució de la càmera posterior | 1080p |
| Mostra | 3.2" IPS Touchscreen |
| Connectivitat | Built-in GPS, 5.8GHz Wi-Fi, USB-C |
| Característiques especials | STARVIS 2 Enhanced Night Vision, HDR, G-Sensor, Loop Recording, Parking Mode (requires hardwire kit), Supercapacitor |
| Camp de View | Davant: 170 graus, Darrere: 140 graus |
| Emmagatzematge | Admet targetes MicroSD de fins a 256 GB (64 GB incloses) |
| Font d'alimentació | Hardwired, USB-C |
| Dimensions del producte | 3.74 x 1.97 x 1.77 polzades |
| Pes de l'article | 3.88 unces |
Garantia i Suport
JOMISE offers a 30-day worry-free return policy and 18-month quality support for the A80 Dash Cam. For technical assistance, warranty claims, or any questions regarding your product, please contact JOMISE customer service through the official channels provided at the time of purchase or on the JOMISE weblloc.