1. Introducció
This manual provides comprehensive instructions for the installation, operation, and maintenance of your VEEMENT V200Pro 2.5K Car Dash Cam. Please read this manual carefully before using the device to ensure proper functionality and safety. Keep this manual for future reference.
2. Contingut del paquet
Verifiqueu que tots els elements que s'enumeren a continuació s'inclouen al vostre paquet:
- 1 x VEEMENT V200Pro Dash Cam
- 1 x Carregador de cotxe
- 2 adhesius electrostàtics
- 1 x Spare 3M Adhesive Pad
- 1 x Eina de palanca fàcil
- 1 x User Manual + Installation Guide

Image: All components included in the VEEMENT V200Pro Dash Cam package, laid out for clear viewing.
3. Producte acabatview
The VEEMENT V200Pro is a compact 2.5K car dash camera designed to record driving footage. It features a 1.47-inch display, a 160° wide-angle lens, and various recording modes.
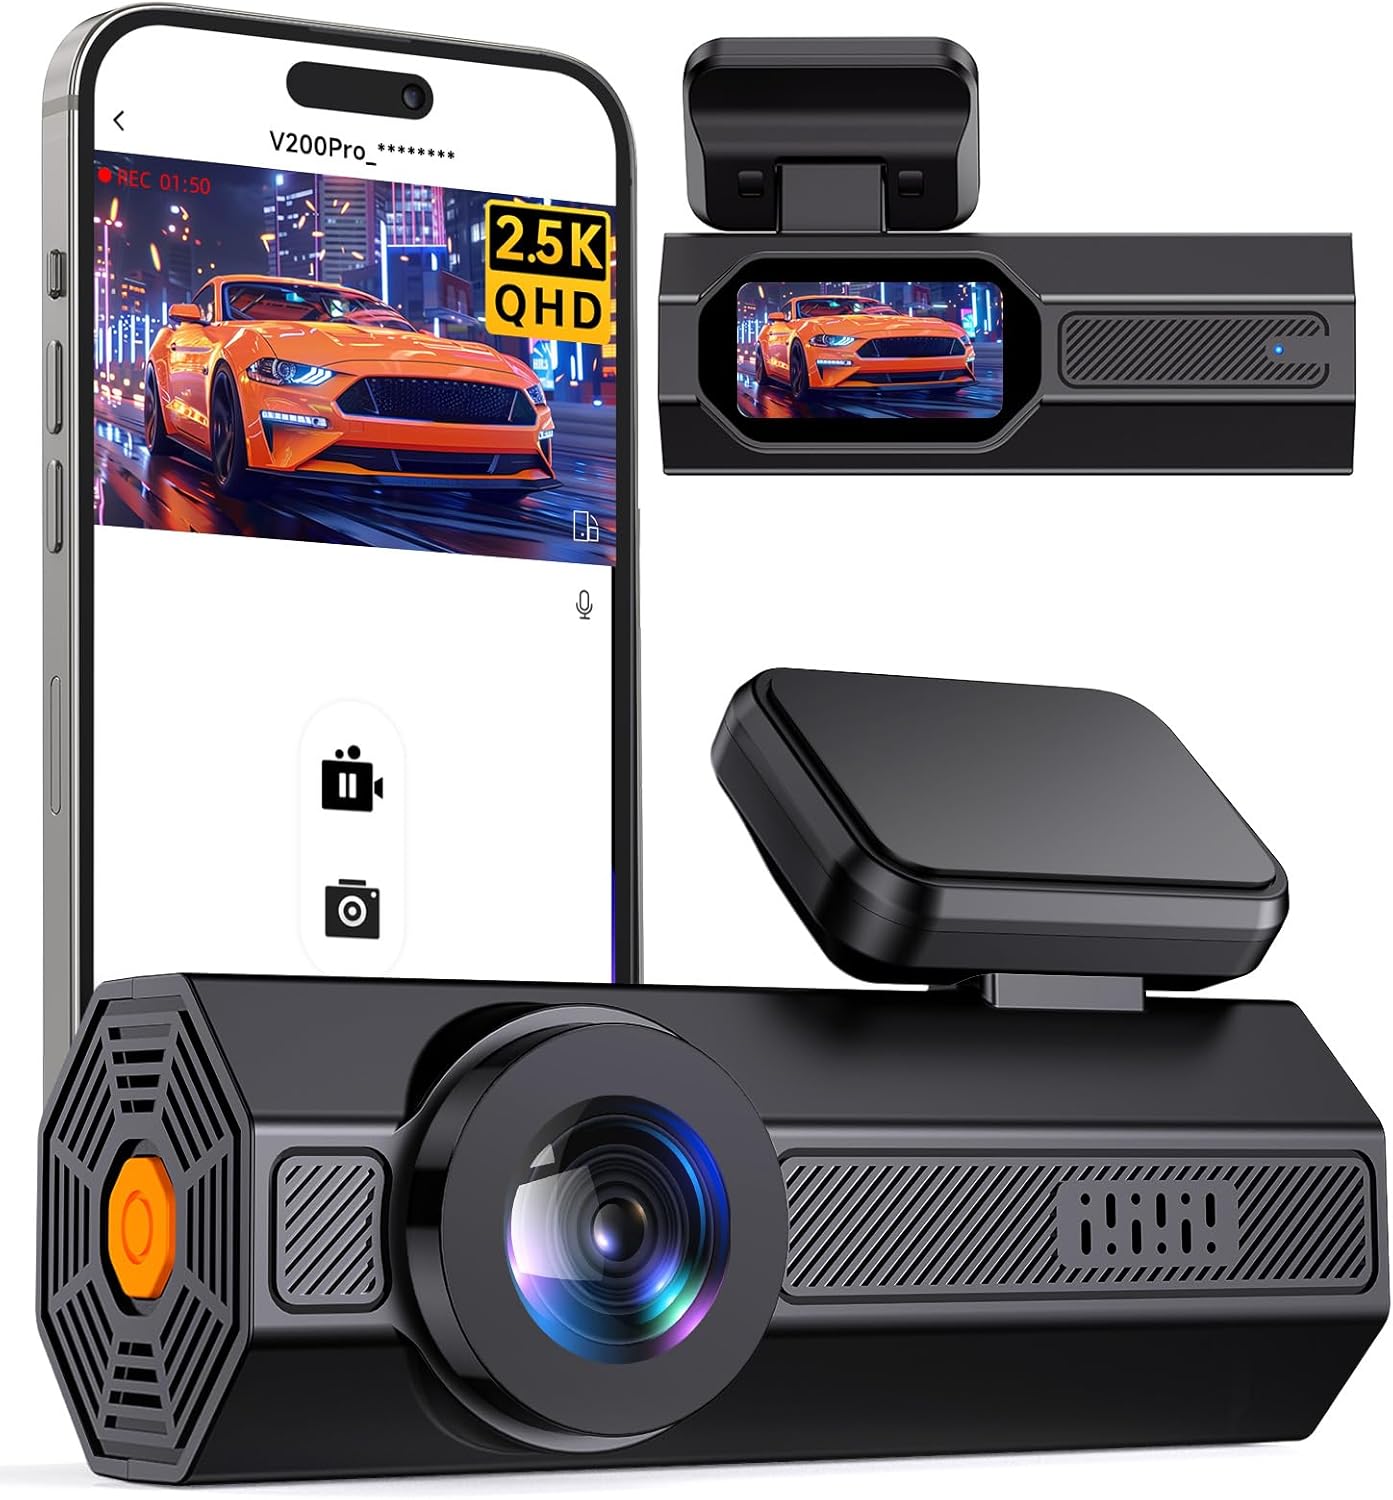
Image: The VEEMENT V200Pro Dash Cam shown alongside a smartphone displaying its companion app interface.
4. Configuració i instal·lació
4.1. Inserció de la targeta de memòria
The V200Pro requires a Micro SD card (not included) for recording. Use a U1 grade or higher SD card with a maximum capacity of 256GB for optimal performance.
- Localitza la ranura per a targetes Micro SD al lateral de la càmera del salpicader.
- Insert the Micro SD card with the gold contacts facing the back of the dash cam until it clicks into place.
- Per treure-la, premeu suaument la targeta fins que faci clic i, a continuació, estireu-la de la ranura.

Image: A Micro SD card being inserted into the designated slot on the side of the dash cam.
4.2. Muntatge de la Dash Cam
The V200Pro is designed for windshield mounting using the provided adhesive pad.
- Netegeu la zona del parabrisa on es muntarà la càmera del salpicader. Assegureu-vos que no tingui pols ni greix.
- Attach an electrostatic sticker to the cleaned area of the windshield. This helps protect the windshield and makes removal easier.
- Peel off the protective film from the 3M adhesive pad and firmly press the dash cam mount onto the electrostatic sticker. Hold for 30 seconds.
- Adjust the camera angle using the 60° rotatable bracket to ensure a clear view de la carretera.

Image: The dash cam discreetly installed on the upper center of a car's windshield, showing minimal obstruction to the driver's view.

Image: A diagram demonstrating the flexible 60-degree rotation capability of the dash cam's mounting bracket, allowing for optimal angle adjustment.
4.3. Connexió d'alimentació
Connect the provided car charger to the dash cam's power port and plug the other end into your vehicle's cigarette lighter socket. The dash cam will power on automatically when the vehicle starts and power off when the engine is turned off.
5. Instruccions de funcionament
5.1. Funcionament bàsic
- Encès/apagat: The dash cam powers on automatically with vehicle ignition and powers off when the engine is off. Manual power control may be available via a dedicated button (refer to the included Installation Guide for button layout).
- Gravació: Once powered on and with a valid SD card inserted, the dash cam begins recording automatically. A red indicator light or on-screen icon typically confirms recording status.
- Visualització: The 1.47-inch display allows for real-time viewing of recordings and menu navigation.
5.2. Qualitat del vídeo
The V200Pro records video at 2.5K (2560x1440P) resolution with a 160° wide-angle lens, capturing clear details of license plates and road signs.

Image: A visual representation of the dash cam's 2.5K QHD recording capability and 160-degree wide-angle view, showing a car from behind on a road.
5.3. Enregistrament en bucle
When the memory card reaches its storage limit, the dash cam automatically overwrites the oldest recordings with new footage. This ensures continuous recording without manual intervention. Video segments are typically recorded in 1, 2, or 3-minute intervals.

Image: A chart illustrating the approximate recording duration for different Micro SD card capacities (32GB, 64GB, 128GB, 256GB) with loop recording enabled.
5.4. Sensor G (enregistrament d'emergència)
The built-in G-Sensor detects sudden impacts or collisions. When triggered, it automatically locks the current video segment, preventing it from being overwritten by loop recording. These emergency videos are stored in a separate, protected folder on the SD card.

Image: An illustration depicting two cars involved in a collision, with a prominent lock icon symbolizing the G-Sensor's function to secure incident footage.
5.5. Monitor d'aparcament
The 24-hour parking monitor feature provides surveillance when your vehicle is parked. It automatically activates and records video upon detecting collisions or motion (depending on settings). Note: This feature requires a hardwire kit (ASIN: B0D93L49TD), which is sold separately.

Image: The VEEMENT V200Pro Dash Cam displayed alongside a hardwire kit, indicating its necessity for enabling 24-hour parking monitoring.

Image: An illustration of a car under a protective shield with a '24H' icon, signifying continuous parking monitoring.
5.6. Time-Lapse Recording (Parking Mode)
When the hardwire kit is installed and parking mode is active, the dash cam can record in time-lapse mode (e.g., 1 frame per second). This compresses long periods of parking surveillance into shorter video files, conserving memory card space while providing continuous coverage.

Image: A smartphone screen showing a compressed time-lapse video recorded by the dash cam, demonstrating the feature's output.
5.7. Supervisió nocturna
The V200Pro is equipped with an F1.6 large aperture and a 6-layer glass lens, which increases light intake by 60%. Combined with Wide Dynamic Range (WDR) technology, this enhances recording clarity in low-light conditions, providing clear footage a la nit.

Image: A car driving on a road at night, demonstrating the enhanced visibility and clarity provided by the dash cam's super night vision feature.
6. App Control (WiFi)
The V200Pro features built-in 2.4G WiFi for seamless connection to its companion app on iOS and Android smartphones. This allows for convenient management of recordings.
6.1. Connexió a l'aplicació
- Download the 'VeeCar' app from the App Store (iOS) or Google Play Store (Android).
- Engega la càmera del salpicader.
- On your smartphone, go to WiFi settings and connect to the dash cam's WiFi network (SSID and password can be found in the dash cam's settings or included guide).
- Open the VeeCar app. The app should automatically connect to the dash cam.

Image: A hand holding a smartphone displaying the dash cam's app interface, showing options for viewing, sharing, editing, and downloading videos.

Image: A smartphone displaying the VeeCar app, showing live footage from the dash cam and options for app control.
6.2. Funcions de l'aplicació
Through the VeeCar app, you can:
- View viu footage de la càmera de guió.
- Review vídeos i fotografies gravats.
- Download recordings directly to your smartphone.
- Ajusta la configuració de la càmera del salpicader.
- Share videos and photos.
7. Manteniment
- Neteja: Feu servir un drap suau i sec per netejar la lent i el cos de la càmera del salpicader. Eviteu utilitzar netejadors o dissolvents abrasius.
- Format de la targeta SD: Regularly format the Micro SD card (at least once a month) within the dash cam's settings to ensure optimal performance and prevent data corruption. Back up any important files abans de formatar.
- Temperatura: The dash cam is designed to operate in temperatures from -40℉ to 185℉ (-40℃ to 85℃). Avoid prolonged exposure to extreme temperatures outside this range.

Imatge: Una imatge interna view of the dash cam's circuit board, highlighting its aluminum alloy shell for heat dissipation and overall durability.
8. Solució De Problemes
- La càmera del salpicader no s'encén: Check the car charger connection and ensure the vehicle's cigarette lighter socket is functioning.
- Errors d'enregistrament: Ensure a U1 grade or higher Micro SD card is inserted and formatted. Try formatting the card again or using a different card.
- Problemes de connexió WiFi: Ensure the dash cam's WiFi is enabled. Restart both the dash cam and your smartphone. Verify you are connecting to the correct WiFi network.
- El monitor d'aparcament no funciona: Confirmeu que el kit de cablejat opcional estigui instal·lat i connectat correctament.
- Blurred Footage: Clean the dash cam lens. Ensure the protective film has been removed from the lens.
9. Especificacions
| Característica | Especificació |
|---|---|
| Nom del model | V200Pro |
| Resolució de captura de vídeo | 2.5K (2560 x 1440p) |
| Camp de View | 160 graus |
| Mostra | 1.47" IPS Display |
| Tecnologia de connectivitat | Wi-Fi (2.4 G) |
| Característiques especials | Compact Design, WDR, G-Sensor, Loop Recording, Night Vision, Parking Monitor (requires hardwire kit), Speaker |
| Tipus de muntatge | Muntatge del parabrisa |
| Dimensions del producte | 1.2 x 3.6 x 1.8 polzades |
| Pes de l'article | 8.4 unces |
| Temperatura de funcionament | -40 ℉ a 185 ℉ (-40 ℃ a 85 ℃) |
| Compatibilitat màxima amb targetes SD | 256GB (U1 grade or higher recommended) |
10. Garantia i Suport
Warranty information and specific customer support details are not provided in the available product data. Please refer to the product packaging or the manufacturer's official website for warranty terms and contact information for technical support.