
1. Introducció
This instruction manual provides comprehensive guidance for the safe and effective use of your Elna eXplore 130 Mechanical Sewing Machine. Please read this manual thoroughly before operating the machine to ensure proper setup, operation, and maintenance. Retain this manual for future reference.
2. Instruccions de seguretat importants
Quan utilitzeu un aparell elèctric, sempre s'han de seguir les precaucions bàsiques de seguretat, com ara les següents:
- Llegiu totes les instruccions abans d’utilitzar aquesta màquina de cosir.
- Mantingueu els dits allunyats de totes les parts en moviment. Es requereix una cura especial al voltant de l’agulla de la màquina de cosir.
- Utilitzeu sempre la placa d'agulla adequada. La placa incorrecta pot fer que l'agulla es trenqui.
- No utilitzeu agulles doblegades.
- Turn the sewing machine off when making any adjustments in the needle area, such as threading the needle, changing the needle, threading the bobbin, or changing the presser foot.
- Desendolleu sempre la màquina de cosir de la presa de corrent quan traieu les cobertes, lubriqueu o quan feu qualsevol altre ajust de servei de l'usuari esmentat al manual d'instruccions.
- No deixeu caure ni introduïu cap objecte a cap obertura.
- No utilitzar a l'aire lliure.
- No opereu on s'utilitzen productes en aerosol (esprai) o on s'administra oxigen.
- Per desconnectar, gireu tots els controls a la posició d'apagat i, a continuació, traieu l'endoll de la presa de corrent.
- No desconnecteu estirant el cable. Per desconnectar, agafa l'endoll, no el cable.
3. Producte acabatview
The Elna eXplore 130 is a mechanical sewing machine designed for various sewing tasks, offering a selection of utility, stretch, and decorative stitches. It features a lightweight and portable design.
Característiques principals:
- 23 puntades utilitàries, elàstiques i decoratives integrades.
- One four-step buttonhole.
- Front Loading Vertical Oscillating Bobbin system.
- Free-arm sewing capability by removing the front accessory tray.
- Maximum stitch width: 5mm.
- Maximum stitch length: 4mm.
- Maximum sewing speed: 800 stitches per minute (SPM).
- LED lighting for improved visibility.
- Convenient dial system for stitch pattern, length, and width selection.
Components inclosos:
The following accessories are included with your Elna eXplore 130 sewing machine:
- Presser Feet: Standard Foot A, Zipper Foot E, Blind Hem Foot G, Buttonhole Foot.
- Darning plate.
- Bobbins (x3).
- Seam Ripper.
- Needle Set.
- Tornavís.
- Felt.
- Foot Controller.
- Manual d'instruccions (aquest document).
màquina Views:


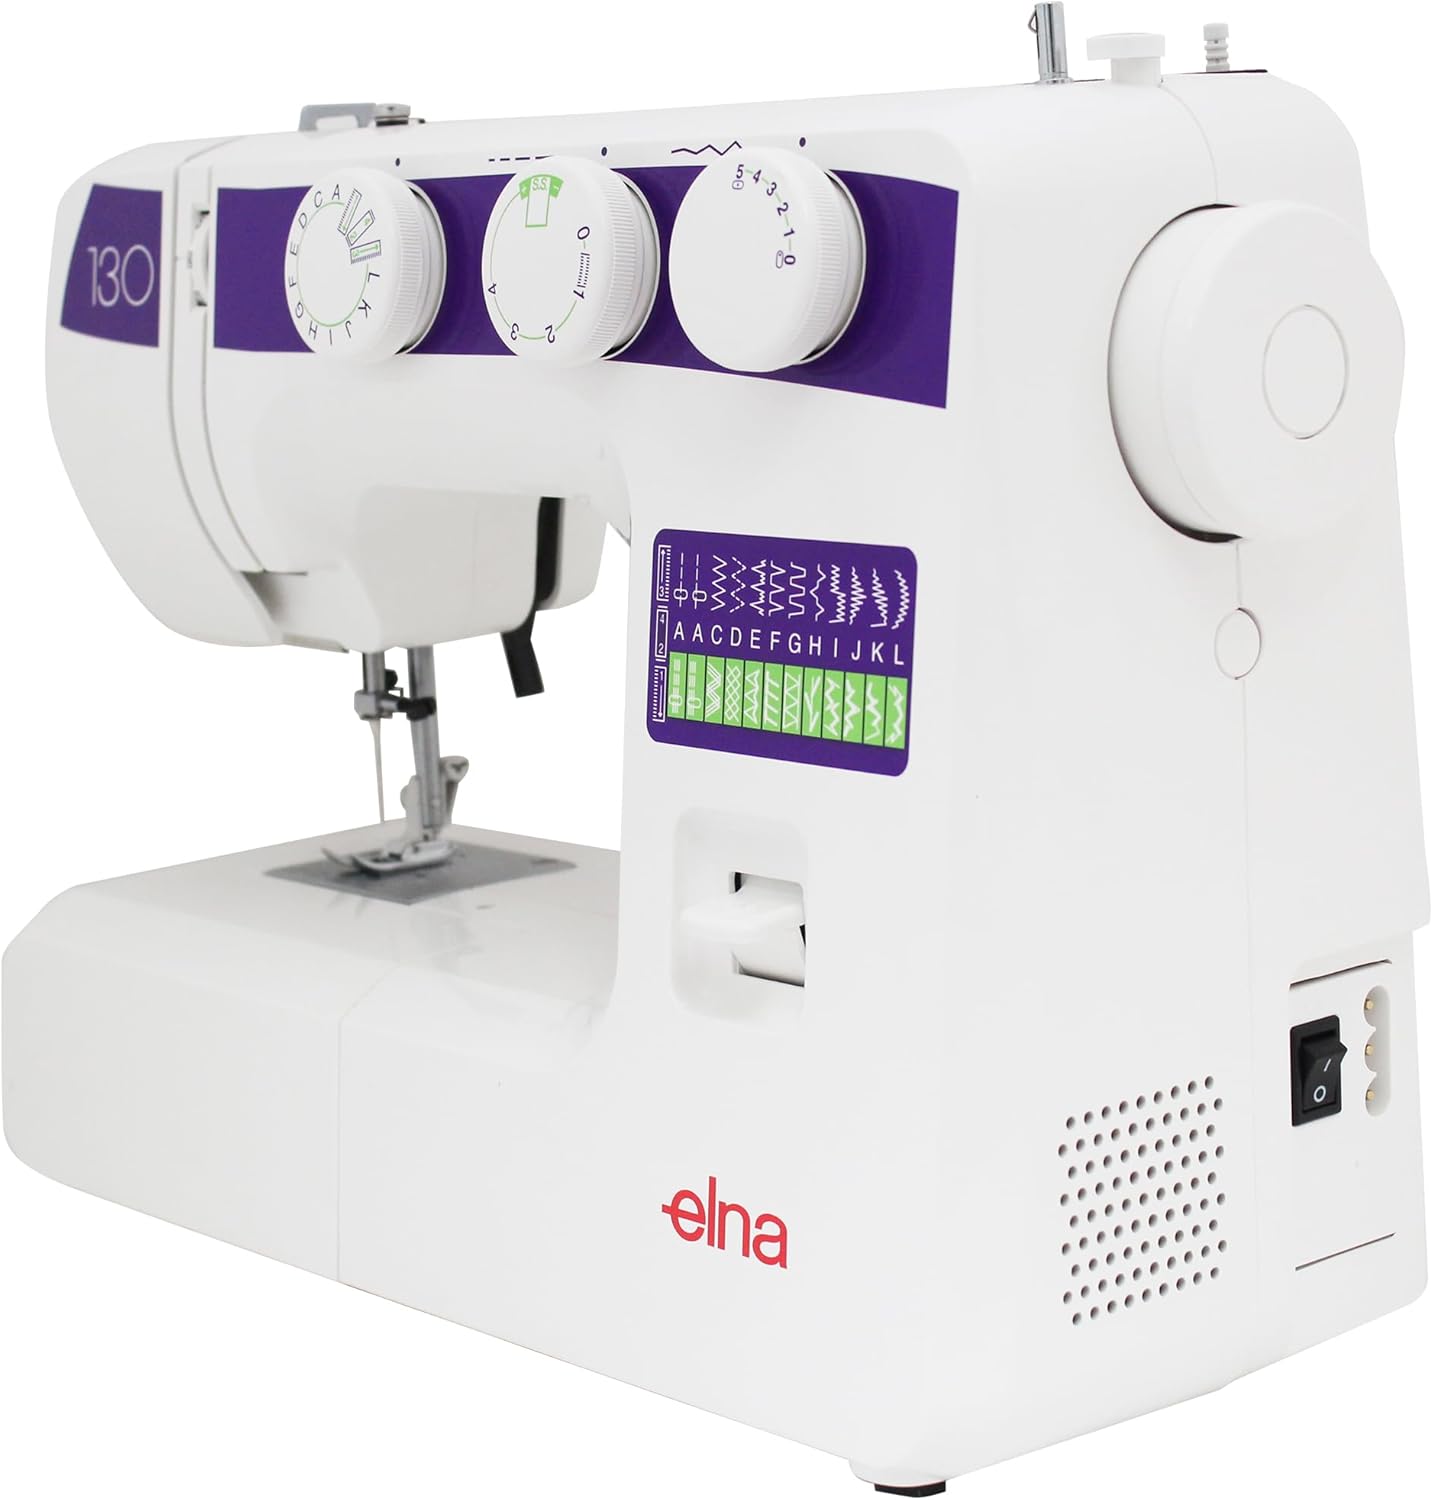


4. Configuració
4.1 Desembalatge i col·locació
- Traieu amb cura la màquina del seu embalatge.
- Col·loqueu la màquina sobre una superfície plana i estable.
- Assegureu-vos que hi hagi una il·luminació i un espai adequats per a un funcionament còmode.
4.2 Connexió d'alimentació
- Connecteu l'endoll del pedal a la presa de corrent de la màquina.
- Introduïu el cable d'alimentació a una presa de corrent adequada.
- Ensure the power switch on the machine is in the "OFF" position before connecting.
4.3 Enrotllament de la bobina
- Col·loqueu una bobina buida a l'eix de la bobinadora.
- Guide the thread from the spool pin through the upper thread guide and around the bobbin winding tension disc.
- Wrap the thread a few times around the bobbin.
- Empenyeu l'eix de la bobina de bobina cap a la dreta.
- Gently press the foot controller to start winding. Stop when the bobbin is full.
- Talleu el fil i empenyeu el cargol de la bobina cap a l'esquerra.
4.4 Inserting the Bobbin
- Open the bobbin cover plate located on the free arm.
- Introduïu la bobina enrotllada a la caixa de la bobina, assegurant-vos que el fil es desenrotlli en la direcció correcta (normalment en sentit antihorari).
- Pull the thread through the tension spring and into the bobbin case slot.
- Tanqueu la placa de la coberta de la bobina.
4.5 Enfilar el fil superior
- Aixequeu el aixecador del peu premsador.
- Col·loqueu una bobina de fil al portacarret.
- Guieu el fil a través del guiafils superior.
- Follow the numbered threading path down through the tension discs and up to the take-up lever.
- Enfileu la palanca de recollir el fil de dreta a esquerra.
- Continue guiding the thread down through the remaining guides to the needle.
- Enfileu l'agulla de davant a darrere.
- Estireu uns 6 polzades de fil per l'ull de l'agulla.
5. Instruccions de funcionament
5.1 Selecció de puntades
- Gireu el Stitch Pattern Dial (leftmost dial) to select the desired stitch. Refer to the stitch pattern guide on the machine for available options.
- Ajusteu el Dial de longitud de puntada (middle dial) to set the desired stitch length (0-4mm). For stretch stitches, use the preset length indicated by the green mark.
- Ajusteu el Dial d'amplada de punt (rightmost dial) to set the desired stitch width (0-5mm).
5.2 Costura bàsica
- Col·loqueu la tela sota el peu de premsa.
- Baixeu el peu de premsa.
- Turn the handwheel towards you to bring the needle down into the fabric, then up again, pulling the bobbin thread through the needle plate hole.
- Pull both upper and bobbin threads to the back under the presser foot.
- Gently press the foot controller to begin sewing. Guide the fabric smoothly.
- To secure a seam, press the reverse lever for a few stitches at the beginning and end of your seam.
- When finished, raise the needle to its highest position, lift the presser foot, and pull the fabric away from the machine. Cut the threads using the thread cutter.
5.3 Ús del braç lliure
To use the free arm for sewing tubular items like sleeves, cuffs, or trouser hems, simply slide off the accessory storage tray located at the front of the machine. This exposes the narrow free arm.
5.4 Four-Step Buttonhole
The Elna eXplore 130 features a four-step buttonhole function.
- Attach the Buttonhole Foot.
- Mark the buttonhole position on your fabric.
- Set the Stitch Pattern Dial to the first buttonhole step (indicated by a square symbol).
- Sew the first side of the buttonhole.
- Adjust the Stitch Pattern Dial to the second step for the bar tack.
- Adjust to the third step for the second side, and the fourth step for the final bar tack.
- Carefully cut open the buttonhole using a seam ripper.
6. Manteniment
Un manteniment regular garanteix la longevitat i el rendiment òptim de la teva màquina de cosir.
6.1 Neteja de la màquina
- Desconnecteu sempre la màquina abans de netejar-la.
- Traieu l'agulla, el peu premsatelas i la placa de l'agulla.
- Use the provided brush to remove lint and dust from the bobbin case area and feed dogs.
- Netegeu l'exterior de la màquina amb un drap suau i sec. No utilitzeu netejadors líquids.
6.2 Changing the Needle
- Aixequeu l'agulla a la seva posició més alta.
- Afluixeu l'agulla clamp cargol.
- Traieu l'agulla vella.
- Insert a new needle with the flat side facing the back, pushing it up as far as it will go.
- Apretar l'agulla clamp cargol de manera segura.
- Change needles regularly (after 8-10 hours of sewing) or if it becomes bent or dull.
7. Solució De Problemes
Aquesta secció tracta els problemes habituals que podeu trobar. Per a problemes que no figuren aquí, poseu-vos en contacte amb l'atenció al client.
| Problema | Causa possible | Solució |
|---|---|---|
| Punts saltats | Mida/tipus d'agulla incorrecte, agulla doblegada, enfilat incorrecte. | Change needle, re-thread machine, ensure correct needle for fabric. |
| Thread Breaking (Upper) | Incorrect upper tension, improperly threaded, poor quality thread, bent needle. | Adjust tension, re-thread, use quality thread, change needle. |
| Thread Breaking (Bobbin) | Improperly wound bobbin, incorrect bobbin insertion, lint in bobbin case. | Rewind bobbin, re-insert bobbin correctly, clean bobbin case. |
| La tela no s'alimenta | Presser foot not lowered, feed dogs lowered, lint under needle plate. | Lower presser foot, raise feed dogs, clean under needle plate. |
| La màquina no arrenca | Power cord not connected, power switch off, foot controller issue. | Check power connections, turn on switch, inspect foot controller. |
8. Especificacions
| Característica | Detall |
|---|---|
| Marca | Elna |
| Número de model | EL130 |
| Tipus | Màquina de cosir mecànica |
| Recompte de punts | 23 punts incorporats |
| Tipus de trau | Four-step |
| Tipus de bobina | Front Loading Vertical Oscillating |
| Amplada màxima de punt | 5 mm |
| Longitud màxima de puntada | 4 mm |
| Velocitat màxima de costura | 800 SPM |
| Il·luminació | LED |
| Font d'alimentació | Elèctric |
| Dimensions del producte (P x A x A) | 6 "P x 15.3" W x 11.6" H |
| Pes de l'article | 13 lliures |
| Material | Metall, plàstic |
| UPC | 732212411939 |
9. Garantia i Suport
For information regarding your product's warranty, please refer to the warranty card included with your purchase or visit the official Elna weblloc.
If you require technical assistance, have questions about operation, or need to order replacement parts, please contact Elna customer support.
- Elna Official Weblloc: www.elna.com
- Elna USA Store on Amazon: Visit the Elna Store