
1. Introducció
Thank you for choosing the BitFenix AL118 ATX Mid Tower PC Case. This manual provides essential information for the proper installation, operation, and maintenance of your new PC case. Please read this manual thoroughly before beginning installation to ensure correct setup and to prevent any damage to the product or its components. Keep this manual for future reference.
Informació de seguretat
- Desconnecteu sempre l'alimentació de la presa de corrent abans d'instal·lar o treure qualsevol component.
- Handle components with care to avoid electrostatic discharge (ESD) damage. Consider using an anti-static wrist strap.
- Ensure all cables are properly routed and secured to prevent interference with fans or other moving parts.
- Do not open the power supply unit (PSU) as it contains high voltage components.
- Keep the case away from direct sunlight, high temperatures, and moisture.
2. Producte acabatview i Característiques
The BitFenix AL118 is a high-performance ATX Mid Tower PC case designed for enthusiasts. It features a tempered glass side panel, integrated ARGB lighting, and comes equipped with a 1000W 80+ Gold Gen5 ATX 3.0 power supply unit. The case offers extensive compatibility for various motherboard sizes, GPUs, and cooling solutions.
Característiques principals:
- Factor de forma: Torre mitjana ATX
- Font d'alimentació: Integrated 1000W 80+ Gold Gen5 ATX 3.0 PSU
- Tauler lateral: Vidre temperat
- Il·luminació: Addressable RGB (ARGB) elements
- Suport de la placa base: MicroATX, Mini-ITX (ATX implied by case type)
- E / S davantera: 1 x USB 3.2 Type-C, 2 x USB 3.0
- Badies d'emmagatzematge: 2 x 2.5" internal, 1 x 3.5" internal
- Liquidació de la GPU: Fins a 400 mm
- Suport de refrigeració:
- Top Radiator: 240mm, 280mm, 360mm
- Rear Radiator: 1 x 120mm
- Rear Fan: 1 x 120mm (pre-installed ARGB)
- Top Fan: 3 x 120mm or 3 x 140mm (support)
- Side Fan: 3 x 120mm (pre-installed ARGB)
3. Guia de configuració
Follow these steps to properly set up your BitFenix AL118 PC case and install your components.
3.1 Desembalatge i inspecció inicial
- Traieu amb cura la caixa del seu embalatge.
- Inspect the case for any signs of damage during transit. If damaged, contact your retailer immediately.
- Remove the tempered glass side panel by unscrewing the thumb screws (if present) or releasing the latch mechanism. Place it on a soft, flat surface to prevent scratches.
- Locate the accessory box inside the case, which contains screws, cable ties, and other mounting hardware.
3.2 Instal·lació de la placa base
- Ensure the correct standoffs are installed for your motherboard form factor (MicroATX, Mini-ITX). Additional standoffs may be in the accessory box.
- Instal·leu la protecció d'E/S a l'obertura posterior de la carcassa.
- Col·loca amb cura la placa base sobre els separadors, alineant els forats dels cargols.
- Secure the motherboard with the provided screws. Do not overtighten.

Figura 3.2.1: Intern view of the case, highlighting the motherboard tray and various mounting points for fans and components.
3.3 Instal·lació de la targeta gràfica (GPU)
- Remove the necessary expansion slot covers from the rear of the case, corresponding to your GPU's size.
- Insert your GPU into the appropriate PCIe slot on the motherboard until it clicks into place.
- Secure the GPU to the case with screws.
- Connect the required PCIe power cables from the PSU to the GPU.
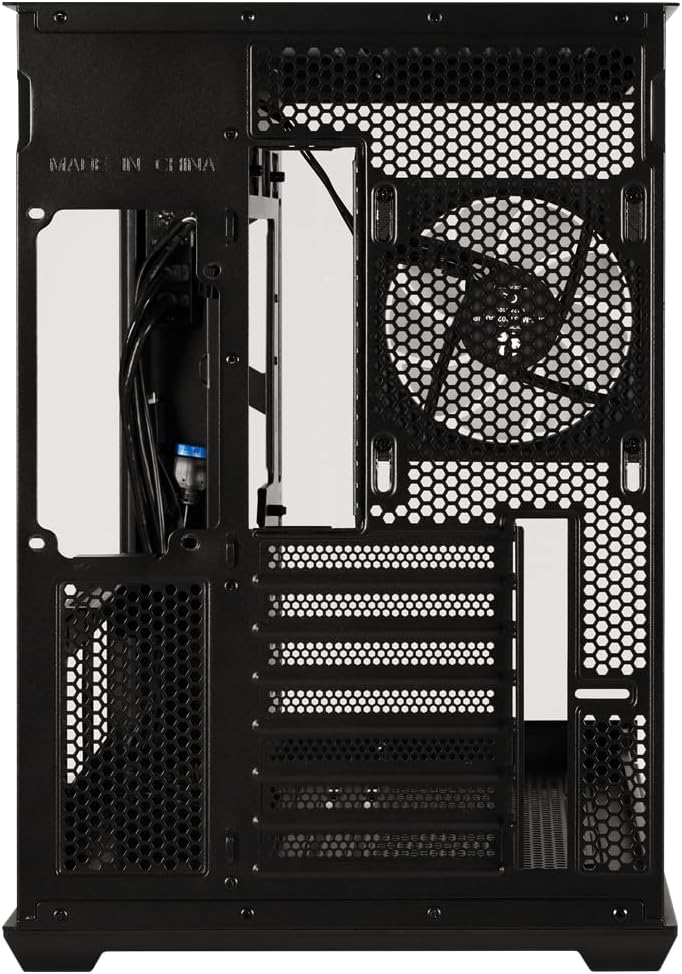
Figura 3.3.1: posterior view of the case, showing the expansion slots where graphics cards are mounted and the pre-installed rear fan.
3.4 Storage Drive Installation (2.5" SSD/HDD, 3.5" HDD)
- Locate the 2.5" drive mounts (2 available) and 3.5" drive bay (1 available). These are typically found behind the motherboard tray or in a dedicated drive cage.
- For 2.5" drives, secure them to the mounting brackets with screws.
- For 3.5" drives, slide them into the drive cage and secure with screws or tool-less clips if available.
- Connect SATA data cables to the motherboard and SATA power cables from the PSU to each drive.
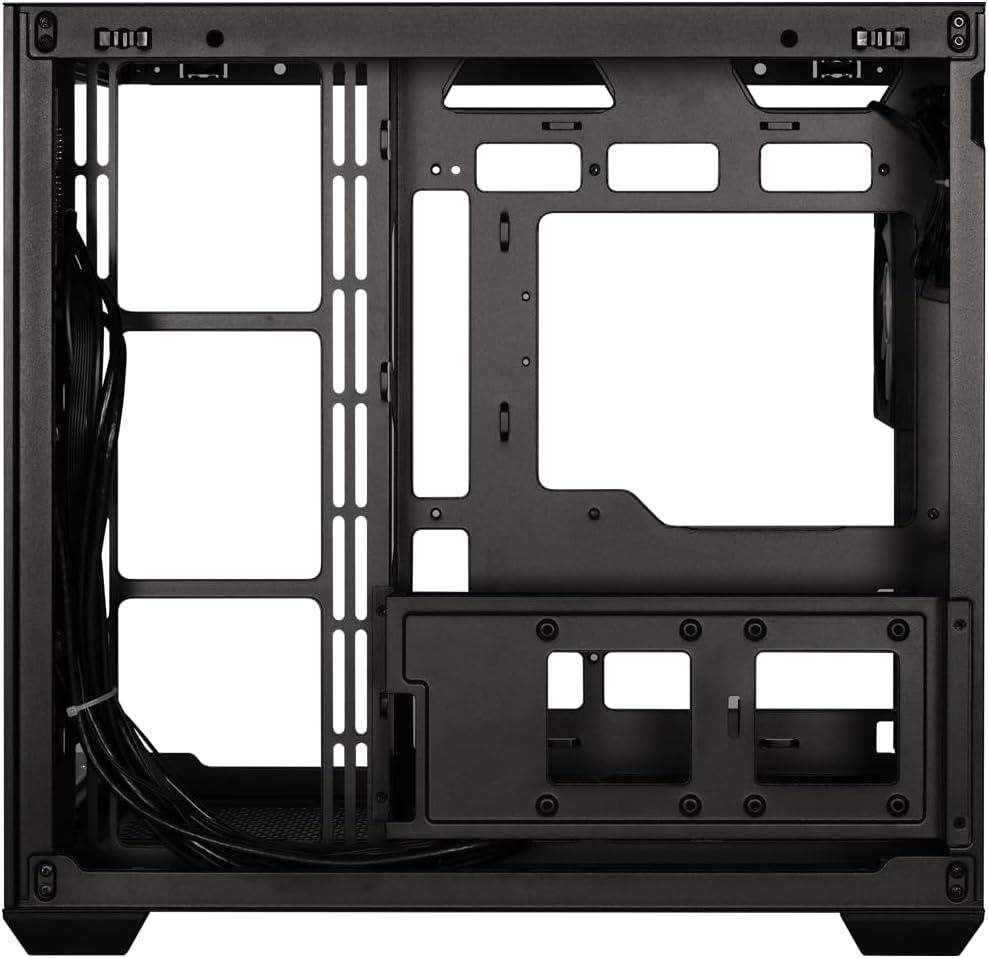
Figura 3.4.1: View behind the motherboard tray, illustrating the cable management channels and mounting locations for 2.5-inch and 3.5-inch storage drives.
3.5 Power Supply Unit (PSU) Connections
Your BitFenix AL118 case comes with a pre-installed 1000W 80+ Gold Gen5 ATX 3.0 PSU. Ensure all necessary power cables are connected:
- Alimentació ATX de 24 pins: Connect to the motherboard.
- 8-pin (4+4) EPS/CPU Power: Connect to the motherboard CPU power header.
- Alimentació PCIe: Connecteu-vos a la targeta o targetes gràfiques segons calgui.
- Alimentació SATA: Connect to your storage drives.
- Peripheral/Molex Power: Connect to any other components requiring this type of power.
3.6 Connexions del panell frontal
Connect the front panel cables to the corresponding headers on your motherboard:
- USB 3.2 tipus C: Connect the internal USB-C header cable to your motherboard's USB 3.2 Gen2 Type-C header.
- USB 3.0: Connect the internal USB 3.0 header cable to your motherboard's USB 3.0 header.
- Àudio HD: Connect to your motherboard's audio header.
- Power SW, Reset SW, HDD LED, Power LED: Connect these small connectors to the front panel header pins on your motherboard according to your motherboard manual.

Figura 3.6.1: Intern view showing the pre-installed ARGB fans and the routing of front panel I/O cables, including USB 3.2 Type-C and USB 3.0 connections.
3.7 Gestió de cables
Utilize the cable routing cutouts and tie-down points behind the motherboard tray to manage cables. Proper cable management improves airflow and aesthetics.
- Route main power cables (24-pin, EPS) through the largest cutouts.
- Use cable ties or Velcro straps (included in accessory box) to bundle and secure cables.
- Ensure no cables obstruct fan blades or airflow paths.
4. Instruccions de funcionament
4.1 Powering On Your System
- Once all components are installed and cables connected, replace the tempered glass side panel.
- Connecteu el cable d'alimentació de CA a la font d'alimentació i després a una presa de corrent.
- Gireu l'interruptor d'alimentació de la part posterior de la font d'alimentació a la posició "ON".
- Press the power button on the front panel of your case.
4.2 Control d'il·luminació ARGB
The BitFenix AL118 features Addressable RGB (ARGB) lighting. The control method depends on how the ARGB components are connected:
- Sincronització de la placa base: If the ARGB cables are connected to a compatible 3-pin 5V ARGB header on your motherboard, you can control the lighting effects using your motherboard's RGB software (e.g., ASUS Aura Sync, MSI Mystic Light, Gigabyte RGB Fusion, ASRock Polychrome Sync).
- Controlador integrat: If the case includes a built-in ARGB controller (often connected to a reset button or dedicated ARGB button), you can cycle through pre-programmed lighting modes by pressing that button. Refer to the specific controller's instructions if applicable.
5. Manteniment
Un manteniment regular ajuda a garantir un rendiment òptim i una llarga vida útil dels components del teu PC.
- Filtres de pols: The case is equipped with dust filters (e.g., top, front, bottom). Regularly remove and clean these filters with water and mild soap, or by vacuuming/brushing them. Ensure they are completely dry before re-installing.
- Neteja interior: Periodically use compressed air to blow dust out of the case interior, especially from fan blades, heatsinks, and vents. Ensure the system is powered off and unplugged before cleaning.
- Vidre temperat: Netegeu el panell de vidre temperat amb un drap de microfibra i un netejador de vidres no abrasiu. Eviteu productes químics agressius.
6. Solució De Problemes
If you encounter issues with your PC build, refer to the following common troubleshooting steps:
- No Power / System Not Starting:
- Ensure the PSU power switch is in the 'ON' position.
- Check that the AC power cord is securely connected to both the PSU and the wall outlet.
- Verify all PSU cables (24-pin, EPS, PCIe) are firmly connected to the motherboard and components.
- Confirmeu que el cable de l'interruptor d'alimentació del panell frontal estigui connectat correctament a la capçalera de la placa base.
- Sense sortida de pantalla:
- Ensure your monitor is connected to the graphics card (GPU) output, not the motherboard's integrated graphics output (unless you are using integrated graphics).
- Torneu a col·locar la targeta gràfica a la ranura PCIe.
- Check that the GPU's power cables are securely connected.
- Els ventiladors no giren / L'ARGB no funciona:
- Verify that all fan power cables are connected to the motherboard fan headers or a fan controller.
- Check ARGB cables are connected to a compatible 3-pin 5V ARGB header on the motherboard or an ARGB controller.
- Si feu servir programari de placa base, assegureu-vos que estigui instal·lat i configurat correctament.
- Sobreescalfament:
- Assegureu-vos que tots els ventiladors de la caixa girin i estiguin orientats correctament per a un flux d'aire òptim (entrada/sortida).
- Clean dust filters and case interior as described in the Maintenance section.
- Verifiqueu que el refrigerador de CPU i el refrigerador de GPU estiguin instal·lats correctament i funcionin.
7. Especificacions
| Característica | Especificació |
|---|---|
| Nom del model | BitFenix AL118 1000W 80+Gold Gen5 ATX 3.0 TemperedGlass ARGB ATX MidTower SiyahKasa BFC-ALB100KKGSK-4A |
| Número de part | BFC-ALB100KKGSK-4A |
| Tipus de cas | Torre mitjana ATX |
| Compatibilitat amb la placa base | MicroATX, Mini-ITX (ATX implied by case type) |
| Unitat d'alimentació (PSU) | 1000W 80+ Gold Gen5 ATX 3.0 (Pre-installed) |
| Ubicació de la PSU | A baix |
| Panell lateral | Vidre temperat |
| Ports d'E / S frontals | 1 x USB 3.2 Type-C, 2 x USB 3.0 |
| Badies d'unitat internes de 2.5" | 2 |
| Badies d'unitat internes de 3.5" | 1 |
| Longitud màxima de la GPU | 400 mm |
| Suport superior del radiador | 240 mm, 280 mm, 360 mm |
| Suport del radiador posterior | 1 x 120 mm |
| Front Panel Fan Support | None (Side fans are present) |
| Rear Panel Fan Support | 1 x 120 mm |
| Top Panel Fan Support | 3 x 120 mm, 3 x 140 mm |
| Pre-installed Fans (Side) | 3 x 120mm ARGB |
| Pre-installed Fans (Rear) | 1 x 120mm ARGB |
| Dimensions del producte | 48 x 45.5 x 34.5 cm |
| Pes del producte | 8 quilos |
8. Garantia i Suport
BitFenix products are manufactured to the highest quality standards. For specific warranty terms and conditions, please refer to the warranty card included with your product or visit the official BitFenix website. If you encounter any issues that cannot be resolved using this manual, please contact BitFenix customer support or your retailer for assistance.
Official BitFenix Weblloc: www.bitfenix.com