
IBKINXX 20 EGG
IBKINXX 20-Egg Capacity Automatic Egg Incubator User Manual
Model: 20 EGG
1. Introducció
This manual provides detailed instructions for the safe and efficient operation of your IBKINXX 20-Egg Capacity Automatic Egg Incubator. Please read this manual thoroughly before use to ensure optimal performance and successful hatching results.
The IBKINXX Egg Incubator is designed for hatching various types of poultry and bird eggs, including chicken, duck, quail, goose, parrot, and pigeon eggs. It features an automatic egg turner, precise temperature and humidity control, a built-in LED egg candler, and a 360° viewing design for easy monitoring.
2. Components del producte
Familiarize yourself with the main components of your incubator:
- Portada superior: Tapa transparent per a viewing, houses control panel and fan.
- Tauler de control: Digital display for temperature, humidity, and settings.
- Egg Turning Mechanism: Automatically rotates eggs.
- Safates d'ous: Designed to hold eggs securely.
- Water Channels: For adding water to maintain humidity.
- Unitat base: Contains heating element and water reservoir.
- Cable d'alimentació: Per connectar a una presa de corrent.

Imatge: Més deview of the incubator's intelligent display screen and key features like automatic egg turner, temperature/humidity control, LED candler, and external water injection.
3. Instruccions de configuració
- Unpack the Incubator: Traieu amb cura tots els components de l'embalatge. Inspeccioneu-ho per veure si hi ha algun dany.
- Trieu una ubicació: Place the incubator on a stable, level surface in a room with a consistent ambient temperature (ideally between 20-25°C / 68-77°F) and away from direct sunlight, drafts, or extreme temperature fluctuations.
- Assemble Egg Trays: The incubator features a two-tier design. Ensure the egg turning mechanism and trays are correctly assembled according to the type and size of eggs you intend to incubate.

Image: Demonstrates the two-tier flexibility of the incubator, showing configurations for larger chicken/duck eggs and smaller quail/pigeon eggs.
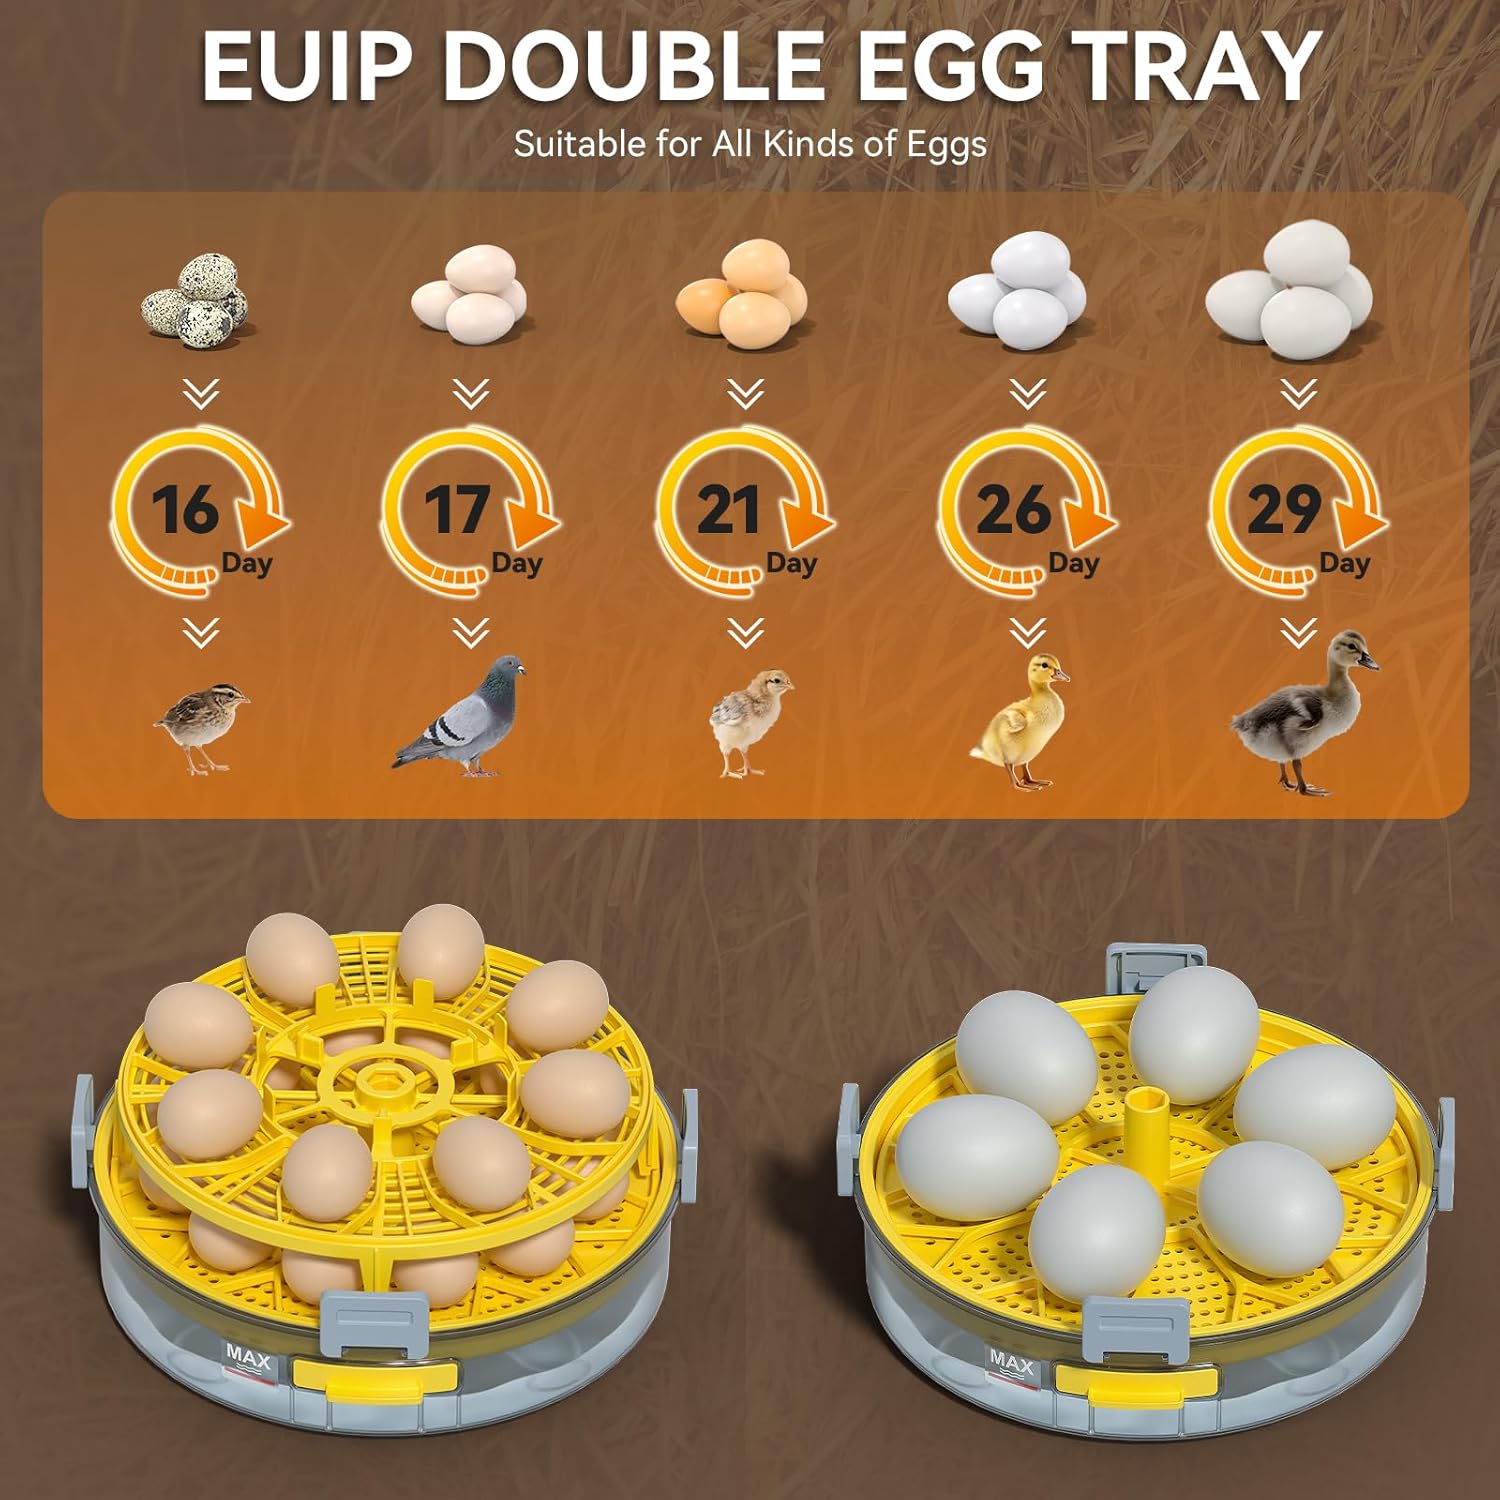
Image: Illustrates the EUIP double egg tray system, suitable for different egg sizes and showing estimated hatching days for various bird types.
- Afegeix aigua: Use the external water injection port to fill the water channels in the base unit. Use distilled or demineralized water to prevent mineral buildup. Do not overfill.
Note: The external water injection feature allows for easy refilling without opening the incubator, maintaining stable internal conditions.
- Connectar l'alimentació: Plug the power cord into a suitable electrical outlet. The incubator will power on and the display will illuminate.
- Pre-heat and Stabilize: Allow the incubator to run for at least 2-4 hours (preferably 24 hours) before placing eggs inside. This allows the internal temperature and humidity to stabilize and ensures the system is functioning correctly.
4. Instruccions de funcionament
4.1 Setting Temperature and Humidity
The intelligent display screen allows for easy adjustment of settings. Refer to the specific requirements for the type of eggs you are incubating. Typical settings are:
- Chicken Eggs: Temperature 37.5-37.8°C (99.5-100°F), Humidity 50-60% (first 18 days), 65-75% (last 3 days).
- Duck Eggs: Temperature 37.5°C (99.5°F), Humidity 60-70% (first 25 days), 75-85% (last 3 days).
- Quail Eggs: Temperature 37.5°C (99.5°F), Humidity 45-55% (first 14 days), 65-70% (last 3 days).
Use the control panel buttons to navigate and adjust the desired temperature and humidity levels. The incubator will automatically maintain these settings.
4.2 Placing Eggs
Carefully place fertile, clean eggs into the egg trays. Ensure they are positioned correctly for the automatic turning mechanism. The 20-egg capacity allows for efficient use of space.
4.3 Automatic Egg Turning
The incubator features an automatic egg turning system that rotates eggs every 90 minutes. This mimics natural conditions and prevents the embryo from sticking to the shell, promoting healthy development. Do not manually turn the eggs once this feature is active.

Image: Depicts the automatic egg turning function, showing eggs being rotated every 90 minutes to simulate natural incubation.
4.4 Monitoring and Candling
Regularly monitor the temperature and humidity readings on the display. The 360° viewing design allows for observation of the eggs without opening the incubator, minimizing temperature fluctuations.
Use the built-in LED egg candler to check the viability and development of the embryos. This feature allows you to observe the internal contents of the egg without needing external tools.
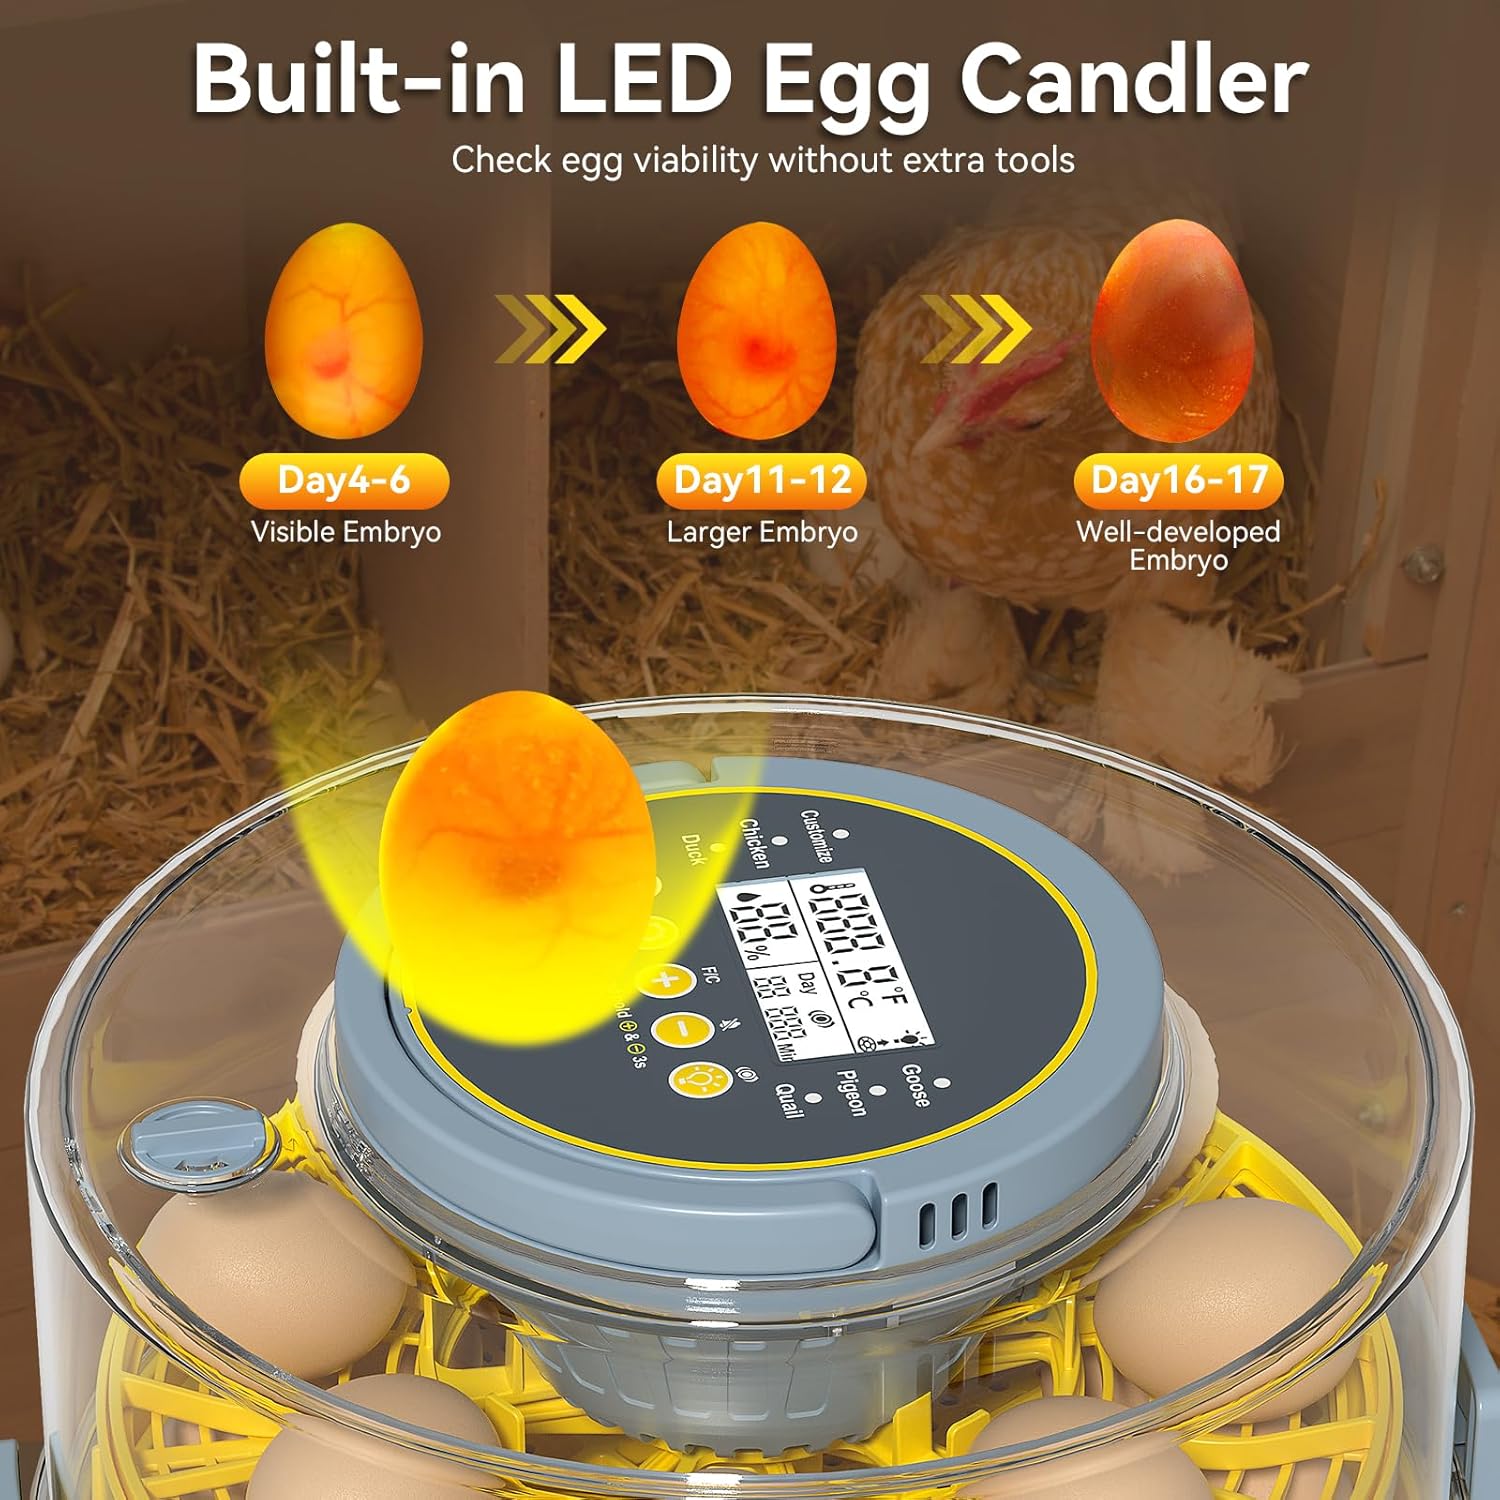
Image: Shows the built-in LED egg candler in action, illustrating how to check egg viability and embryo development at different stages (Day 4-6, Day 11-12, Day 16-17).
Candling Schedule (General Guide):
- Dia 4-6: Check for visible embryo and blood vessels.
- Dia 11-12: Observe larger embryo and increased vascularization.
- Dia 16-17: A well-developed embryo should be visible, filling most of the egg.
4.5 Airflow Circulation System
The incubator incorporates a built-in airflow circulation system to ensure balanced warm and cool air distribution. This promotes uniform incubation conditions throughout the incubator, crucial for successful hatching.
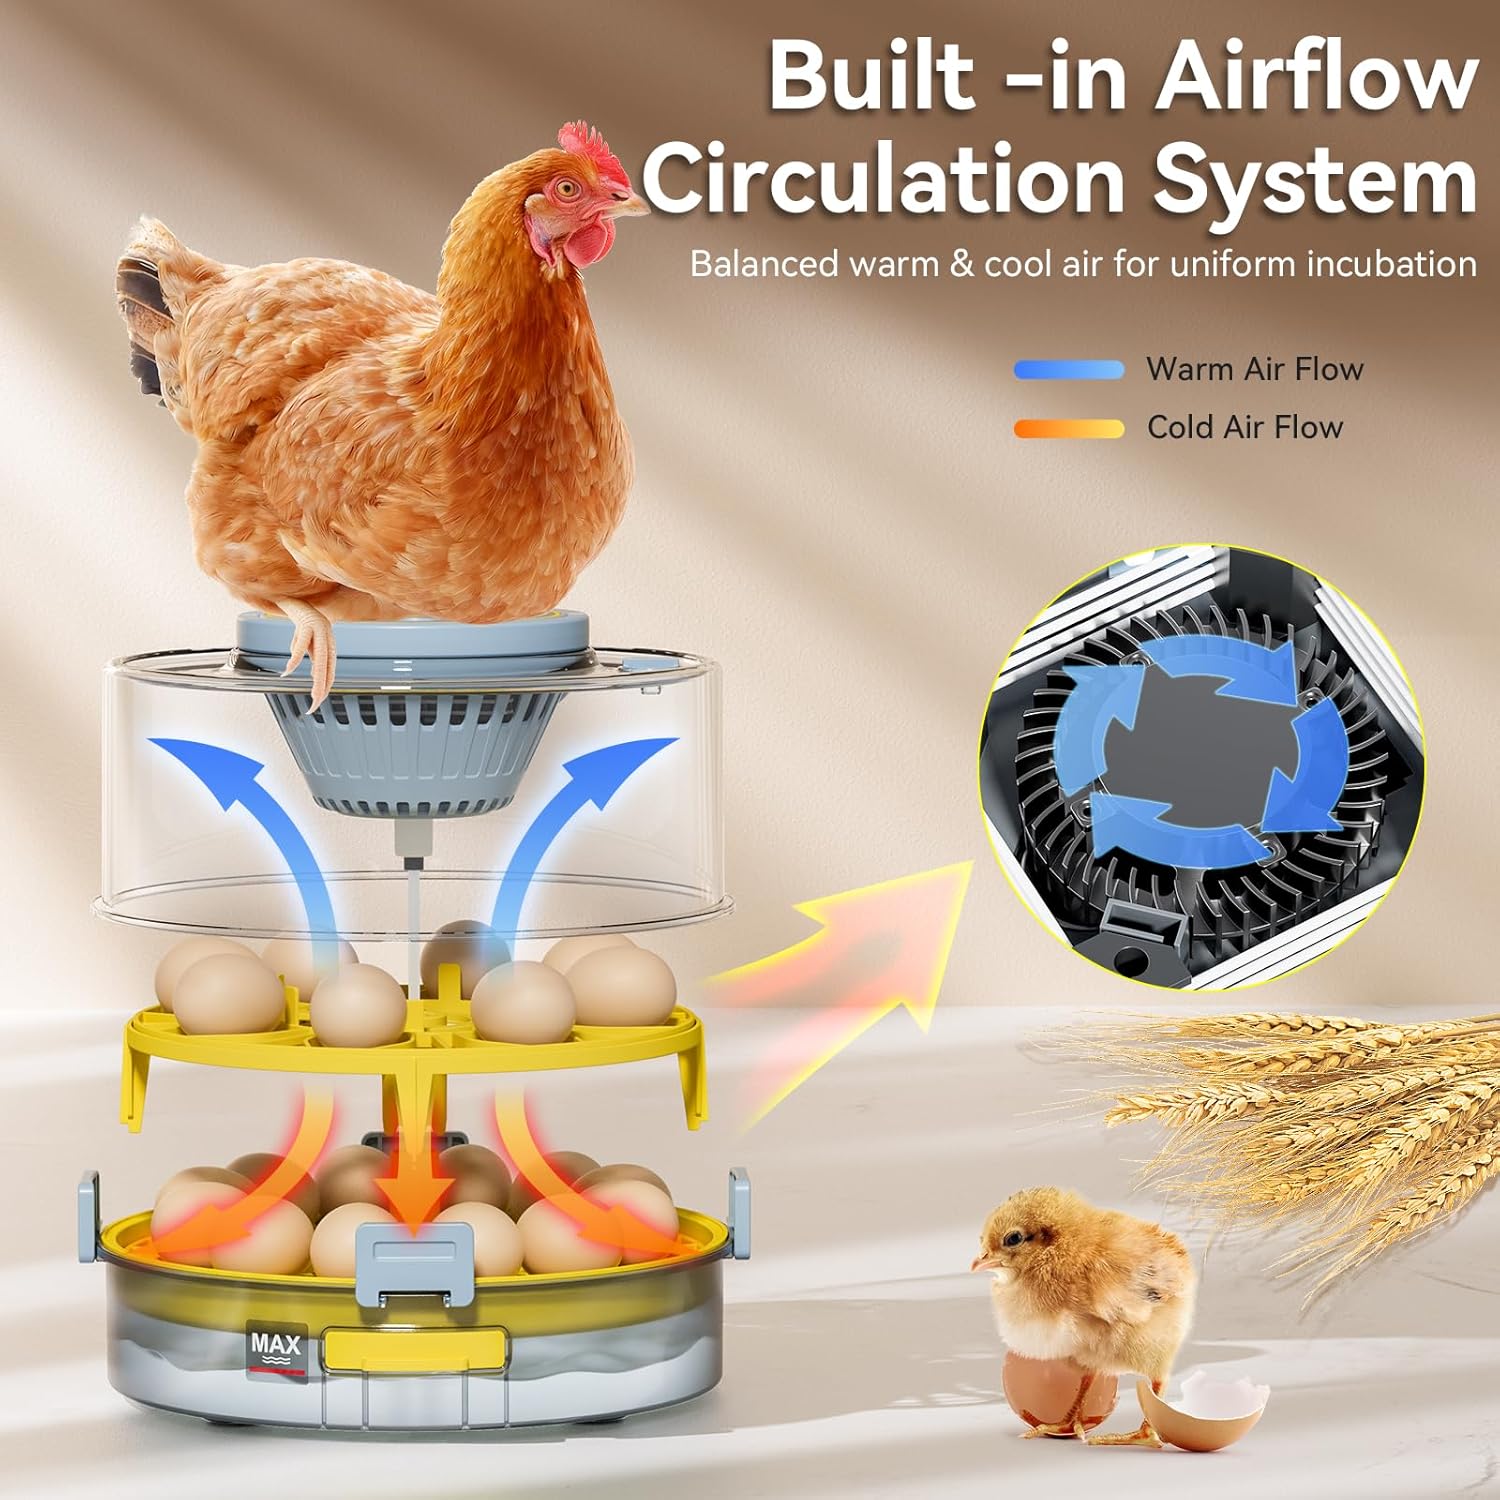
Image: Diagram illustrating the built-in airflow circulation system, showing how warm and cool air are balanced for uniform incubation.
4.6 Hatching Phase (Lockdown)
Approximately 3 days before the expected hatch date, stop the automatic egg turning. Increase the humidity level as recommended for your specific egg type. Do not open the incubator during the hatching process unless absolutely necessary, as this can cause critical drops in temperature and humidity.
5. Manteniment
5.1 Neteja
After each hatch, or if the incubator becomes soiled, disconnect it from power and clean all surfaces. Use a mild disinfectant solution suitable for poultry equipment. Wipe down the egg trays, base, and lid. Ensure all parts are completely dry before reassembly or storage.
- Do not immerse the control panel or electrical components in water.
- Utilitzeu un suau, damp cloth for cleaning the display and exterior.
5.2 Water Refilling
Regularly check the water levels in the channels. Refill as needed using the external injection port to maintain desired humidity. The frequency of refilling will depend on ambient humidity and incubator settings.
5.3 Emmagatzematge
When not in use, store the incubator in a clean, dry place, away from direct sunlight and extreme temperatures. Keep it covered to prevent dust accumulation.
6. Solució De Problemes
If you encounter issues with your IBKINXX Egg Incubator, please refer to the following common problems and solutions:
- Incubator Not Powering On:
- Check if the power cord is securely plugged into both the incubator and the electrical outlet.
- Verifiqueu que la presa de corrent funciona connectant-hi un altre aparell.
- Fluctuacions de temperatura:
- Ensure the incubator is placed in a stable environment, away from drafts or direct heat sources.
- Check that the lid is securely closed.
- Allow sufficient pre-heating time for stabilization.
- Humidity Too Low:
- Add more water to the water channels using the external injection port.
- Ensure the room humidity is not excessively low.
- Humidity Too High:
- Reduce the amount of water in the channels.
- Ensure the room humidity is not excessively high.
- Eggs Not Turning:
- Verify the automatic turning function is enabled on the control panel.
- Check that the egg trays are correctly installed and not obstructed.
For further assistance, please contact IBKINXX customer support.
7. Especificacions
| Marca | IBKINXX |
| Número de model | 20 EGG |
| Capacitat | 20 Eggs (standard chicken egg size) |
| Pes de l'article | 2.3 quilos |
| Color | groc |
| Fabricant | IBKINXX |
8. Garantia i Suport
La informació sobre la garantia del producte i l'atenció al client no estava disponible a les dades del producte proporcionades. Consulteu l'embalatge del producte o el fullet oficial del fabricant. website for details on warranty coverage and how to contact customer support for assistance.
Ask a question about this manual
Ask about setup, troubleshooting, compatibility, parts, safety, or missing instructions. Manuals+ will review the question and use this page’s manual context to help answer it.