
Zalman Cubix-G
Zalman CUBIX-G Micro-ATX PC Case Instruction Manual
Model: Cubix-G Black
Introducció
This manual provides detailed instructions for the assembly, operation, and maintenance of your Zalman CUBIX-G Micro-ATX Compact Mini Tower Gaming PC Case. Please read these instructions carefully before beginning installation to ensure proper setup and optimal performance.
The CUBIX-G case is designed for compact Micro-ATX and Mini-ITX builds, featuring a panoramic view tempered glass panel and pre-installed FRGB fans for efficient cooling and aesthetics.
Configuració i instal·lació
1. Desembalatge i inspecció
Carefully remove the PC case from its packaging. Inspect for any damage that may have occurred during shipping. Retain all packaging materials for future transport or warranty claims.
2. Case Dimensions and Compatibility
The Zalman CUBIX-G is a compact mini-tower case. Ensure your components are compatible with the case dimensions and supported hardware specifications.

Figure 1: Case Dimensions. The case measures 11.42 inches (290mm) in depth and 15.63 inches (397mm) in height.
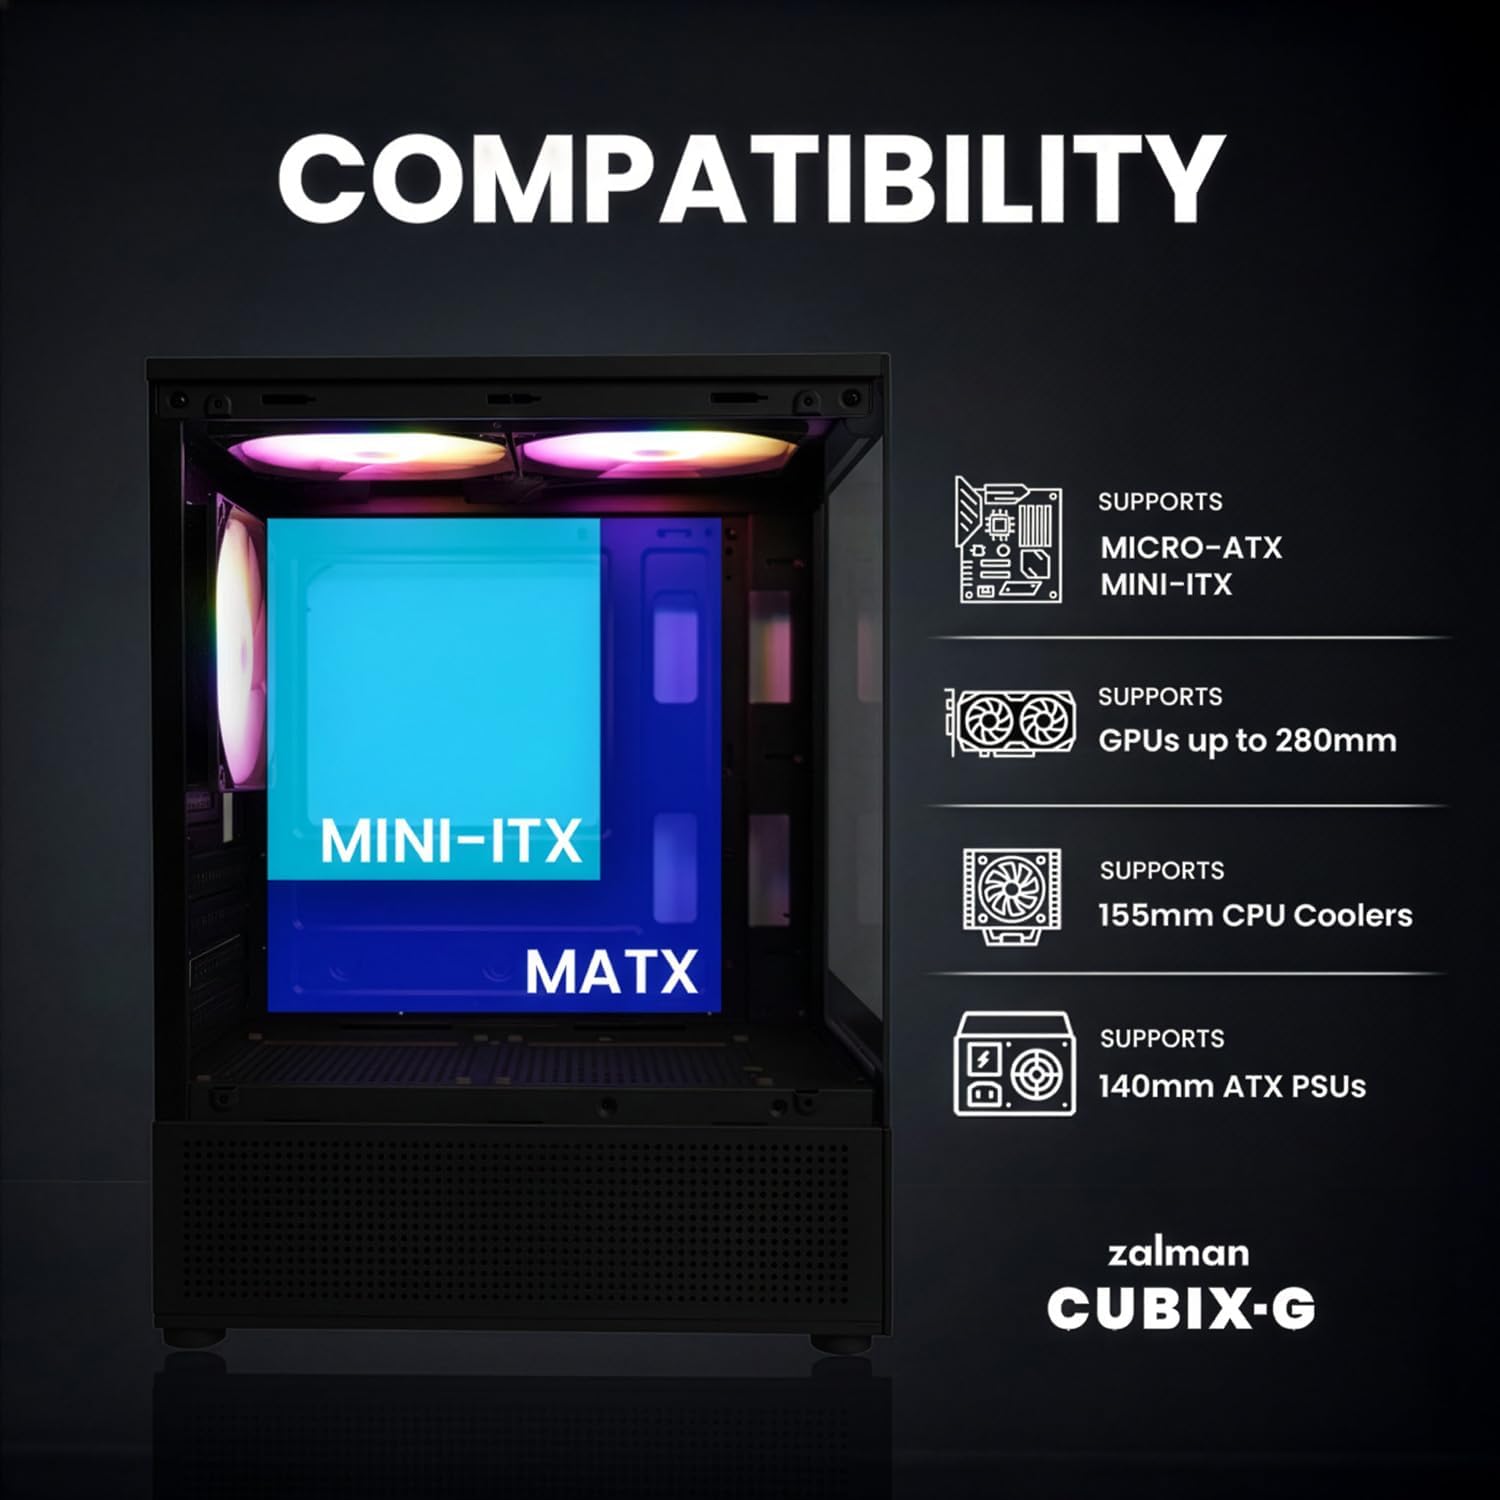
Figure 2: Component Compatibility. This image illustrates the supported motherboard sizes (Micro-ATX, Mini-ITX), maximum GPU length (280mm), maximum CPU cooler height (155mm), and maximum PSU length (140mm).
3. Instal·lació de la placa base
- Remove the side panel(s) by unscrewing the thumbscrews at the rear of the case.
- Instal·leu la protecció d'E/S que s'inclou amb la placa base a l'obertura posterior de la carcassa.
- Align your Micro-ATX or Mini-ITX motherboard with the standoffs inside the case. Ensure all standoffs match the motherboard's mounting holes.
- Fixeu la placa base amb els cargols proporcionats.
4. Instal·lació de la font d'alimentació (PSU)
- The CUBIX-G supports ATX PSUs up to 140mm in length.
- Mount the PSU in the designated bottom compartment, ensuring the fan faces the bottom ventilation or upwards, depending on your preference and PSU design.
- Fixeu la font d'alimentació amb els cargols de la part posterior de la carcassa.
5. Instal·lació de la unitat d'emmagatzematge
The case supports up to three 2.5" HDDs/SSDs and one 3.5" HDD (or two 2.5" + one combo 2.5"/3.5").

Figure 3: Storage Drive Locations. This image shows the various mounting points for 2.5-inch SSDs and 3.5-inch HDDs within the case.
- Locate the 2.5" drive mounts behind the motherboard tray and/or on the PSU shroud.
- For 3.5" drives, use the combo mount typically located near the PSU compartment.
- Fixeu les unitats amb els cargols adequats.
6. Instal·lació de la targeta gràfica (GPU)
- The CUBIX-G supports GPUs up to 280mm in length.
- Traieu les cobertes de les ranures PCIe necessàries de la part posterior de la carcassa.
- Insert your GPU into the primary PCIe slot on your motherboard until it clicks into place.
- Fixeu la GPU amb cargols.
7. Fan Installation and Airflow
The case includes three pre-installed 120mm FRGB fans. It supports up to five 120mm fans in total.

Figure 4: Fan Layout. This image indicates the positions for 120mm fans and explicitly states that liquid AIO coolers are not supported.
The CUBIX-G features optimized vertical airflow with perforated top and bottom panels.

Figure 5: Optimized Vertical Airflow. This diagram illustrates the vertical airflow path through the case, utilizing top and bottom vents for improved air efficiency.
The pre-installed fans are 3-pin DC fans with fixed RGB lighting. Connect them to your motherboard's fan headers or a fan controller.

Figure 6: FRGB Fan Details. Specifications for the included 120mm fixed RGB fans are shown, including size, power, speed, airflow, noise level, and blade count.
8. Gestió de cables
Utilize the space behind the motherboard tray and cable tie points to route and secure cables. Proper cable management improves airflow and aesthetics.
9. Connexions d'E/S frontals
Connect the front panel cables (USB 3.0, USB Type-C, HD Audio, Power Switch, Reset Switch, Power LED, HDD LED) to the corresponding headers on your motherboard. Refer to your motherboard manual for header locations.
Instruccions de funcionament
1. Encendre/apagar
Press the power button located on the front I/O panel to turn on your PC. Press and hold for several seconds to force a shutdown, or use the operating system's shutdown function.
2. Ports USB
The front I/O panel includes USB Type-C and USB 3.0 ports for convenient connectivity of peripherals and external storage devices.
3. Fan Lighting
The pre-installed FRGB fans feature fixed RGB lighting. There is no external control button for changing lighting patterns on these specific fans. The lighting will activate when the fans receive power.
Manteniment
1. Neteja de pols
Regularly clean dust from the case, especially from fan filters and ventilation areas, to maintain optimal airflow and cooling performance. Use compressed air or a soft brush.
2. Neteja exterior
Wipe the exterior surfaces and tempered glass panels with a soft, damp cloth. Avoid abrasive cleaners that could scratch the finish or glass.
Resolució de problemes
- El sistema no s'encén:
Ensure all power cables (24-pin ATX, 8-pin CPU, GPU power) are securely connected. Verify that the front panel power switch cable is correctly connected to the motherboard header. Check the PSU switch is in the 'ON' position.
- Fans Not Spinning/Lighting:
Confirm that the fan power cables are properly connected to the motherboard fan headers or a fan controller. Ensure the power supply is providing adequate power.
- Tight Spaces During Installation:
Due to the compact nature of the CUBIX-G, some installations may be challenging. Plan your build order carefully, installing larger components like the CPU cooler and GPU last if space is limited. Consider modular PSUs for easier cable management.
- Rear I/O Shield Fit Issues:
Some users may experience a tight fit with the motherboard I/O shield. Ensure it is properly aligned and seated before installing the motherboard. Gentle, even pressure may be required.
Especificacions tècniques
| Característica | Especificació |
|---|---|
| Marca | Zalman |
| Nom del model | Cubix-G |
| Tipus de cas | Mini-torre |
| Compatibilitat amb la placa base | Micro ATX, Mini ITX |
| Color | Negre |
| Material | Metall |
| Dimensions de l'article (D x W x H) | 11.42 "P x 7.87" W x 15.63" H |
| Pes de l'article | 7.1 lliures |
| Suport de GPU | Fins a 280 mm |
| Alçada del refrigerador de la CPU | Fins a 155 mm |
| Suport PSU | ATX PSUs up to 140mm |
| Drive Bays | 3 x 2.5" HDD/SSD, 1 x 3.5" HDD (or 2 x 2.5" + 1 x Combo) |
| Ranures d'expansió | 4 |
| Ventiladors preinstal·lats | 3 x 120mm FRGB Fans (3-pin DC) |
| Suport màxim del ventilador | Ventiladors de fins a 5 x 120 mm |
| E/S frontal | USB Type-C, USB 3.0, USB 2.0, HD Audio, Power, Reset |
| Característiques especials | Panoràmica View Tempered Glass, Optimized Vertical Airflow, RGB Lighting |
Informació de la garantia
This Zalman CUBIX-G PC Case comes with a 1 anys de garantia del fabricant. Please retain your proof of purchase for warranty claims. For detailed terms and conditions, refer to the official Zalman weblloc o contacteu amb el servei d'atenció al client.
Atenció al client
For technical assistance, troubleshooting, or warranty inquiries, please contact Zalman customer support. Visit the official Zalman weblloc web per obtenir informació de contacte i recursos addicionals.
Official Zalman Weblloc: www.zalman.com
Ask a question about this manual
Ask about setup, troubleshooting, compatibility, parts, safety, or missing instructions. Manuals+ will review the question and use this page’s manual context to help answer it.