
1. Introducció
Thank you for choosing the Garvee 2 Flip Drawer Shoe Cabinet. This manual provides essential information for the safe assembly, operation, and maintenance of your new shoe cabinet. Please read these instructions carefully before beginning assembly and retain them for future reference.

Image 1.1: The Garvee 2 Flip Drawer Shoe Cabinet, designed for a clutter-free home.
This compact and space-saving shoe cabinet (31.4"W × 9.4"D × 43.4"H) is ideal for small apartments and tight spaces such as hallways, entryways, and living rooms. Its slim profile maximizes storage efficiency without compromising functionality. The cabinet features two flip-front drawers with adjustable shelves and one top drawer for smaller items.
2. Informació de seguretat
ADVERTÈNCIA: Per evitar lesions greus, seguiu sempre aquestes pautes de seguretat.
- Munteu sempre l'armari segons les instruccions proporcionades.
- Secure the cabinet to the wall using appropriate hardware to prevent tip-over, especially if the cabinet will be used to store heavy items or if there are children or pets in the household.
- No permeteu que els nens s'enfilin o juguin amb l'armari.
- Assegureu-vos que tots els cargols i elements de fixació estiguin ben ajustats abans d'utilitzar-los. Comproveu-los periòdicament i torneu-los a apretar si cal.
- Do not overload the drawers or shelves.
3. Contingut del paquet
Before assembly, verify that all parts and hardware listed in the included installation manual are present and undamaged. If any parts are missing or damaged, do not proceed with assembly. Contact customer support for assistance.

Imatge 3.1: Ex.ample of product components. Refer to your specific manual for a detailed list of parts.
4. Instruccions de muntatge i instal·lació
Assembly is straightforward with clear step-by-step instructions included in the installation manual provided with your product. Please refer to that manual for detailed diagrams and specific hardware. The following is a general overview del procés de muntatge:
- Desempaquetar i identificar les peces: Carefully unpack all components and hardware. Lay them out on a clean, soft surface to prevent scratches. Compare them against the parts list in your manual.
- Muntar el marc: Fixeu els panells laterals als panells base i superior amb els cargols i les espigues proporcionats. Assegureu-vos que totes les connexions estiguin ben fixades.
- Instal·leu el panell posterior: Fixeu el panell posterior al marc muntat amb claus o cargols petits.
- Muntar calaixos abatibles: Construct the two flip-front drawers according to the manual's instructions. This typically involves attaching the front panel to the side mechanisms.
- Instal·leu prestatges ajustables: Insert the dual-groove adjustable shelves into the flip drawers. These can be positioned at different heights to accommodate various shoe types.
- Install Top Drawer: Assemble and slide the top drawer into its designated slot.
- Attach Legs and Handles: Secure the four sturdy metal legs to the base of the cabinet. Attach the square black handles to the flip drawers and top drawer.
- Ancoratge a la paret: For safety, especially in households with children or pets, secure the cabinet to a wall using the anti-tip hardware provided. Follow the specific instructions for wall mounting in your manual.
5. Instruccions de funcionament
5.1 Flip Drawers with Adjustable Shelves
The Garvee shoe cabinet features two flip-front drawers designed for easy access and storage. Each flip drawer contains two adjustable shelves.
- Obertura: Gently pull the handle on the flip drawer outwards and downwards to open. The drawer will pivot forward, revealing the shoe compartments.
- Ajust de prestatgeries: The internal shelves can be adjusted or removed to fit different shoe shapes and sizes, including boots, high heels, slippers, sports shoes, and leather shoes. To adjust, carefully unclip the shelf from its current position and re-clip it into a higher or lower groove. To remove, unclip both sides and pull the shelf out.
- Tancament: Push the flip drawer upwards and inwards until it securely latches into the closed position.

Image 5.1: Illustration of the adjustable and removable panels within the flip drawers to accommodate various shoe types.

Image 5.2: The cabinet is suitable for storing various shoe types due to its adjustable shelves.
5.2 Top Drawer
The top drawer is designed for storing small daily items, such as keys, socks, shoe care tools, or other accessories.
- Obertura: Pull the handle on the top drawer outwards.
- Tancament: Push the drawer inwards until it is fully closed.

Image 5.3: The top drawer provides convenient storage for small daily essentials.
5.3 Ventilation and Elevated Legs
- Ventilated Slat Panels: The hollow-out design of the flip drawer panels promotes air circulation, helping to banish shoe odors.
- Elevated Metal Legs: The 4.72-inch elevated metal legs allow for easy cleaning underneath the cabinet and can accommodate robot vacuums. They also provide space to store slippers directly beneath the unit.
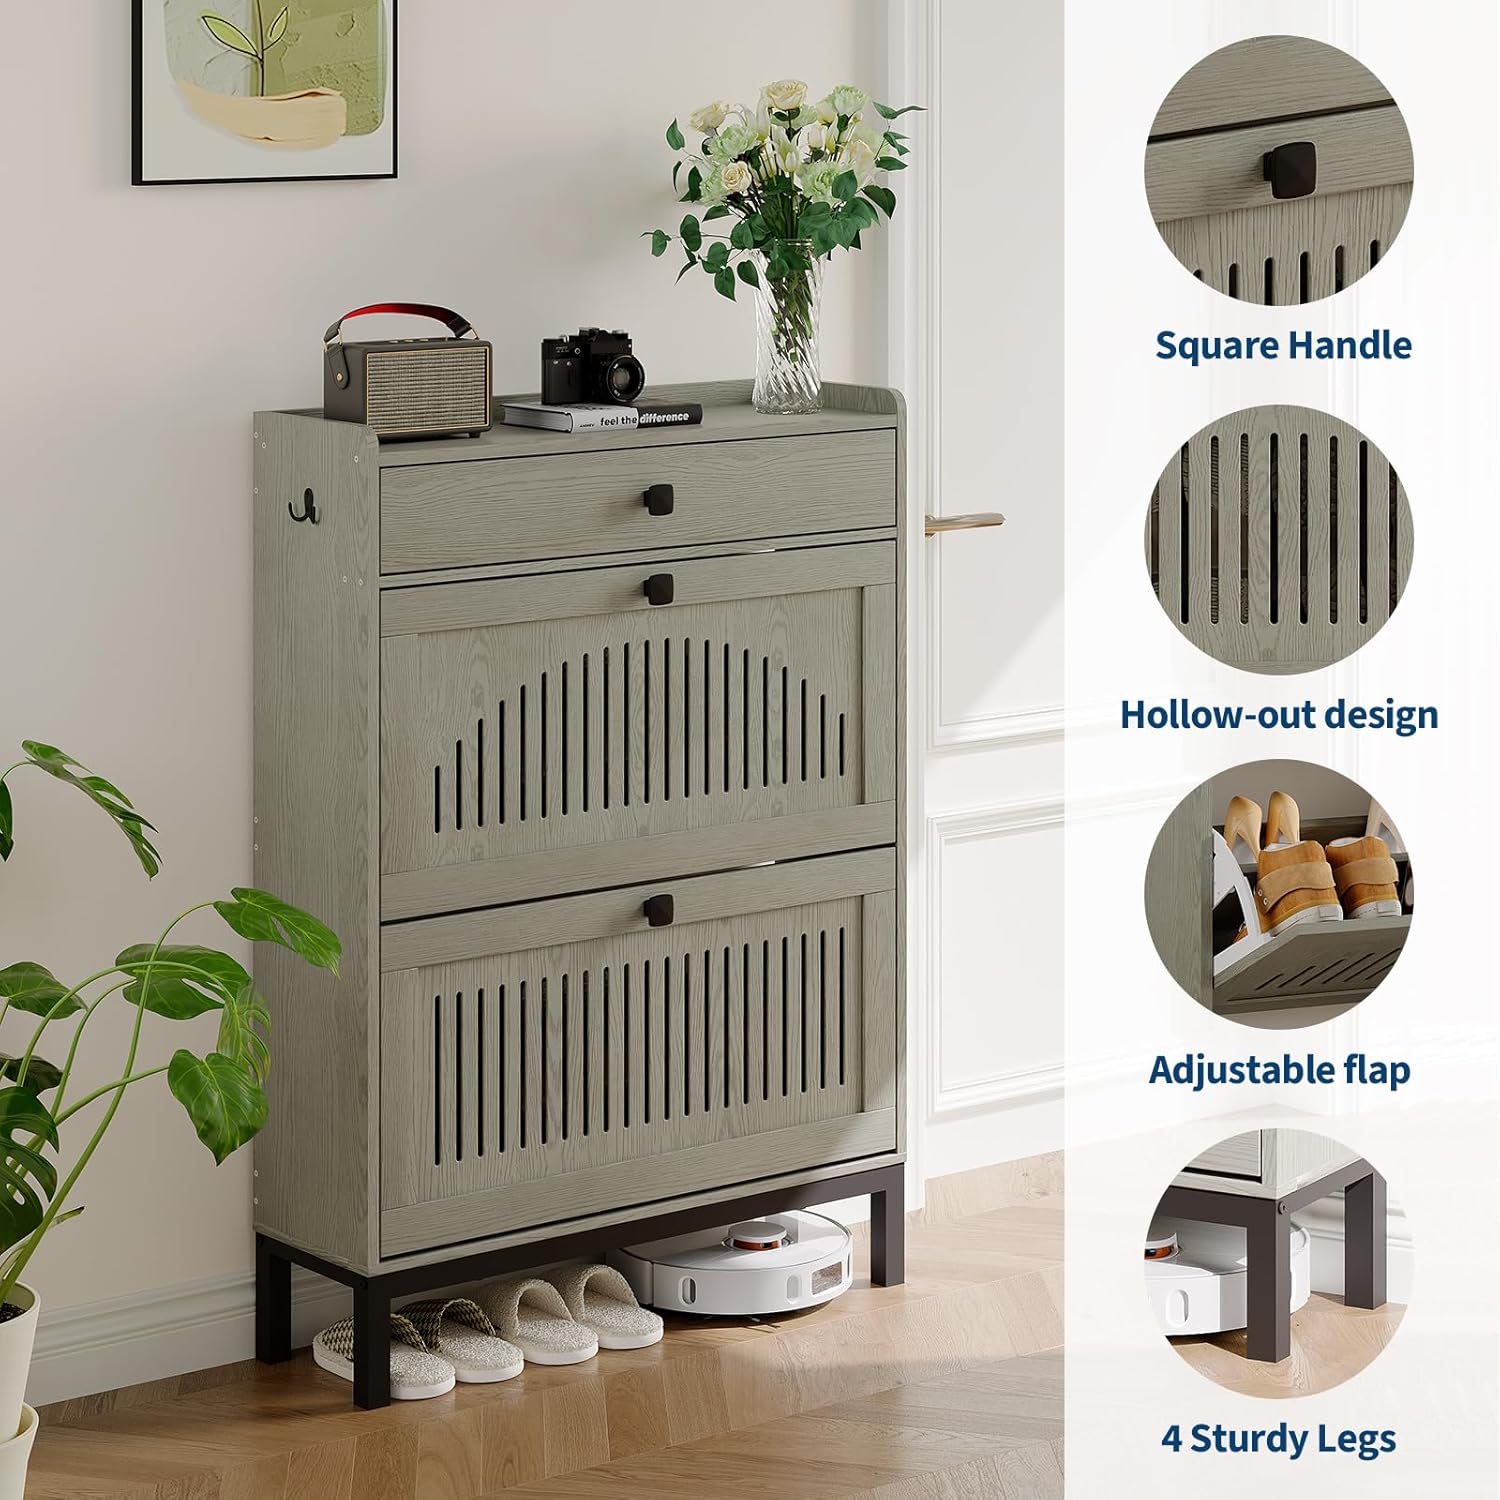
Image 5.4: Key design features including the square handle, ventilated panels, adjustable flap, and sturdy legs.
6. Manteniment
- Neteja: Netegeu les superfícies de l'armari amb un drap suau iamp drap. Eviteu productes químics agressius o netejadors abrasius, que poden danyar l'acabat de la fusta.
- Pols: Regularly dust the cabinet to prevent buildup.
- Vessaments: Immediately wipe up any spills to prevent staining or water damage to the wood.
- Comprovació de maquinari: Reviseu periòdicament tots els cargols i elements de fixació per assegurar-vos que romanen ajustats. Torneu a apretar-los si cal.
- Eviteu la llum solar directa: L'exposició prolongada a la llum solar directa pot causar decoloració o danys a l'acabat de la fusta.
7. Solució De Problemes
- Els calaixos no tanquen bé:
Check for any obstructions inside the drawer or along the runners. Ensure the drawer mechanisms are correctly aligned and all screws are tightened. - El gabinet sembla inestable:
Verify that all assembly screws are fully tightened. Ensure the cabinet is placed on a level surface. If instability persists, ensure the wall anchoring hardware is properly installed and secured. - Shelves not staying in place:
Ensure the adjustable shelves are correctly clipped into both grooves on the flip drawer mechanism. - Peces que falten o components danyats:
Do not attempt to assemble the product with missing or damaged parts. Contact Garvee customer support immediately for replacement parts.
8. Especificacions

Image 8.1: Product dimensions for the Garvee 2 Flip Drawer Shoe Cabinet.
| Característica | Detall |
|---|---|
| Marca | Garvee |
| Número de model | Gar-ZHD-PTH_33A7GBYF-ShoeRack-q64 |
| Color | Washed Grey |
| Material | Fusta |
| Dimensions del producte (P x A x A) | 9.4 "P x 31.4" W x 43.4" H |
| Pes de l'article | 51.8 lliures |
| Nombre de calaixos abatibles | 2 |
| Number of Top Drawers | 1 |
| Prestatges ajustables | Yes (2 per flip drawer) |
| Tipus de muntatge | Floor Mount (with wall anchoring recommended) |
| Elevated Legs Height | 4.72 polzades |
| UPC | 820559992645 |
9. Informació de la garantia
Garvee products are manufactured to high-quality standards. Specific warranty details, including coverage period and terms, are typically provided with your purchase documentation or can be found on the official Garvee weblloc web. Si us plau, conserveu el comprovant de compra per a qualsevol reclamació de garantia.
10. Atenció al client
If you have any questions, require assistance with assembly, or need to report missing/damaged parts, please contact Garvee customer support. Refer to the contact information provided in your product packaging or visit the Garvee store online for support options.
For further assistance, you may visit the Garvee Store: Botiga Garvee a Amazon