
Introducció
This manual provides comprehensive instructions for the installation, operation, and maintenance of your ERYUE Engine Starter Ignition Keyless Push Start Button Lock System. This system offers a convenient push-button engine start feature combined with advanced RFID immobilizer technology for enhanced vehicle security. Please read this manual thoroughly before installation and use to ensure proper function and safety.
Informació de seguretat
Always prioritize safety during installation and operation. Incorrect installation can lead to vehicle damage or electrical issues. If you are unsure about any step, consult a qualified automotive technician.
- Ensure the vehicle's battery is disconnected before beginning any electrical installation.
- Verify all wiring connections are secure and properly insulated to prevent short circuits.
- This product is designed for DC12V vehicles only. Do not attempt to install it in vehicles with different voltagsistemes electrònics.
- Keep RFID keys away from strong magnetic fields to prevent interference.
- Do not attempt to modify the system components. Unauthorized modifications may void the warranty and compromise safety.
Contingut del paquet
Si us plau, comproveu el paquet per assegurar-vos que hi hagi tots els components:
- 1 x Car Engine Push Starter Host (Control Unit)
- 1 x Push Start Stop Button
- 1 x RFID Sensor Ring (Antenna)
- 2 x RFID Key (Transponders)
- 2 x Wire Harnesses (Main Wiring and Auxiliary Wiring)

Imatge: Més deview of all components included in the ERYUE Engine Starter Kit.
Configuració i instal·lació
Installation of this system requires basic automotive electrical knowledge. It is recommended to have this system installed by a professional if you are not familiar with car wiring.
1. Identificar els components
Familiarize yourself with each part of the system before beginning installation.
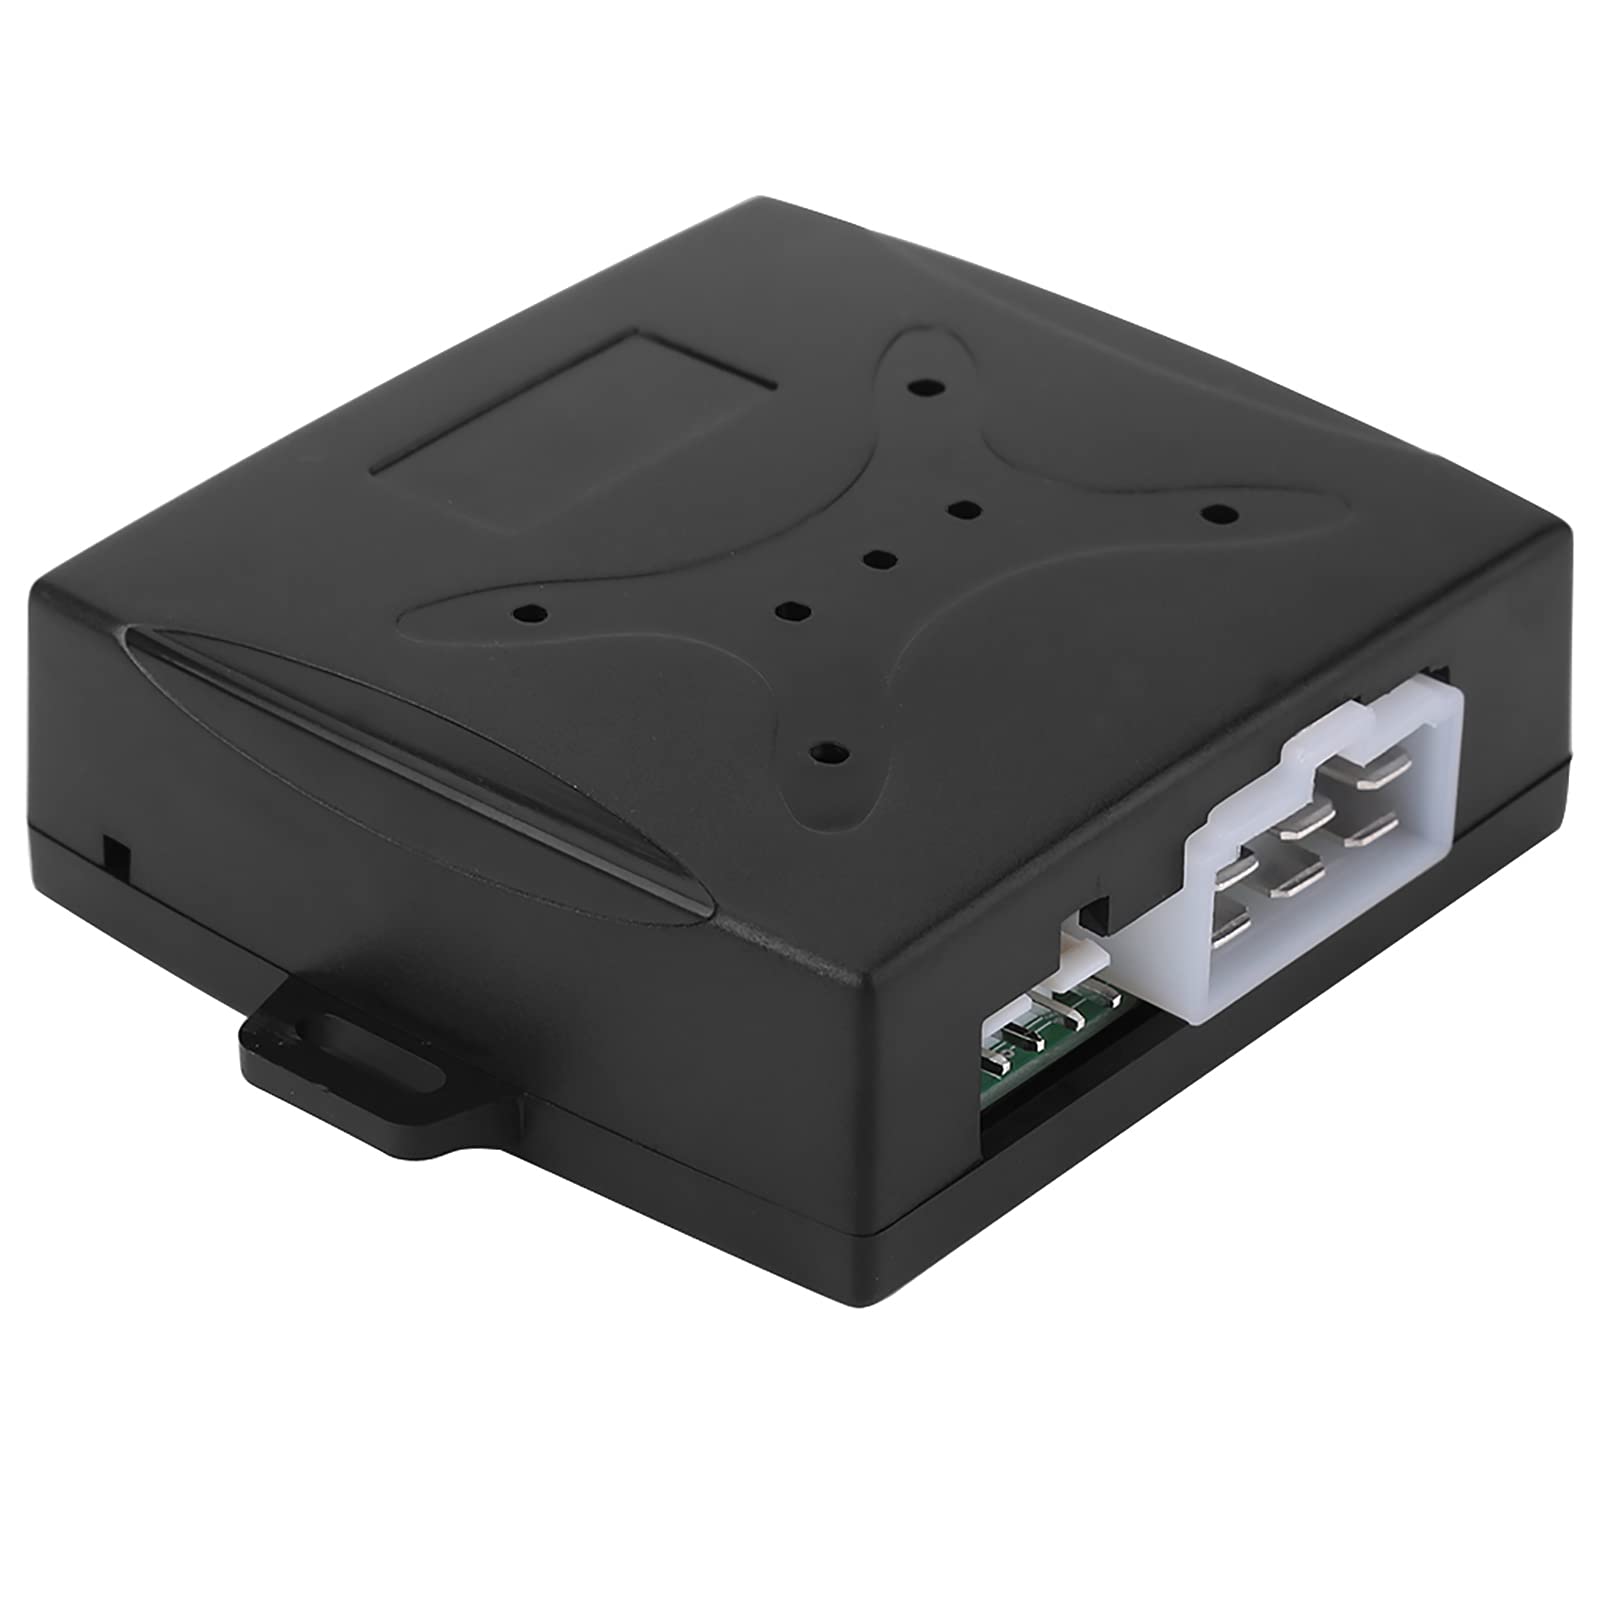
Image: The main control unit, showing connection ports.

Image: One of the included wiring harnesses, featuring multiple colored wires for different functions.
2. Desconnecteu la bateria
Before making any electrical connections, disconnect the negative terminal of your vehicle's battery to prevent accidental short circuits.
3. Mount the Control Unit
Choose a secure and hidden location under the dashboard for the main control unit. Ensure it is away from excessive heat or moisture.
4. Install Push Start Button
Select a suitable flat surface on your dashboard to install the push start button. You may need to drill a hole of appropriate size. Connect the button's wiring to the main control unit as per the wiring diagram (not provided in this manual, refer to product packaging or manufacturer's weblloc).
5. Install RFID Sensor Ring
Mount the RFID sensor ring near the ignition area or another easily accessible location where the RFID key can be brought into close proximity (2-5cm). Connect the sensor ring's wire to the control unit.
6. Connexions de cablejat
Connect the main wiring harness to the control unit and integrate it with your vehicle's ignition system. This typically involves connecting to ACC, ON, START, and power/ground wires. Refer to your vehicle's specific wiring diagram and the product's detailed wiring instructions for accurate connections.
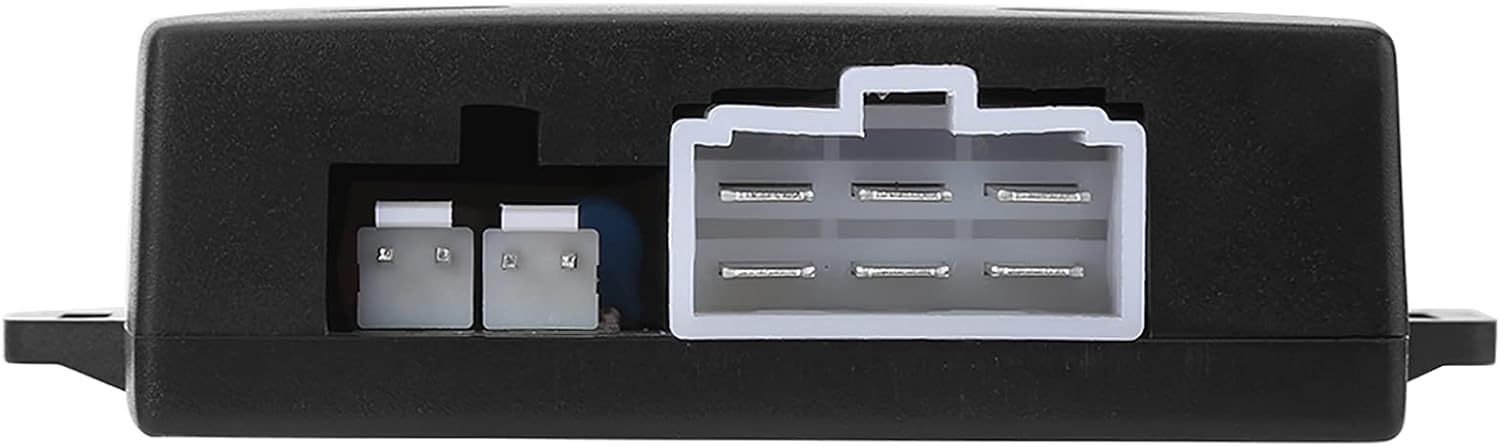
Image: Detail of the control unit's input/output ports for wiring connections.

Image: The control unit with a wiring harness connected, illustrating the complexity of the setup.
7. Reconnect Battery and Test
Once all connections are secure, reconnect the vehicle's battery and perform initial tests as described in the "Operating Instructions" section.
Instruccions de funcionament
1. Disarming the Immobilizer
When the vehicle is stopped, the system automatically enters arming mode after 15 seconds. To disarm, bring an RFID key (transponder) close to the RFID sensor ring (approximately 2-5cm). The system will emit a "Bi Bi" sound, indicating it is disarmed and ready for engine start.

Image: The RFID sensor ring and the two RFID keys used for disarming the immobilizer.
2. Arrencada del motor
- Mode ACC: With the system disarmed, press the push start button once to activate ACC (Accessory) power.
- Mode ON: Press the push start button a second time to activate ON (Ignition) power. The dashboard lights will illuminate.
- Arrencada del motor: With the brake pedal pressed, press and hold the push start button to crank the engine. Release the button once the engine starts.
3. Aturar el motor
To stop the engine, simply press the push start button once while the vehicle is stationary.
4. Automatic Host Locking
After the engine stalls or is turned off, the main control unit (host) will automatically lock after 35 seconds, enhancing security.
Manteniment
- Keep the control unit and wiring free from moisture and extreme temperatures.
- Comproveu periòdicament totes les connexions del cablejat per comprovar si estan ben ajustades i si hi ha signes de desgast.
- Ensure the RFID sensor ring is not obstructed and the RFID keys are kept in good condition.
- Clean the push start button with a soft, dry cloth if necessary. Do not use harsh chemicals.
Resolució de problemes
| Problema | Causa possible | Solució |
|---|---|---|
| Engine does not start when button is pressed. | Immobilizer not disarmed; wiring issue; low car battery. | Ensure RFID key is near sensor; check all wiring connections; check car battery charge. |
| System does not respond to RFID key. | RFID key too far from sensor; damaged RFID key; sensor interference. | Bring RFID key closer (2-5cm); try the second RFID key; ensure no strong magnetic fields are present. |
| Automatic locking not engaging. | Faulty control unit; incorrect wiring. | Verify wiring connections to the control unit; contact support if issue persists. |
Especificacions
- Marca: ERYUE
- Número de model: ERYUE065vhs8kur
- Subministrament Voltage: 12V DC
- Corrent de treball: 4 mA
- Temperatura de treball: -40 ℃ a + 85 ℃
- Compatibilitat: Universal for DC12V cars
Informació de la garantia
This product comes with a manufacturer warranty for 90 days from the date of purchase. Please retain your proof of purchase for warranty claims. The warranty covers defects in materials and workmanship under normal use. It does not cover damage caused by improper installation, misuse, accident, or unauthorized modifications.
Atenció al client
For technical assistance, troubleshooting, or warranty inquiries, please contact ERYUE customer support through the retailer where the product was purchased or refer to the official ERYUE weblloc per obtenir informació de contacte.