
1. Introducció
Thank you for choosing the Contixo F15 Astro Mini Drone. This compact and lightweight drone is designed for beginners and experienced pilots alike, featuring a 720P HD camera, live video display, optical flow hover, and easy-to-use controls. Please read this manual thoroughly before operating the drone to ensure safe and optimal performance.
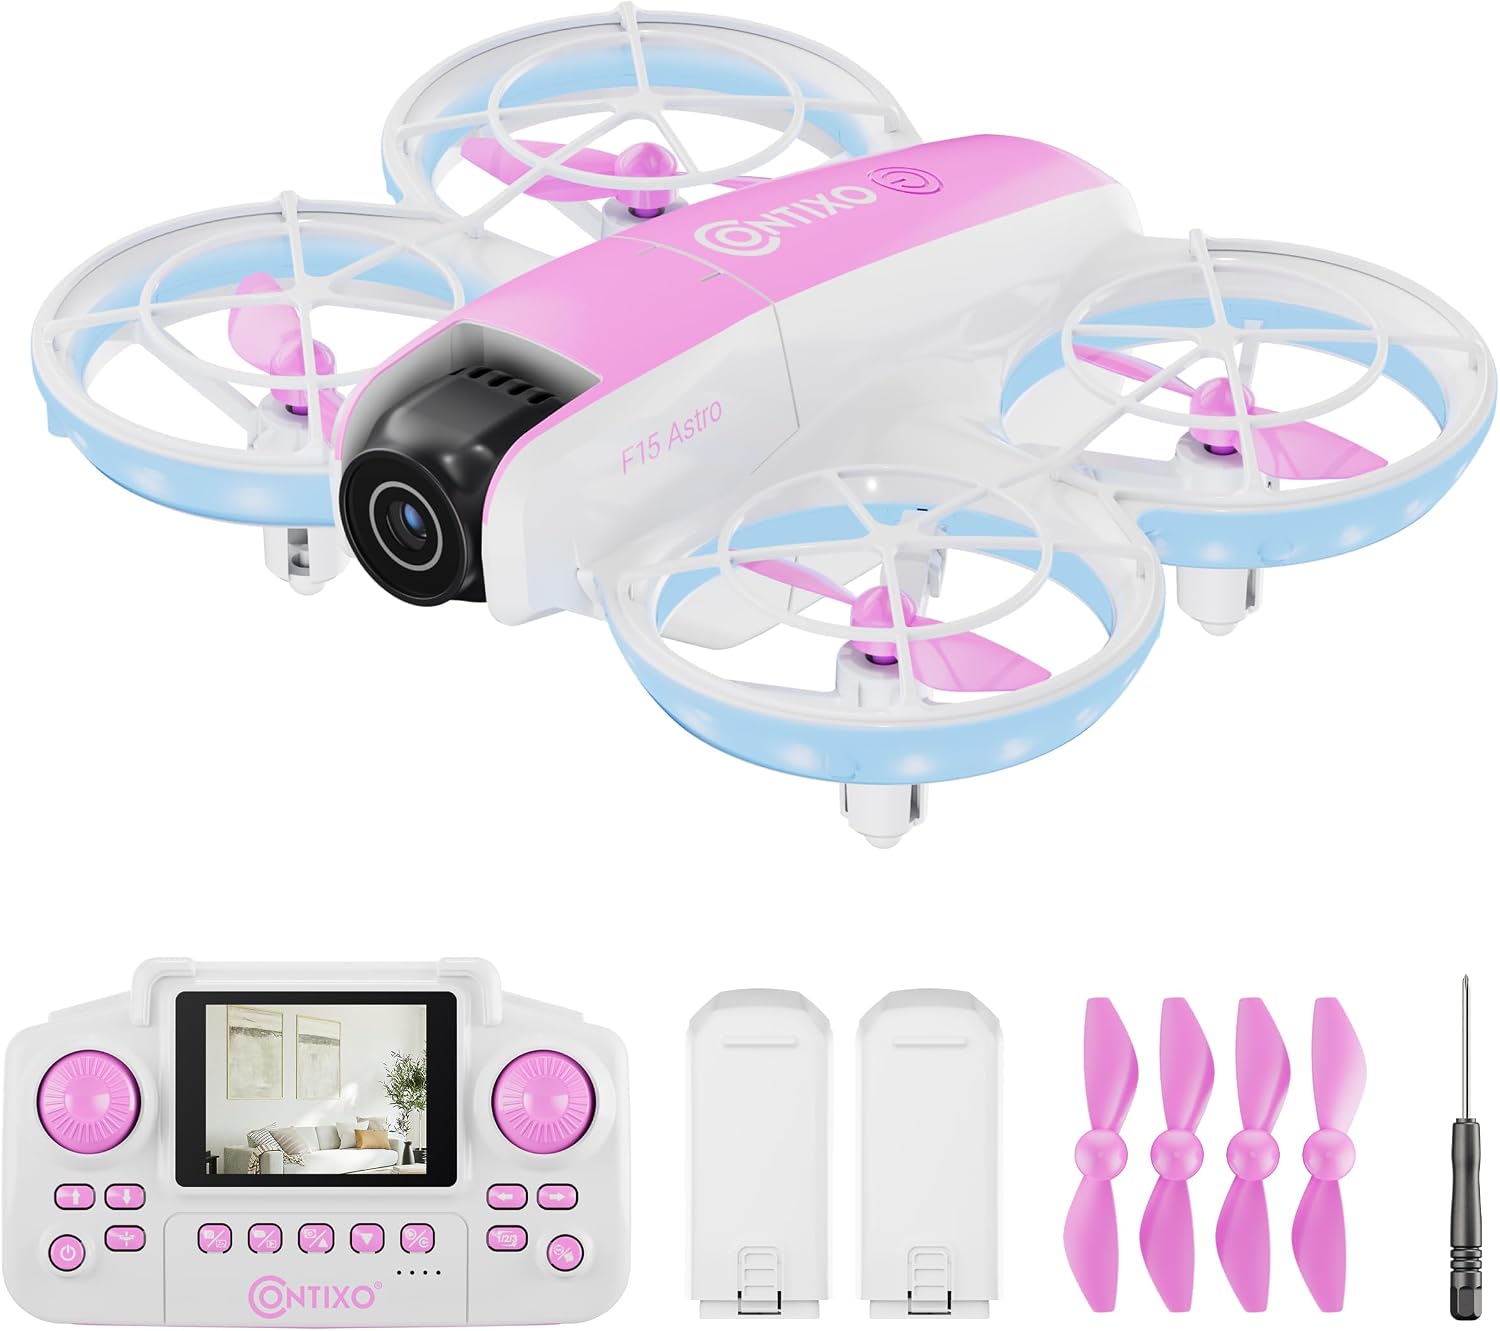
Image: The Contixo F15 Astro Mini Drone, showcasing its compact design and LED lighting.
2. Pautes de seguretat
- Feu servir sempre el dron en zones obertes i clares, allunyat de persones, animals i obstacles.
- Do not fly near airports, restricted airspace, or power lines.
- Ensure the drone's battery and remote control batteries are fully charged before each flight.
- Supervise children during drone operation.
- Eviteu volar amb vents forts o condicions meteorològiques adverses.
- No toqueu les hèlixs mentre estan girant.
3. Contingut del paquet
Verifiqueu que tots els elements siguin presents al vostre paquet:
- 1x F15 Astro Mini Drone
- 1x Remote Controller with 2.4" Screen
- 2x Drone Batteries
- 4x Spare Propellers
- 1x tornavís
- 1x cable de càrrega USB

Image: All components included in the Contixo F15 Astro Mini Drone package.
4. Drone Components Overview
4.1 Drone
- Proteccions de l'hèlix: Provide protection for propellers and enhance safety.
- Hèlixs: Generar sustentació per al vol.
- Càmera HD 720P: Captures photos and videos, with adjustable tilt.
- Llums LED: Indicate drone status and provide visibility.
- Compartiment de la bateria: Houses the drone's rechargeable battery.

Image: The Contixo F15 Astro Mini Drone highlighting its protected propeller design.
4.2 Control remot
- 2.4" Screen: Displays live video feed from the drone's camera.
- Joystick esquerre: Controla l'altitud (amunt/avall) i la rotació (esquerra/dreta).
- Joystick dret: Controla el moviment endavant/enrere i esquerra/dreta.
- Botó d'enlairament/aterratge d'un sol botó: Inicia l'enlairament o l'aterratge automàtic.
- Botó de gir de 360°: Activates aerial stunt mode.
- Botons de foto/vídeo: Capture images or start/stop video recording.

Image: The Contixo F15 Astro remote control with its integrated 2.4-inch screen for live video display.
5. Configuració
5.1 Càrrega de la bateria del dron
- Traieu la bateria del dron.
- Connect the USB charging cable to the battery and a USB power source (e.g., computer, USB wall adapter).
- The indicator light on the charging cable will show charging status (refer to cable instructions for specific light patterns).
- Charging typically takes approximately 60-90 minutes.

Image: The Contixo F15 Astro Mini Drone and its two included rechargeable batteries.
5.2 Installing Drone Battery
- Assegureu-vos que el drone estigui apagat.
- Carefully insert the fully charged battery into the battery compartment on the drone's underside.
- Assegureu la coberta de la bateria.
5.3 Instal·lació de les piles del comandament a distància
- Obriu el compartiment de la bateria a la part posterior del comandament a distància.
- Introduïu 3 piles AAA (no incloses) respectant les marques de polaritat.
- Tanqueu el compartiment de la bateria de manera segura.
5.4 Emparellament del dron i el comandament a distància
- Col·loqueu el drone sobre una superfície plana i plana.
- Power on the drone. The drone's LED lights will flash.
- Enceneu el comandament a distància.
- Push the left joystick up to its maximum position, then pull it down to its minimum position. The drone's LED lights will stop flashing and remain solid, indicating successful pairing.
5.5 Gyro Calibration
- After pairing, ensure the drone is still on a flat, level surface.
- Simultaneously push both joysticks down and to the bottom-right corner.
- The drone's LED lights will flash rapidly and then become solid, indicating successful calibration.
Video: A detailed guide on how to use the Contixo F15 Astro Drone, covering setup and basic operations.
6. Funcionament del dron
6.1 Enlairament i aterratge amb una sola tecla
- Enlairament: After pairing and calibration, press the One-Key Takeoff/Landing button. The drone will automatically ascend and hover at a stable altitude.
- Aterratge: During flight, press the One-Key Takeoff/Landing button again. The drone will slowly descend and land automatically.

Image: Visual representation of the one-touch takeoff and landing feature of the F15 Astro drone.
6.2 Controls bàsics de vol
- Joystick esquerre (accelerador/guinyada):
- Push up/down: Increase/decrease altitude.
- Push left/right: Rotate drone left/right.
- Joystick dret (endavant/enrere/lateralment):
- Push up/down: Fly forward/backward.
- Push left/right: Fly left/right (strafe).
6.3 Optical Flow Hover
The F15 Astro drone features Optical Flow Hover technology, which uses a downward-facing camera to detect patterns on the ground and maintain a stable position. This feature helps the drone hover steadily, making it easier to control, especially for beginners.
6.4 360° Stunts
To perform a 360° flip:
- Ensure the drone is flying at a sufficient height (at least 2-3 meters).
- Press the 360° Flip button on the remote control.
- Immediately push the right joystick in the desired direction (forward, backward, left, or right) to execute the flip.

Image: The Contixo F15 Astro Mini Drone performing a 360-degree flip.
6.5 Camera Operation (720P HD)
The drone is equipped with a 720P HD camera that can capture photos and videos. The camera angle can be manually adjusted before flight.
- Vídeo en directe: The 2.4" screen on the remote control provides a real-time live video feed from the drone's camera.
- Fent fotos: Press the Photo button on the remote control to capture a still image.
- Gravació de vídeo: Press the Video button once to start recording, and press it again to stop recording.

Image: The 720P HD camera of the F15 Astro drone, featuring an adjustable angle.
Video: A demonstration of the Contixo F15 Astro Drone's features and flight capabilities.
7. Manteniment
7.1 Neteja
- Feu servir un drap suau i sec per netejar el dron i el comandament a distància.
- Do not use water or cleaning solvents, as they may damage the electronics.
7.2 Substitució de l'hèlix
If a propeller is damaged, replace it with a spare propeller from the package. Use the included screwdriver to carefully remove the screw holding the damaged propeller and install the new one, ensuring it is securely fastened.
7.3 Cura de la bateria
- Guardeu les piles en un lloc fresc i sec.
- No sobrecarregueu ni descarregueu excessivament les bateries.
- If the drone will not be used for an extended period, remove the batteries from both the drone and the remote control.
8. Solució De Problemes
| Problema | Causa possible | Solució |
|---|---|---|
| El dron no respon al comandament a distància. | Not paired or low battery. | Ensure drone and remote are powered on and paired correctly. Check battery levels. |
| El dron es desplaça durant el vol. | Gyro not calibrated. | Perform gyro calibration on a flat surface. |
| Poor video quality or no live feed. | Weak signal or camera issue. | Ensure drone is within range. Check for obstructions. Restart drone and remote. |
| Les hèlixs no giren. | Obstrucció o danys. | Check for hair or debris around propellers. Replace damaged propellers. |
9. Especificacions
- Marca: Contixo
- Nom del model: F15 Astro
- Càmera: 720P HD, Adjustable Angle
- Remote Screen: 2.4 polzades
- Capacitat de la bateria: 580 mAh (polímer de liti)
- Dimensions del producte: 10 cm de llargada x 7 cm d'amplada x 2 cm d'alçada
- Característiques del vol: Optical Flow Hover, One-Key Takeoff/Landing, 360° Stunts
10. Garantia i Suport
For warranty information, technical support, or any questions regarding your Contixo F15 Astro Mini Drone, please refer to the contact information provided on the product packaging or visit the official Contixo weblloc. Conserveu el rebut de compra per a reclamacions de garantia.
Vídeo: Una introduccióview of the Contixo F15 Astro Drone, highlighting its key features.