1. Introducció
The Minolta Auto Meter IV F is a professional-grade light meter designed for precise measurement of both ambient and flash light. It provides accurate exposure readings for photographers, ensuring optimal results in various lighting conditions. This manual will guide you through the setup, operation, and maintenance of your Auto Meter IV F, enabling you to utilize its full potential for consistent and reliable exposure control.
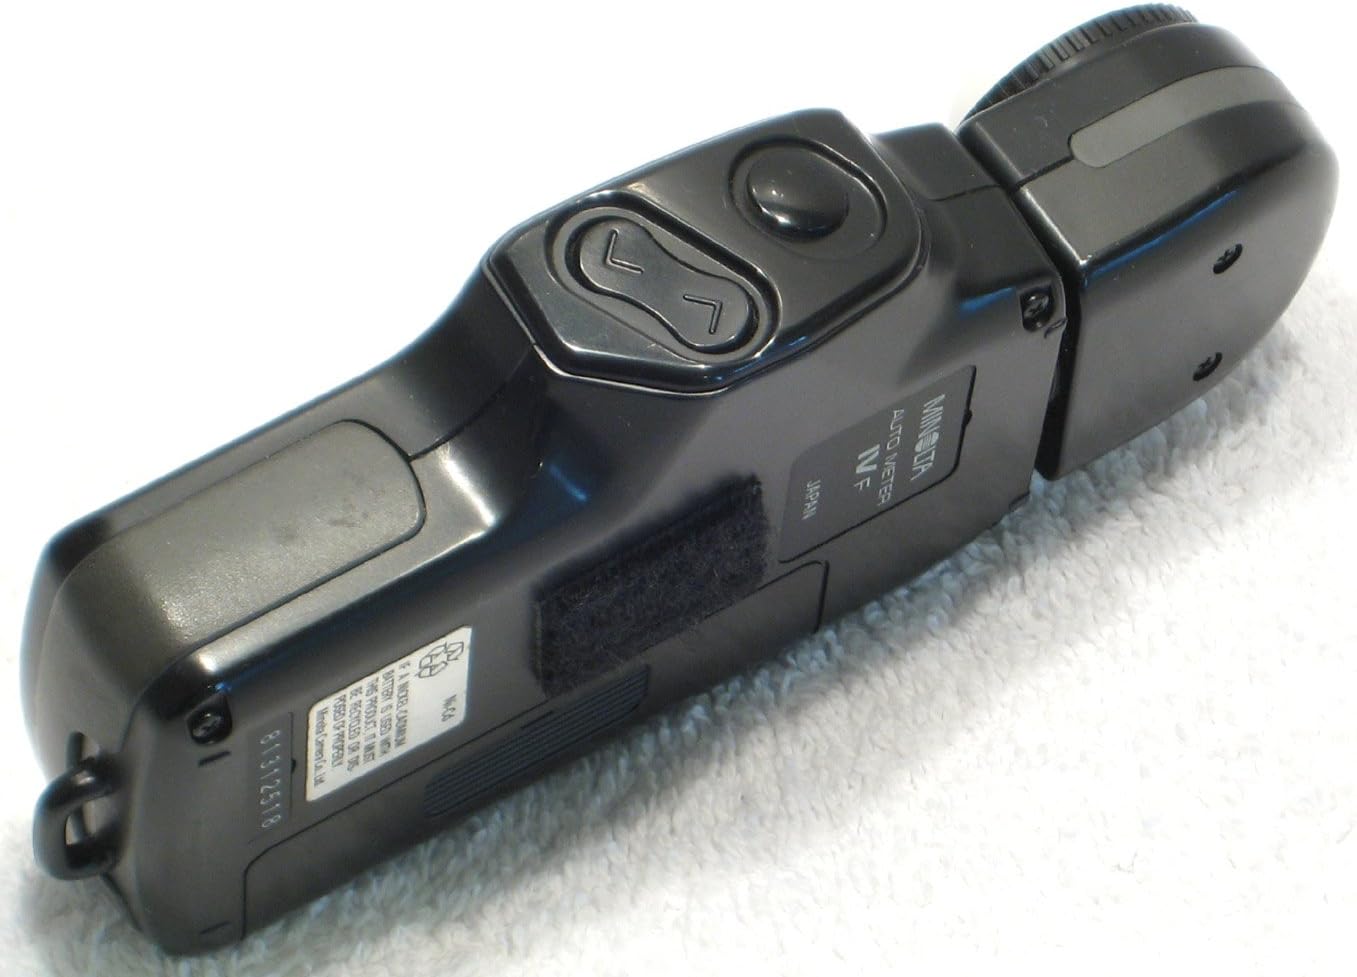
2. Producte acabatview
The Minolta Auto Meter IV F features a robust design with an intuitive interface. Key components include:
- Spherical Diffuser (White Dome): S'utilitza per a mesures de llum incident.
- Pantalla LCD: Shows exposure values (shutter speed, aperture, ISO) and mode indicators.
- Botó d'encesa: Encén i apaga el mesurador.
- Botó de mode: Cycles through measurement modes (ambient, flash cord, flash cordless).
- ISO/EV Buttons: Adjusts ISO sensitivity and EV compensation.
- Measuring Button: Initiates a light measurement.
- Compartiment de la bateria: Houses the AA battery.
- Sync Terminal: For connecting to studio flash units for corded flash measurement.

3. Configuració
3.1 Instal·lació de la bateria
The Minolta Auto Meter IV F operates on a single AA battery. Proper battery installation is crucial for the meter's functionality.
- Localitzeu la tapa del compartiment de la bateria a la part posterior del mesurador.
- Slide the cover in the direction indicated by the arrow or lift the latch to open the compartment.
- Insert one AA battery, ensuring the positive (+) and negative (-) terminals align with the markings inside the compartment.
- Tanqueu la tapa del compartiment de la bateria de manera segura fins que encaixi al seu lloc.

3.2 Encès inicial
Premeu el botó PODER button to turn on the meter. The LCD display will illuminate, showing the current settings.
4. Instruccions de funcionament
4.1 Setting ISO Sensitivity
To match the meter's sensitivity to your film or digital camera's ISO setting:
- Premeu el botó ISO button. The ISO value on the display will blink.
- Use the up/down arrow buttons (often integrated with ISO/EV) to adjust the ISO value to your desired setting.
- Premeu el botó ISO button again or wait a few seconds for the setting to be confirmed.
4.2 Measuring Ambient Light
For ambient light measurement, ensure the spherical diffuser (white dome) is extended. This measures incident light, which is the light falling on the subject.
- Premeu el botó MODE button until the ambient light icon (usually a sun symbol) is displayed.
- Position the meter at the subject's position, pointing the spherical diffuser towards the camera lens.
- Premeu el botó MESURA button. The meter will display the recommended shutter speed and aperture values for the set ISO.
4.3 Measuring Flash Light
The Auto Meter IV F supports both cordless and corded flash measurements.
4.3.1 Cordless Flash Measurement
- Premeu el botó MODE button until the cordless flash icon is displayed.
- Position the meter at the subject's position, pointing the spherical diffuser towards the flash unit.
- Premeu el botó MESURA button. The meter will enter a standby mode, waiting for the flash to fire.
- Trigger your flash unit manually. The meter will detect the flash and display the appropriate aperture value.
4.3.2 Corded Flash Measurement
- Connect a sync cord from your flash unit or flash trigger to the meter's sync terminal.
- Premeu el botó MODE button until the corded flash icon is displayed.
- Position the meter at the subject's position, pointing the spherical diffuser towards the flash unit.
- Premeu el botó MESURA button. This will trigger the flash unit via the sync cord, and the meter will display the appropriate aperture value.
5. Manteniment
Proper care and maintenance will extend the life and accuracy of your Minolta Auto Meter IV F.
- Neteja: Use a soft, dry, lint-free cloth to clean the meter's body and display. Avoid abrasive cleaners or solvents. Ensure the spherical diffuser is kept clean and free of dust or smudges, as this can affect measurement accuracy.
- Emmagatzematge: When not in use, store the meter in its protective case in a cool, dry place, away from direct sunlight, extreme temperatures, and high humidity.
- Substitució de la bateria: If the display becomes dim or the meter behaves erratically, replace the AA battery promptly. Remove the battery if the meter will not be used for an extended period to prevent leakage.
6. Solució De Problemes
If you encounter issues with your Auto Meter IV F, refer to the following common problems and solutions:
- El mesurador no s'encén:
- Comproveu si la bateria està instal·lada correctament amb la polaritat correcta.
- Substituïu la bateria AA per una de nova.
- Lectures inexactes:
- Ensure the ISO setting on the meter matches your camera's ISO.
- Verify that the spherical diffuser is clean and unobstructed.
- Confirm you are using the correct measurement mode (ambient, cordless flash, corded flash) for your lighting situation.
- For incident light, ensure the diffuser is pointed correctly towards the camera from the subject's position.
- Flash measurement not triggering or reading:
- For cordless flash, ensure the flash unit is firing correctly and the meter is positioned to receive its light.
- For corded flash, check the sync cord connection at both the meter and the flash unit. Ensure the sync cord is not damaged.
7. Especificacions
| Característica | Especificació |
|---|---|
| Número de model | 8054-103 |
| Modes de mesura | Ambient Light, Flash Light (Cordless, Corded) |
| Light Reception | Incident Light (with Spherical Diffuser) |
| Font d'alimentació | 1 x bateria AA |
| Interval de velocitat d'obturació | Up to 1/8000th of a second |
| Pes de l'article | Aproximadament 8 unces (227 grams) |
| Dimensions del paquet | 6.8 x 4.1 x 2.7 polzades (17.3 x 10.4 x 6.9 cm) |
8. Garantia i Suport
For warranty information, please refer to the documentation provided at the time of purchase or contact your retailer. For technical support or service inquiries, please reach out to Minolta customer service or an authorized service center. Keep your purchase receipt as proof of purchase for any warranty claims.


