1. Introducció
This manual provides detailed instructions for the proper installation, operation, and maintenance of your Daewoo DV 2500 H DVD player. Please read this manual thoroughly before using the device to ensure safe and optimal performance. Keep this manual for future reference.
2. Instruccions de seguretat importants
- Font d'alimentació: Connect the player only to the specified power supply voltage.
- Ventilació: Assegureu-vos que hi hagi una ventilació adequada. No bloquegeu les obertures de ventilació.
- Aigua i humitat: Do not expose the player to rain or moisture. Do not place objects filled with liquids on the player.
- Calor: Keep the player away from heat sources such as radiators, heat registers, stoves, or other apparatus that produce heat.
- Neteja: Unplug the player from the wall outlet before cleaning. Use a dry cloth for cleaning.
- Manteniment: No intenteu atendre aquest producte vosaltres mateixos. Consulteu tots els serveis a personal de servei qualificat.
3. Contingut del paquet
Si us plau, comproveu que hi hagi tots els elements:
- Daewoo DV 2500 H DVD Player
- Comandament a distància (piles no incloses)
- Cable d'alimentació
- Audio/Video Cables (e.g., RCA or Scart cable)
- Manual d'usuari
4. Producte acabatview
The Daewoo DV 2500 H is a versatile DVD player designed to play a wide range of media formats. It features multiple connectivity options for seamless integration into your home entertainment system.
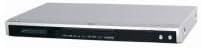
This image displays the Daewoo DV 2500 H DVD player from the front. The device features a sleek silver-black design with a central disc tray, a digital display, and essential control buttons on the right side of the front panel.
Característiques principals:
- HDMI output for high-quality digital video and audio.
- Two karaoke outputs with independent volume control.
- Separate AV outputs including Cinch, Scart with RGB, and S-VHS.
- USB port for connecting external storage devices (e.g., USB flash drives, card readers).
- Zoom function for DVD/S-VCD/VCD playback.
- Optical and Cinch audio outputs supporting DTS and Dolby Digital.
- Supports various media formats: DVD, DVD-R, DVD-RW, DVD+R, DVD+RW, DVD-ROM, MP3, DivX (3.11, 4.x, 5.x), JPEG, S-VCD, VCD, CD-ROM, AUDIO CD, CD-R, CD-RW.
5. Configuració i connexions
5.1 Connexió d'alimentació
- Ensure the DVD player is placed on a stable, level surface with adequate ventilation.
- Connect the power cable to the AC IN socket on the rear of the DVD player.
- Connecteu l'altre extrem del cable d'alimentació a una presa de corrent.
5.2 Video Connections
Choose one of the following video connection methods:
- Connexió HDMI (recomanada): Connect an HDMI cable from the HDMI OUT port on the DVD player to the HDMI IN port on your TV or display. This provides the best digital video and audio quality.
- Connexió SCART: Connect a SCART cable from the SCART OUT port on the DVD player to the SCART IN port on your TV. This supports RGB video output.
- Component Video Connection (Cinch): Connect component video cables (Red, Green, Blue) from the Y, Pb, Pr OUT ports on the DVD player to the corresponding IN ports on your TV.
- Connexió S-Video: Connect an S-Video cable from the S-VIDEO OUT port on the DVD player to the S-VIDEO IN port on your TV.
5.3 Connexions d'àudio
Choose one of the following audio connection methods:
- Àudio HDMI: If using an HDMI connection, audio will be transmitted digitally through the HDMI cable.
- Àudio digital òptic: Connect an optical cable from the OPTICAL OUT port on the DVD player to the optical digital audio IN port on your amplifier or home theater system for multi-channel audio (DTS, Dolby Digital).
- Coaxial Digital Audio (Cinch): Connect a coaxial digital audio cable from the COAXIAL OUT port on the DVD player to the coaxial digital audio IN port on your amplifier or home theater system for multi-channel audio (DTS, Dolby Digital).
- Analog Stereo Audio (Cinch): Connect RCA audio cables (Red for Right, White for Left) from the AUDIO OUT ports on the DVD player to the corresponding AUDIO IN ports on your TV or ampmés viu.
5.4 USB Device Connection
Insert a USB flash drive or a card reader into the USB port on the front panel of the DVD player to access compatible media files.
5.5 Karaoke Microphone Connection
Connect up to two microphones to the KARAOKE MIC IN ports on the front panel. Adjust microphone volume using the dedicated controls.
6. Funcionament bàsic
6.1 Encès/Apagat
Press the POWER button on the front panel or the remote control to turn the player on or off.
Reproducció de disc 6.2
- Premeu el botó OPEN/CLOSE per obrir la safata del disc.
- Col·loqueu un disc DVD o CD suaument a la safata amb l'etiqueta cap amunt.
- Premeu de nou el botó OPEN/CLOSE per tancar la safata.
- Playback will usually start automatically. If not, press the PLAY button.
- Use the remote control buttons (PLAY, PAUSE, STOP, FAST FORWARD, REWIND, NEXT, PREVIOUS) to control playback.
6.3 Reproducció multimèdia USB
- Insert a USB device containing compatible media files (MP3, DivX, JPEG) into the USB port.
- The player should automatically detect the USB device and display a menu. If not, press the USB button on the remote control.
- Navega per les carpetes i files using the arrow buttons on the remote control.
- Press the ENTER/PLAY button to select and play a file.
6.4 Funció de karaoke
- Connect microphones to the KARAOKE MIC IN ports.
- Play a karaoke-compatible disc or media file.
- Adjust the microphone volume using the dedicated MIC VOL controls on the front panel or remote control.
6.5 Funció de zoom
During DVD, S-VCD, or VCD playback, press the ZOOM button on the remote control to magnify a portion of the screen. Use the arrow buttons to navigate the zoomed area.
7. Manteniment i cura
7.1 Neteja de la unitat
Wipe the exterior of the DVD player with a soft, dry cloth. Do not use liquid cleaners or abrasive materials, as they may damage the finish.
7.2 Neteja dels discs
Netegeu els discs des del centre cap a fora amb un drap suau i sense borrissol. No utilitzeu dissolvents ni productes de neteja abrasius. Eviteu tocar la superfície de reproducció del disc.
8. Solució De Problemes
If you experience problems with your DVD player, refer to the following table for possible solutions:
| Problema | Causa possible | Solució |
|---|---|---|
| Sense poder | Cable d'alimentació no connectat; presa de corrent no funciona | Comproveu la connexió del cable d'alimentació; proveu una presa de corrent diferent |
| Cap imatge | Video cable not connected correctly; Incorrect input selected on TV | Check video cable connections; Select correct input source on TV |
| Sense so | Audio cable not connected correctly; TV/amplifier volume too low; Incorrect audio output selected | Check audio cable connections; Increase volume; Select correct audio output on player/ampmés viu |
| El disc no es reprodueix | Disc is dirty or scratched; Disc format not supported; Disc inserted incorrectly | Clean or replace disc; Ensure disc format is supported; Insert disc label-side up |
| El comandament a distància no funciona | Les piles estan gastades o inserides incorrectament; Obstrucció entre el comandament a distància i el reproductor | Replace batteries, check polarity; Remove any obstructions; Point remote directly at player |
Si el problema persisteix després de provar aquestes solucions, poseu-vos en contacte amb l'atenció al client.
9. Especificacions tècniques
| Característica | Especificació |
|---|---|
| Model | DV-2500H |
| Marca | Daewoo Electronics |
| Tipus de suports compatibles | DVD, DVD-R, DVD-RW, DVD+R, DVD+RW, DVD-ROM, MP3, DivX (3.11, 4.x, 5.x), JPEG, S-VCD, VCD, CD-ROM, AUDIO CD, CD-R, CD-RW |
| Connectivitat | HDMI, USB, SCART, Component Video (Cinch), S-Video, Optical Digital Audio, Coaxial Digital Audio (Cinch), Analog Stereo Audio (Cinch), Karaoke Mic In (x2) |
| Dimensions (L x P x A) | 430 x 270 x 52 mm (aprox.) |
| Pes | 2.3 kg |
| Font d'alimentació | AC 230V, 50Hz (typical, check product label) |
10. Garantia i Suport
For warranty information and customer support, please refer to the warranty card included with your product or contact your local Daewoo Electronics service center. Keep your proof of purchase for warranty claims.


