1. Introducció
This manual provides detailed instructions for installing the Metra 95-2009 Double DIN Installation Multi-Kit. This kit is designed to facilitate the installation of a double-DIN radio or two single-DIN radios in select 1990 to 2012 GM, Honda, Isuzu, and Suzuki vehicle models. It features Metra's patented quick-release snap-in ISO mount system with a custom trim ring, ensuring a secure and integrated fit for your aftermarket stereo system.
2. Informació de seguretat
- Always disconnect the vehicle's negative battery terminal before beginning any electrical work to prevent short circuits and electrical shock.
- Utilitzeu l'equip de seguretat adequat, inclosa la protecció ocular, durant la instal·lació.
- Assegureu-vos que totes les connexions estiguin ben fixades i degudament aïllades per evitar riscos elèctrics.
- Refer to your vehicle's service manual for specific instructions on removing dash components and accessing wiring.
3. Contingut del paquet
Verifiqueu que tots els components que s'enumeren a continuació s'inclouen al vostre kit:
- Double DIN Dash Kit Components (Plastic Brackets and Trim Ring)
- Mounting Screws and Fasteners
- Manual d'instal·lació

Figure 3.1: Main components of the Metra 95-2009 Double DIN Installation Multi-Kit, including plastic brackets and trim ring.
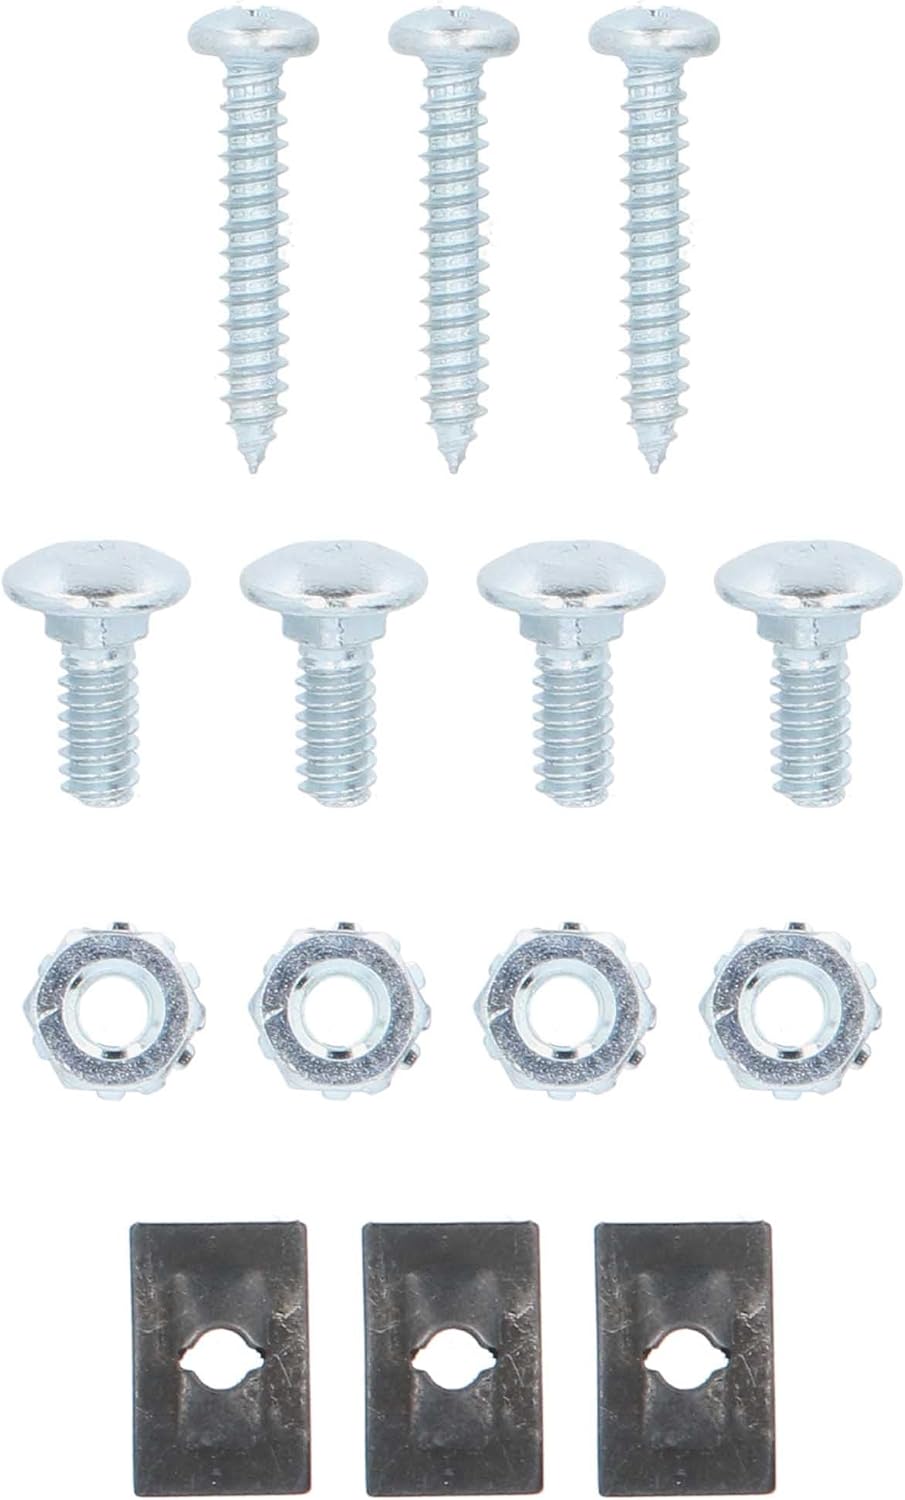
Figure 3.2: Included mounting screws and fasteners for securing the radio and dash kit.
4. Configuració
4.1 Eines necessàries
- Eina d'eliminació de panells
- Joc de tornavisos (Phillips i de punta plana)
- Wire Strippers/Crimpers
- Multimeter (for verifying wiring)
- Cinta elèctrica o tub termoretràctil
- Lligams Zip
4.2 Comprovacions prèvies a la instal·lació
- Confirm vehicle compatibility with the Metra 95-2009 kit.
- Read through the entire instruction manual before starting.
- Reuneix totes les eines i components necessaris.
5. Instruccions d'instal·lació
5.1 Removing the Factory Radio
Carefully remove the factory radio and any surrounding trim panels using a panel removal tool. Refer to your vehicle's specific service manual for precise instructions on trim removal and screw locations. Disconnect all wiring harnesses and the antenna cable from the back of the factory radio.
Video 5.1.1: General guide on removing a factory stereo and trim panels. Note: This video is from Scosche Industries and may not show your exact vehicle model, but the general principles apply.
5.2 Assembling the Dash Kit
The Metra 95-2009 kit includes plastic brackets and a custom trim ring. Follow the kit's specific instructions to break off any unnecessary tabs from the brackets that are not required for your vehicle's application. Secure the new aftermarket radio to the dash kit brackets using the screws provided with your new radio.
Vídeo 5.2.1: Acabatview of a dash kit and its components. This video is from an influencer and shows a similar kit, providing a general idea of the parts involved.
5.3 Connexions de cablejat
Connect the wiring harness from your new radio to the vehicle's wiring harness. Match wire colors carefully (e.g., yellow to yellow for constant 12V, red to red for ignition 12V, black to black for ground). Use wire strippers/crimpers and splice connectors or solder for secure connections. Insulate all connections with electrical tape or heat shrink tubing. If your vehicle has steering wheel controls, consult the radio's manual for specific connections, or tape off unused wires.
Video 5.3.1: Detailed guide on full stereo harness installation. Note: This video is from Scosche Industries and provides general wiring principles.
5.4 Installing the New Radio
Once the radio is secured to the dash kit and all wiring connections are made, carefully slide the assembled unit into the vehicle's dash opening. Secure the radio and dash kit to the vehicle's mounting points using the original screws or those provided with the kit. Reinstall any removed trim panels, ensuring they snap securely into place.
Vídeo 5.4.1: General acabatview of installing a new radio with a dash kit. This video is from an influencer and shows a similar kit, providing a general idea of the installation process.
5.5 Reconnecting the Battery and Testing
Reconnect the vehicle's negative battery terminal. Turn on the vehicle and test the functionality of your new radio, including audio, display, and any connected accessories like a backup camera. Ensure all features are working correctly before finalizing the installation.
6. Operating the New Radio
Refer to the instruction manual provided with your specific aftermarket radio for detailed operating instructions, including setting up stations, adjusting audio settings, and utilizing advanced features.
7. Manteniment
The Metra 95-2009 dash kit requires minimal maintenance. Periodically inspect the mounting screws for tightness and ensure the trim ring remains securely in place. Clean the plastic components with a soft, damp tela. Eviteu utilitzar productes químics aggressivs o netejadors abrasius.
8. Solució De Problemes
- La ràdio no s'encén: Check the vehicle's fuse box and the radio's inline fuse. Verify all power and ground connections are secure.
- Sense so: Ensure all speaker wires are correctly connected and not shorted. Check the radio's audio settings.
- Poor Fit of Dash Kit: Double-check that all necessary tabs were removed from the kit components and that the radio is properly aligned within the brackets.
- Connexions soltes: Re-examine all wiring connections for tightness and proper insulation.
9. Especificacions
- Marca: Metra
- Número de model: 95-2009
- Material: Plàstic
- Dimensions de l'article (L x A x A): 14 x 7 x 3.5 polzades
- Pes de l'article: 6.4 unces
- Compatibilitat: Select 1990-2012 GM, Honda, Isuzu, Suzuki vehicles
- Tipus de muntatge: Double DIN / Stacked ISO DIN
10. Garantia i Suport
This product is covered by a double DIN dash kit warranty. For specific warranty details, claims, or technical support, please refer to the documentation included with your purchase or contact Metra Electronics Corp directly. You can also visit the official Metra weblloc per obtenir recursos addicionals i informació de contacte.

Figure 10.1: Metra - The Installer's Choice


