1. Introducció
Thank you for choosing the EXTEL WEMR 83002 Digital Multimeter. This device is designed for precise electrical measurements, featuring a clear 15mm display for easy reading. This manual provides essential information for safe and effective operation of your multimeter.
2. Instruccions de seguretat
Always observe the following safety precautions to prevent electric shock or damage to the meter:
- Llegiu atentament totes les instruccions abans d'utilitzar.
- No aplicar voltage or current that exceeds the maximum rated input for any range.
- Tingueu molta precaució quan treballeu amb voltagés superior a 60 V CC o 30 V CA RMS.
- Desconnecteu sempre els cables de prova del circuit abans de canviar les funcions.
- Assegureu-vos que la tapa de la bateria estigui ben tancada abans de fer-la funcionar.
- No feu funcionar el mesurador si sembla danyat o si el casing està obert.
3. Característiques del producte
The EXTEL WEMR 83002 Digital Multimeter offers a range of functionalities for various electrical testing needs:
- 15mm Digital Display: Provides clear and precise measurement readings.
- Vol. ACtage Mesura: Ranges include 200 V and 600 V.
- DC Voltage Mesura: Ranges include 200mV, 2 V, 20 V, 200 V, and 600 V.
- Mesura de corrent DC: Ranges include 200 µA, 2 mA, 20 mA, 200 mA, and 10 A.
- Mesura de la resistència: Ranges include 2 kOhms, 20 kOhms, 200 kOhms, and 2 MOhms.
- hFE Test: For NPN and PNP transistors.
- Prova de díode: For semiconductor measurement.
- Shockproof Casing: Designed for durability and protection.
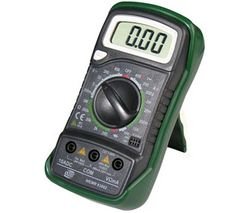
Image showing the EXTEL WEMR 83002 Digital Multimeter, featuring its display and rotary dial.
4. Configuració
4.1. Instal·lació de la bateria
- Assegureu-vos que el multímetre estigui apagat.
- Localitzeu la tapa del compartiment de la bateria a la part posterior de la unitat.
- Descargoleu el(s) cargol(s) de subjecció i traieu la coberta.
- Introduïu una pila nova de 9 V, respectant la polaritat correcta (+ i -).
- Torneu a col·locar la tapa de la bateria i fixeu-la amb el(s) cargol(s).
4.2. Connexió dels cables de prova
- Inseriu el cable de prova negre al connector "COM" (comú).
- Per al voltage, resistance, and diode measurements, insert the red test lead into the "VΩmA" jack.
- For current measurements (up to 10A), insert the red test lead into the "10A" jack.
5. Instruccions de funcionament
5.1. Mesura de la tensió de CCtage
- Set the rotary switch to the desired "VDC" range (e.g., 20V for measuring up to 20V).
- Connecteu el cable de prova vermell al costat positiu (+) del circuit i el cable de prova negre al costat negatiu (-).
- Llegeix el voltage valor a la pantalla.
5.2. Mesurar AC Voltage
- Set the rotary switch to the desired "VAC" range (e.g., 200V or 600V).
- Connecteu els cables de prova a través del voltatge de CAtage font.
- Llegeix el voltage valor a la pantalla.
5.3. Measuring DC Current
- Set the rotary switch to the desired "ADC" range (e.g., 200mA).
- Important: For current measurements, the multimeter must be connected in series with the circuit.
- Open the circuit where current is to be measured.
- Connect the red test lead to the higher potential side and the black test lead to the lower potential side of the break.
- Llegiu el valor actual a la pantalla.
5.4. Mesura de la Resistència
- Assegureu-vos que el circuit estigui desenergitzat abans de mesurar la resistència.
- Set the rotary switch to the desired "Ω" (Ohms) range.
- Connecteu els cables de prova al component que s'ha de mesurar.
- Llegiu el valor de resistència a la pantalla.
5.5. Prova de díodes
- Set the rotary switch to the "Diode" symbol.
- Connecteu el cable de prova vermell a l'ànode i el cable de prova negre al càtode del díode.
- La pantalla mostrarà el volum d'avançtage drop. Reverse the leads; the display should show "OL" (Open Loop) for a good diode.
5.6. hFE Test (Transistor Test)
- Set the rotary switch to the "hFE" position.
- Identify if the transistor is NPN or PNP.
- Insert the transistor leads (Emitter, Base, Collector) into the corresponding sockets in the hFE test socket.
- Read the hFE value on the display.
6. Manteniment
6.1. Neteja
Netegeu el mesurador amb un drap sec i suau. No utilitzeu abrasius ni dissolvents.
6.2. Substitució de la bateria
When the battery low indicator appears on the display, replace the 9V battery as described in the "Battery Installation" section (4.1). Remove the battery if the meter is not used for extended periods.
6.3. Substitució de fusibles
If the current measurement function fails, the fuse may need replacement. Refer to the specifications for the correct fuse type. Fuse replacement should only be performed by qualified personnel.
7. Solució De Problemes
| Problema | Causa possible | Solució |
|---|---|---|
| Sense pantalla o pantalla tènue | Low battery or no battery installed. | Substituïu la bateria de 9V. |
| Es mostra "OL" o "1" | Overload, open circuit, or incorrect range. | Select a higher range, check circuit continuity, or ensure leads are properly connected. |
| Lectura de corrent incorrecta | Blown fuse or incorrect lead connection. | Check and replace fuse if necessary. Ensure leads are in the correct current jacks and connected in series. |
| No reading for resistance | Circuit is energized or component is open. | Ensure circuit is de-energized. Check component for breaks. |
8. Especificacions
- Model: WEMR 83002
- Marca: EXTEL
- Visualització: 15mm Digital LCD
- Font d'alimentació: 9V Battery (battery powered)
- Vol. ACtage Intervals: 200 V, 600 V
- DC Voltage Intervals: 200mV, 2V, 20V, 200V, 600V
- DC Current Ranges: 200µA, 2mA, 20mA, 200mA, 10A
- Intervals de resistència: 2kΩ, 20kΩ, 200kΩ, 2MΩ
- Funcions especials: hFE (NPN/PNP Transistor Test), Diode Test
- Casing: a prova de xocs
- Data de primera disponibilitat: 1 de setembre de 2009
9. Garantia i Suport
EXTEL products are manufactured to high-quality standards. For specific warranty information, please refer to the warranty card included with your purchase or contact EXTEL customer support. Information regarding spare parts availability is currently unavailable.
For technical assistance or support, please visit the official EXTEL weblloc o poseu-vos en contacte amb el seu departament d'atenció al client.


