1. Introducció
This manual provides comprehensive instructions for the installation, operation, and maintenance of your Iomega ZIP DRIVE Z100ATAPI internal drive. The Iomega Zip drive is a removable disk storage system, offering a convenient way to store and transport large files.
Please read this manual thoroughly before attempting to install or operate the device to ensure proper functionality and to prevent damage.

Figura 1: Davant view of the Iomega ZIP DRIVE Z100ATAPI, showing the disk slot and eject button.
2. Configuració i instal·lació
The Iomega ZIP DRIVE Z100ATAPI is an internal ATAPI (IDE) device designed for installation into a desktop computer's drive bay.
2.1 Precaucions de seguretat
- Always power off and unplug your computer before opening the case.
- Discharge static electricity by touching a grounded metal object before handling internal components.
- Refer to your computer's manual for specific instructions on opening the case and accessing drive bays.
2.2 Configuració del pont
Before installation, configure the drive's jumpers for Master, Slave, or Cable Select operation. Refer to the label on the drive for specific jumper configurations.
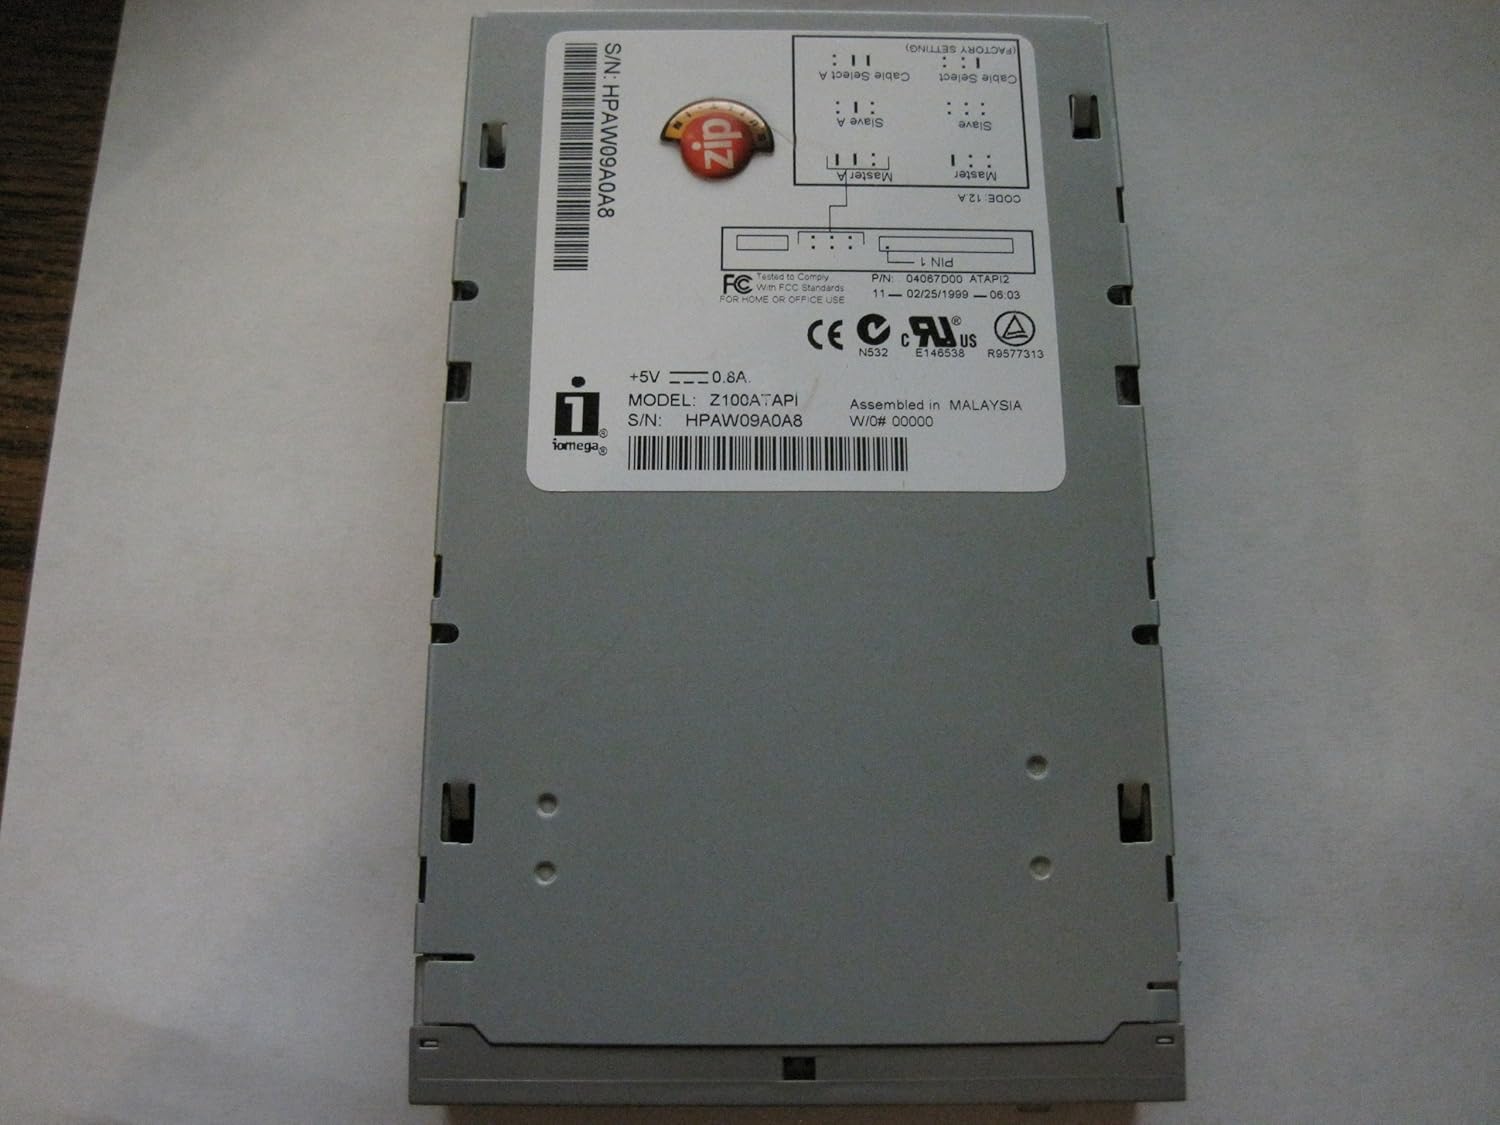
Figura 2: A dalt view of the drive, displaying the product label with model number, serial number (S/N HPAW09A0A8), and jumper setting diagrams for Master, Slave, and Cable Select configurations.
- Mestre: If the drive is the primary device on an IDE channel.
- Esclau: If the drive is a secondary device on an IDE channel, alongside another drive set to Master.
- Cable Select: If your IDE cable supports Cable Select, the drive's position on the cable determines its role.
2.3 Instal·lació física
- Obriu la caixa de l'ordinador.
- Locate an available 3.5-inch or 5.25-inch drive bay (you may need a bracket for 5.25-inch bays).
- Slide the Zip drive into the bay and secure it with screws.
- Connect the 40-pin IDE ribbon cable from your motherboard to the drive's IDE connector. Ensure the red stripe on the cable aligns with Pin 1 on the drive and motherboard connector.
- Connect a 4-pin Molex power connector from your power supply to the drive's power input.

Figura 3: posterior view of the drive, illustrating the 40-pin IDE data connector and the 4-pin Molex power connector.
2.4 Instal·lació del programari
After physical installation, power on your computer. Your operating system (e.g., Windows 95/98/ME/2000/XP, macOS) should detect the new hardware. You may need to install specific Iomega drivers, typically found on a bundled CD or available for download from the Iomega support website (if still available).
3. Funcionament de l'accionament
3.1 Inserting a Zip Disk
Gently slide a Zip disk into the drive's slot with the metal shutter facing forward and the label side up. The drive will pull the disk in automatically once it's partially inserted.
3.2 Accés a les dades
Once a disk is inserted, it should appear as a removable drive in your computer's file explorer (e.g., "My Computer" or "This PC"). You can then drag and drop files, save documents, or open applications directly from the Zip disk.
3.3 Ejecting a Zip Disk
To eject a disk, locate the small eject button on the front of the drive (refer to Figure 1). Press this button firmly. The disk will partially eject, allowing you to pull it out completely. Always ensure no files are being accessed on the disk before ejecting.
4. Manteniment
- Keep the drive and disks away from dust, moisture, and extreme temperatures.
- Do not force disks into the drive.
- Periodically clean the exterior of the drive with a soft, dry cloth. Do not use liquid cleaners.
- Store Zip disks in their protective cases when not in use.
5. Solució De Problemes
5.1 Unitat no detectada
- Check all cable connections (IDE data and power).
- Verify jumper settings (Master/Slave/Cable Select) are correct for your system configuration.
- Ensure the drive is receiving power (listen for spin-up or check for activity lights if present).
- Check your computer's BIOS/UEFI settings to ensure the IDE channel is enabled and detecting the drive.
- Install or update Iomega drivers if necessary.
5.2 Disk Read/Write Errors
- Ensure the Zip disk is properly inserted.
- Try a different Zip disk to rule out a faulty disk.
- Check for physical damage on the disk.
- Run disk utility software (e.g., ScanDisk in Windows) to check for errors on the disk.
5.3 Disk Will Not Eject
- Ensure no applications are currently accessing files on the disk. Close all programs that might be using the drive.
- Try pressing the eject button firmly.
- If the drive has a manual eject hole (often a small pinhole), insert a straightened paperclip gently to manually eject the disk. Refer to the drive's physical design for this feature.
6. Especificacions
| Característica | Detall |
|---|---|
| Número de model | Z100ATAPI |
| Número de part | 04057D02 |
| Interfície | ATAPI (IDE) |
| Capacitat | 100 MB per Zip disk |
| Factor de forma | 3.5-inch internal drive |
| Requisits d'alimentació | +5V, 0.8A (via 4-pin Molex connector) |
| Número de sèrie (Ex.ample) | HPAW09A0A8 |
| Pes | Aproximadament 3 lliures (1.36 kg) |
7. Garantia i Suport
For information regarding warranty coverage and technical support, please refer to the documentation included with your original purchase or visit the official Iomega support website. Product support for older devices may be limited.


