1. Introducció
This manual provides detailed instructions for the installation, operation, and maintenance of your Voyager AOM713 7" Rear View Wide Format LCD Monitor. Designed to enhance vehicle safety, this monitor eliminates blind spots when paired with up to three Voyager observation cameras, assisting drivers with backing up, changing lanes, and navigating traffic. Please read this manual thoroughly before use to ensure proper functionality and longevity of your device.
The AOM713 monitor features a heavy-duty color LCD panel, compatible with both 12 and 24 Volt power systems, and supports NTSC and PAL video signals. Its auto Day/Night brightness mode and multiple camera inputs make it a versatile solution for various vehicle applications.
2. Característiques del producte
The Voyager AOM713 monitor is equipped with a range of features designed for optimal performance and user convenience:
- 7 polzades posterior View Monitor: Provides a clear, wide-format display for enhanced visibility.
- 3 Camera Inputs: Allows connection of up to three observation cameras for comprehensive coverage.
- NTSC and PAL Video Signal Compatible: Supports various video standards for broad compatibility.
- 12 Volt and 24 Volt Power System: Versatile power input for different vehicle types.
- Manual (Pushbutton) or Automatic (Trigger) Source Selection: Easily switch between camera views.
- Turn-Signal (Pulsed DC) Compatible Trigger Inputs (AV2, AV3): Enables automatic camera activation with turn signals.
- Auto Power On (Standby): Convenient power management.
- Auto Day/Night Brightness Mode: Ajusta automàticament la brillantor de la pantalla per a una òptima viewcondicions.
- Visualització en pantalla (OSD): For AV source, picture adjustment, and volume level control.
- Memòria no volàtil: Retains picture and volume adjustment settings after power off.
- Integrated Audio Speaker: For audio feedback from connected cameras (if applicable).
- Energy Efficient White LED Backlight: Provides bright and clear display with low power consumption.
- Removable Sun-Visor Included: Reduces glare for better visibility in bright conditions.
- Múltiples opcions de muntatge: For flexible installation in various vehicle environments.
3. Configuració i instal·lació
Proper installation is crucial for the optimal performance of your Voyager AOM713 monitor. It is recommended to have this unit installed by a qualified technician.
3.1 Desembalatge i inspecció
Carefully remove all components from the packaging. Inspect the monitor and accessories for any signs of damage. If any damage is found, do not proceed with installation and contact your dealer immediately.
3.2 Muntatge del monitor
Trieu una ubicació de muntatge que proporcioni una vista clara view for the driver without obstructing the windshield or airbags. Ensure the location is stable and can support the monitor's weight. Use the provided mounting hardware to secure the monitor firmly.
3.3 Connexions de cablejat
The AOM713 monitor requires a 12V or 24V DC power source. Connect the power wires according to the wiring diagram provided with your product. Ensure proper polarity (positive to positive, negative to negative) to prevent damage. Connect your observation cameras to the AV1, AV2, and AV3 inputs. The AV2 and AV3 inputs support trigger wires for automatic switching (e.g., with turn signals or reverse gear).

Image: Voyager AOM713 monitor with key features labeled, including 3 Camera Inputs, 7" Color LCD Monitor with built-in speaker, Back-lit Control Buttons, and 12 Volt Triggers.
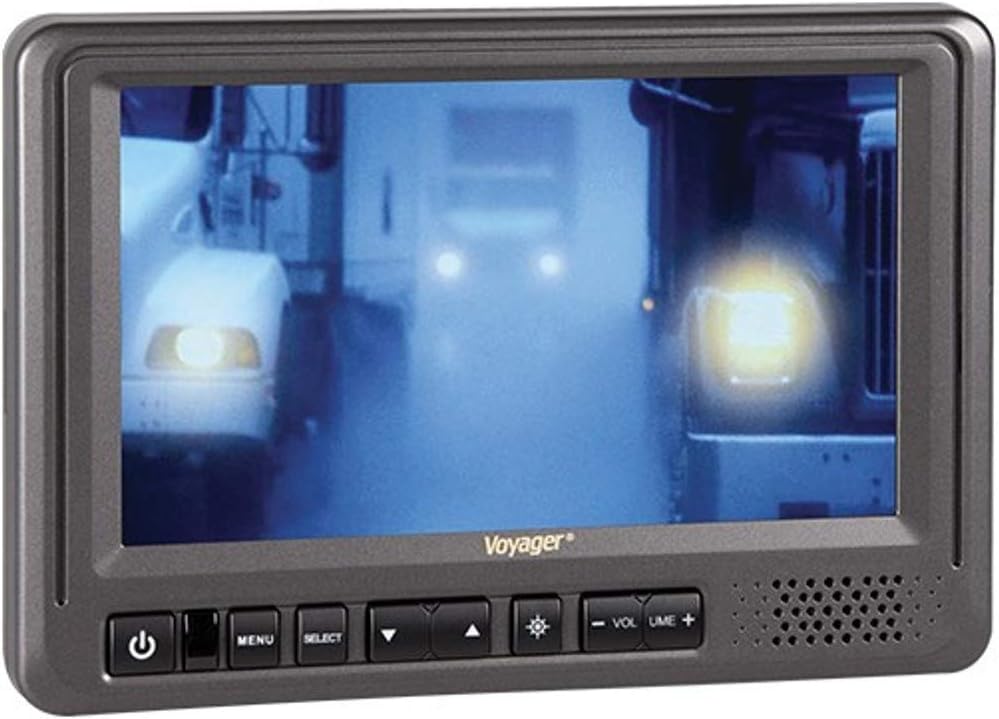
Imatge: Frontal view of the Voyager AOM713 monitor, showing the screen displaying a camera feed and the control buttons below the screen.
4. Instruccions de funcionament
Once installed and powered, the AOM713 monitor is ready for operation.
4.1 Encès/Apagat
- Premeu el botó Botó d'encesa (símbol: cercle amb línia vertical) on the front panel to turn the monitor on or off.
- The monitor also supports auto power on from standby mode.
4.2 Selecció de la font
- Premeu el botó Botó SELECT to cycle through the connected camera inputs (AV1, AV2, AV3).
- Alternatively, the monitor will automatically switch to a triggered input (AV2 or AV3) when the corresponding trigger wire receives a 12V signal (e.g., when reverse gear is engaged or a turn signal is activated).
4.3 Adjusting Settings (OSD)
- Premeu el botó Botó MENU to access the On Screen Display (OSD).
- Utilitza el Botó de fletxa amunt (símbol: triangle apuntant cap amunt) i Botó de fletxa avall (símbol: triangle apuntant cap avall) to navigate through menu options such as brightness, contrast, color, and volume.
- Utilitza el Botó SELECT per confirmar seleccions o entrar en submenús.
- The monitor features an Auto Day/Night brightness mode, which automatically adjusts the screen's illumination based on ambient light conditions.
- Ajusteu el volum amb el botó Volum + i Volum - botons.
4.4 Sun-Visor Usage
Attach the removable sun-visor to the monitor to reduce glare and improve screen visibility in bright sunlight conditions.
5. Manteniment
To ensure the longevity and optimal performance of your Voyager AOM713 monitor, follow these maintenance guidelines:
- Neteja: Use a soft, dry cloth to clean the monitor screen and casing. For stubborn smudges, lightly dampen the cloth with water or a mild, non-abrasive screen cleaner. Do not use harsh chemicals, solvents, or abrasive cleaners, as they can damage the screen or finish.
- Eviteu líquids: Do not spray liquids directly onto the monitor. Ensure no liquids enter the unit's openings.
- Temperatura: Avoid exposing the monitor to extreme temperatures, direct sunlight for prolonged periods, or high humidity.
- Connexions: Comproveu periòdicament totes les connexions dels cables per assegurar-vos que estiguin ben fixades i que no presentin corrosió ni danys.
6. Solució De Problemes
If you encounter issues with your Voyager AOM713 monitor, refer to the following troubleshooting steps:
| Problema | Causa possible | Solució |
|---|---|---|
| El monitor no s'encén. | Sense subministrament elèctric; cablejat incorrecte; fusible fundit. | Check power connections (12V/24V). Verify fuse in the power line. Ensure vehicle ignition is on if wired to accessory power. |
| No es mostra cap imatge. | Camera not connected; incorrect input selected; faulty camera or cable. | Ensure camera is properly connected to an AV input. Press SELECT to cycle through inputs. Check camera and cable for damage. |
| La imatge està distorsionada o parpelleja. | Loose video connection; signal interference; incompatible video signal. | Secure all video cable connections. Ensure cables are routed away from strong electrical interference sources. Verify camera output is NTSC/PAL compatible. |
| Automatic switching (trigger) not working. | Trigger wire not connected; insufficient trigger voltage; incorrect trigger setting. | Check trigger wire connection to the correct AV input (AV2/AV3). Ensure the trigger source provides a stable 12V signal. |
| Sense àudio. | Camera does not have audio; volume too low; faulty speaker. | Confirm connected camera provides audio output. Increase volume using the Volume + button. |
Si el problema persisteix després d'intentar aquestes solucions, poseu-vos en contacte amb l'atenció al client per obtenir més ajuda.
7. Especificacions
Detailed technical specifications for the Voyager AOM713 monitor:
| Característica | Especificació |
|---|---|
| Mida diagonal de la pantalla | 7 polzades |
| Relació d'aspecte | 16:9 |
| Resolució | 480 x 324 |
| Brillantor | 500 nits |
| Relació de contrast | 300:1 |
| ViewAngles | 100/120 |
| Sistema de potència | 12 VDC / 24 VDC Compatible |
| Entrades de càmera | 3 |
| Screen Capabilities | Solter |
| Disparadors | Three 12V |
| Altaveus incorporats | Sí |
| Video Output Signal Format | NTSC/PAL |
| Removable Sunvisor Included | Sí |
| Dimensions del producte (W x H x D) | 7-3/4"W x 5-1/4"H x 1-1/4"D (approx. 9.3 x 6.5 x 4.8 inches packaged) |
| Pes de l'article | 2.05 lliures (envasat) |
8. Garantia i Suport
For warranty information, please refer to the warranty card included with your product or visit the official Voyager (ASA Electronics) weblloc web. Conserveu el comprovant de compra per a reclamacions de garantia.
If you require technical assistance, have questions about installation, or need to troubleshoot an issue not covered in this manual, please contact Voyager customer support. Contact details can typically be found on the manufacturer's weblloc web o a l'embalatge del producte.
Fabricant: ASA Electronics


