1. Introducció
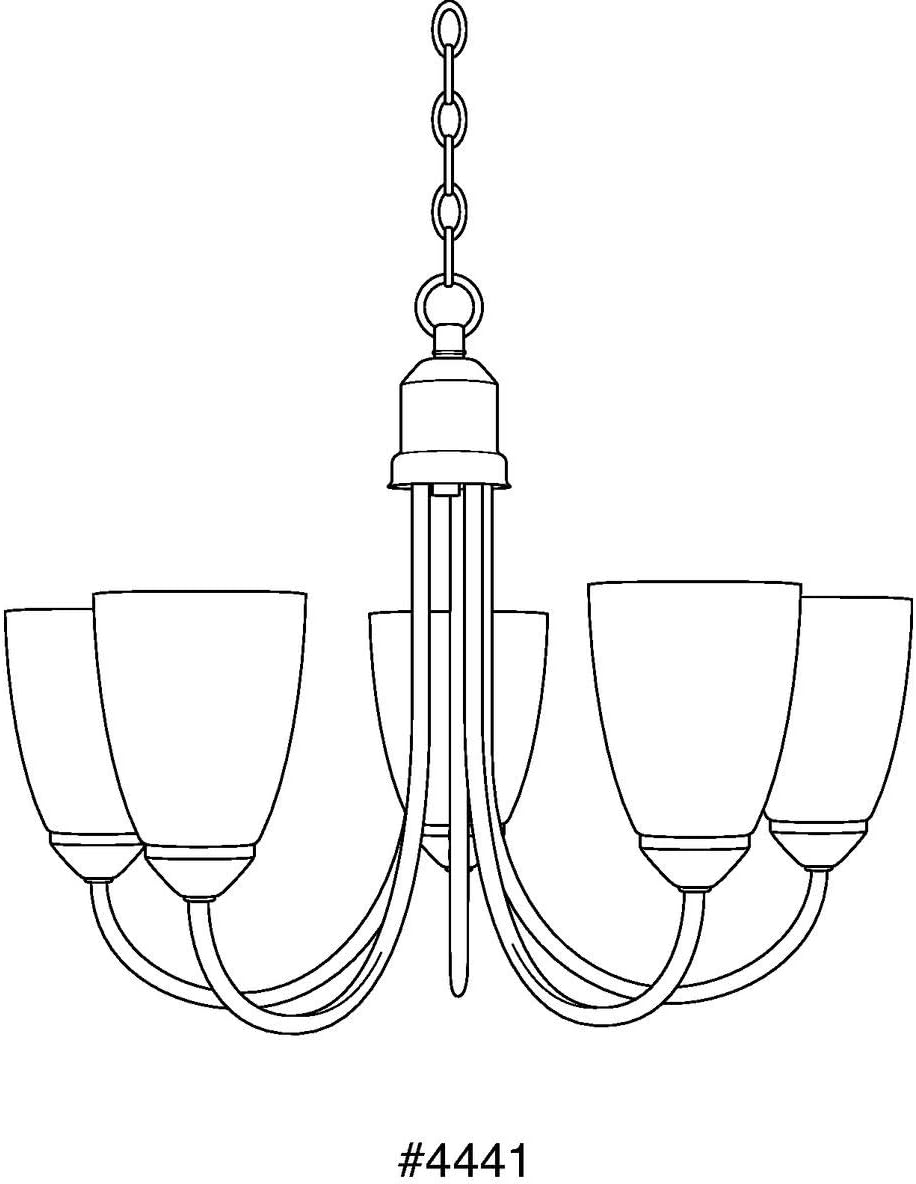
Thank you for choosing the Progress Lighting Gather Collection Five-Light Chandelier. This elegant fixture, featuring etched glass shades and a brushed nickel finish, is designed to enhance your home's ambiance. This manual provides essential information for safe installation, operation, and maintenance of your new chandelier.
2. Informació important de seguretat
ADVERTIMENT: Aquest producte us pot exposar a substàncies químiques, com ara el plom, que l'estat de Califòrnia sap que causa càncer i defectes de naixement o altres danys reproductius. Per a més informació aneu a www.P65Warnings.ca.gov.
Always turn off the main power supply at the circuit breaker before beginning any electrical installation. Consult a qualified electrician if you are unsure about any part of the installation process. Ensure all wiring connections are secure and comply with local electrical codes. Do not exceed the maximum wattage especificat per a les bombetes.
3. Contingut del paquet
Verifiqueu que tots els components siguin presents abans de començar la instal·lació:
- Chandelier Fixture (Brushed Nickel)
- Etched Glass Shades (5)
- Kit de maquinari de muntatge
- Chain and Canopy Assembly
- Full d’instal·lació
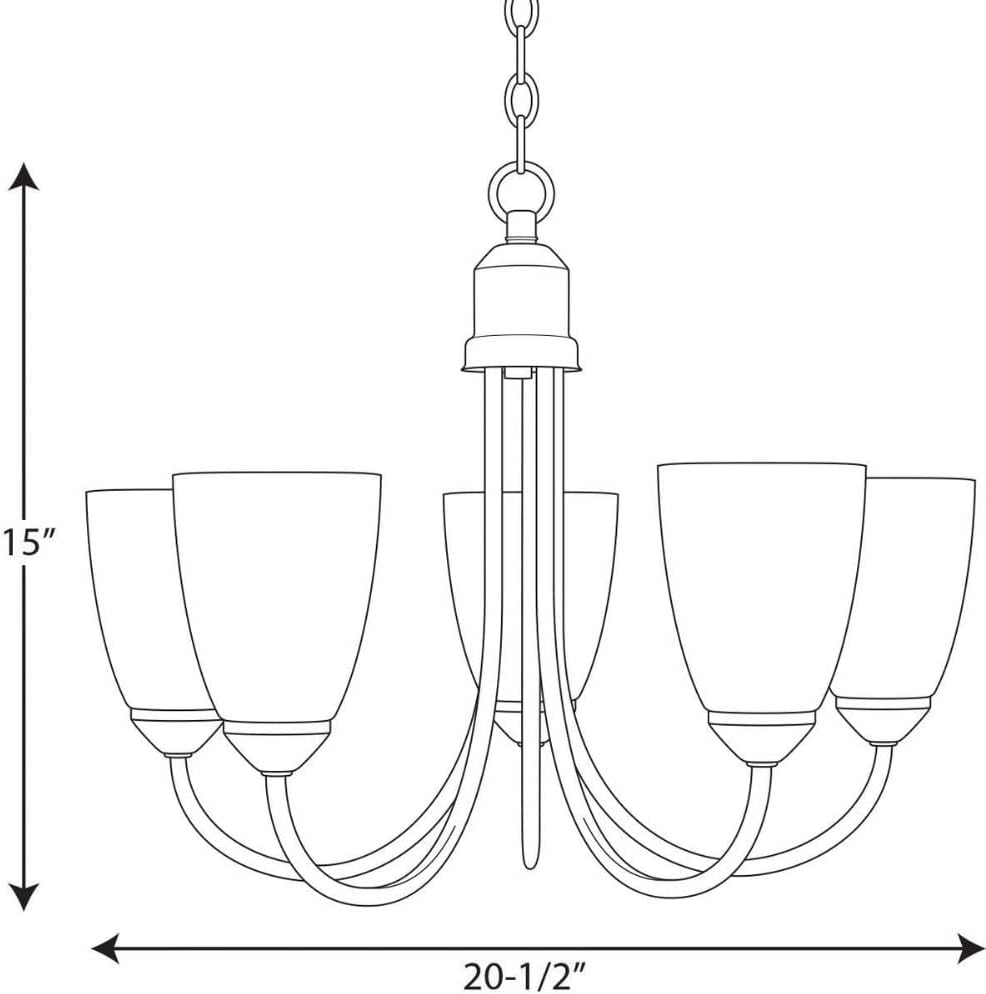
4. Especificacions del producte
| Característica | Especificació |
|---|---|
| Número de model | P4441-09 |
| Marca | Il·luminació de progrés |
| Color | Níquel raspallat |
| Material | Alloy Steel (Fixture), Glass (Shades) |
| Dimensions (L x A x A) | 20.2" x 20.63" x 15" |
| Pes de l'article | 5 lliures |
| Nombre de fonts de llum | 5 |
| Max Wattage per Bulb | 100 watts |
| Voltage | 120 Volts |
| Tipus d'instal·lació | Permanent |
| Tipus de font de llum | Incandescent (compatible amb LED, CFL, halògenes) |
| Tipus d'habitació | Dining Room, Great Room, Bathroom |
5. Configuració i instal·lació
Installation of this chandelier typically requires two people for safety and ease of handling. Follow the detailed instructions provided in the included installation sheet. Below are general steps and helpful visual aids.
5.1. Preinstal·lació
- Apagueu l'alimentació: Locate the circuit breaker controlling the light fixture and turn off the power.
- Desembalar: Traieu amb cura tots els components de l'embalatge i comproveu si hi ha algun dany.
- Eines necessàries: Gather necessary tools such as a screwdriver, wire strippers, pliers, and a ladder.
5.2. Muntatge i muntatge
Assemble the main body of the chandelier according to the diagrams in your installation sheet. This may involve unfolding the arms and attaching the chain. Adjust the chain length to achieve the desired hanging height. For dining room tables, the bottom of the chandelier should typically hang 30-36 inches above the table surface for an 8-foot ceiling. For higher ceilings, consider the guidelines in the video below.


5.3. Chandelier Hanging Height Guidelines
For optimal lighting and aesthetic appeal, consider the following guidelines for hanging your chandelier. This video provides a comprehensive overview of recommended hanging heights for various room types.
5.4. Cablatge
Connect the fixture wires to the house wires according to the provided wiring diagram. Ensure all connections are secure with wire nuts. Proper grounding is crucial for safety; do not skip this step.
5.5. Assemblea Final
Once wired, secure the canopy to the ceiling junction box. Install the light bulbs (not included) into the sockets. The chandelier uses five medium base bulbs (100W max per bulb). Finally, attach the etched glass shades to each light base.
6. Operating Your Chandelier
After installation, restore power at the circuit breaker. Your chandelier is now ready for use. This fixture is fully dimmable when used with dimmable bulbs and a compatible dimmer switch (sold separately), allowing you to adjust the light intensity to suit your needs.
7. Cura i Manteniment
7.1. Neteja
To maintain the finish of your chandelier, wipe it with a soft, dry cloth. Avoid using abrasive cleaners or solvents, as these can damage the finish. For glass shades, use a mild glass cleaner and a soft cloth.
7.2. Substitució de bombetes
Always turn off the power to the fixture at the circuit breaker before replacing bulbs. Allow bulbs to cool completely before handling. Replace bulbs with the same type and wattage (medium base, 100W max) to ensure proper operation and prevent damage.
8. Solució De Problemes
If your chandelier is not functioning correctly, refer to the following common issues and solutions:
- Els llums no s'encenen:
- Comproveu si l'interruptor està en ON.
- Ensure bulbs are securely screwed in and not burnt out.
- Verifiqueu que totes les connexions de cablejat siguin segures.
- Lights flickering or dimming improperly:
- Assegureu-vos que feu servir bombetes regulables amb un interruptor regulador compatible.
- Comproveu si hi ha connexions de cablejat soltes.
- Fixture is loose:
- Ensure the mounting hardware is securely fastened to the ceiling junction box.
If problems persist, contact Progress Lighting customer support or a qualified electrician.
9. Garantia i Suport
This Progress Lighting product comes with a Garantia limitada d'1 any, guaranteeing your complete satisfaction and including professional after-sales customer service support. For warranty claims, technical assistance, or replacement parts, please contact Progress Lighting customer service directly.
Informació de contacte: Refer to the contact details provided on the original product packaging or the official Progress Lighting weblloc.


